
Chromostereoscopy for Use in Visualization
Abstract: Traditional stereoscopic visualization requires either special projection technologies with polarized glasses or special display technologies with LCD shutter glasses to display depth. Other processes such as Red/Blue anaglyph process work both in print and on a computer screen but produce incomprehensible images when the glasses are not worn. Chromostereoscopy is the process of using special prismatic glasses to turn color into stereoscopic depth. Unlike other stereoscopic processes the images look clear without the glasses (though rainbow colored) and are augmented into depth while wearing them. This poster demonstrates examples of the process and offers advice on their usage and creation for visualization techniques.
How it Works: ChromaDepth glasses use prismatic filters that separate the image into the visible spectrum. Each color is shifted a different amount resulting in various planes of perceived depth. In the RGB on Black model – Red is closest and Blue is farthest away (with Black at infinity). In the CMY on White model – Cyan is closest and Yellow is farthest away (with White at infinity).
Photoshop: With a basic understanding of the ChromaDepth color palettes it is not difficult to create compositions. Adding other dimensional cues such as layers, perspective, overlap, and relative size will help to build an effective chromostereoscopic image.
From Depth Map to ChromaDepth: Since in Chromostereoscopy color equals depth – all types of data can be viewed by creating a “depth map”. A “depth map”(also known a as a “z-map”) is a picture where x and y represent space and the color of each pixel represents its height (either from the plane or from a virtual camera). These images are usually grayscale with white being closest and black being furthest away. This grayscale palette is then easily replaced in Photoshop with a custom ChromaDepth palette resulting in the color encoded image.
Step by Step in Photoshop:
- Create “depth map” image with White as near / Black as far
- Open image in Photoshop
- Convert image to grayscale : Image > Mode > Grayscale
- Convert imaget to index color : Image > Mode > Indexed Color
- Apply ChromaDepth palette : Image > Mode > Color Table
- Load ChromaDepth palette : Load > chroma.act > OK
Online Resources:
- Chromatek Website : http://chromatek.com/
- American Paper Optics: http://americanpaperoptics.com/
- Berezin 3D: http://www.berezin.com/3d/3dglasses.htm#ChromaDepth
Figure 1 — How ChromaDepth Glasses Work
Figure 2 — Grayscale & ChromaDepth Color Palettes
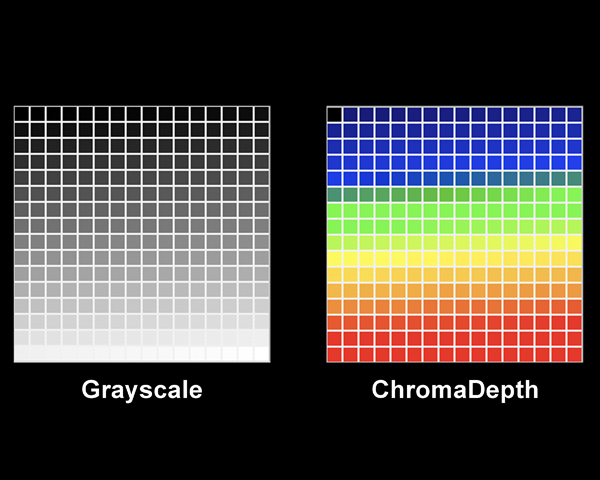
Figure 3 —The RGB on Black Color Model
Figure 4 — The CMY on White Color Model
Figure 5 — Photoshop Example
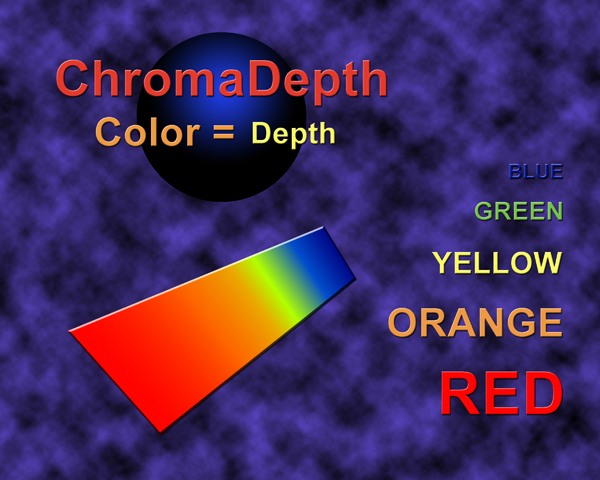
Figure 6 — Painting – Cubist Still Life
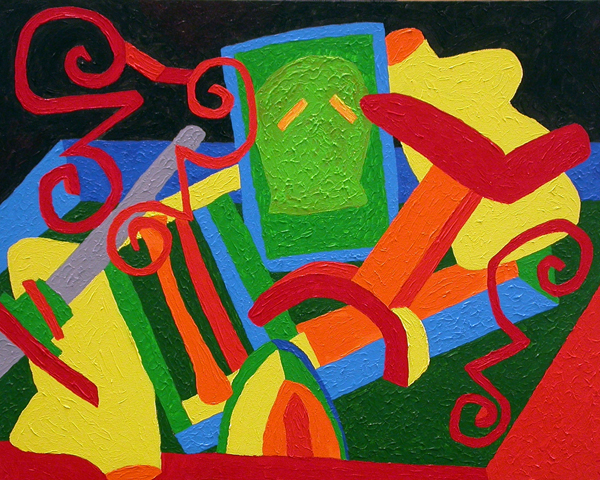
Figure 7 — 2D Photo with Hand Drawn – Depth Map
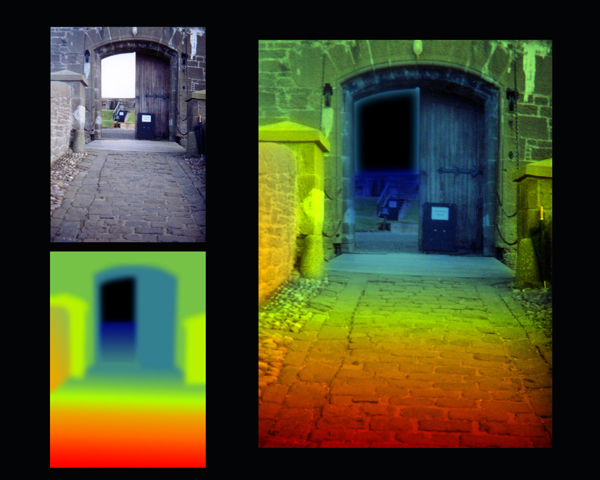
Figure 8 — 3D Model with Computer Generated – Depth Map
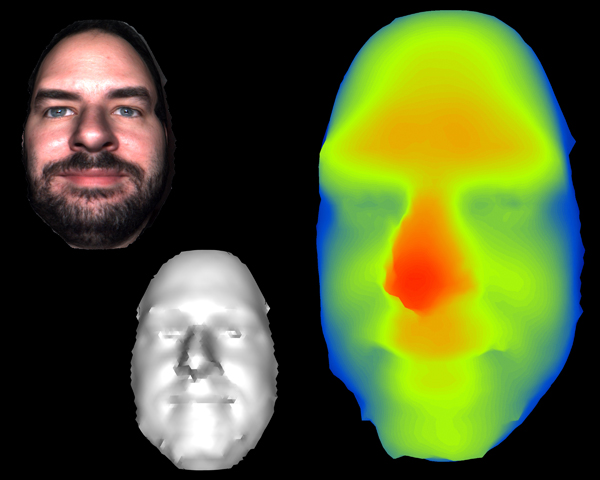
Figure 9 — Data from Excel Spreadsheet
Figure 10 — GIS Elevation Model – Chagrin River
Figure 11 — Data from Mathematica
Figure 12 — Fractal Dataset
