Photogrammetry & The Dijon Mourners: An Experiment
First, a quick shout out to Dr. Charlie Harper. I knew about photogrammetry before I met Charlie, but I never knew how to make it work right. His thorough understanding of the process, his ongoing assistance, and his offhand comments about looking backwards into previous data-sets made this project possible. (Apparently he approves of this endorsement and would like to see it on all article introductions.)
A look back in time.
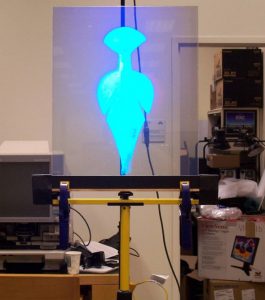
In 2005, my boss at Case Western Reserve University sold me half time to the Cleveland Museum of Art as their Virtual Reality Specialist. For 2 years I had a lot of fun working on cultural objects. While at the Museum I produced a stereoscopic art film about a piece of art (alas in SD), an experimental HD stereoscopic rig, an autostereoscopic visualization (3D without the glasses) of a French table fountain, and a hologram. An honest to goodness hologram – produced by a holographer from turntable data taken in 1/3 degree increments. Again – I had a lot of fun.
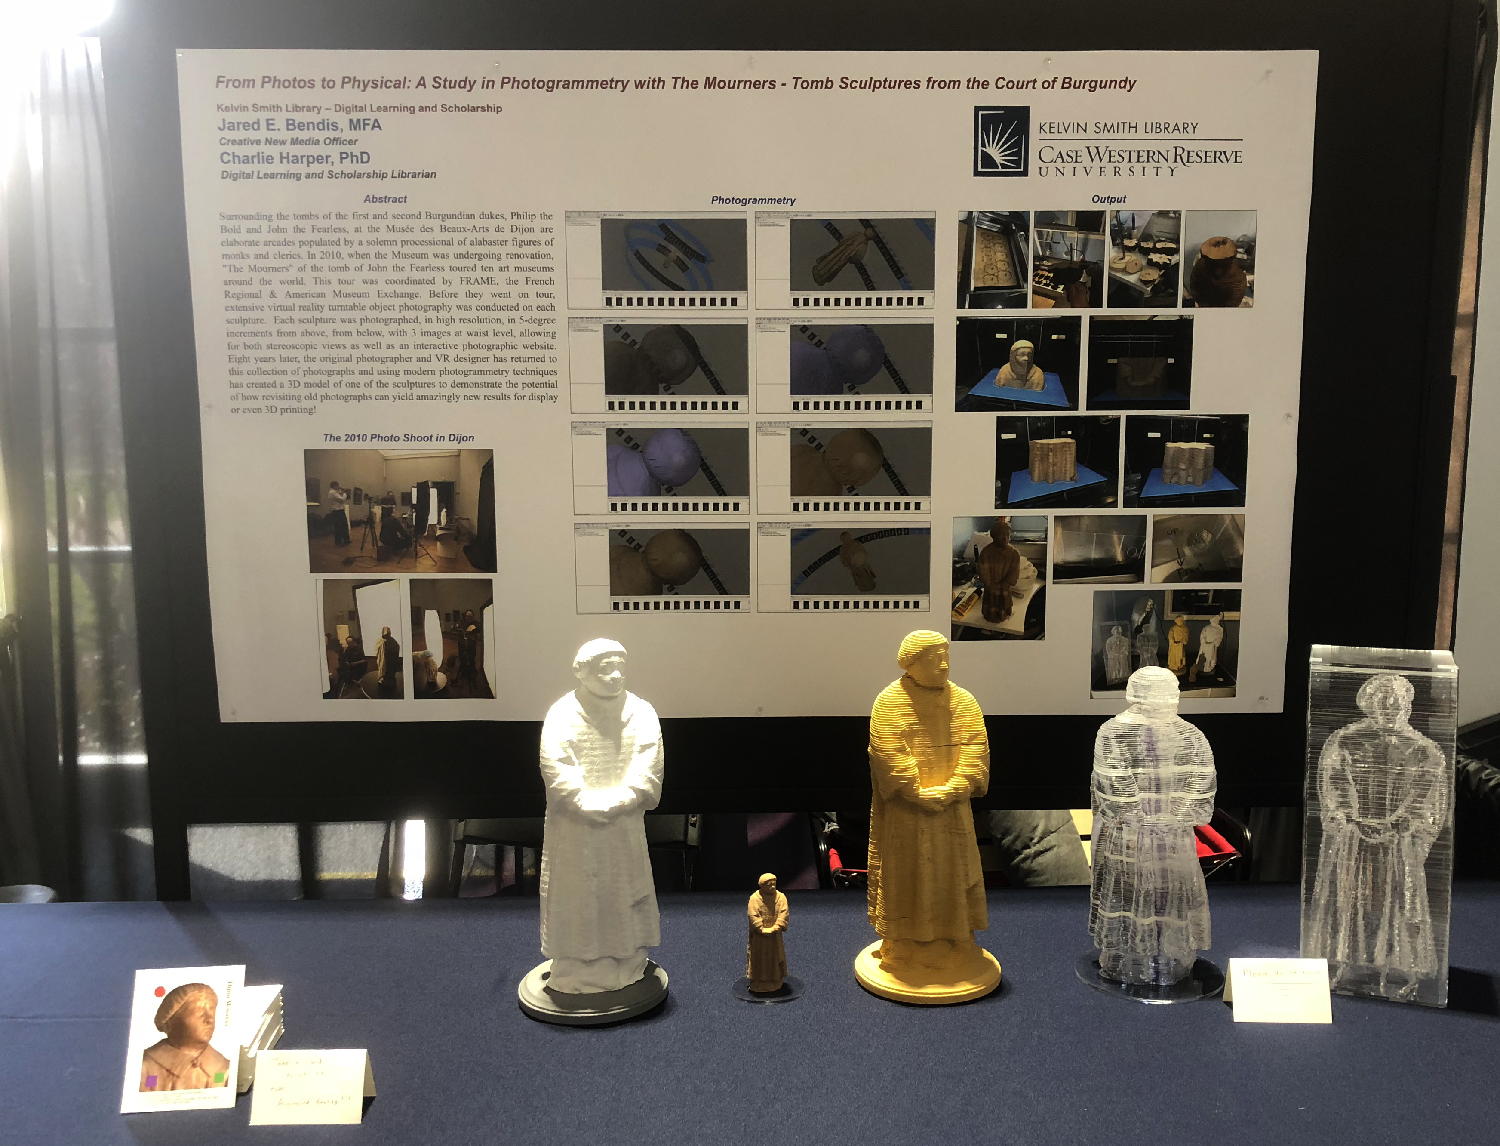
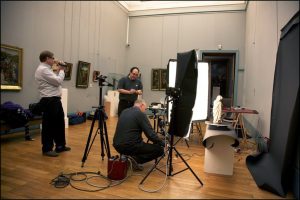
Jump ahead to 2010. My former boss at the Cleveland Museum of Art, Len Steinbach, contacted me about a freelance project. The Musée des Beaux-Arts de Dijon was about to start renovations and it was suggested that since the alabaster sculptures that surround the tombs of the Dukes of Burgundy would have to be de-installed, that the sculptures might go on tour. Before they were to go on tour they wanted to produce a high-tech VR gallery of the mourners and I was hired to create VR photo objects of the sculptures. Even though the sculptures would tour the US, for various reasons it was easier to fly me (and my gear) to France and do the shoot in the museum itself (which was the Duke’s castle!).
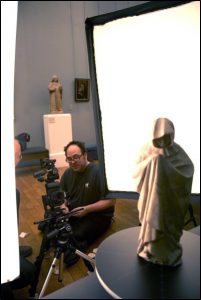
This was a very precision shoot. Each mourner was shot under studio lighting which was coordinated by their in-house photographer François Jay (who was awesome). This is turntable photography and each mourner was shot in 5 degree increments from 5 different views (above, below, and 3 head on). This resulted in 360 21MP photos in camera raw for each mourner. 39 mourners * 360 photos = 14,000+ photos (in 3 days).
The photos were turned into a series of interactive objects. You could spin, zoom, change views, even view them in anaglyph (red/blue) 3D. The objects were all put together in an amazing website designed by Rory Matthews. You could navigate around the cloisters and even download any view in full/high resolution (for non-profit use). (Which is what makes the rest of my story kosher).
As projects go I am very proud. Yes, a lot of it is in Adobe Flash, but back then you really had no choice.
A working sample of one of the original mourner objects can be found here:
http://jaredjared.com/vr/mourner/mourner.html
This project was VERY well received. The tour was amazing (I even got to go to the opening at the Met in New York) and everyone who reviewed the project loved both the physical and the digital aspects of it. I presented on it several times and Len even wrote an article about it for Curator: The Museum Journal.
Now the sad story.
I don’t know who to blame (and blaming anyone wouldn’t help anyways) but the digital side of things were not well cared for. Almost everyone I worked with on the project was a freelancer (myself included) and so a lot of things got lost in the shuffle of “who was supposed to do what” after the fact. Len, had purchased several domain names: mourners.org, mourners.com, themourners.com, some variants in French etc. It is exactly what you are supposed to do – it makes it easier to find. The problem is that no one (of the many organizations) renewed the domain names and one by one each domain name was lost (snatched/stolen) until all that was left was mourners.org. After I found out it had been lost, I contacted the owners of mourners.com and they tried to sell it to me for $50,000. This means most of the articles online about the project are now pointing to bad URLs (specifically themourners.org). Thankfully, mourners.org is still online.
And then someone moved servers. We don’t know how or why but when the website was moved from one server to another it broke. Rory was freelance, I was freelance. We offered to help but everyone said they would take care of it themselves – and 8 years later it is still broken. It is a big disappointment. That’s why I keep a working sample of one mourner on my site.
On a different front, a selection of the data had been packed and submitted to ArtStor. For some reason they have it listed as a project but it has been in a pending state since 2010.
http://internal.artstor.org/what-is-artstor/w-html/col-mourners.shtml
OK – enough sad stuff. These remarks are not meant to embarrass or shame anyone. This isn’t news. The ArtStor link is public, the missing URLs are public, the broken website is public. In reality it was just a perfect storm of institutional bad timing and bad luck. I would love to see the data brought back to its full glory and if the resources or the institutional desire to make this happen are brought to bear I am standing by!
Luckily, I have all the data and as long as I am working on non-profit research projects I am allowed to play (again it says so on the website).
So it is 2018 and I am working on some experiments with Charlie in photogrammetry and he asks me if I have any older data sets of sculptural things that might be good to test with? And I was like – DO I?
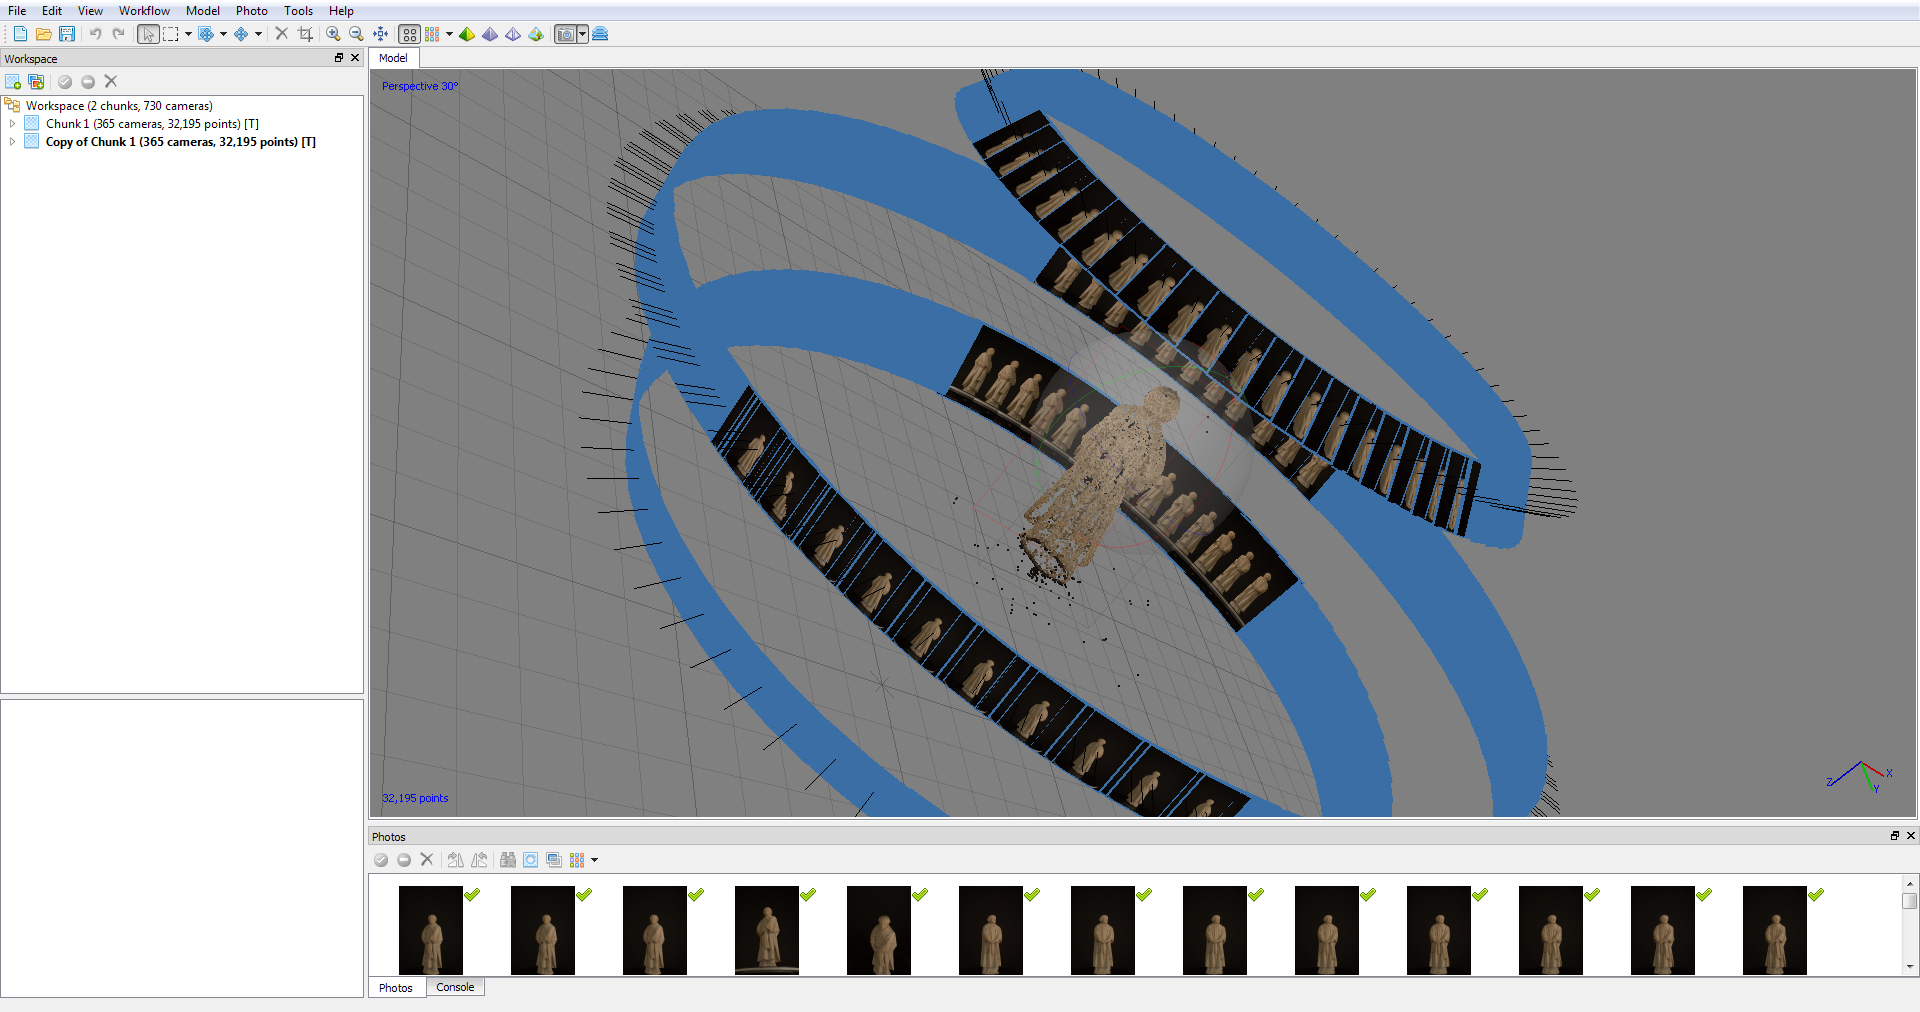
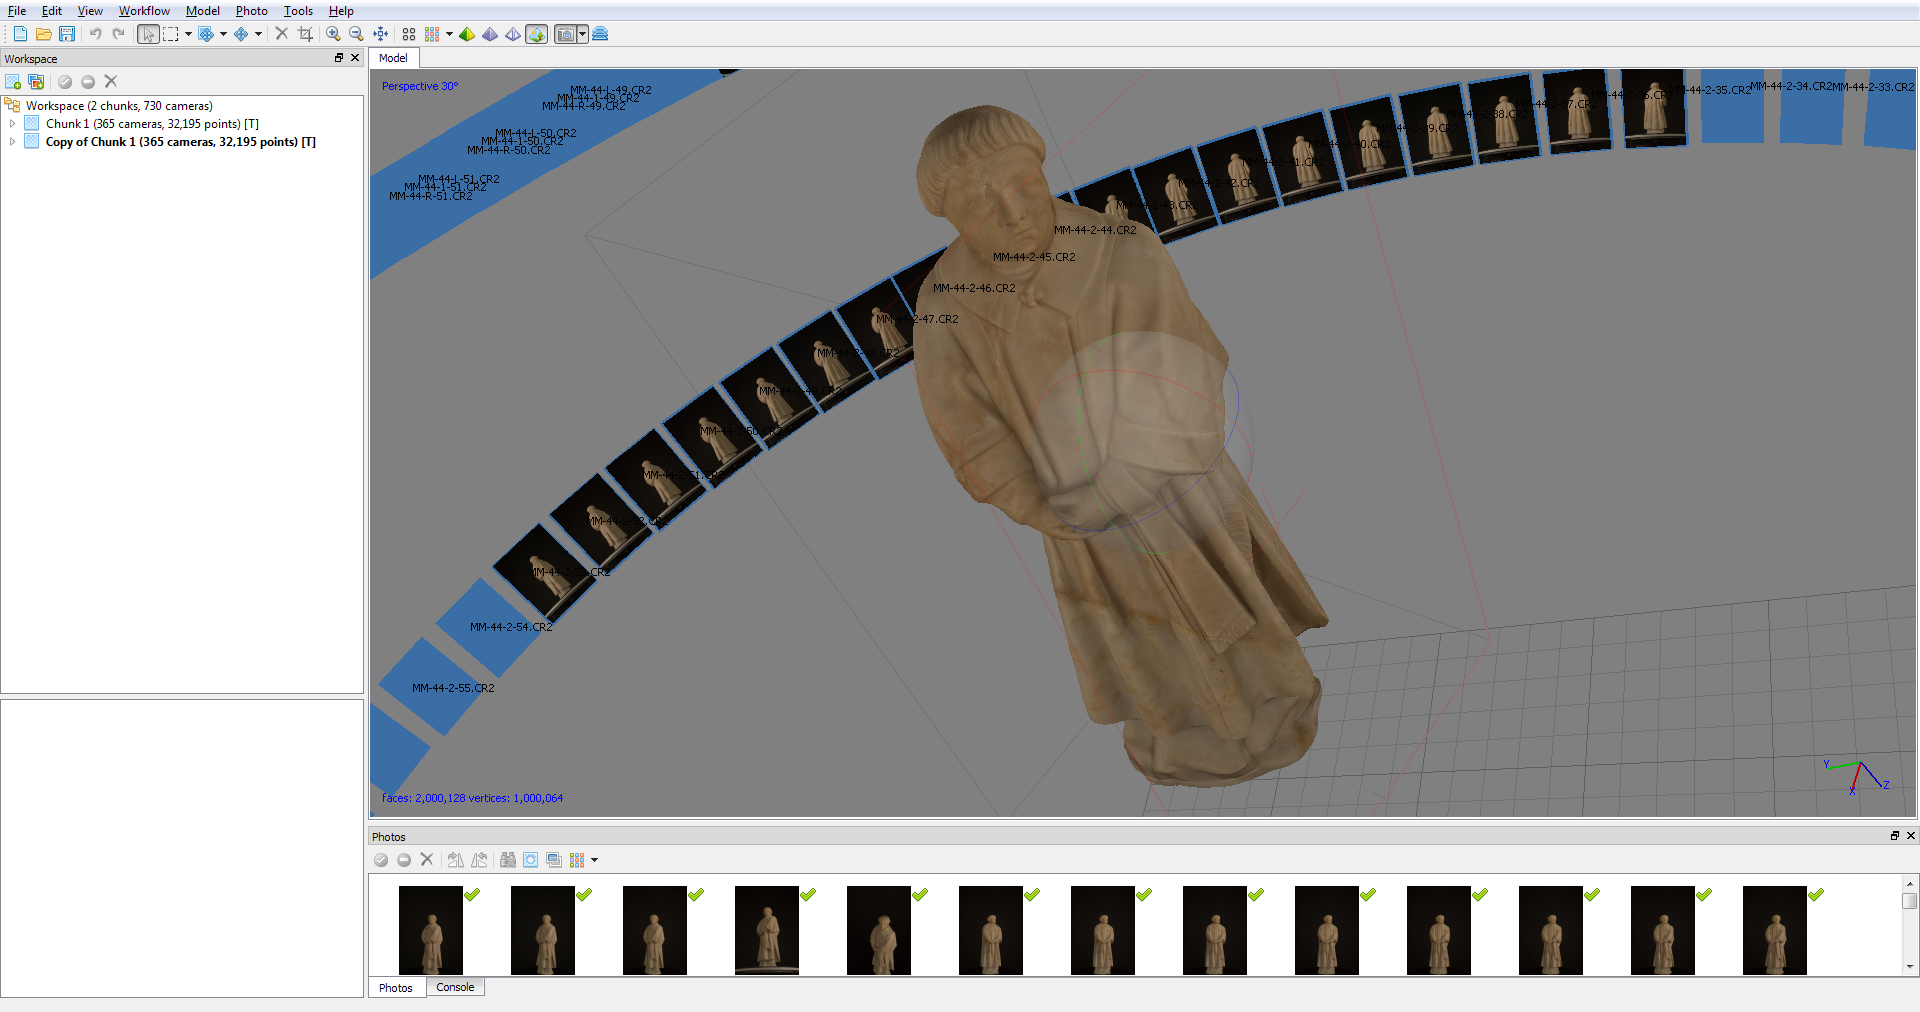
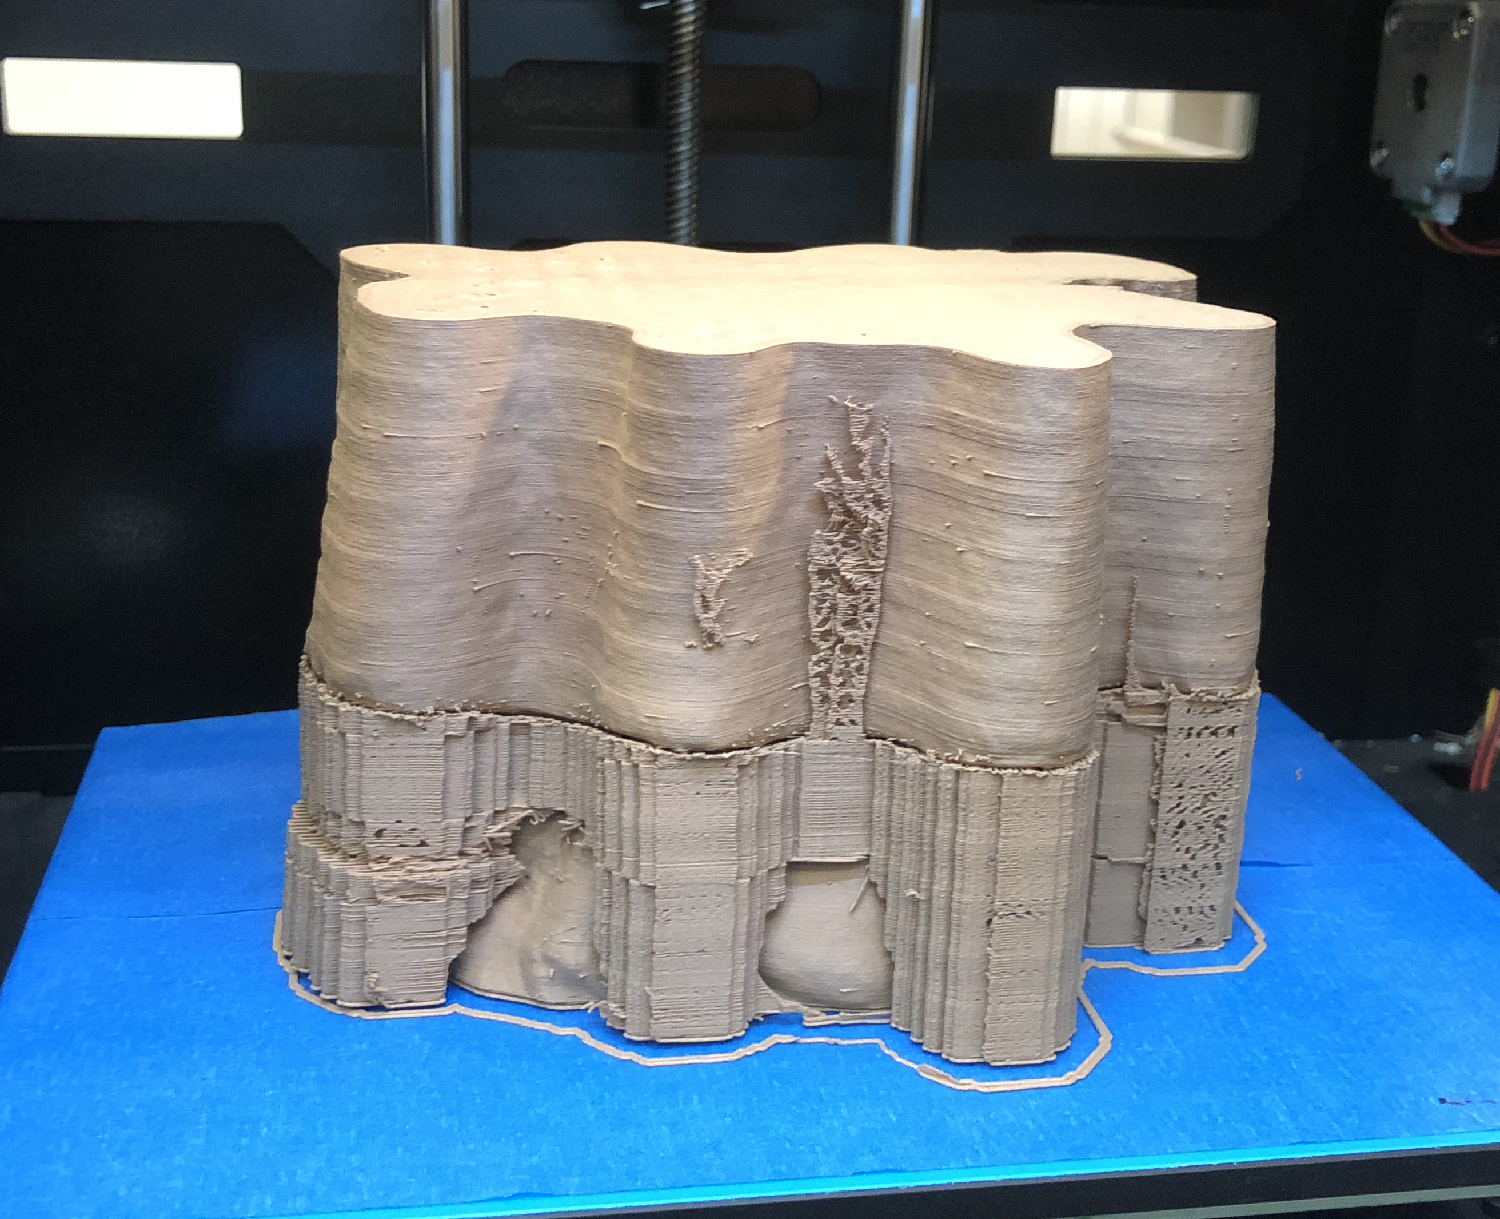
I started with Mourner 44 because it is a simpler model. Nothing too crazy sticking out or around. I only used 3 of the 5 data sets because 5 degrees around the center should be enough that I wouldn’t need the extra 2 orbits around the center that we used for the stereoscopic version.
It’s a long process. It takes a while for that many photos to load and process. A day for the rough alignment, a week for the high resolution model. This is intensive stuff and it is NOT automatic.
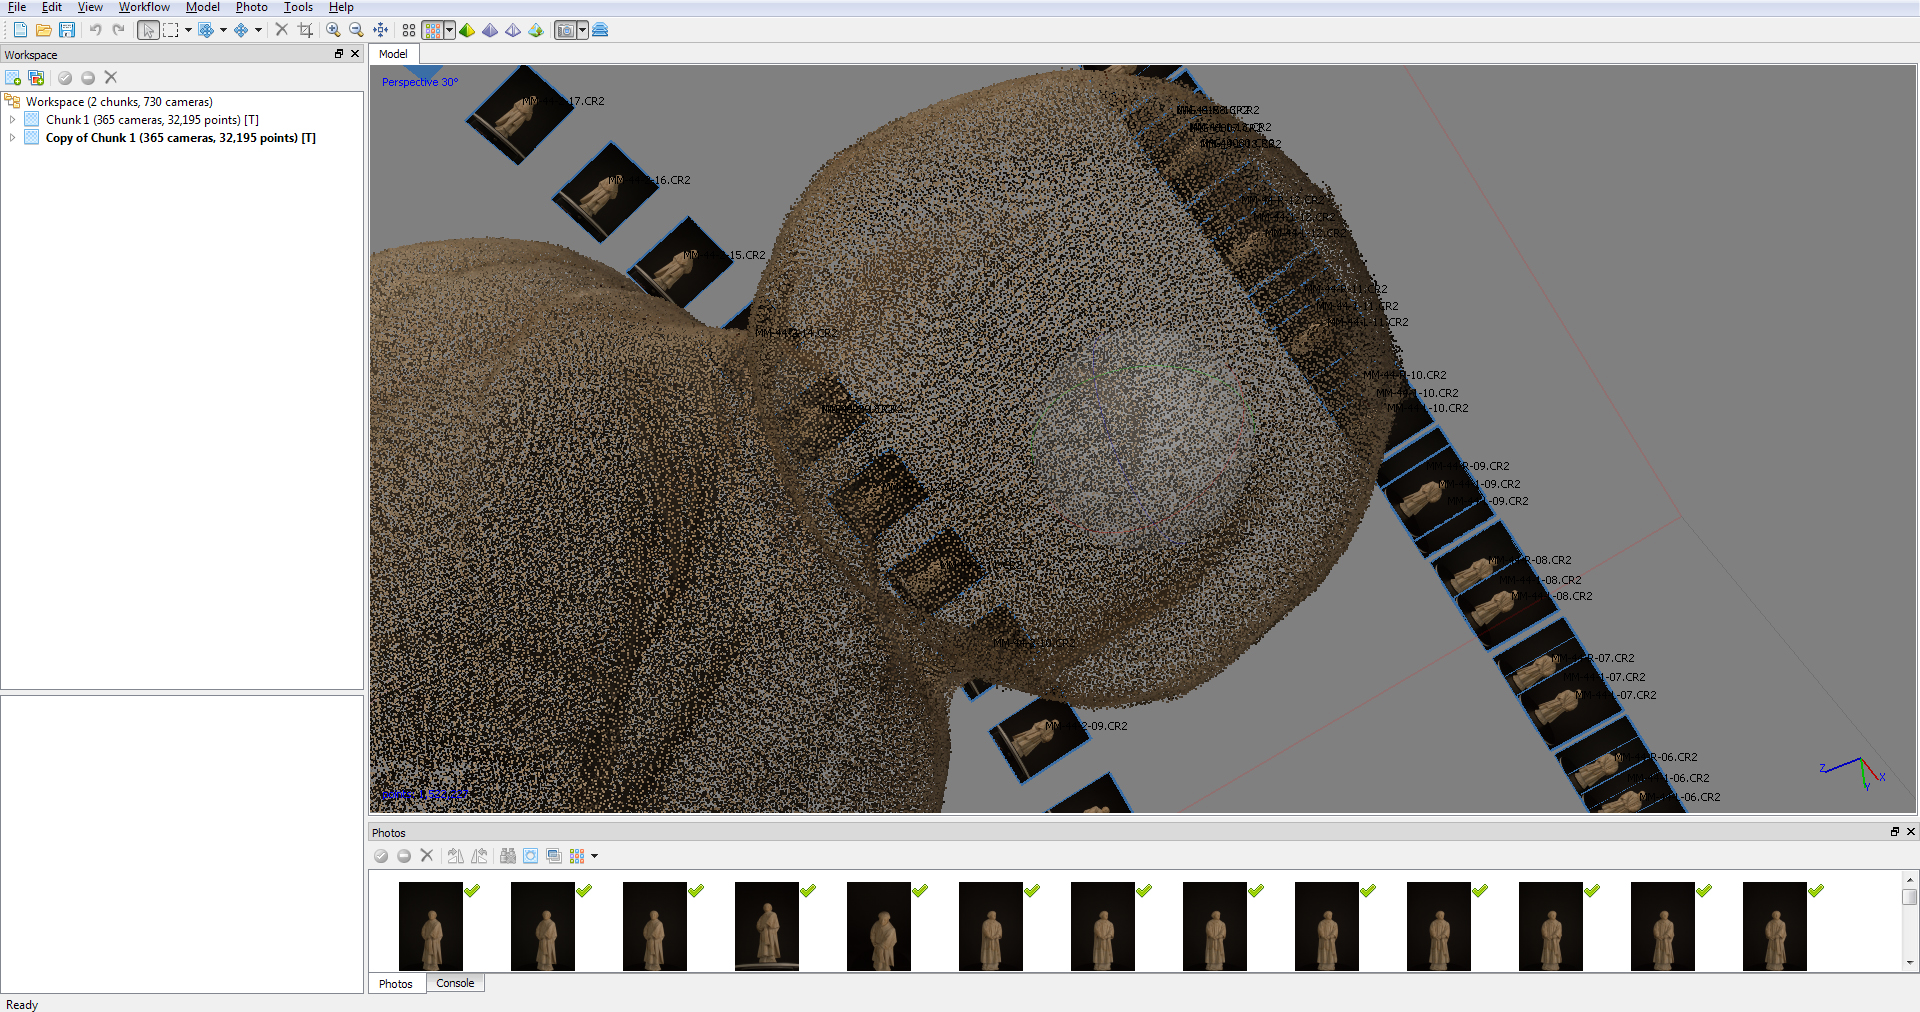
First you load all of the photos into Agisoft Photoscan.
I could have loaded the 3 datasets in different chunks but I opted to do them all at once.
If you do it right then you will see the cameras positioned where they were in space. If you are moving around an item it will align both the foreground and the background, so before you move on you want to get rid of that background data so you are working on the object not the object AND the room. Since I was using a turntable I had to make sure that the software didn’t align to the background. When that happens all of the cameras show up at the same spot – the model turns into noise – and you get a perfect model of the wall behind you!
Luckily we had the proper lighting and backdrops and the software distributed the cameras perfectly around the object.
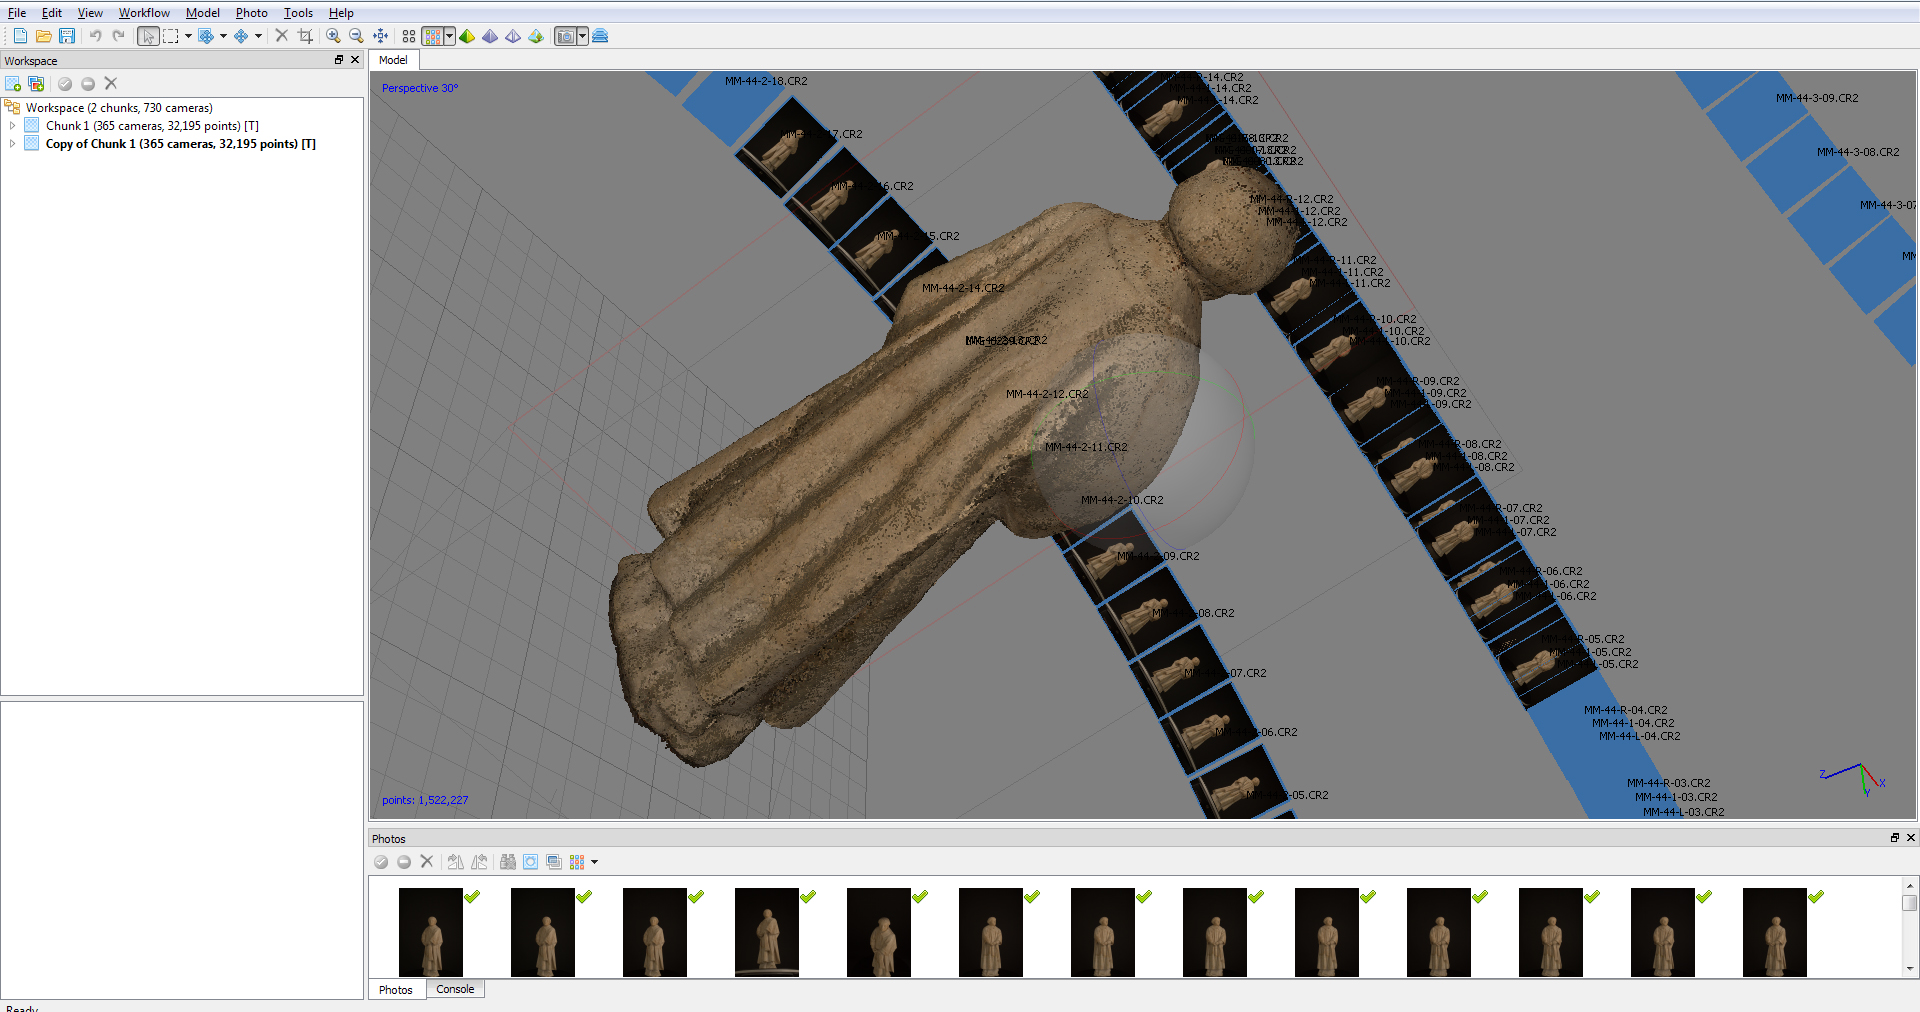
At this point I needed to remove the outlier data. Charlie came in and showed me how to keep the reliable vs. the unreliable points mathematically. This is something I would never have done on my own as it felt like I was throwing away data. I wasn’t – I was throwing away noise. I then hand removed the big strays, the chunks of points outside of my model or at the fringes of my model. It’s tedious but straightforward. The last selection I did was by color where I was able to select data points that didn’t “look” like my sculpture and trim them away as well.
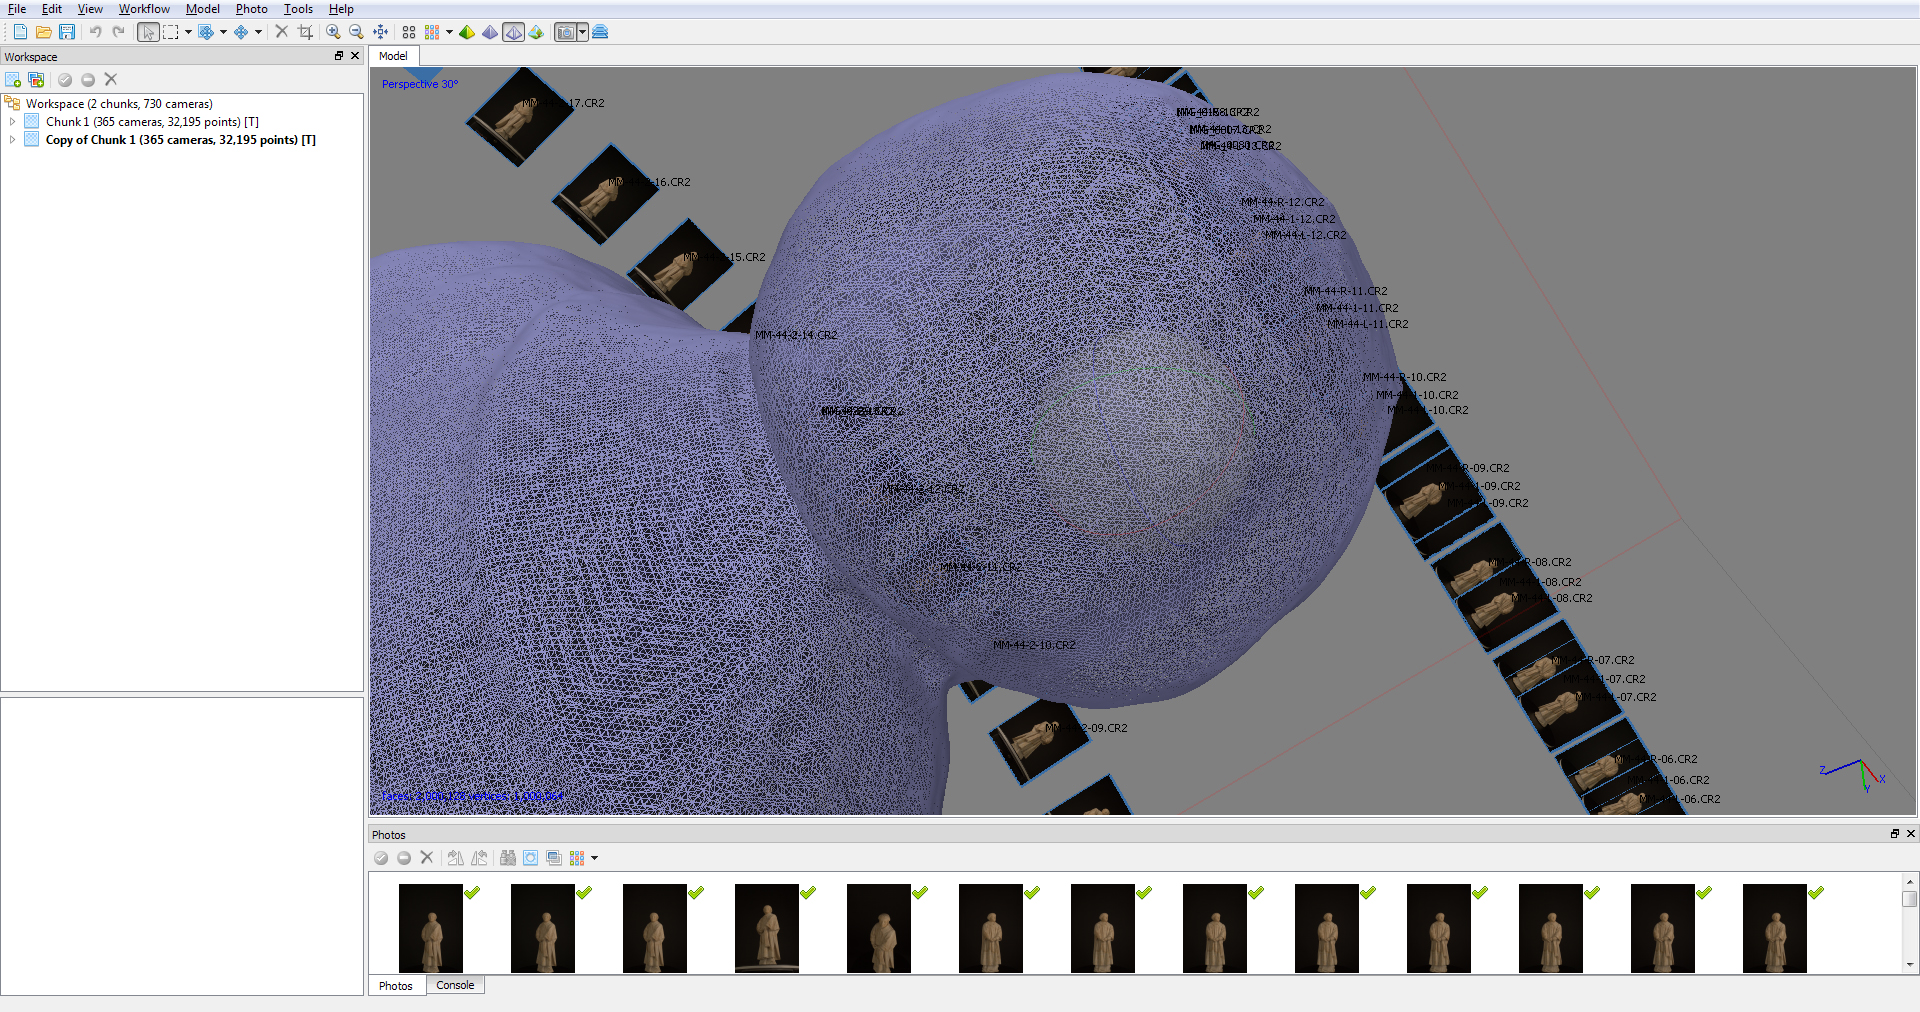
With this new cleaned up data I was able to tweak my camera alignment and then ask it to create a “dense cloud” – there are of course parameters (thank you Charlie). This took a week. My computer is top of the line, crazy video card, crazy memory card, tons of ram, SSD drive. A week!
It looks like a 3d model but it isn’t – it is just a very dense data cloud.
The “dense cloud” is then converted into a mesh, decisions of course are made into how to deal with holes and more parameters. This only took several hours.
This mesh can viewed as a surface with or without color.

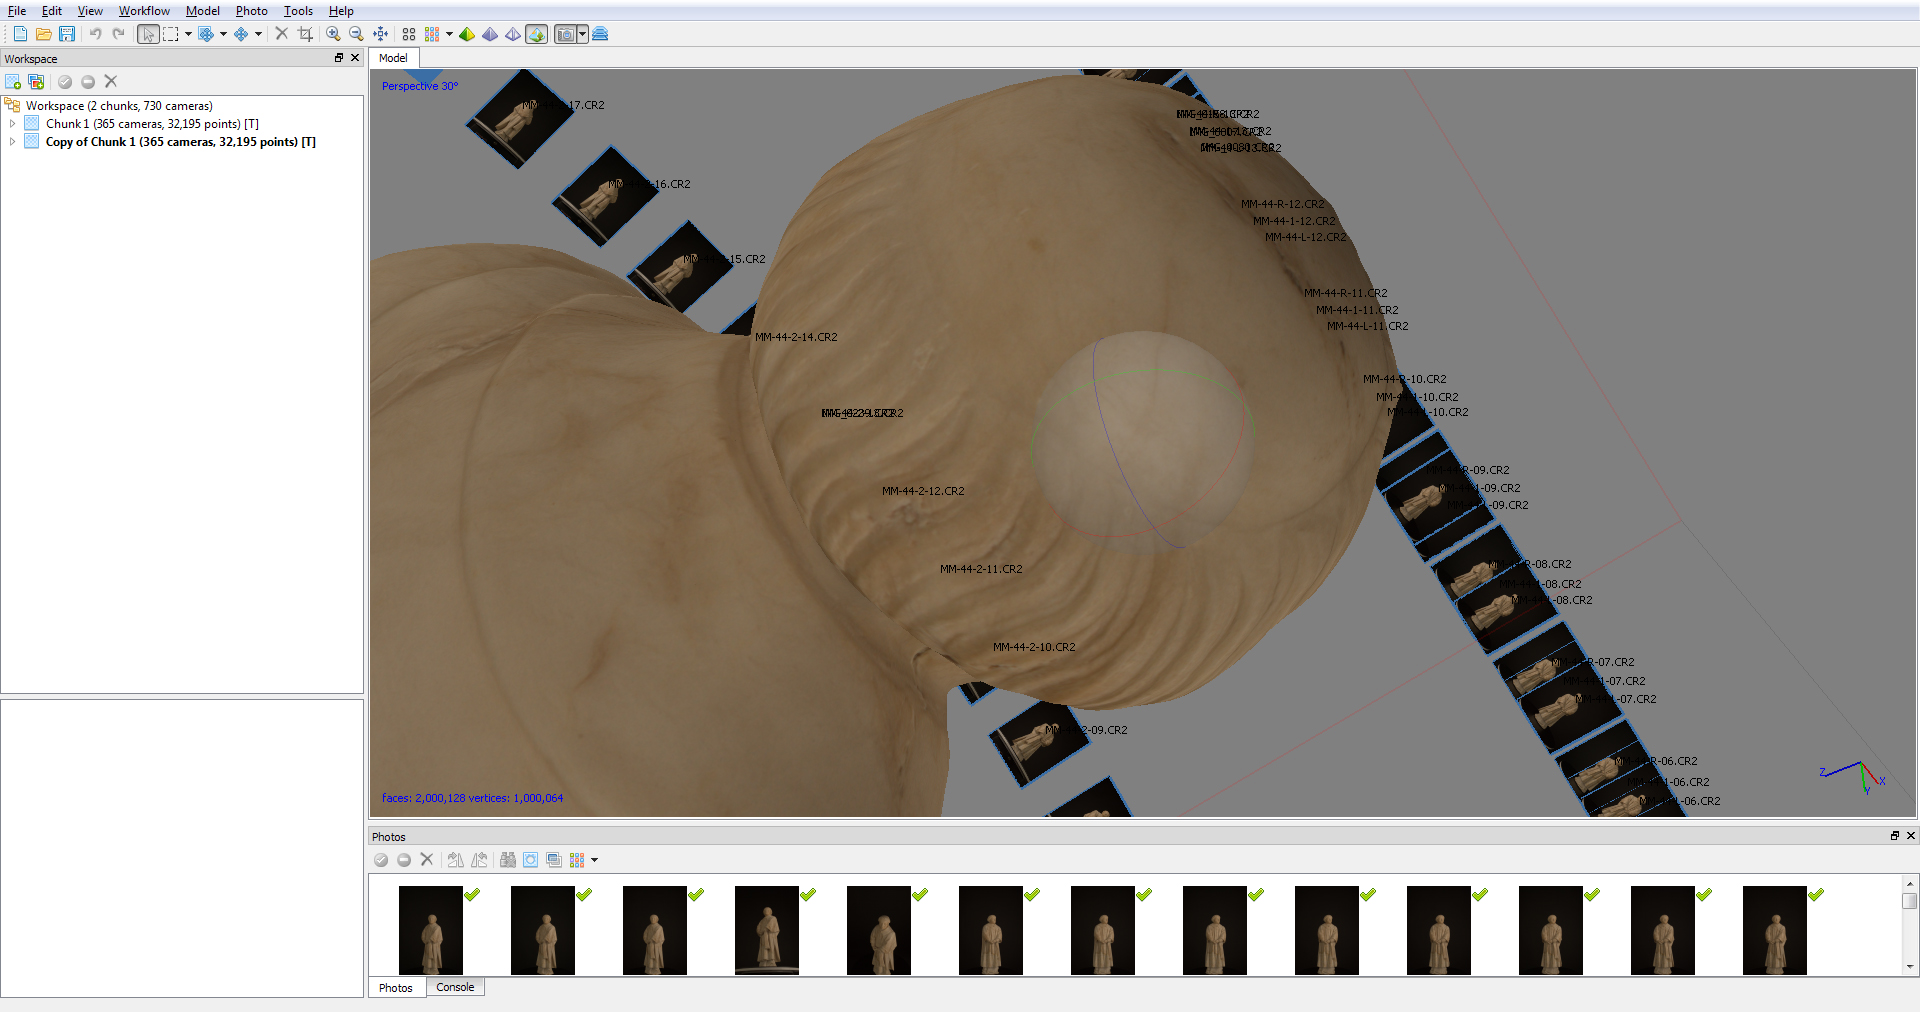
But if you want it to look awesome – you have to build a texture – more time – more parameters.
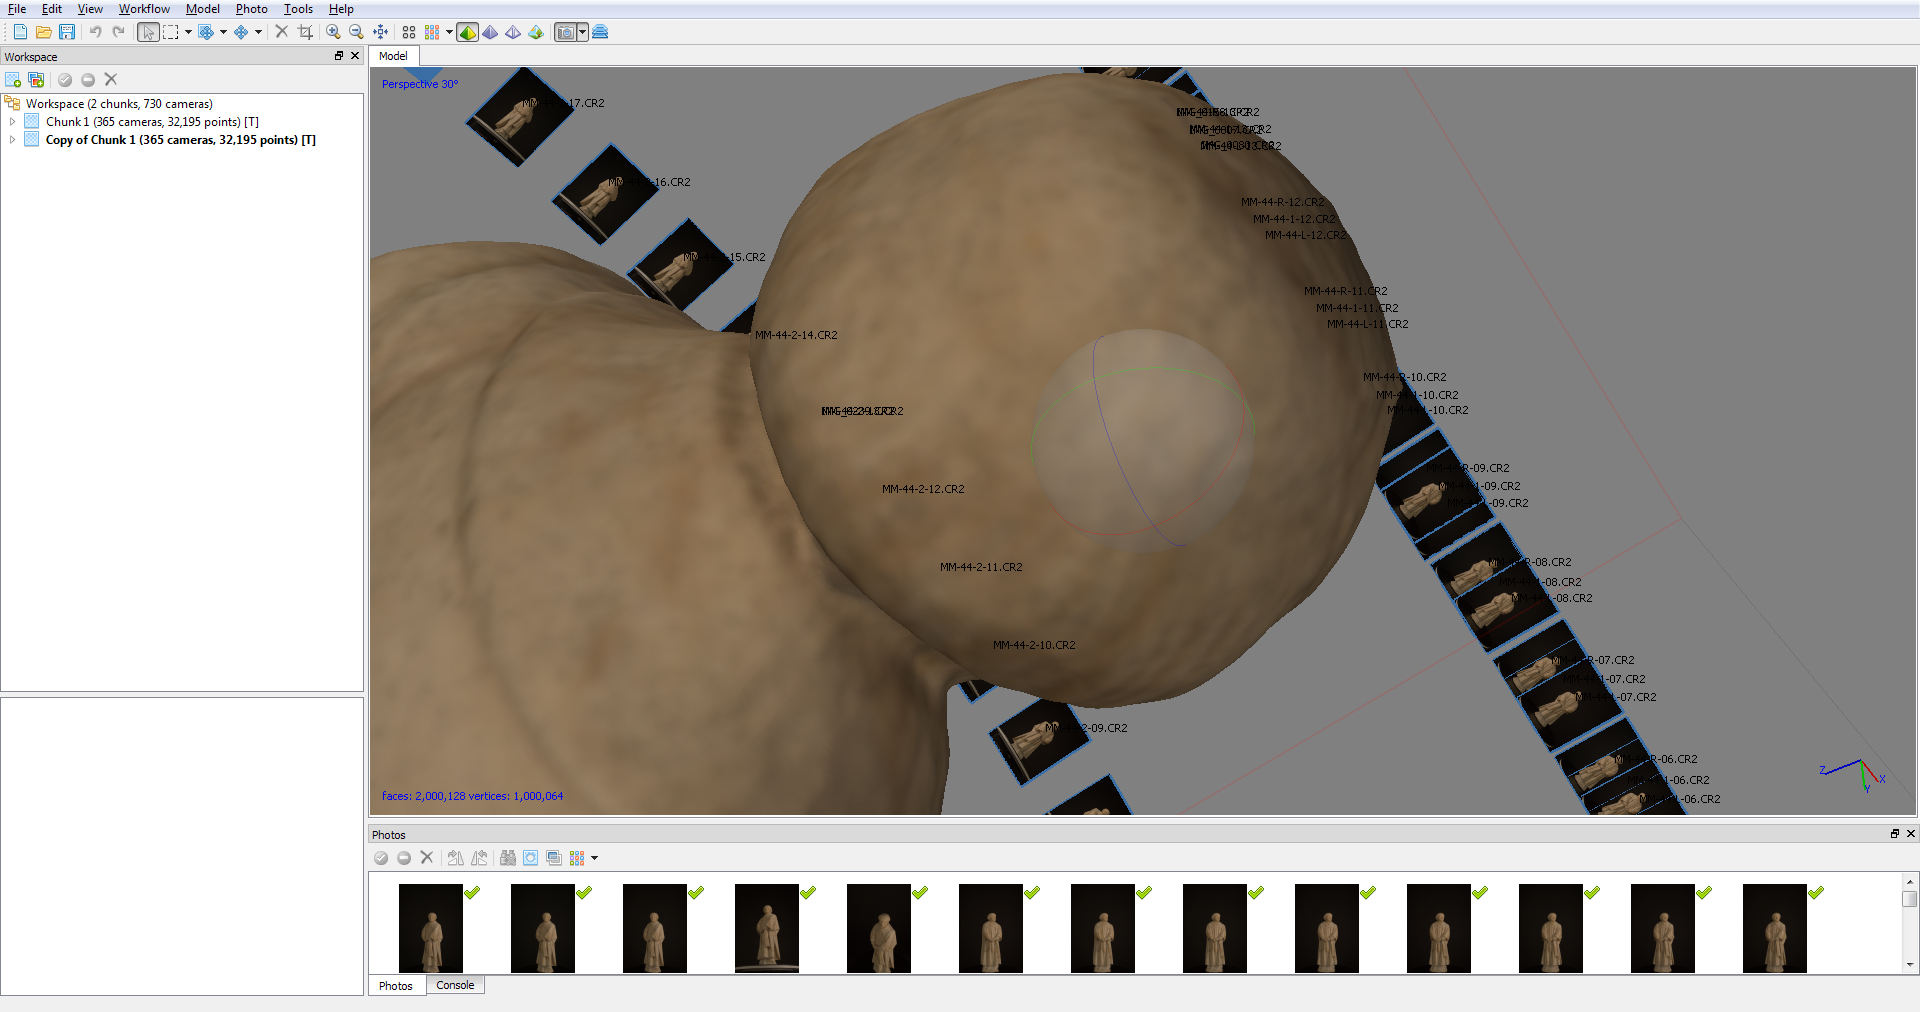
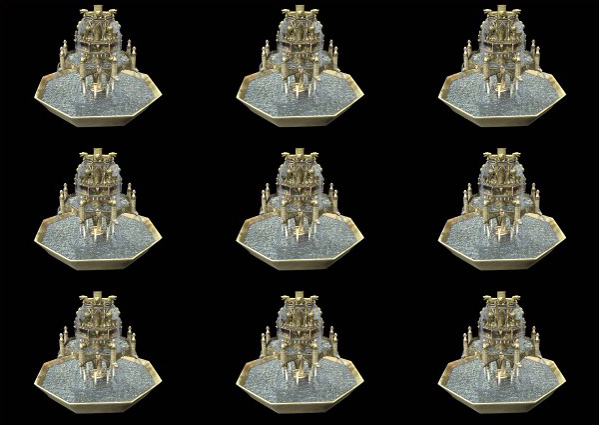
Holy moly! I have a 3D object! It’s a mourner.
I have this awesome OBJ file with texture.
Now what do I do with it?
I wanted to make one – physically.
When preprocessing anything for the “physical world”. I use Autodesk’s Netfabb:
https://www.autodesk.com/products/netfabb/overview
With it, I can load the model, rotate scale, fix errors in the mesh, and all sorts of things.
The first thing I did was to stand it straight and then create a box and subtract it from the base to make sure I had a flat bottom.
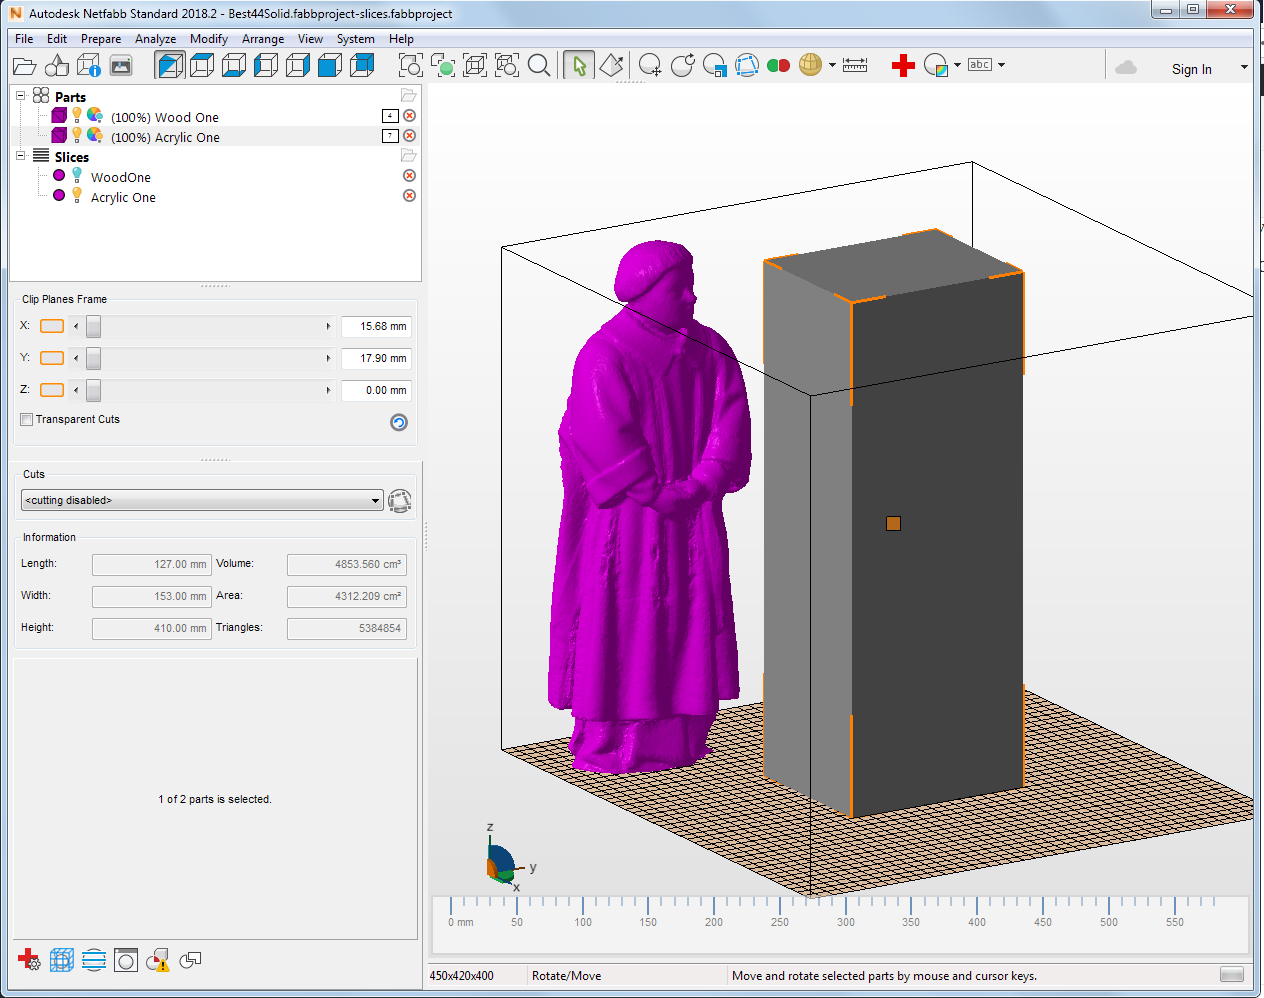
I export this model as an STL and I am ready to print.
The first one I made was going to be small (just a few inches) – actual size is 16″ tall!
While Netfabb prepares my models but I use Simplify3D to prepare the object for my 3D printer:
https://www.simplify3d.com/
Simplify3D allows me precise control of everything you can imagine, supports, infill, temperate(s), raft etc. It makes all the difference in getting the most out of your 3D printer.
Also I like printing in a PLA wood filament. Very easy to play with after:
https://www.bhphotovideo.com/c/product/1192382-REG/afinia_af_pla_1_75_250_wood_specialty_pla_filament_1_75.html
https://www.amazon.com/HATCHBOX-1-75mm-3D-Printer-Filament/dp/B01092XXD4/
I print on a FlahForge Creator Pro. It is a dual extruder unit but the wood filament is a pretty good support and breaks way nicely.
Small cute and effective.

Voila!
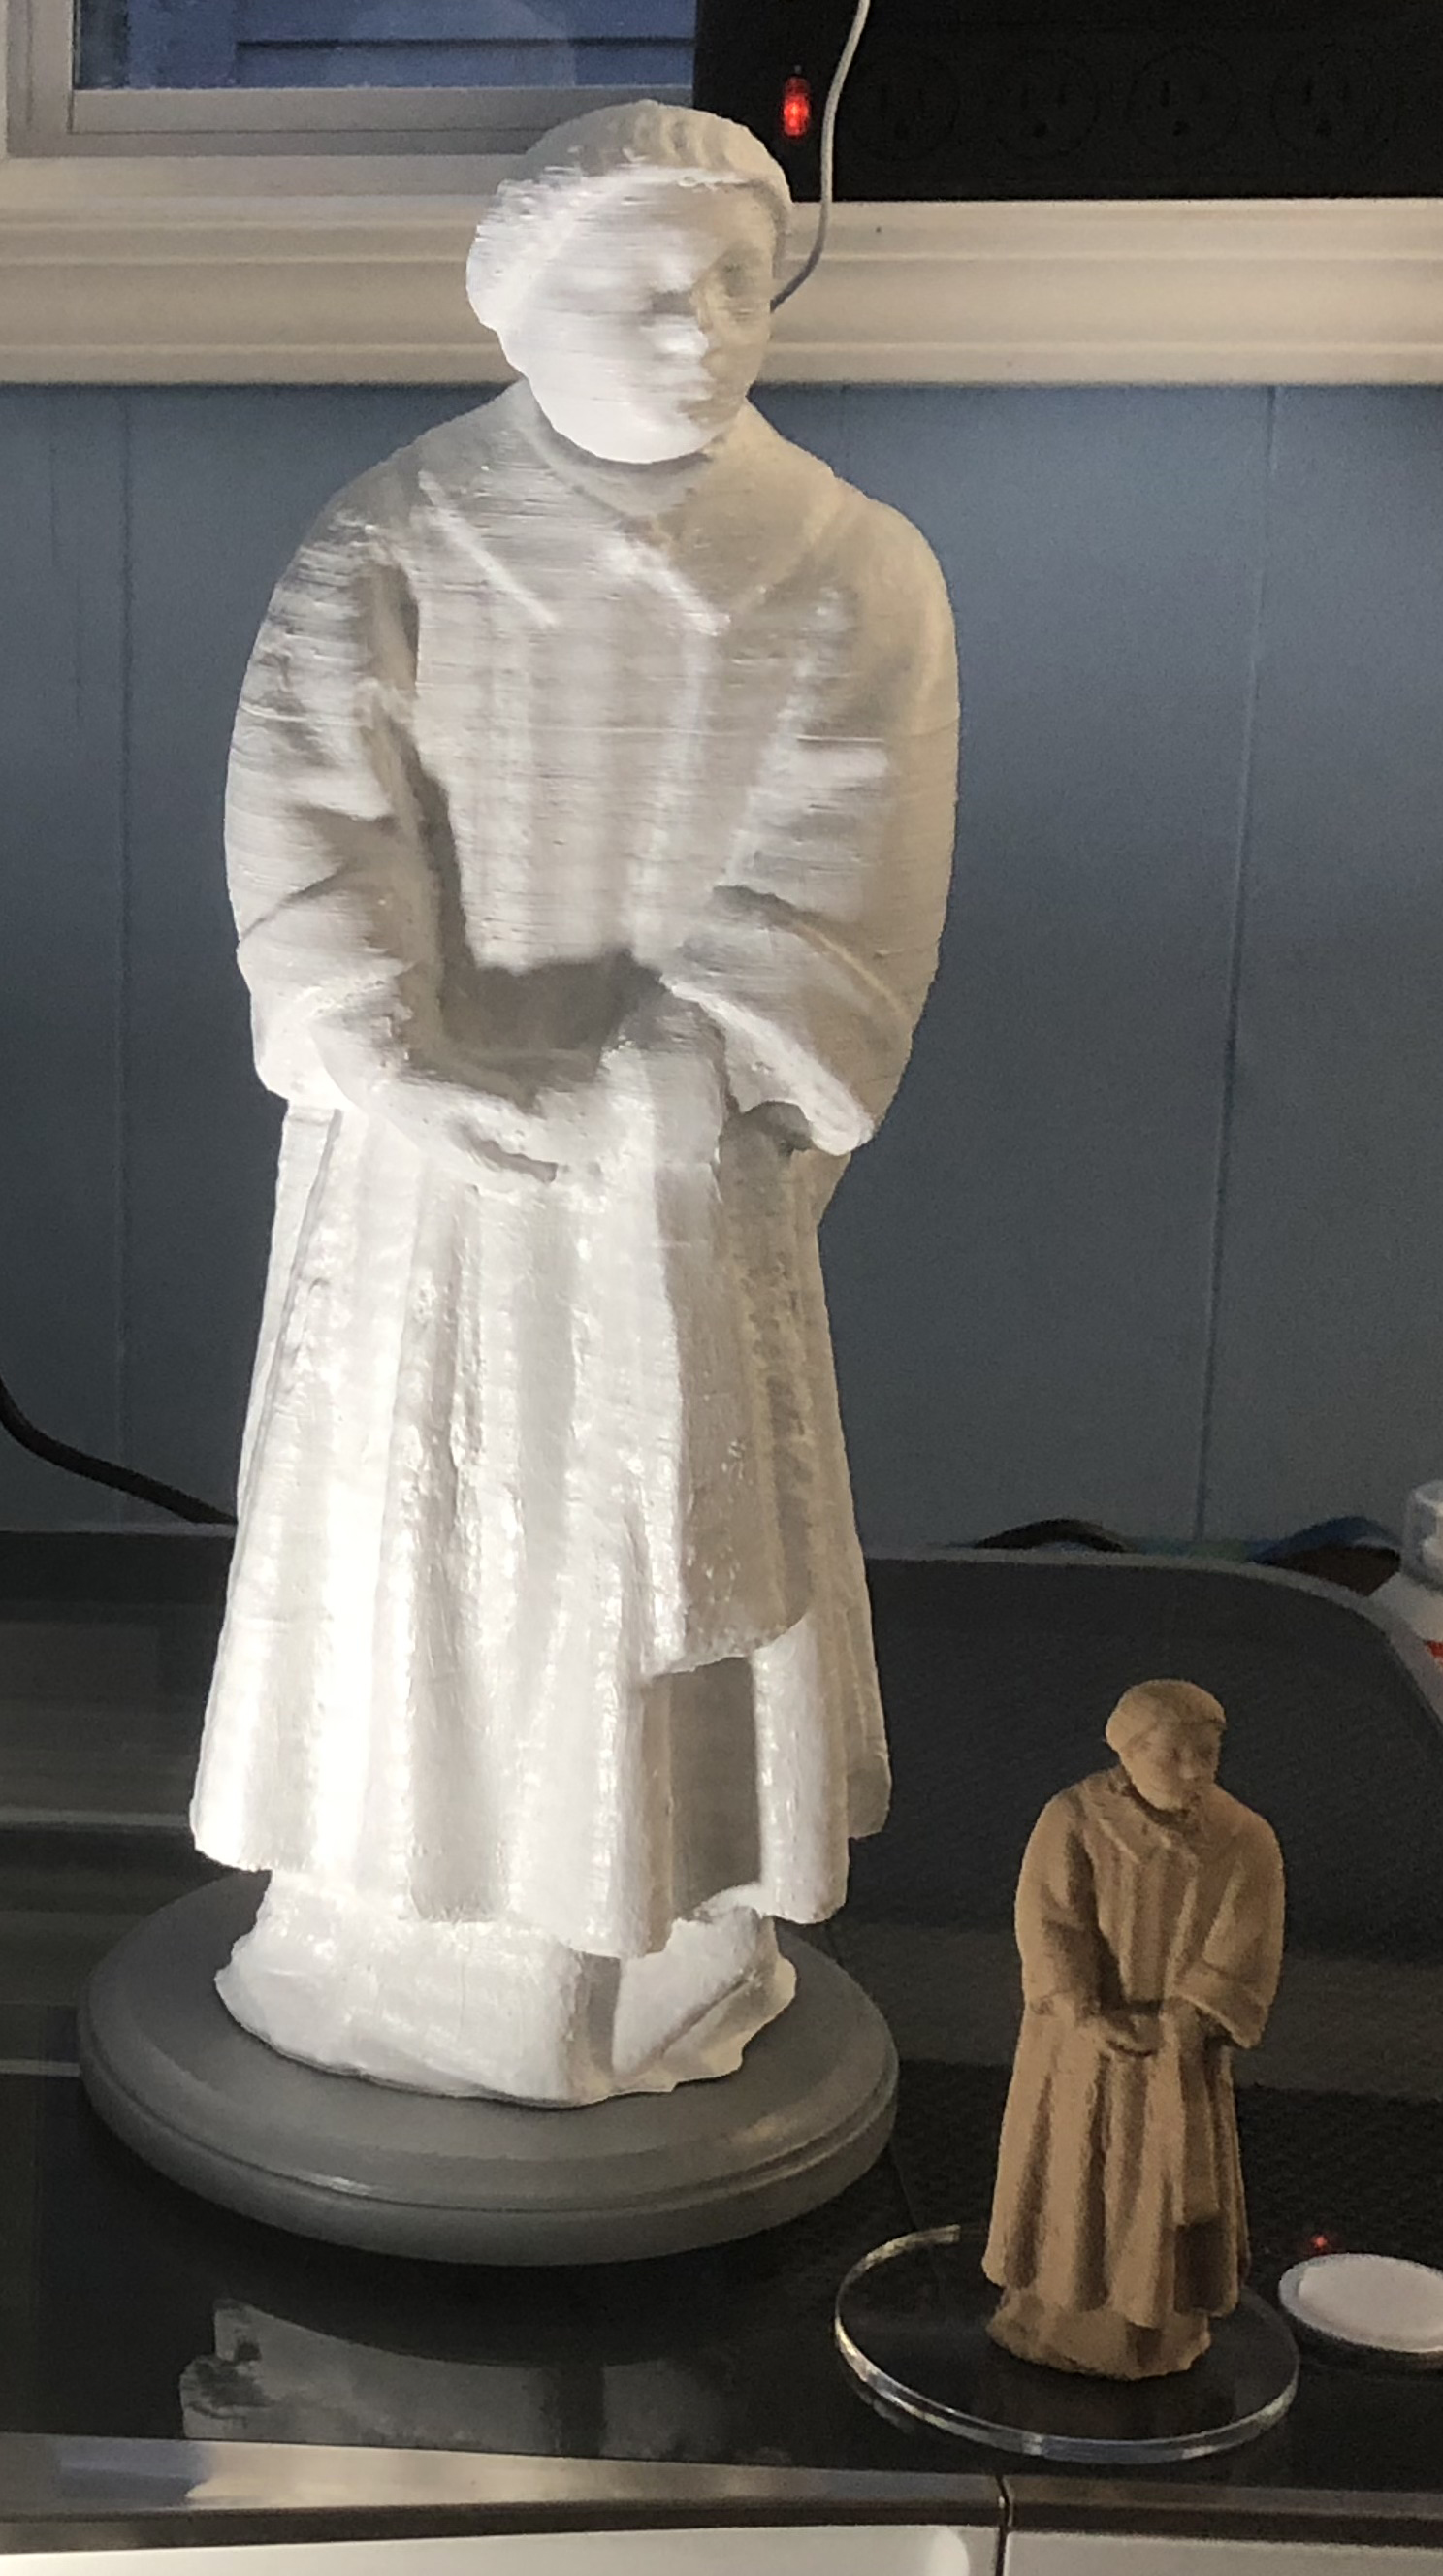
I was going to print a bigger one on an industrial printer at thinkBox (The University’s Center for Innovation) but solid it would have been thousands of dollars and even hollow it was going to be between $500 and $900. (Netfabb can the hollow model / shell for you which is cool).
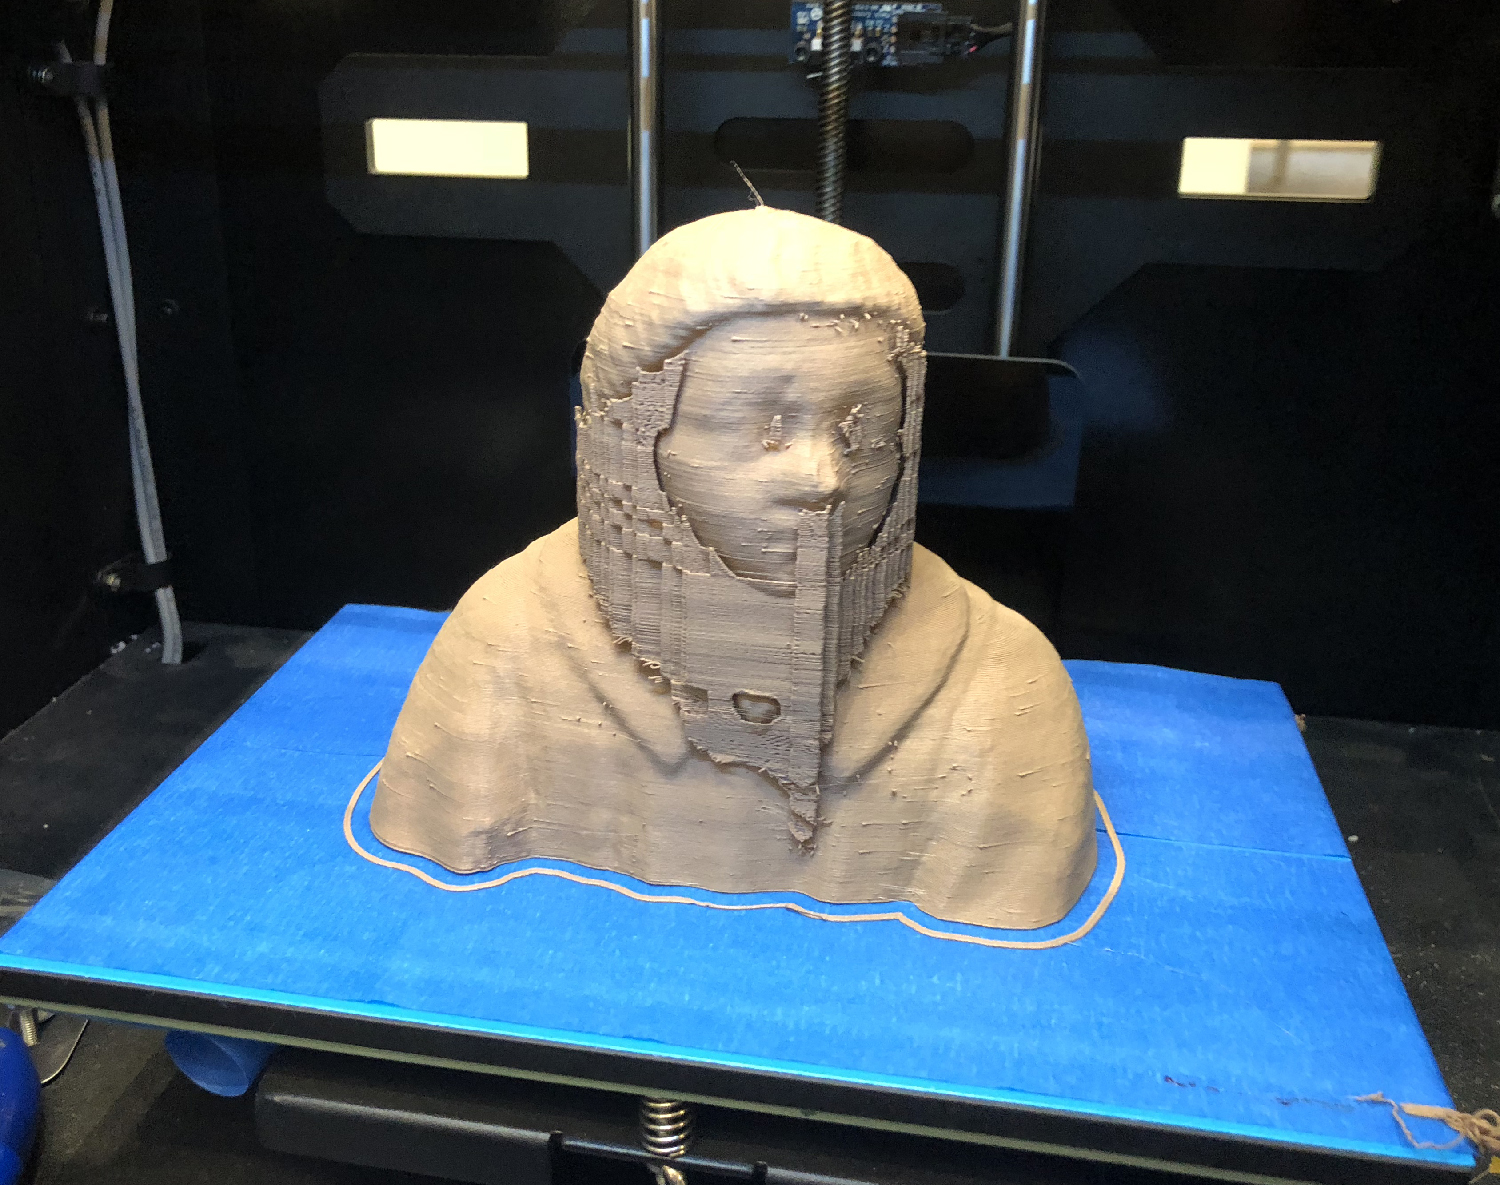
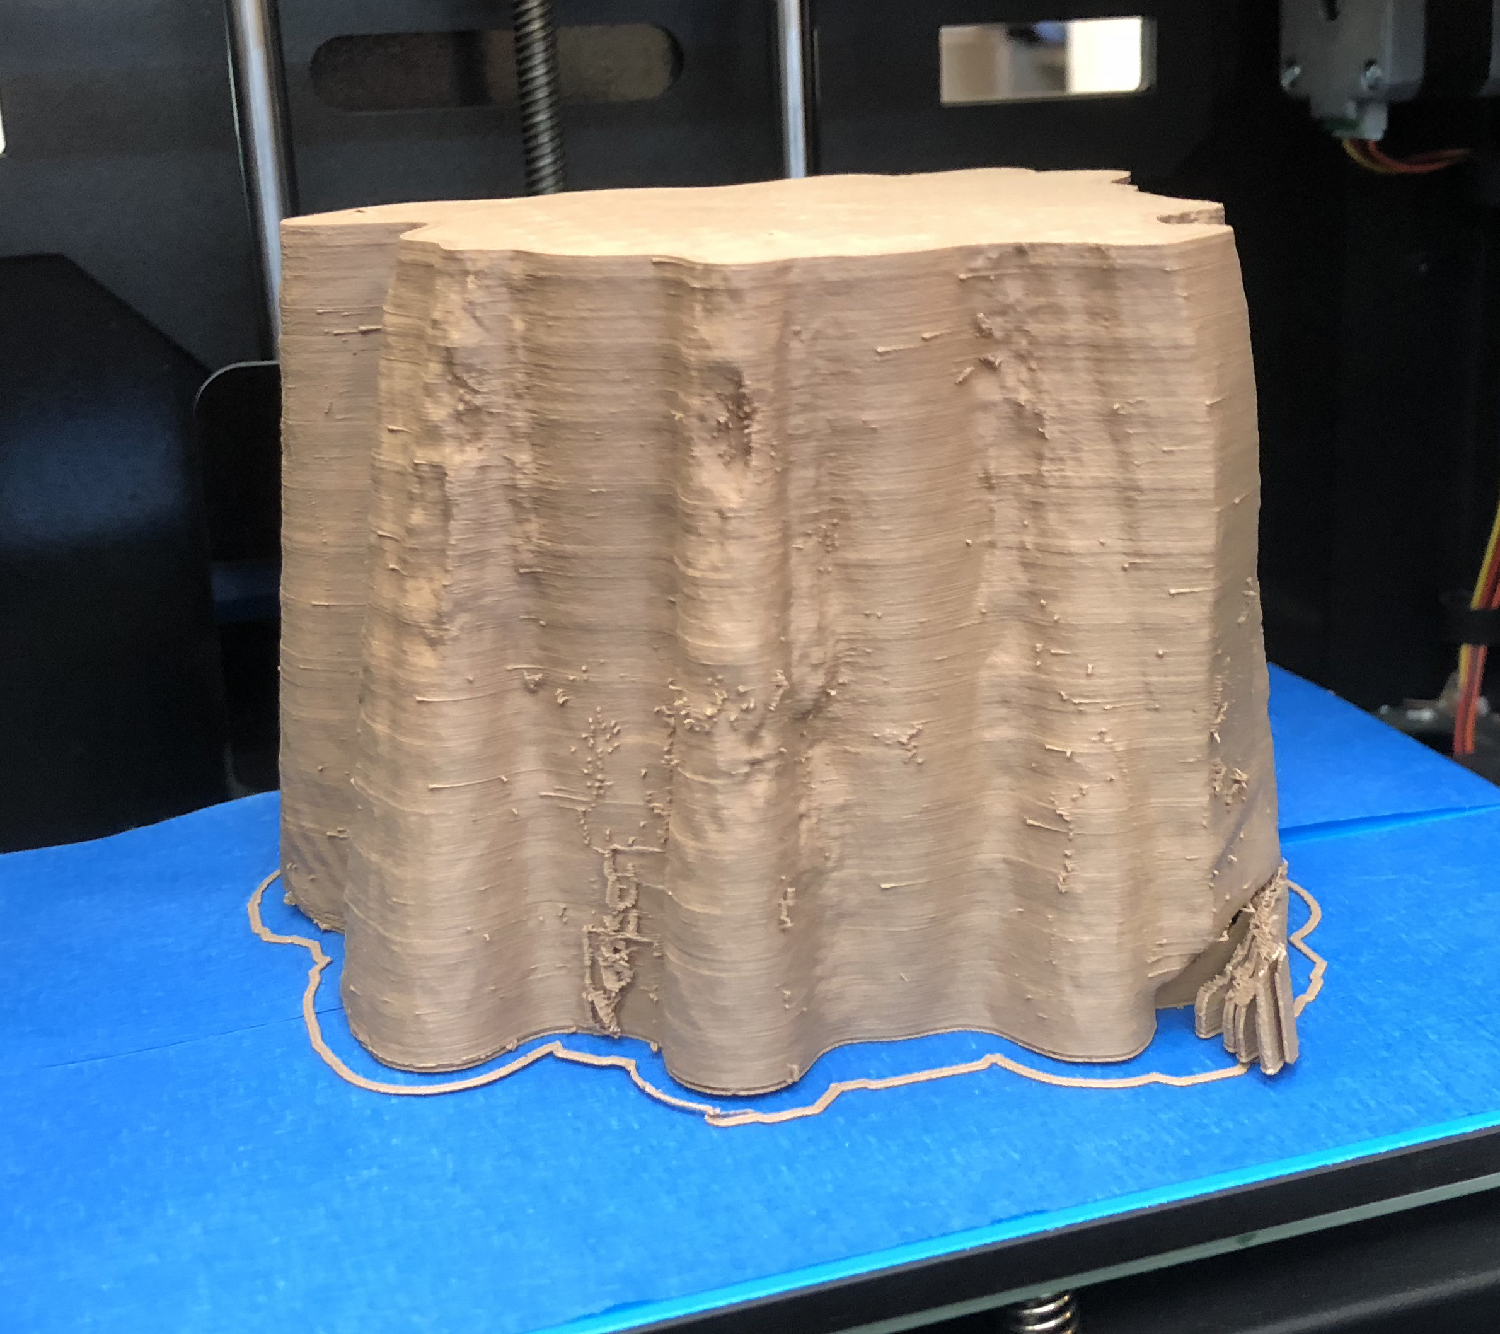
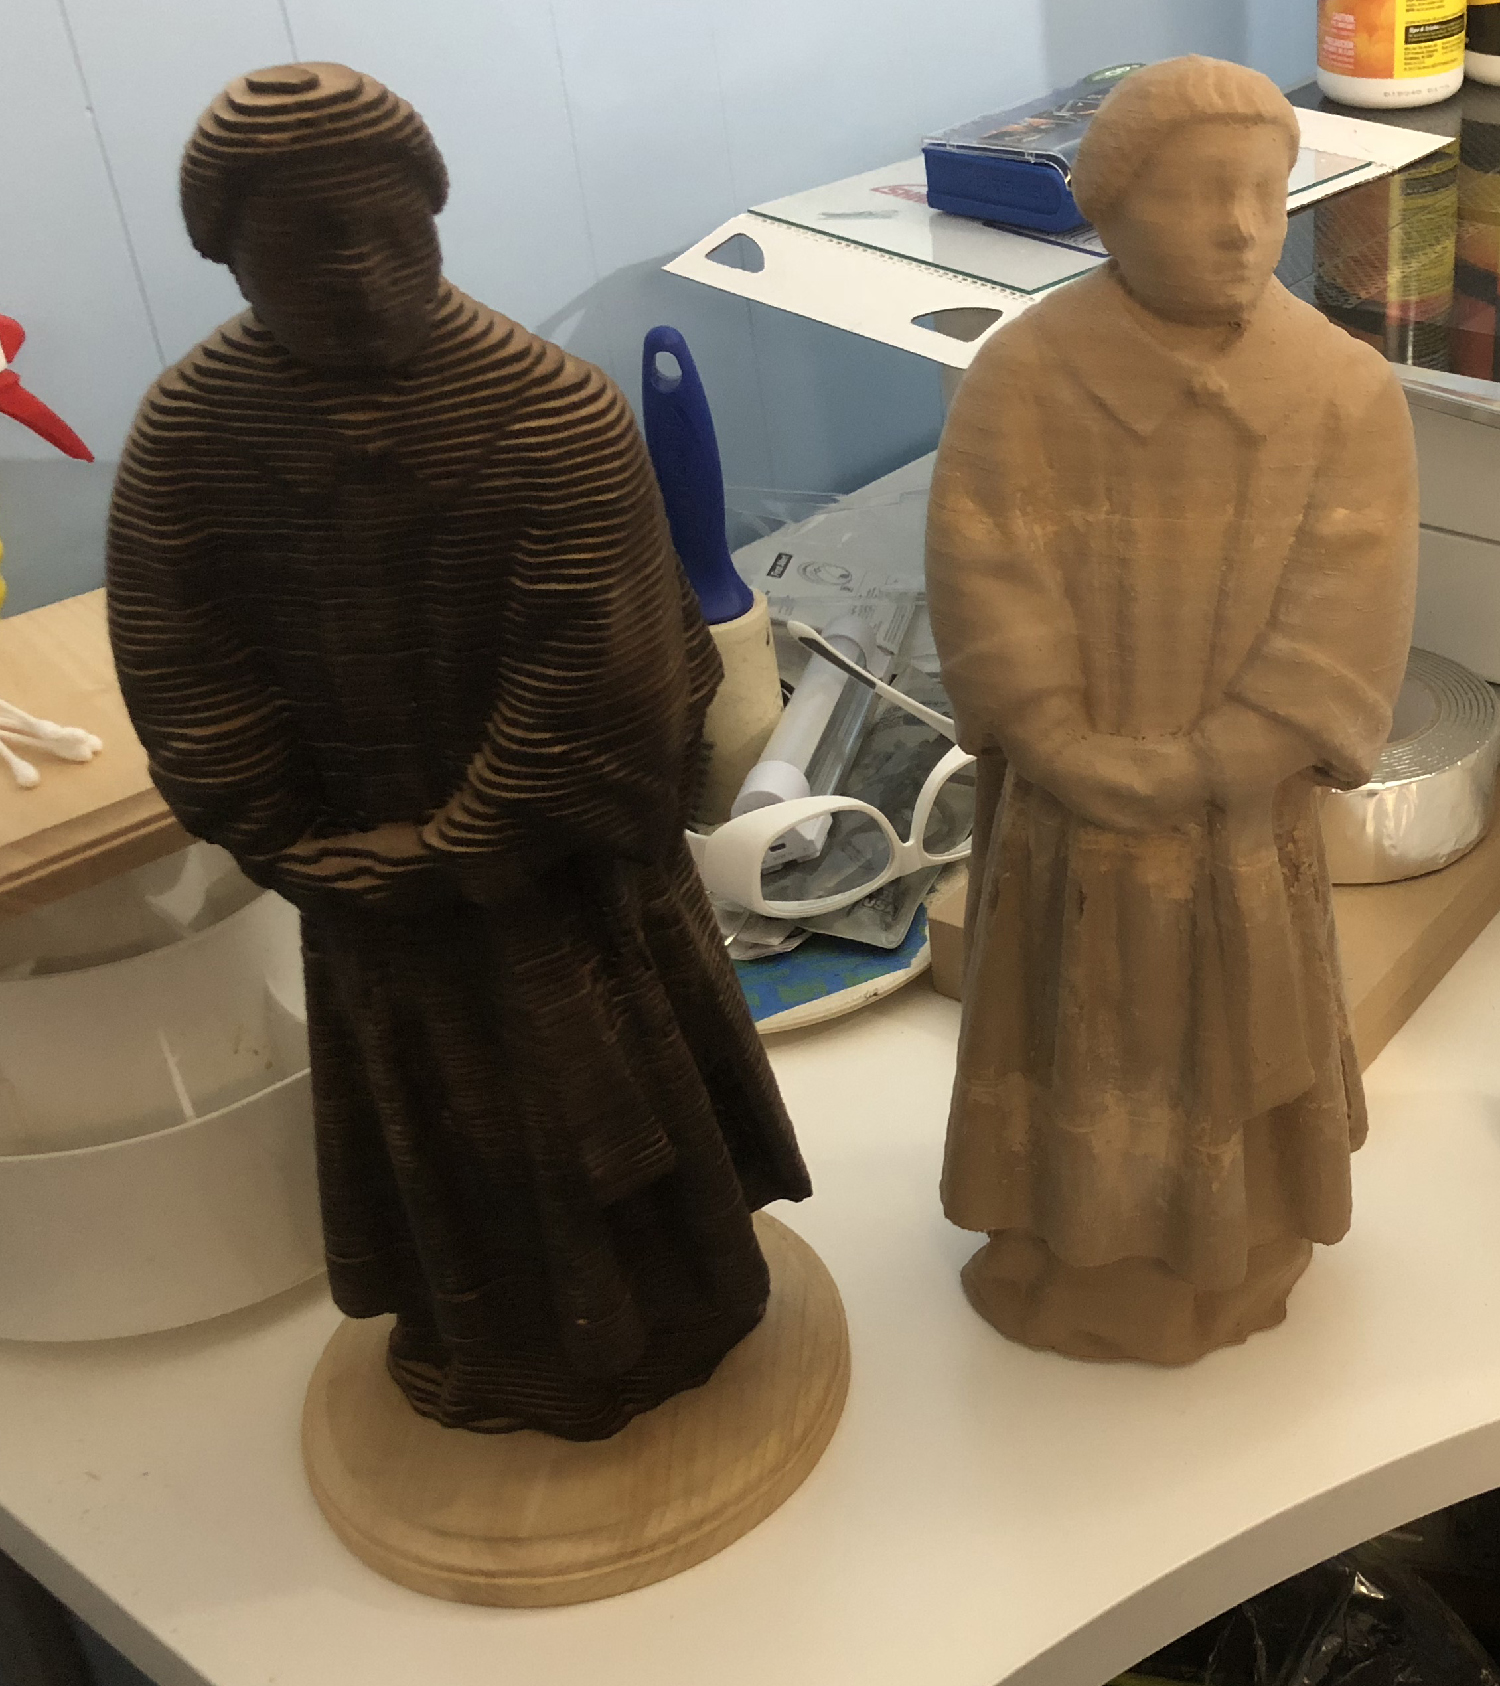
Instead I opted to print it on my own 3D printer in 4 sections and then glue, fill, and paint.
The head took 8.5 hours and 37m of filament, the torso – 18 hours and 80m, the legs 13.5 hours and 58m, and the feet 17.5 hours and 75m. This used a honeycomb infill.

Total for this model: 57.5 hours and 250m of filament (which is around $40).
There was some pullaway at one corner of the base, so each piece isn’t as flush to the others as I would have hoped. I used a wood glue and some wood fill to create the solid model.
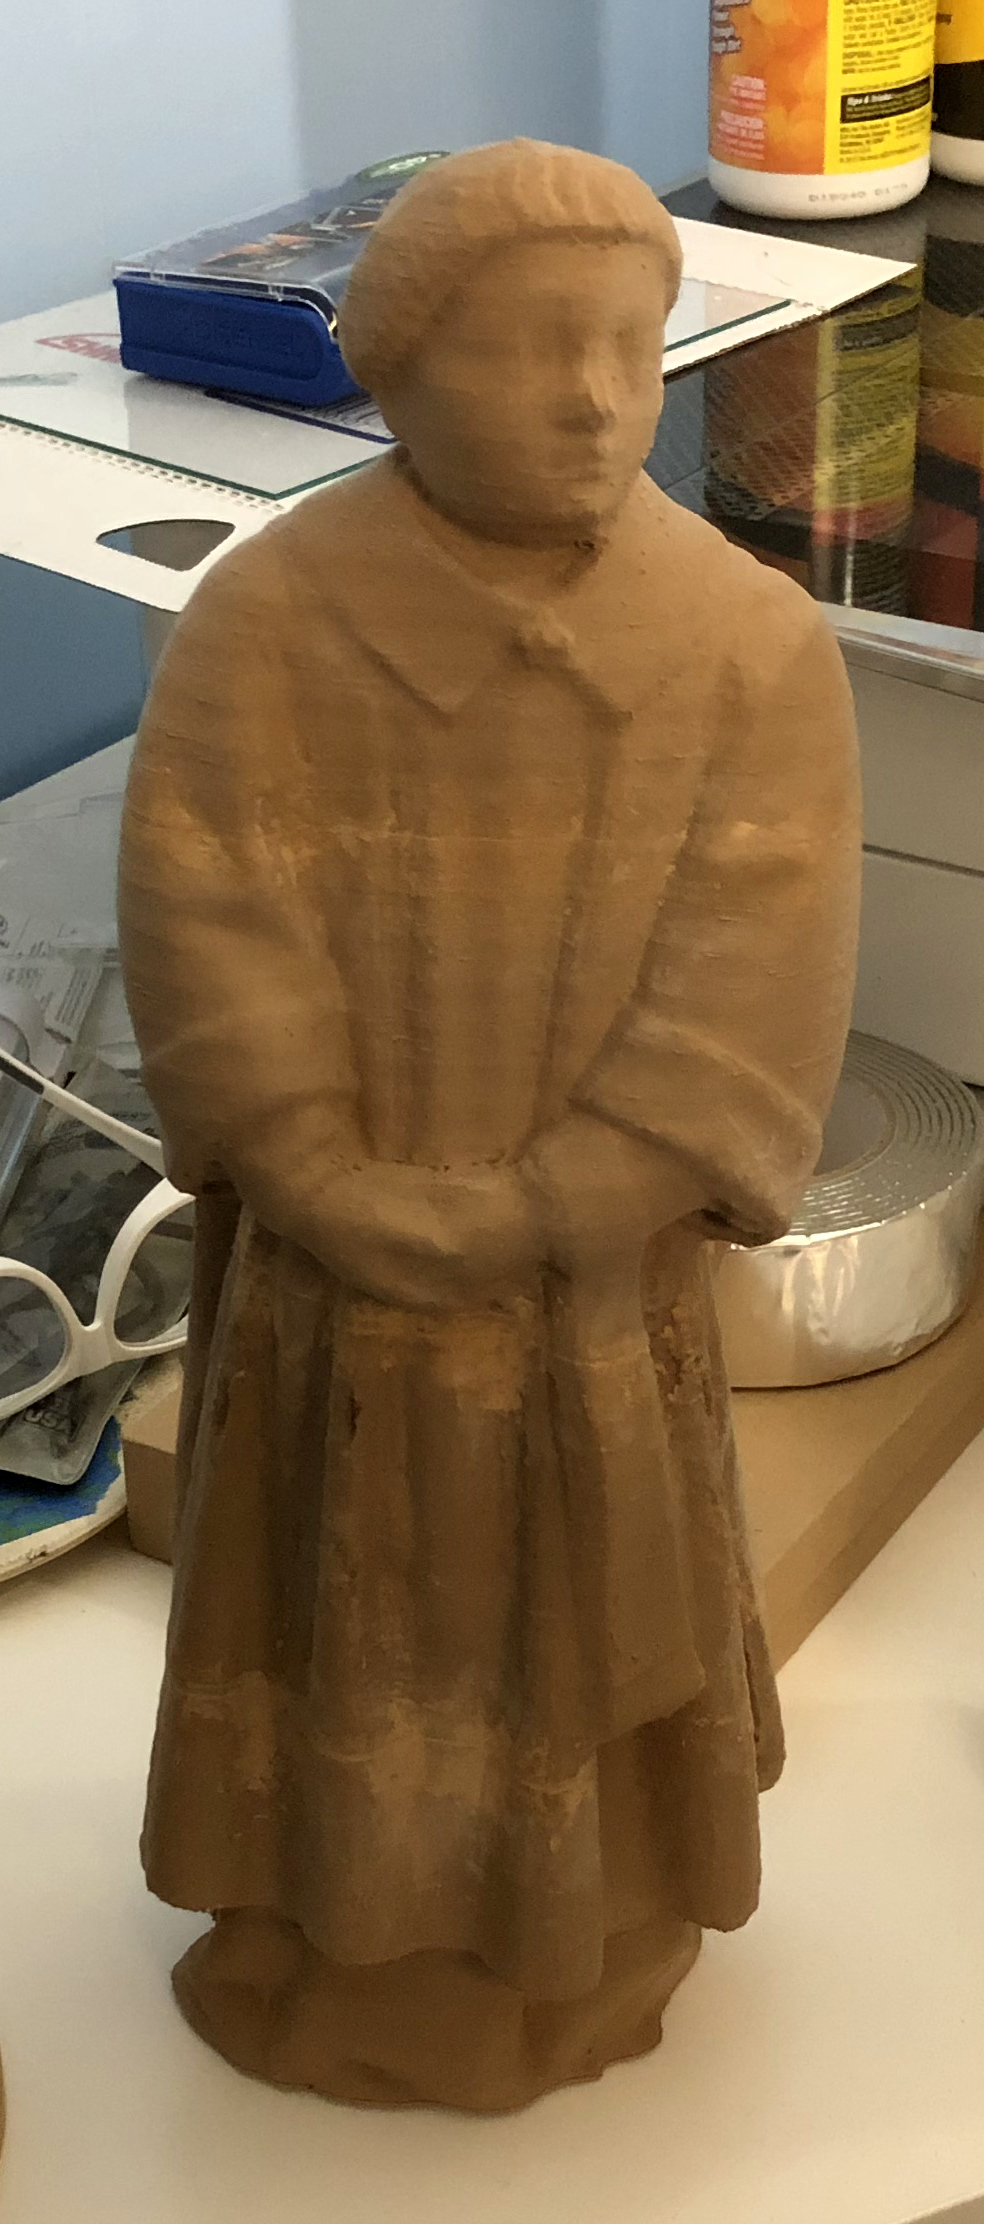
I then primed and painted it with acrylic.
Voila & Voila!
Last year as a retirement present for a friend and coworker, my boss asked me to 3D print a bust of JS Bach. I thought I could do something more artistic and instead sliced the model into thin sheets which I laser cut and assembled. (I did all of this at thinkBox).
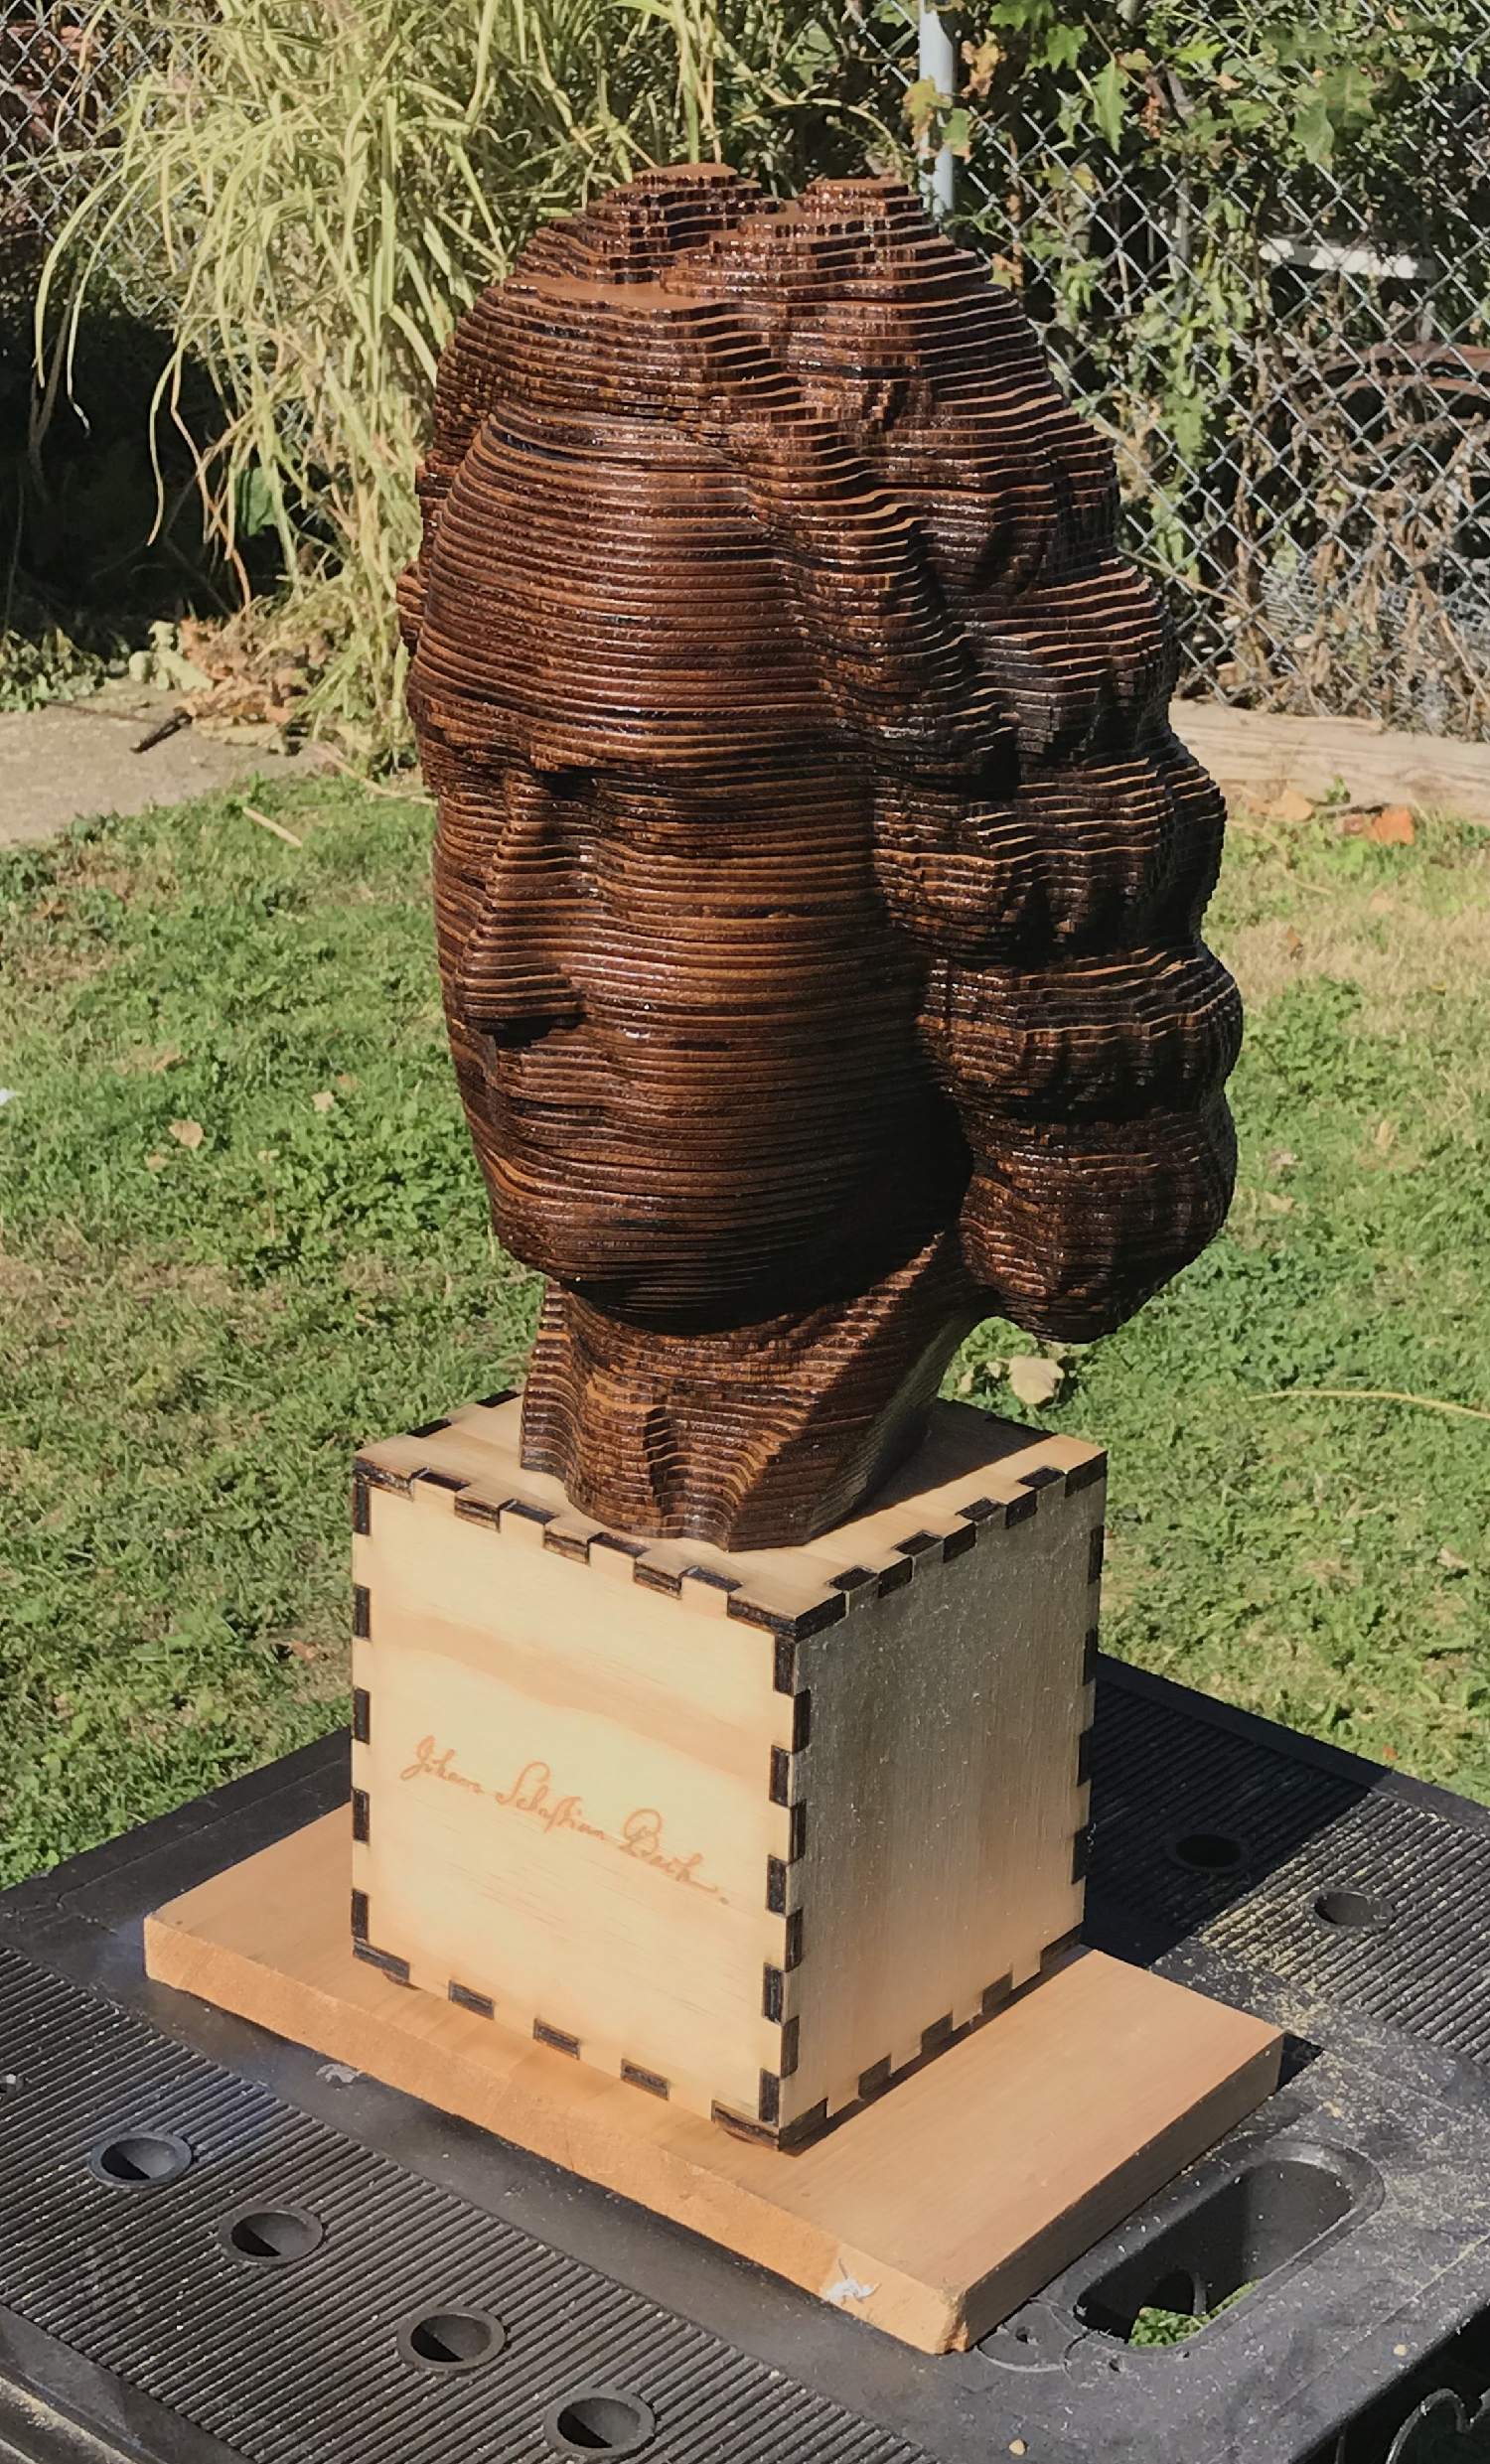
I now own a laser cutter at home and decided I wanted to do this process again. The cutter is a Glowforge and it is amazing:
https://glowforge.com/
First, I to decide on the materials I am going to use. The thinner the slices the higher the “resolution” of the final model – but the more you have to cut. I found a very inexpensive 2.6mm wood veneer at home depot. I had them cut it into 19.5″ wide strips which is all I need because the laser cutter has a pass through.
In Netfabb I scale the model to the right size and then slice it to the correct thickness.
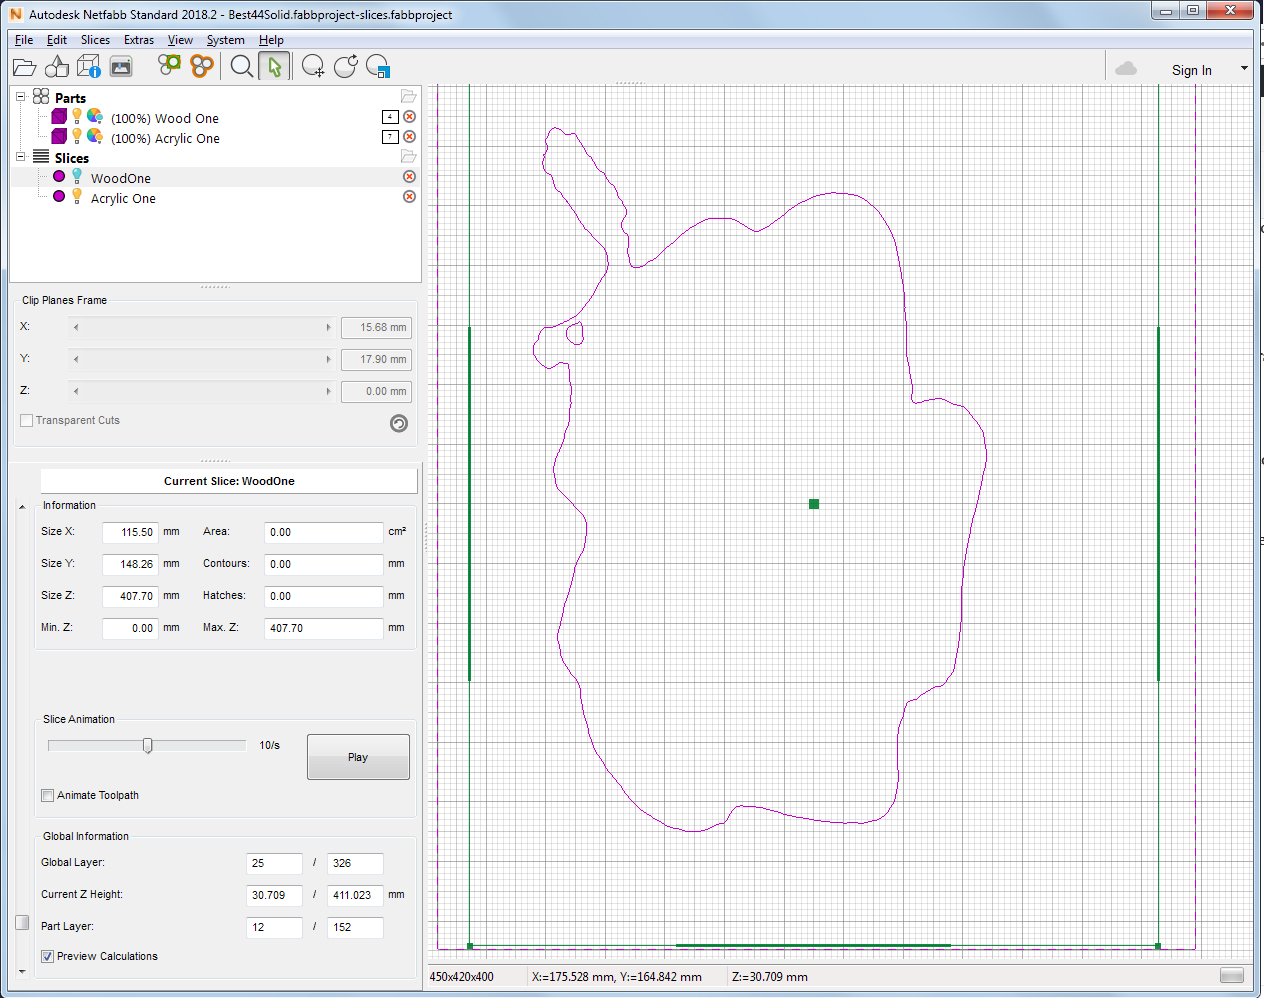
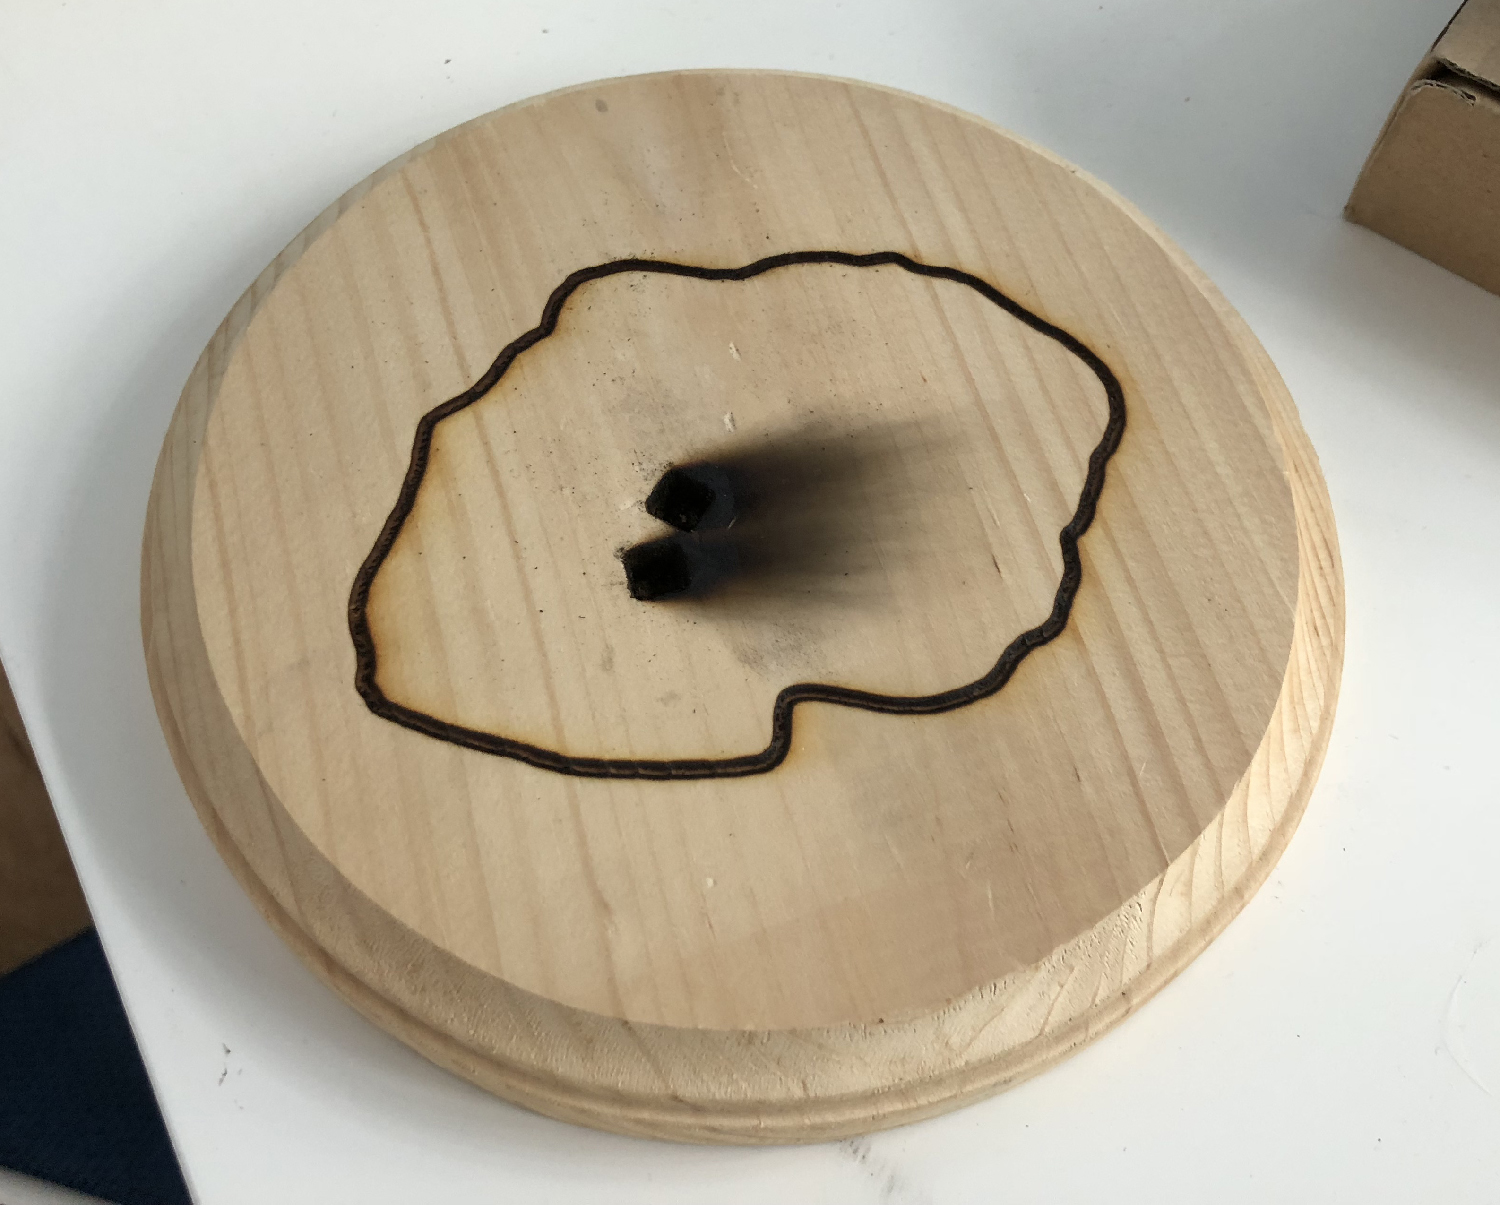
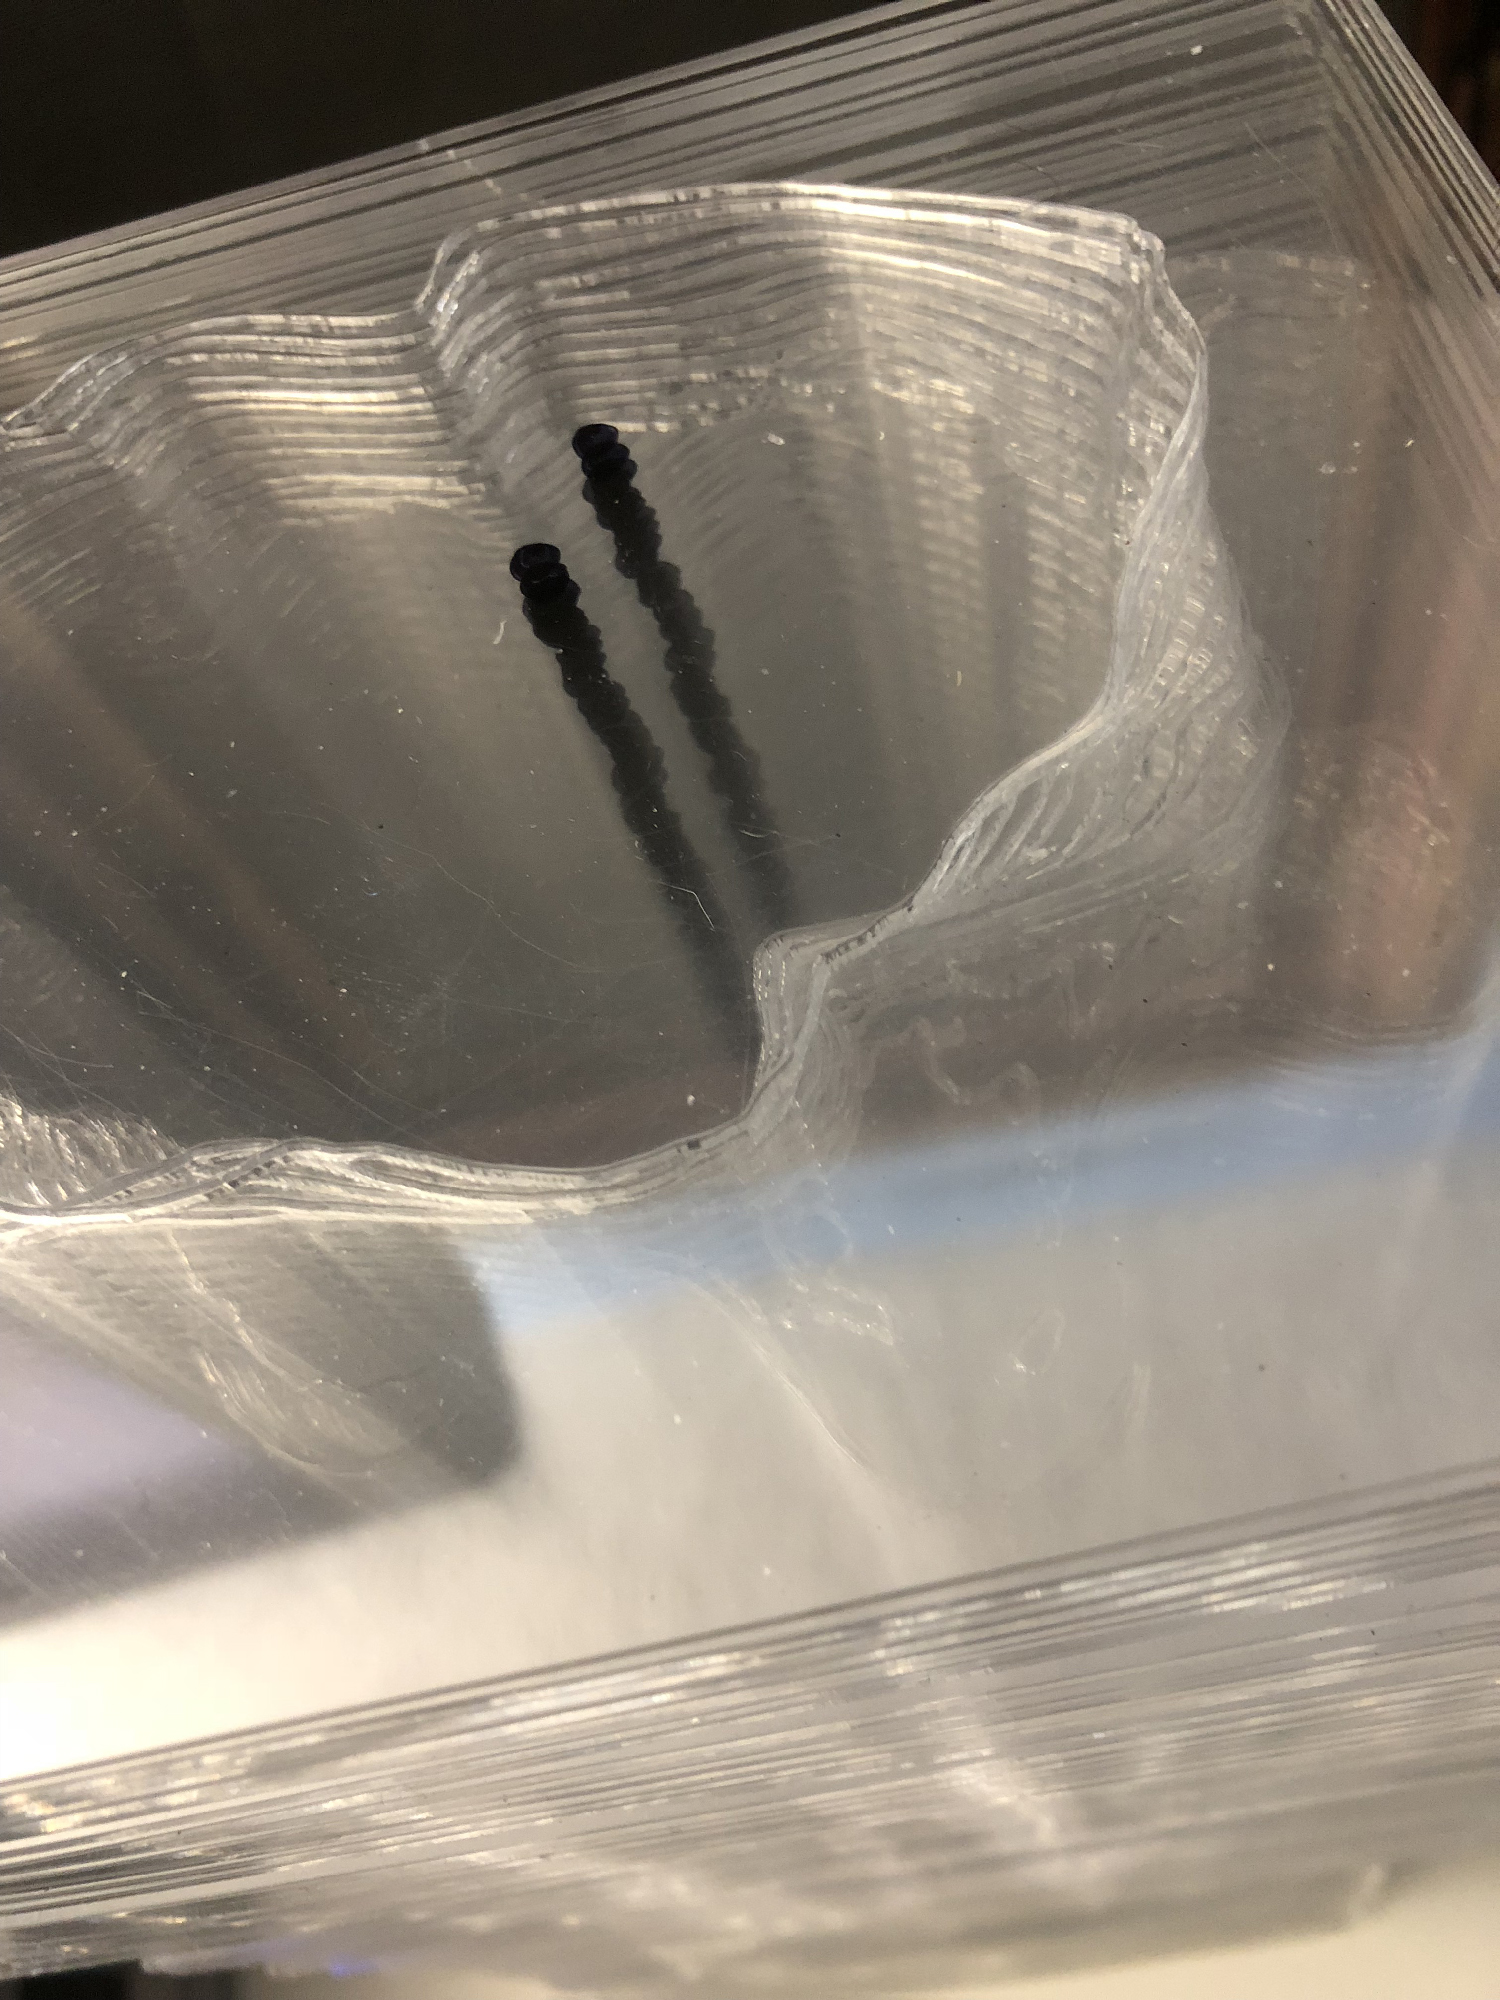
Before I do that I add (well subtract) from the model two 1/4″ by 1/4″ rectangular prisms (not shown in the previous image). These small square holes are placed to run strategically through the entire model as close to the top as possible – but not all the way. I later use 1/4″ square steel rods as an armature to align and hold it together through these holes.
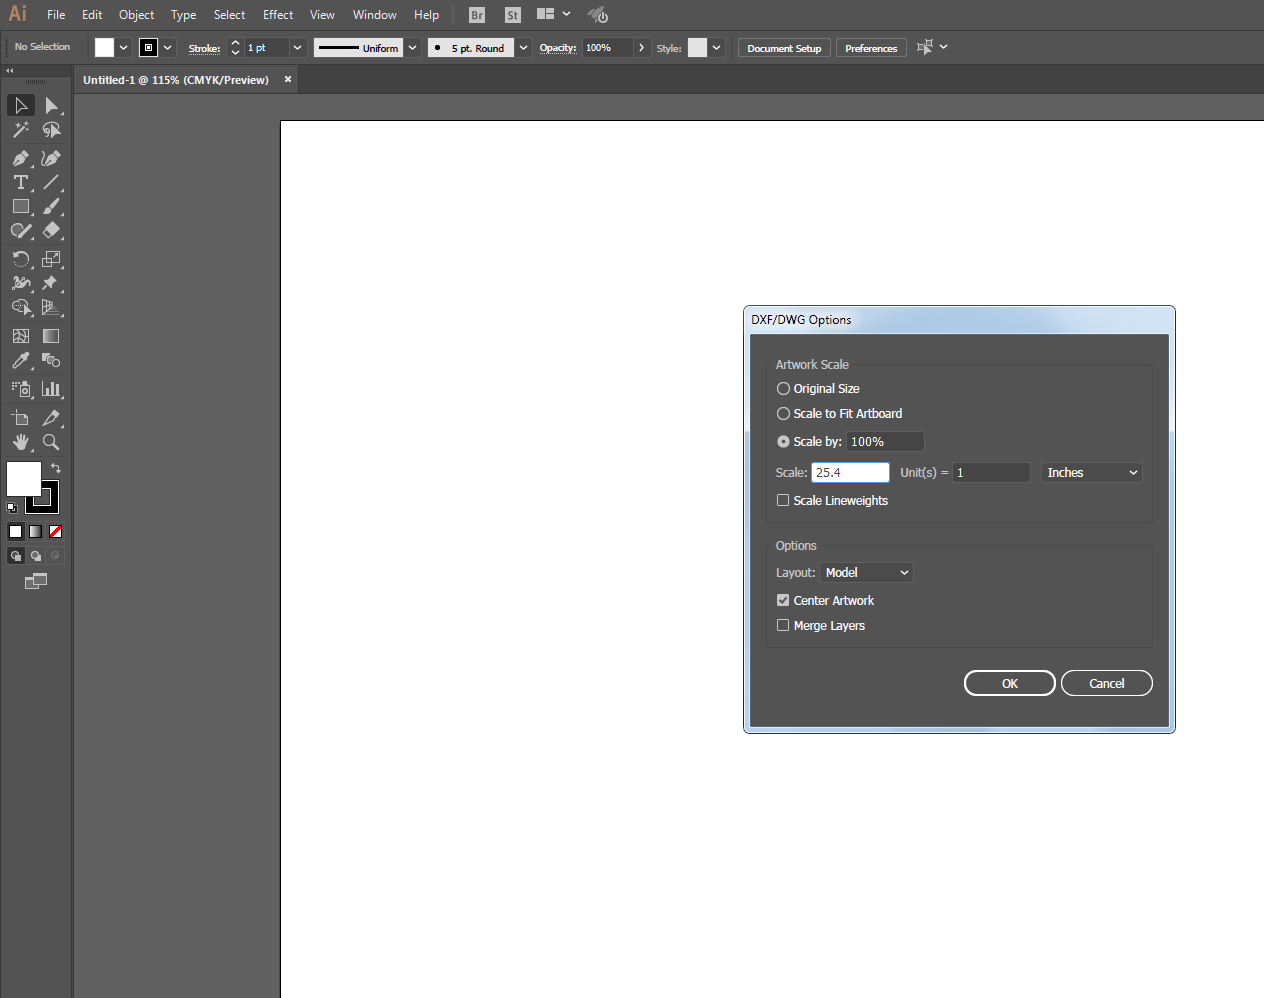
From Netfabb I export a zip file of DXF files. Each DXF file I then load in Adobe Illustrator. When the file is imported it asks how to scale it: 25.4 units = 1 inch keeps everything scaled properly from Netfabb to Illustrator (which is mm to inches).
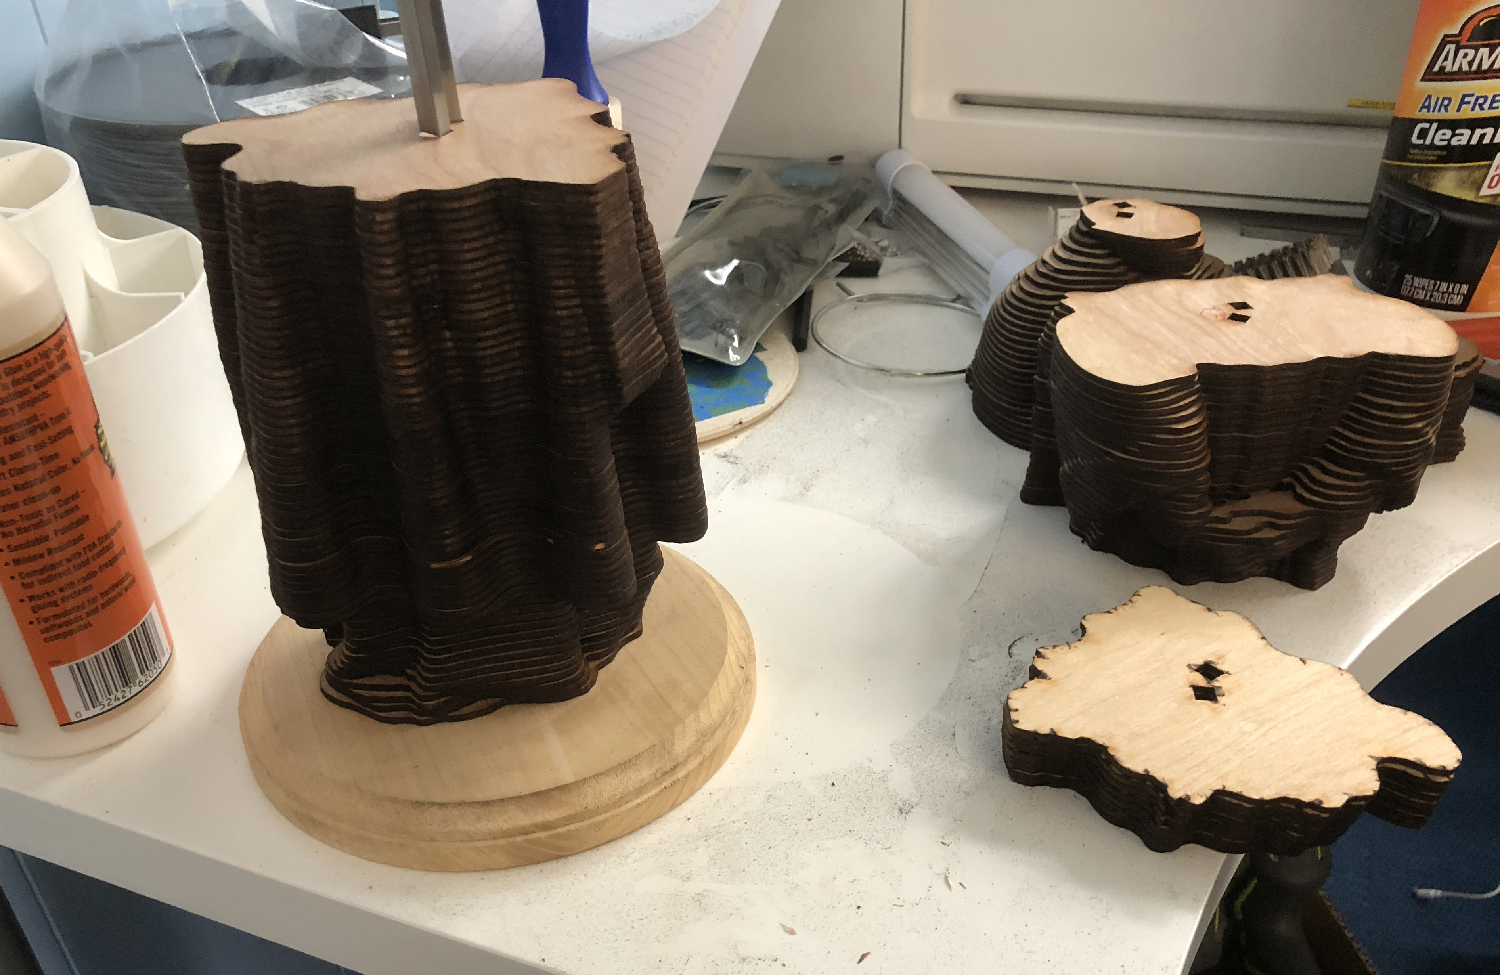
I arrange the shapes into sheets (as large as the Glowforge bed) as many as I could cram on (and in order). With the Bach I engraved numbers on each slice. This took hours to add and added hours to the cut. Instead I just quickly wrote on each slice with a pen as it came off the laser cutter.
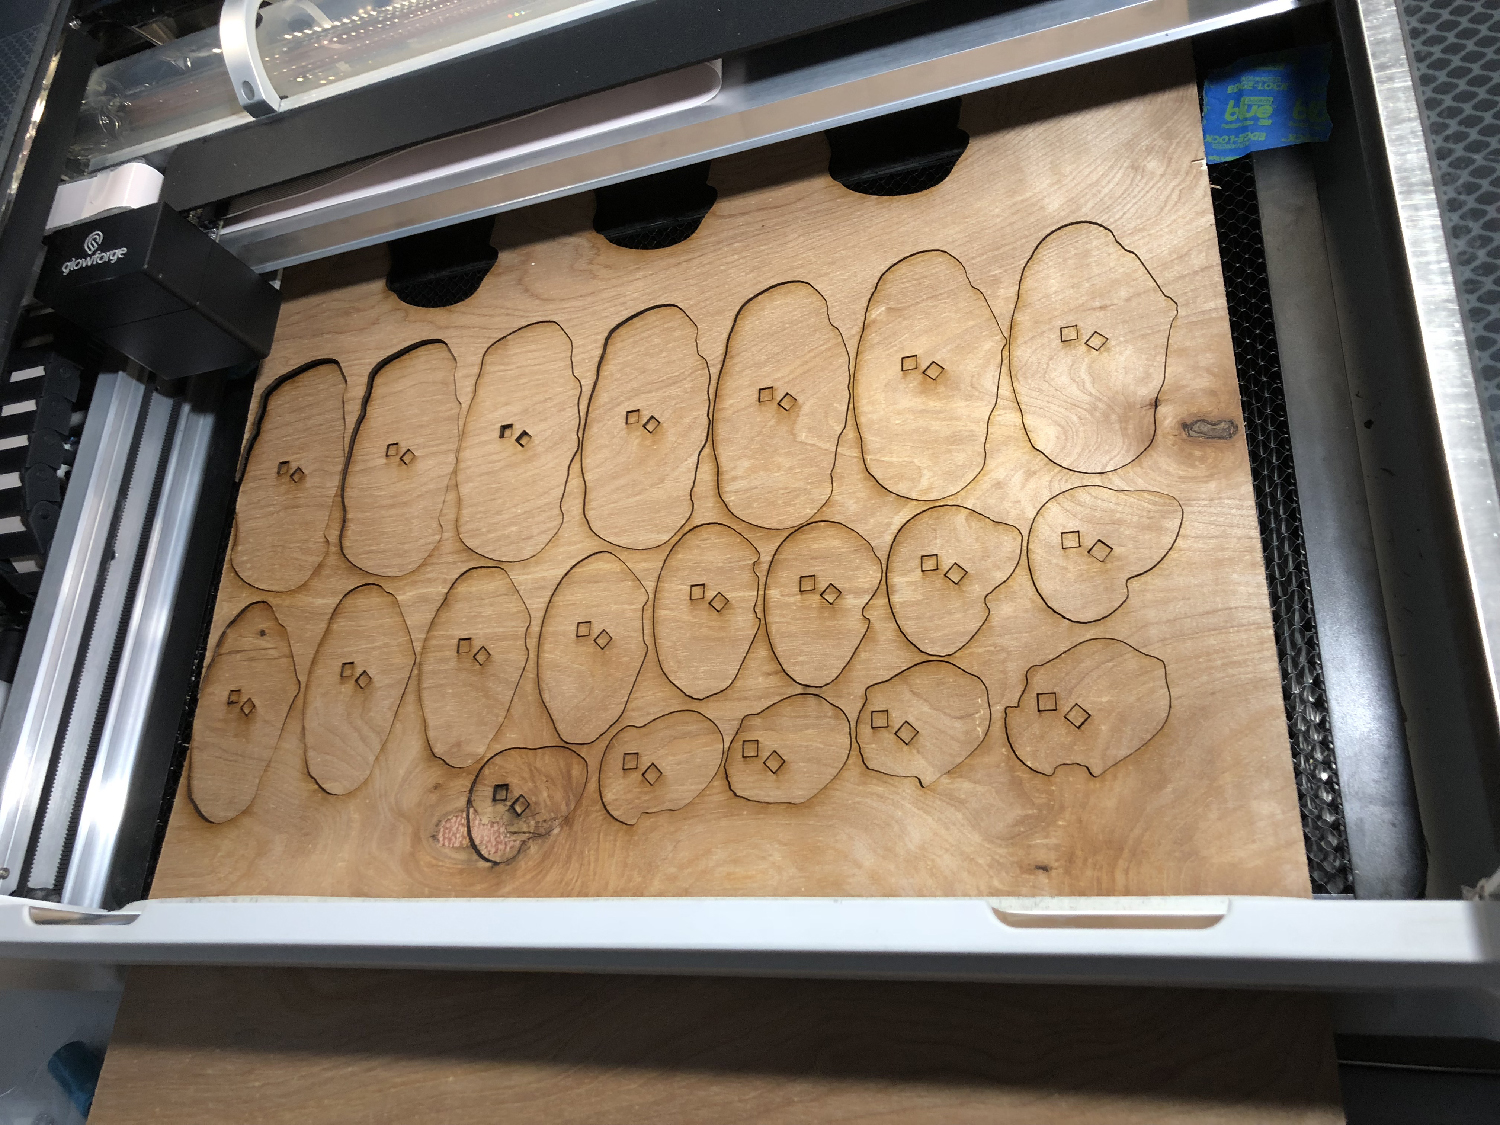
Many cuts later….
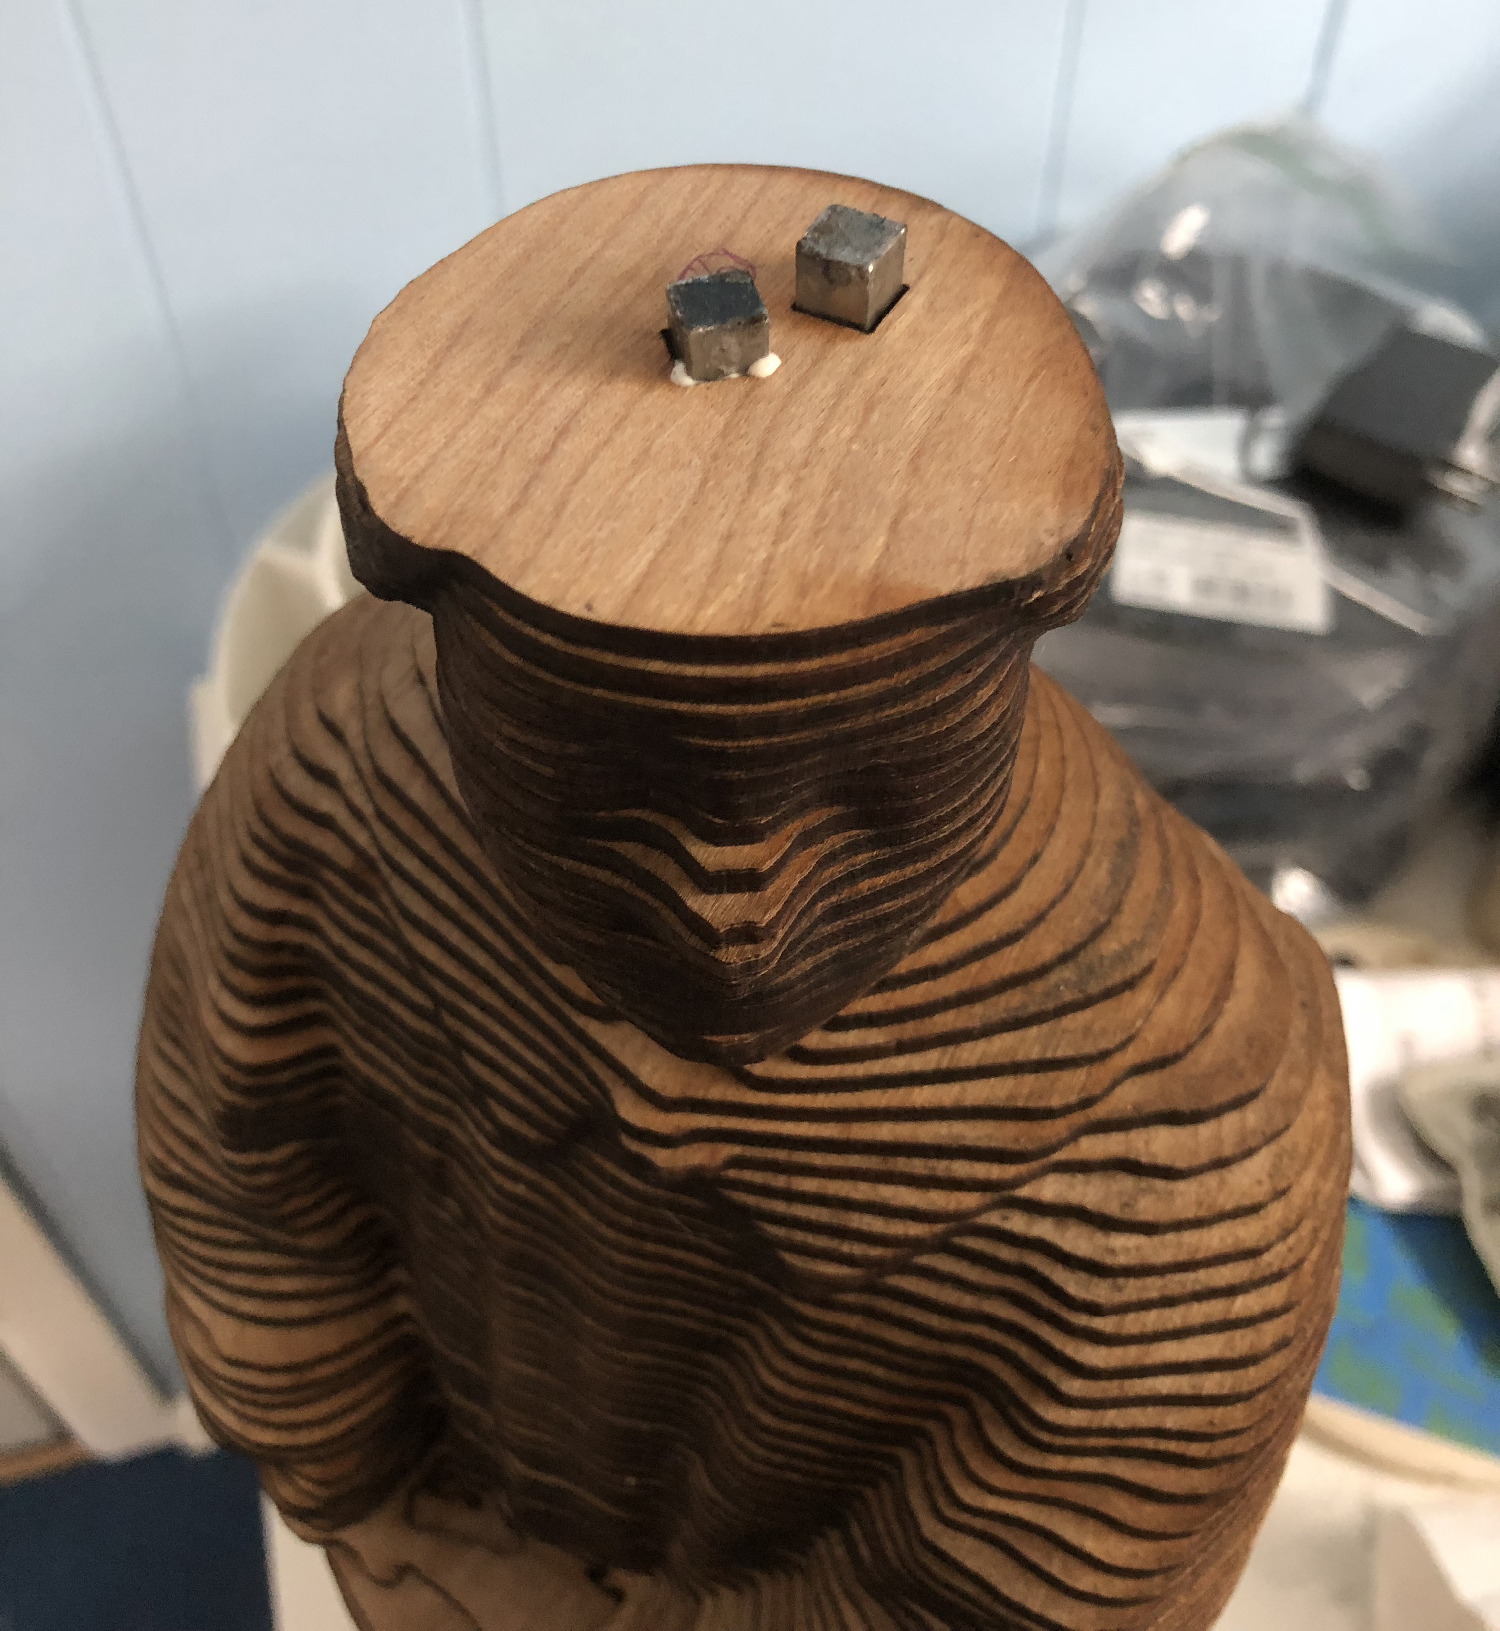
It is very spongy. I pushed down on the slices to figure out the most amount of metal I would need and still be most of the way up the head. I then marked it, removed all of the wood slices from the metal, and cut the metal with a Dremel.
I also laser cut a base with deep holes cut into it to hold the metal armature.

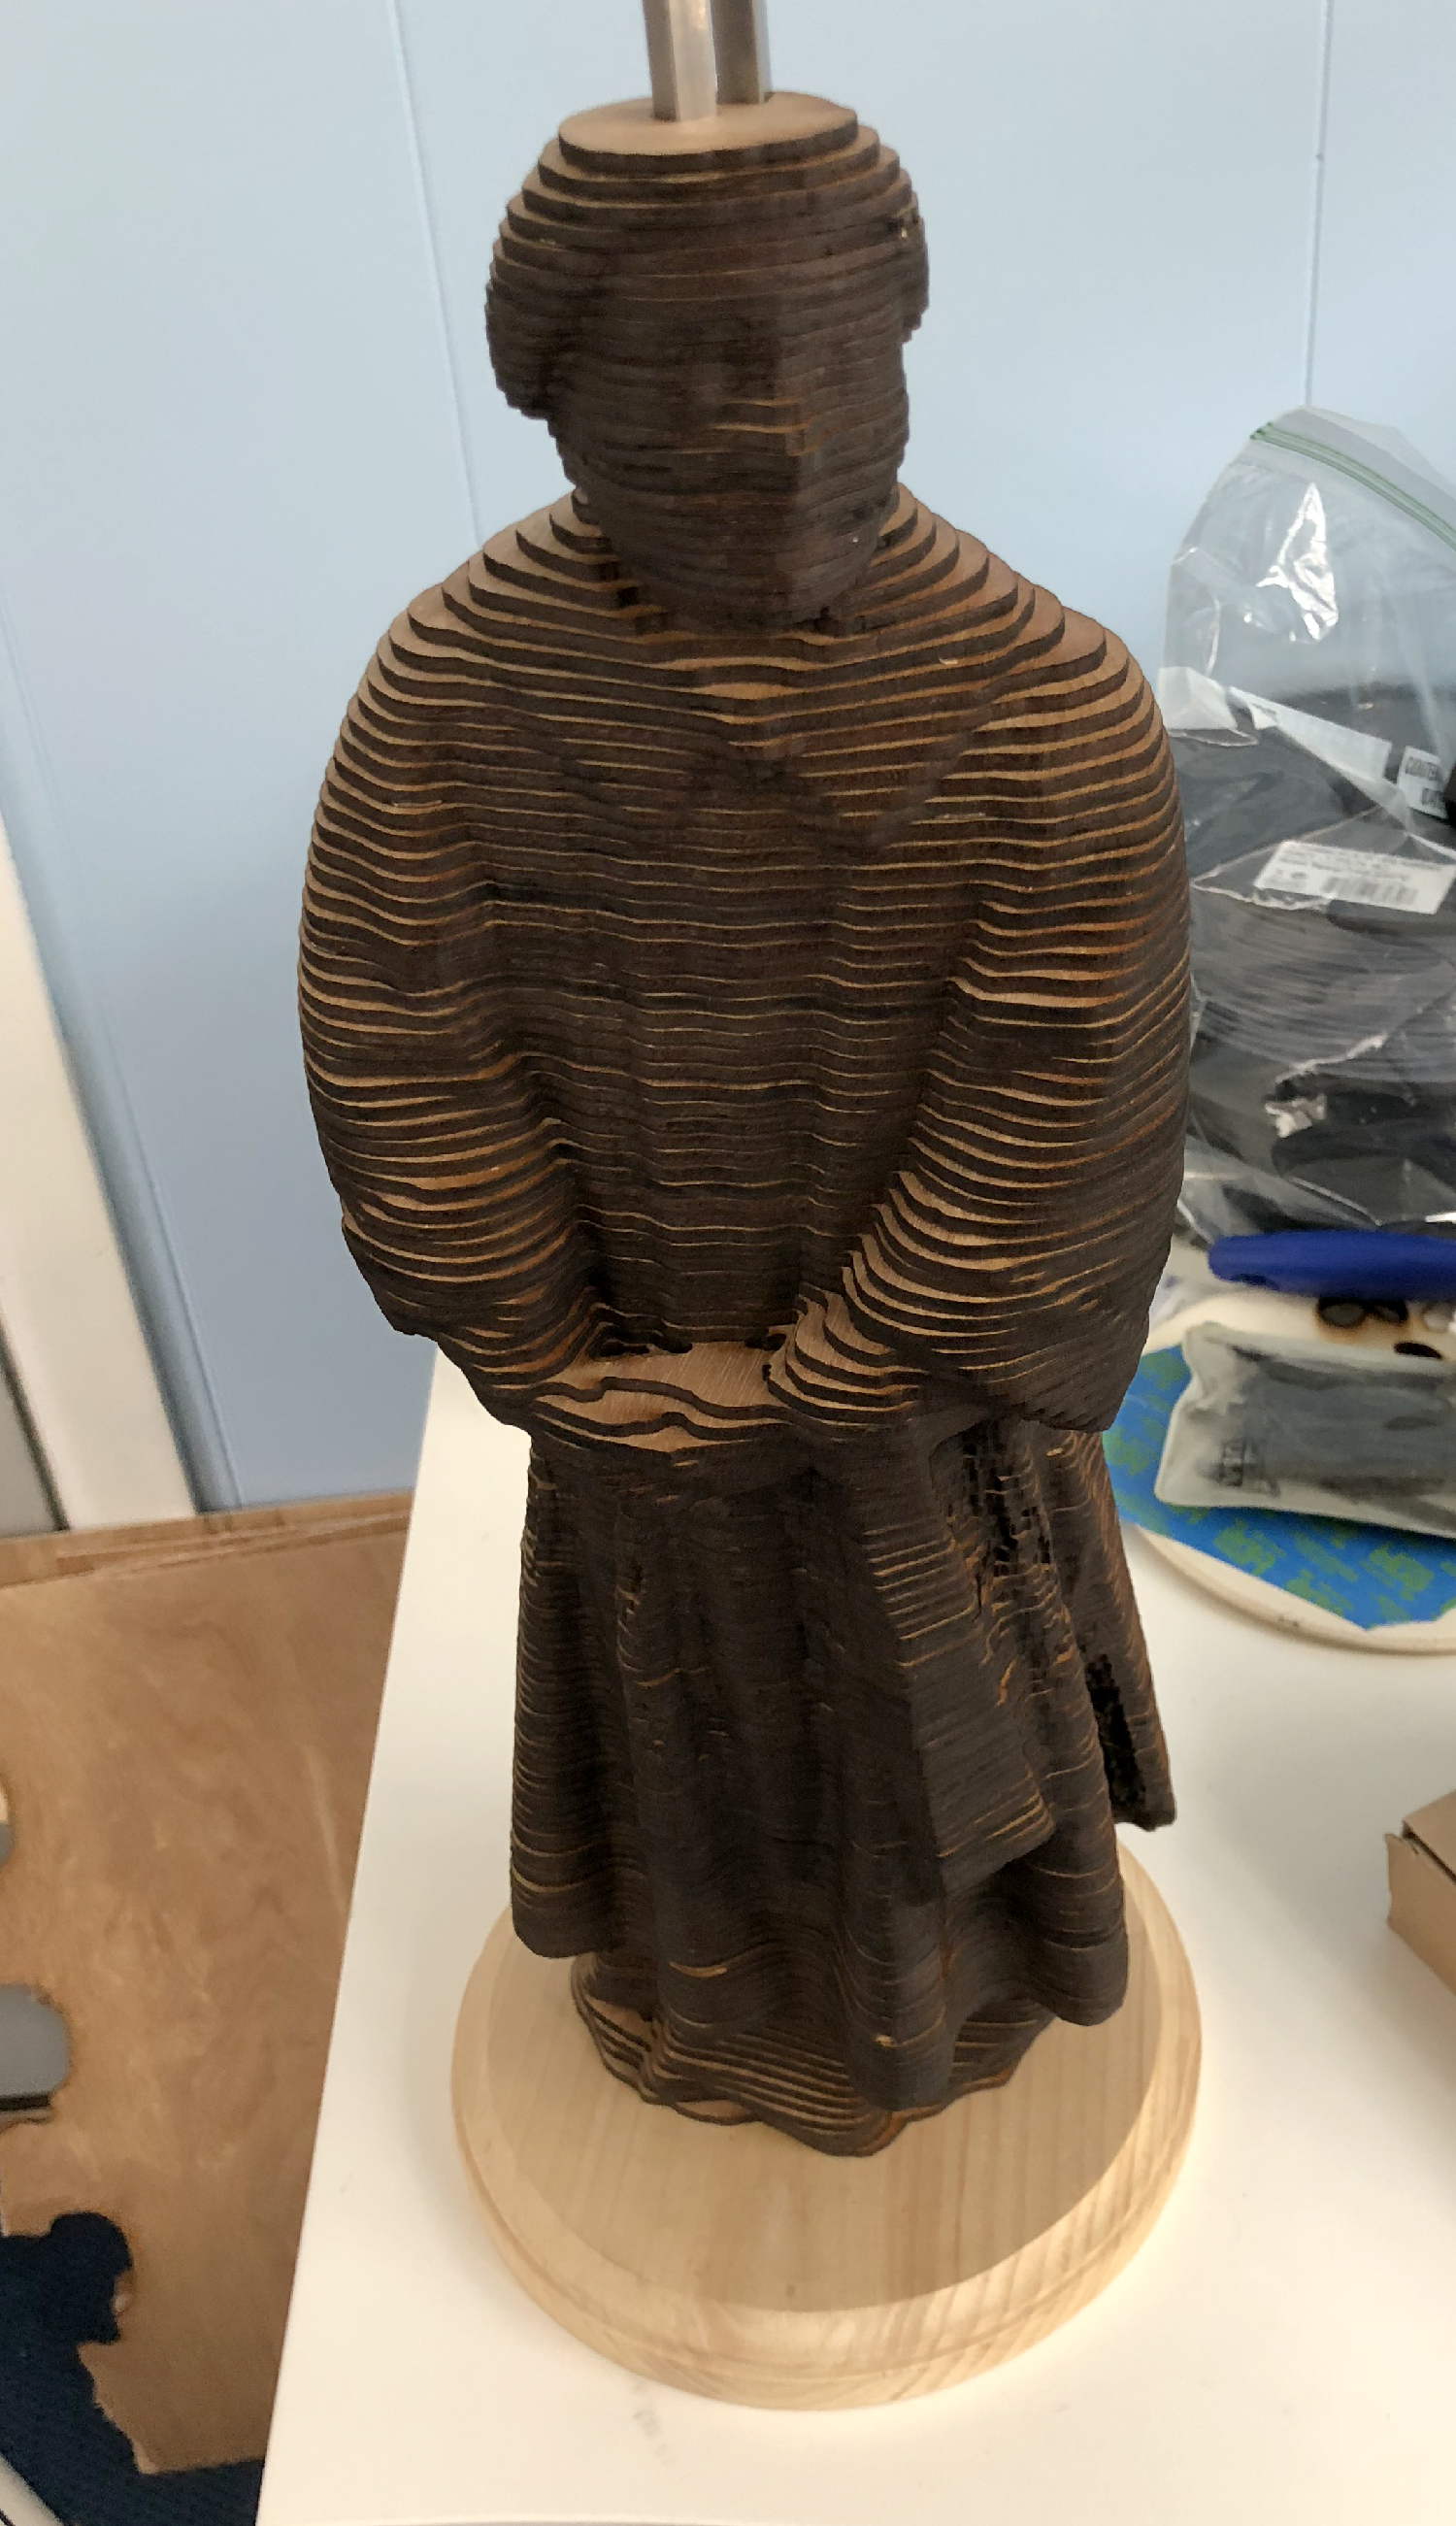
I then put the cut end into the base (so I wouldn’t have to worry about burrs) and then stacked it back up – gluing along the way – touch a touch of wood glue).
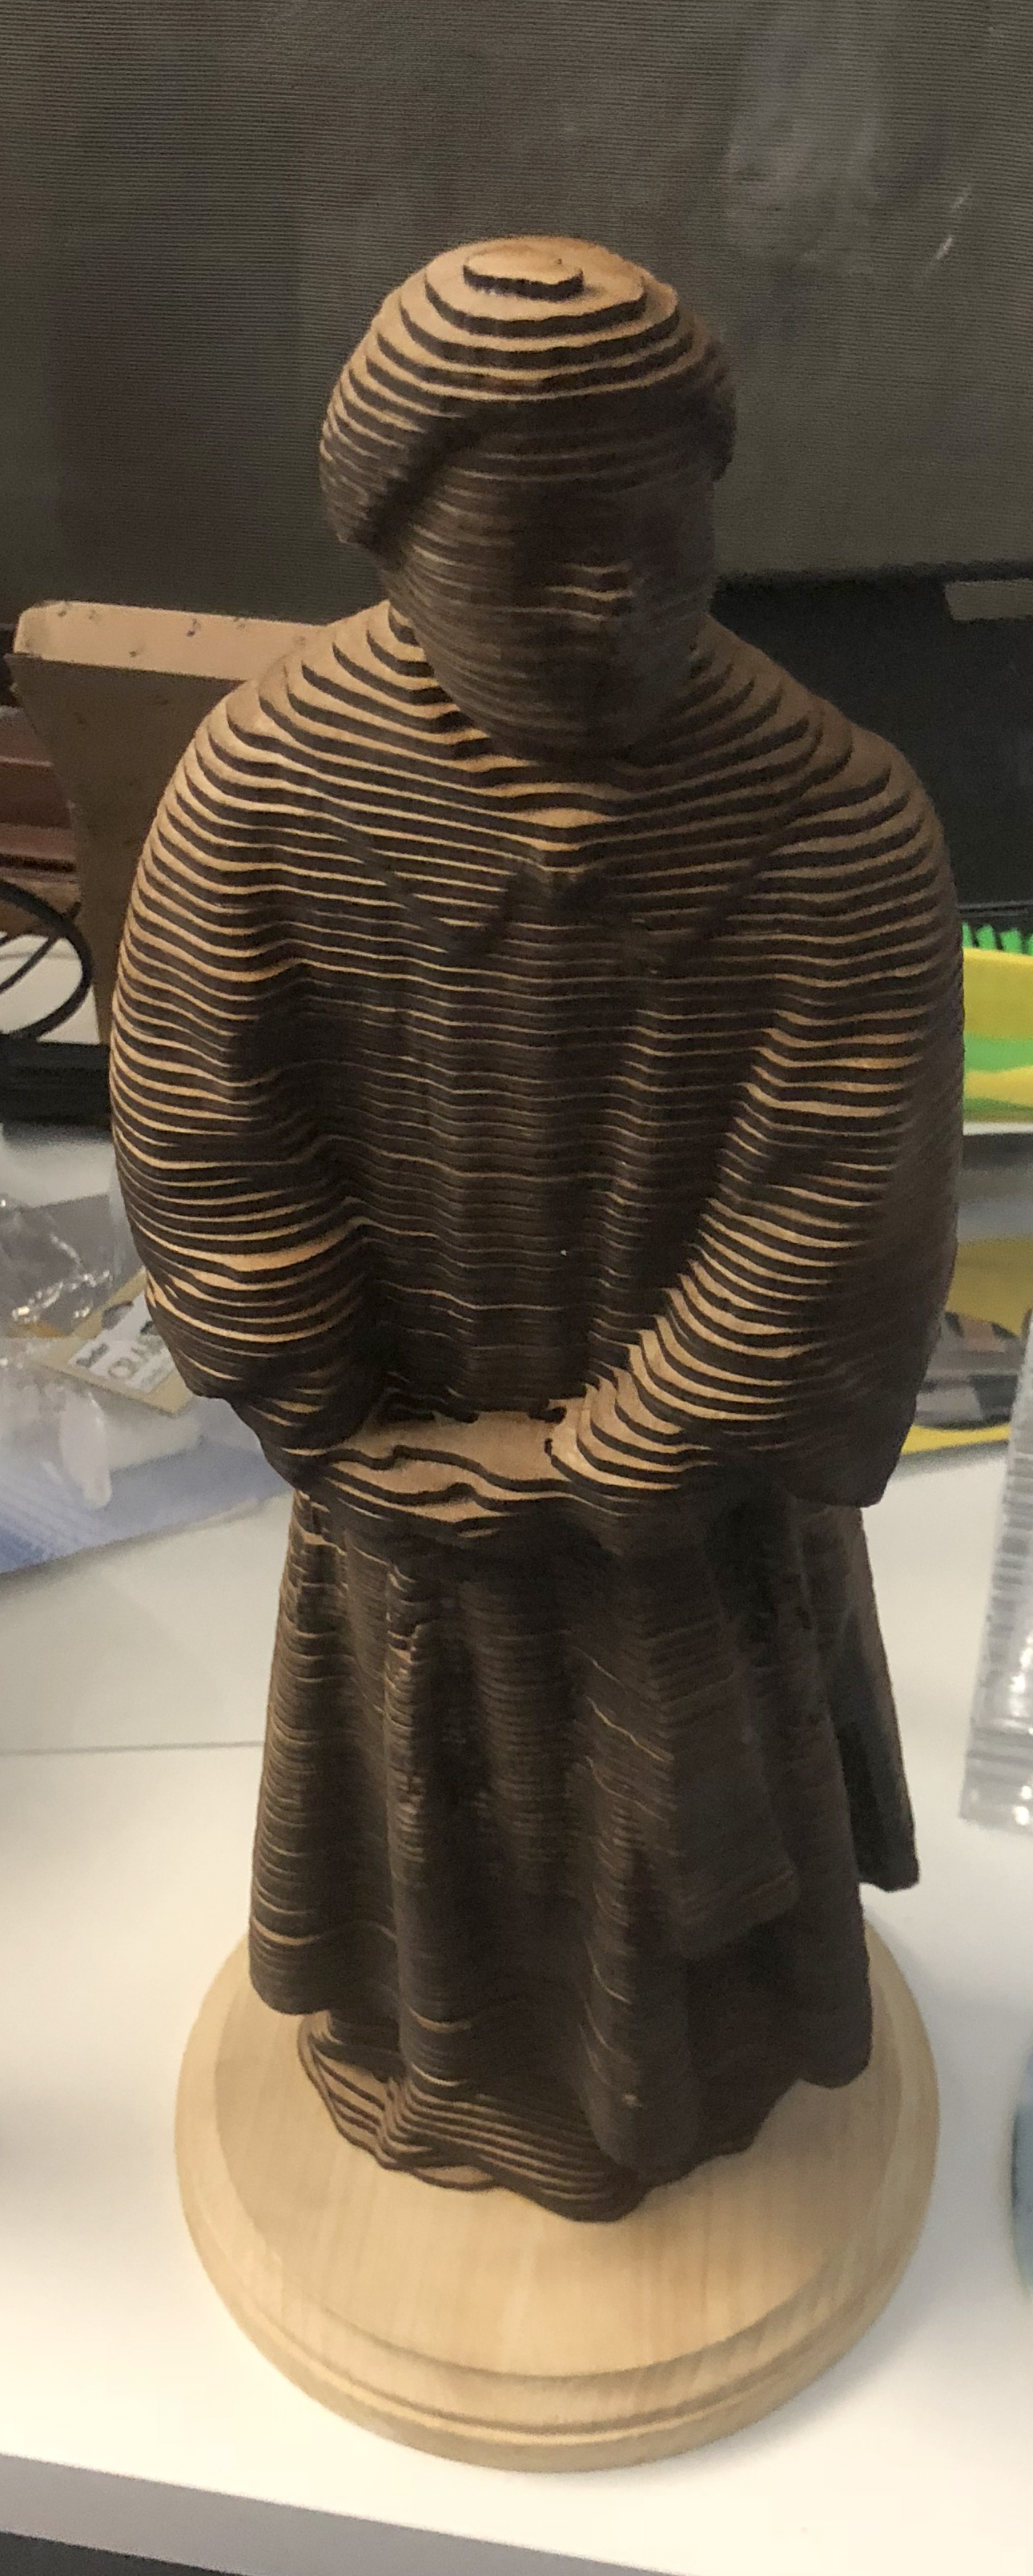
Cleaning the edges of the wood can be tricky. Some use acetone or alcohol. I often use fast orange hand cleaner. For this model I used a little steel brush and some fast orange wipes because I planned on painting it. I wanted something closer in color to the original. Also from experience I knew I couldn’t get the entire thing FLAT FLAT unless I clamped and cleaned up the squeezed out glue non-stop. Instead the paint would fill some gaps for me just like with the 3D printed version seen here unpainted.
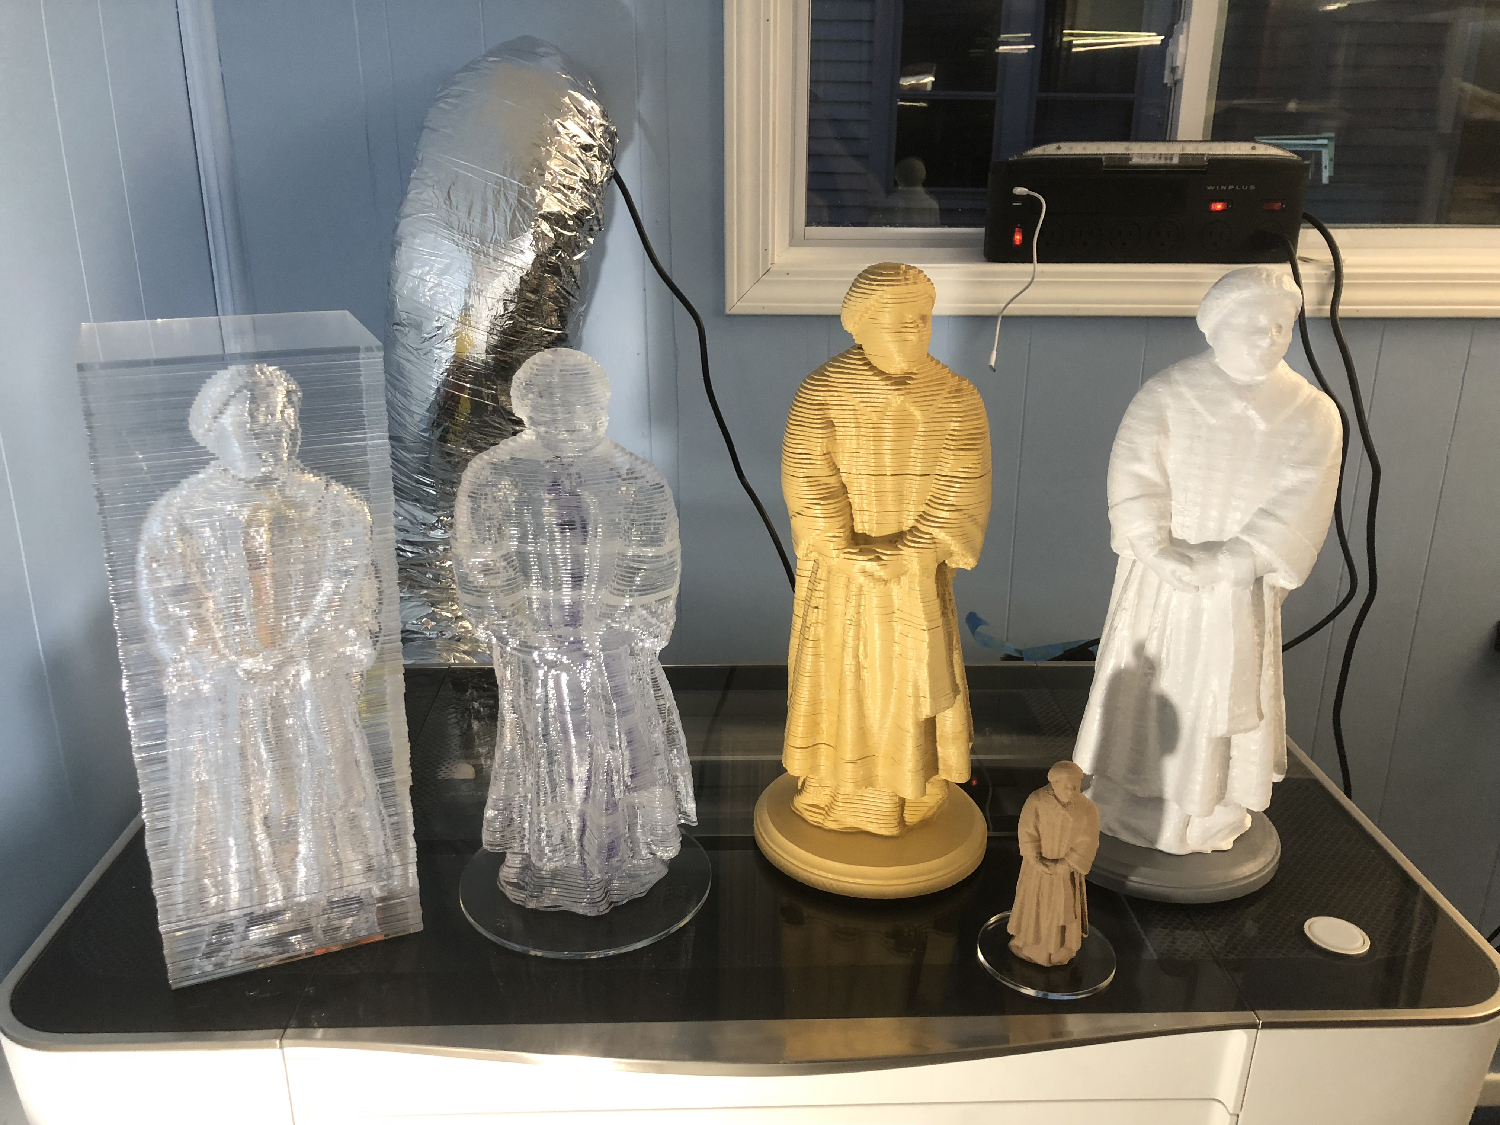
Painted the laser cut slices and the 3D print.
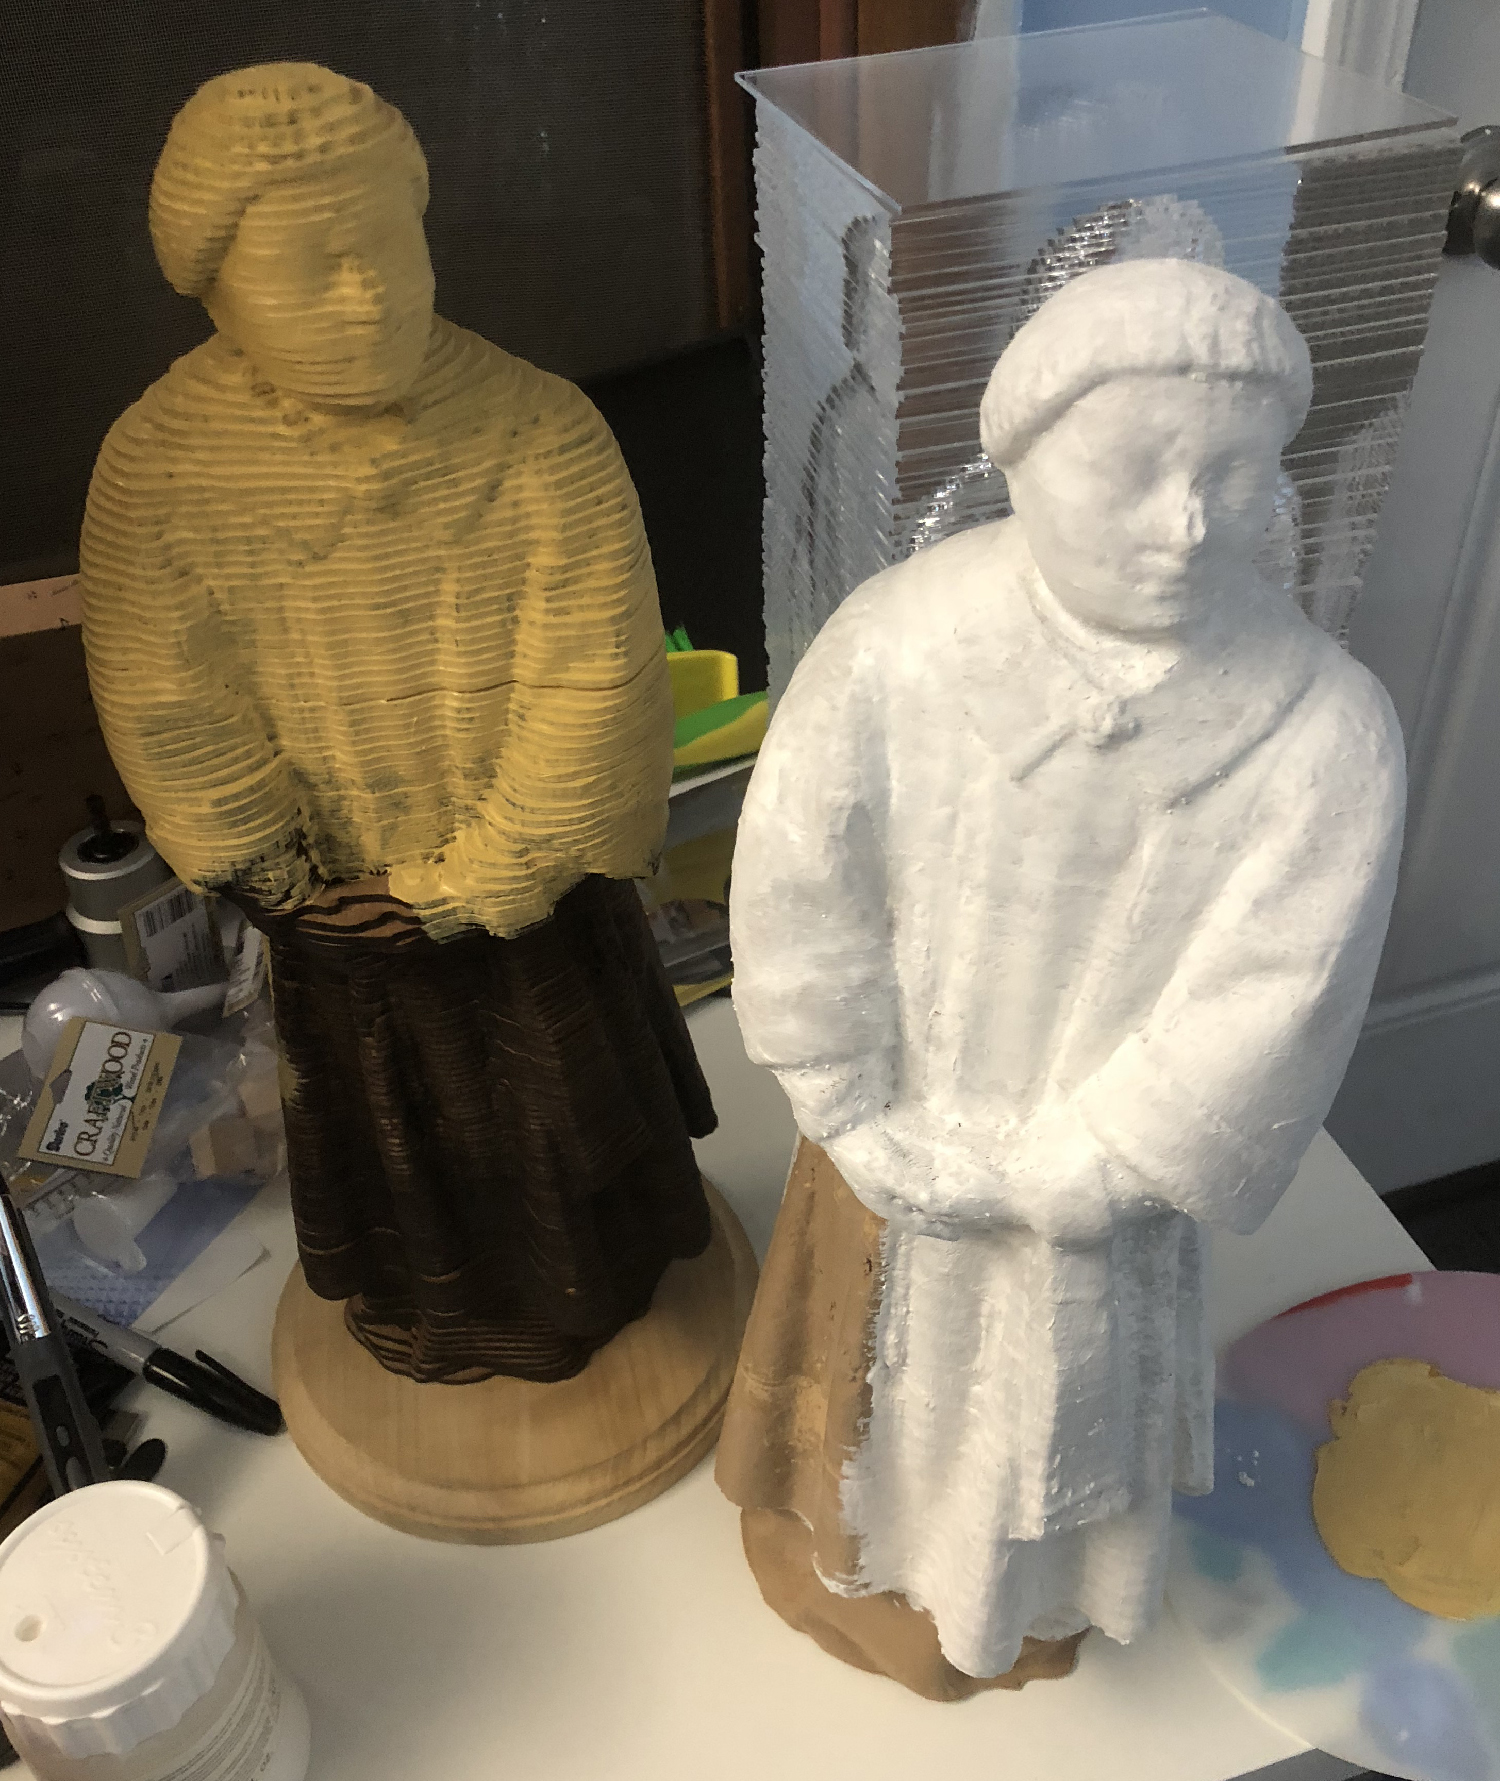

Now I have 3 copies. Voila, Voila, & Voila!
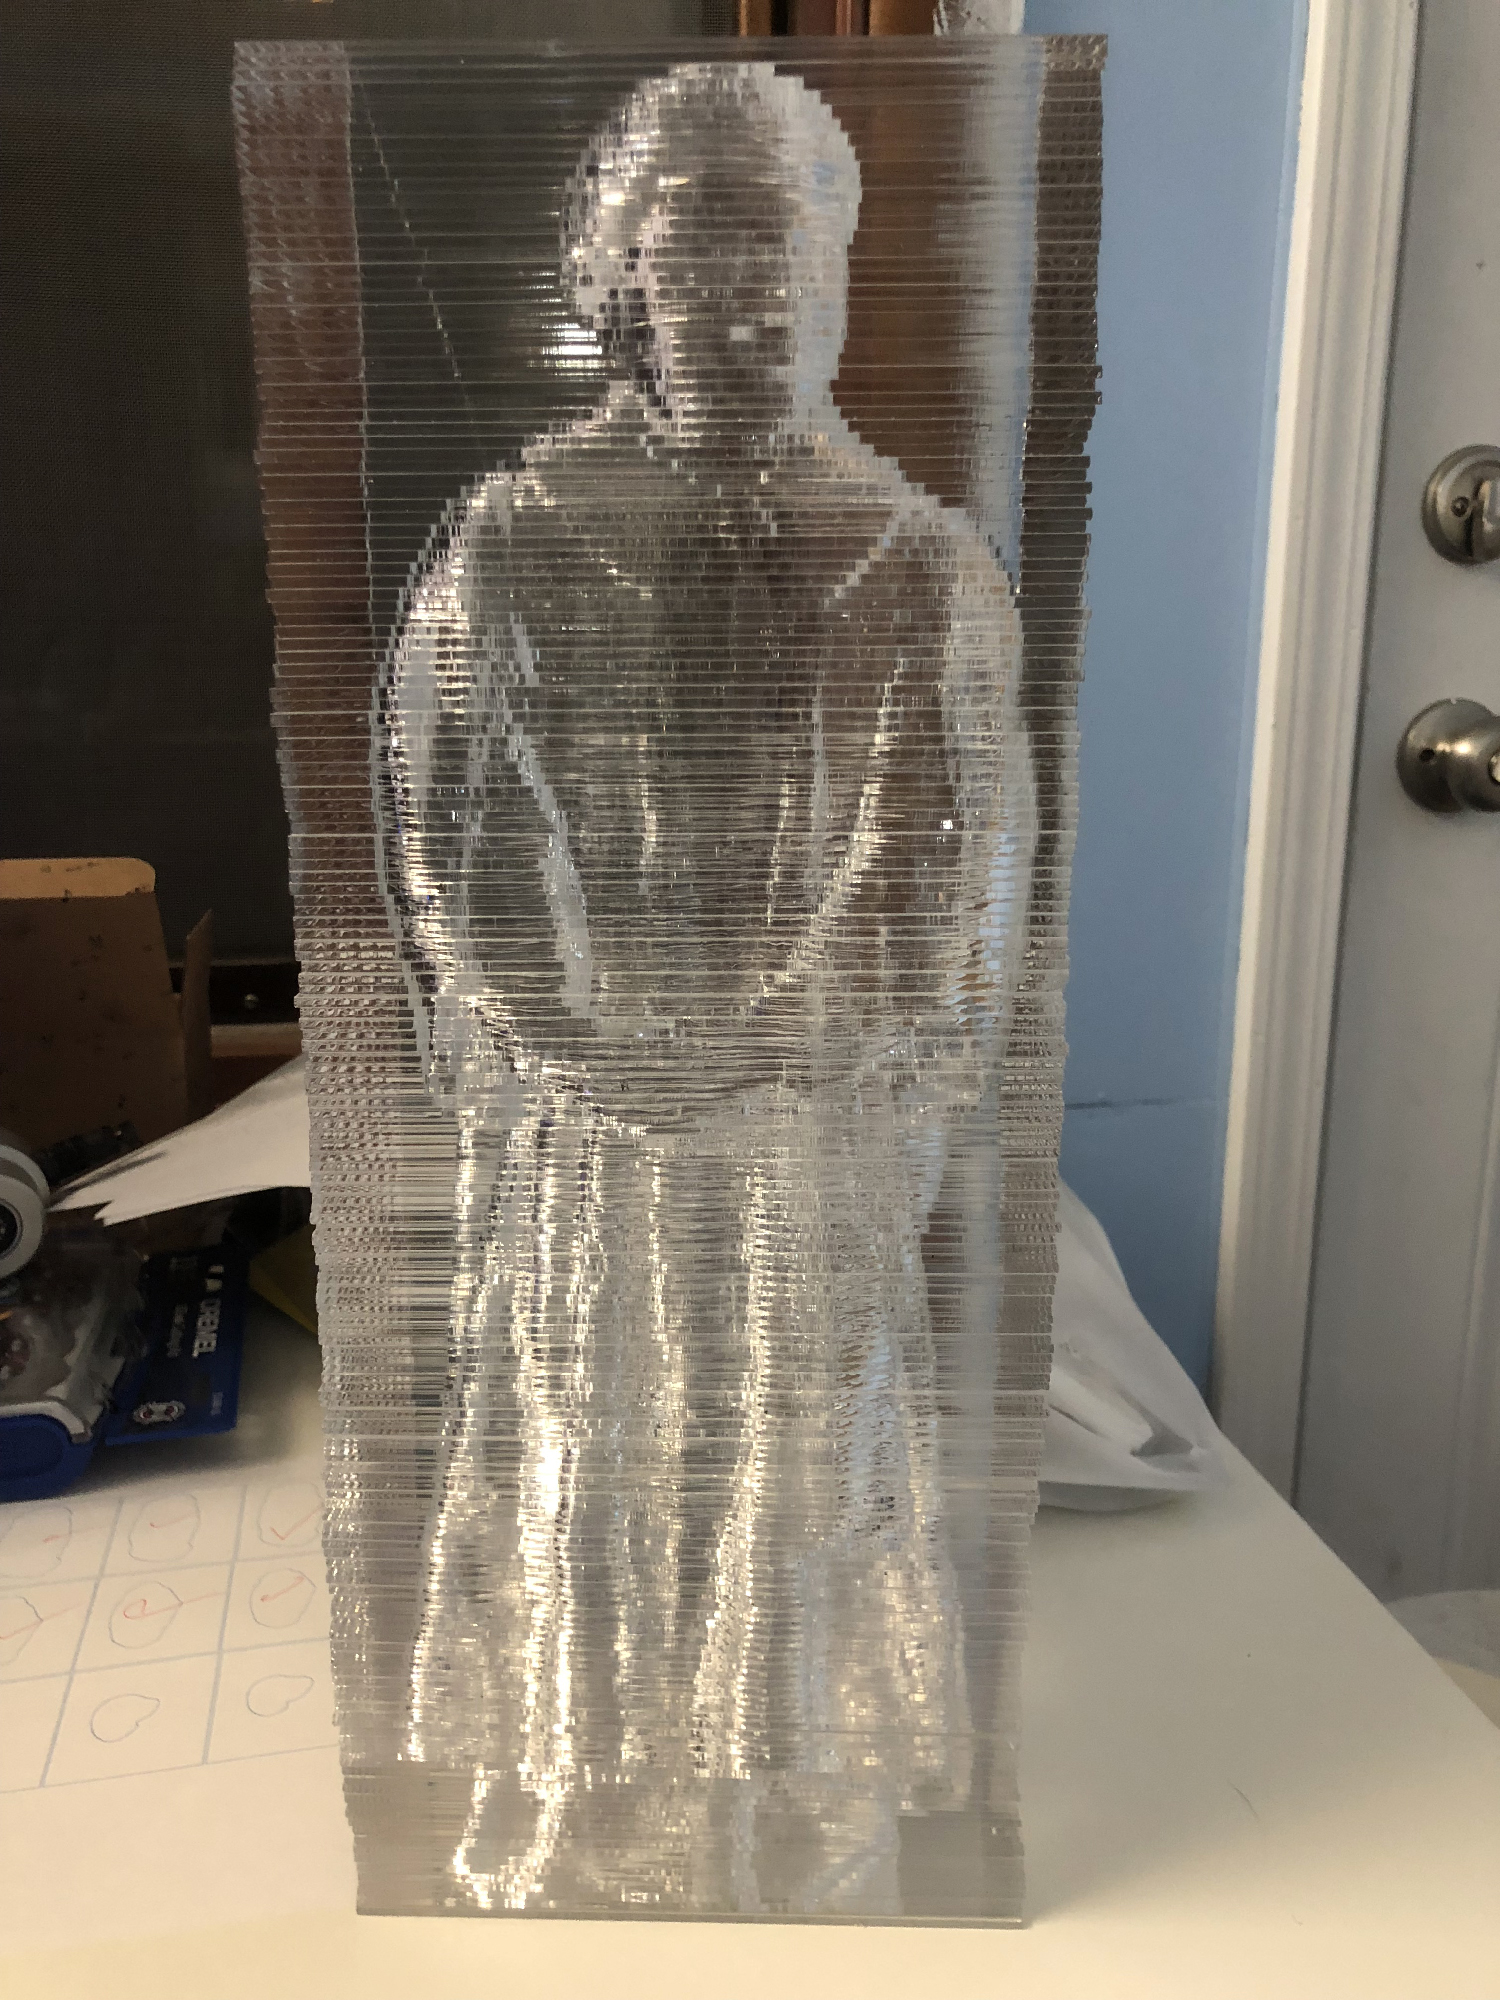
I had an idea about doing a clear version. But instead of tightly arranging the slices on the laser cutter I was going to create a rectangle around each slice. This would allow me to cut 2 at once, both a positive and a negative shape. In Netfabb I subtracted my model from a larger rectangular prism (creating a giant hollow) and sliced it thinner (to match my clear plexi – I used the good optically clear plexi $$). I didn’t add the alignment holes because I didn’t want a bar to be visible running inside.
This took a lot of plexi. Home Depot doesn’t cut your giant sheets of plexi for you. I did find however that per square foot it was cheaper to buy the 48×36″ sheets instead of the 48×96″ sheets.
Also, all I needed to do was to cut each 48″x36″ sheet in half and I would have 48″x18″ which I can run through the cutter. Lots of scoring and snapping later and I was ready to laser cut.
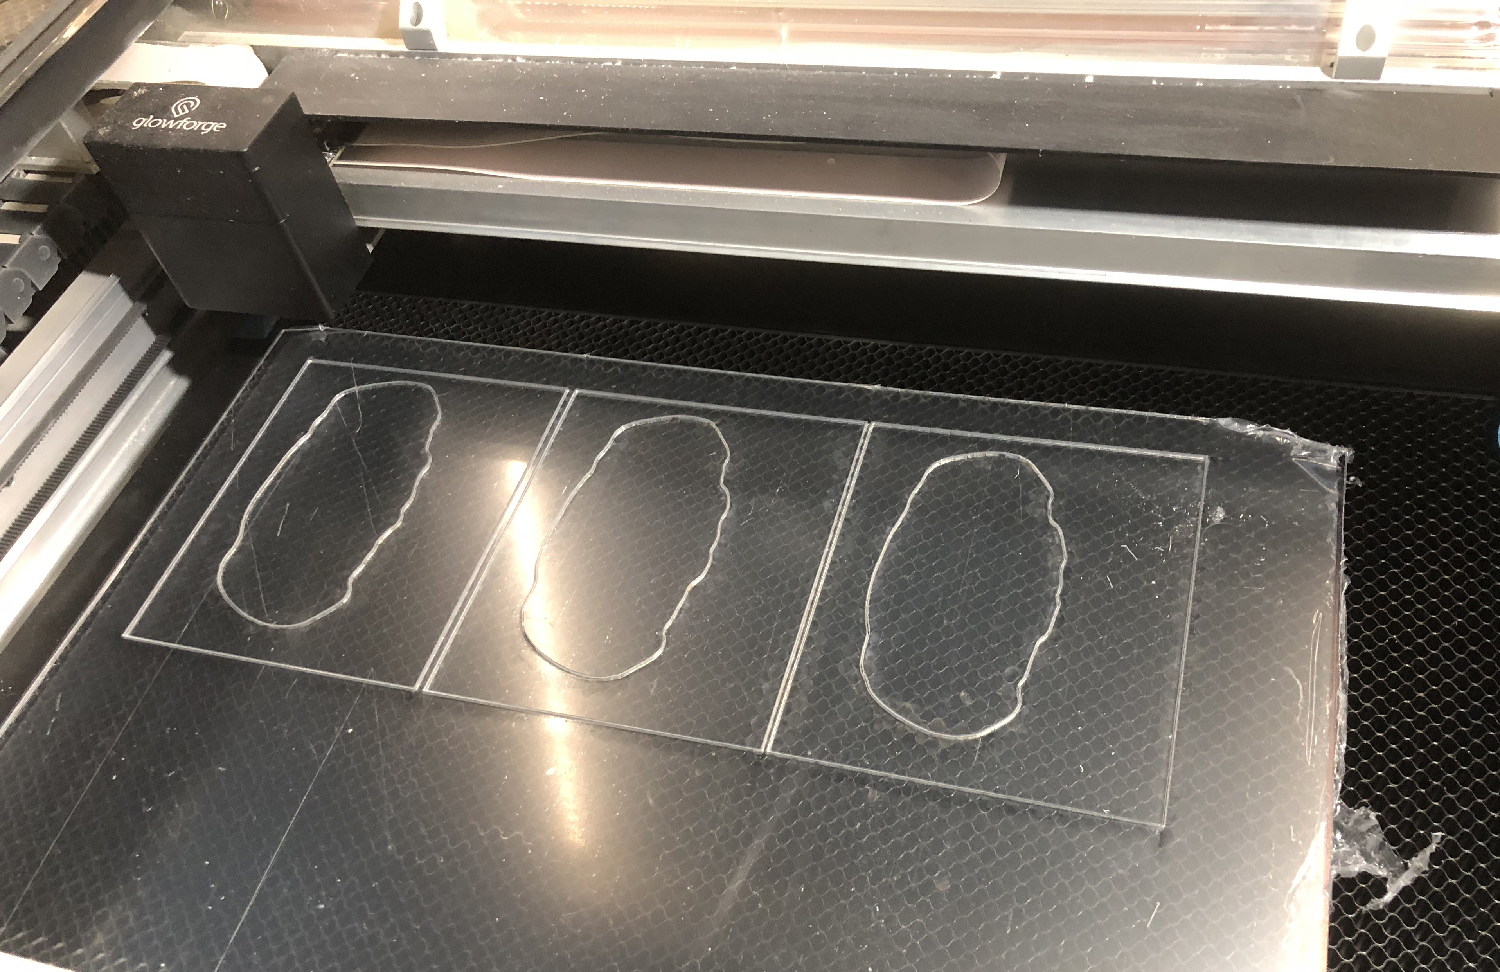
The model assembled beautifully. I made a few mistakes in illustrator – I printed a few extra slices and then later shuffled a few and had to reprint the head – but in plexi everything was gorgeous.
Now I would have to align everything permanently. I created a jig which I could lay on top of each slice (both outside and inside still together) and then added 2 dots with a black sharpie so I could align them later. I used the same spot the metal bars went through.
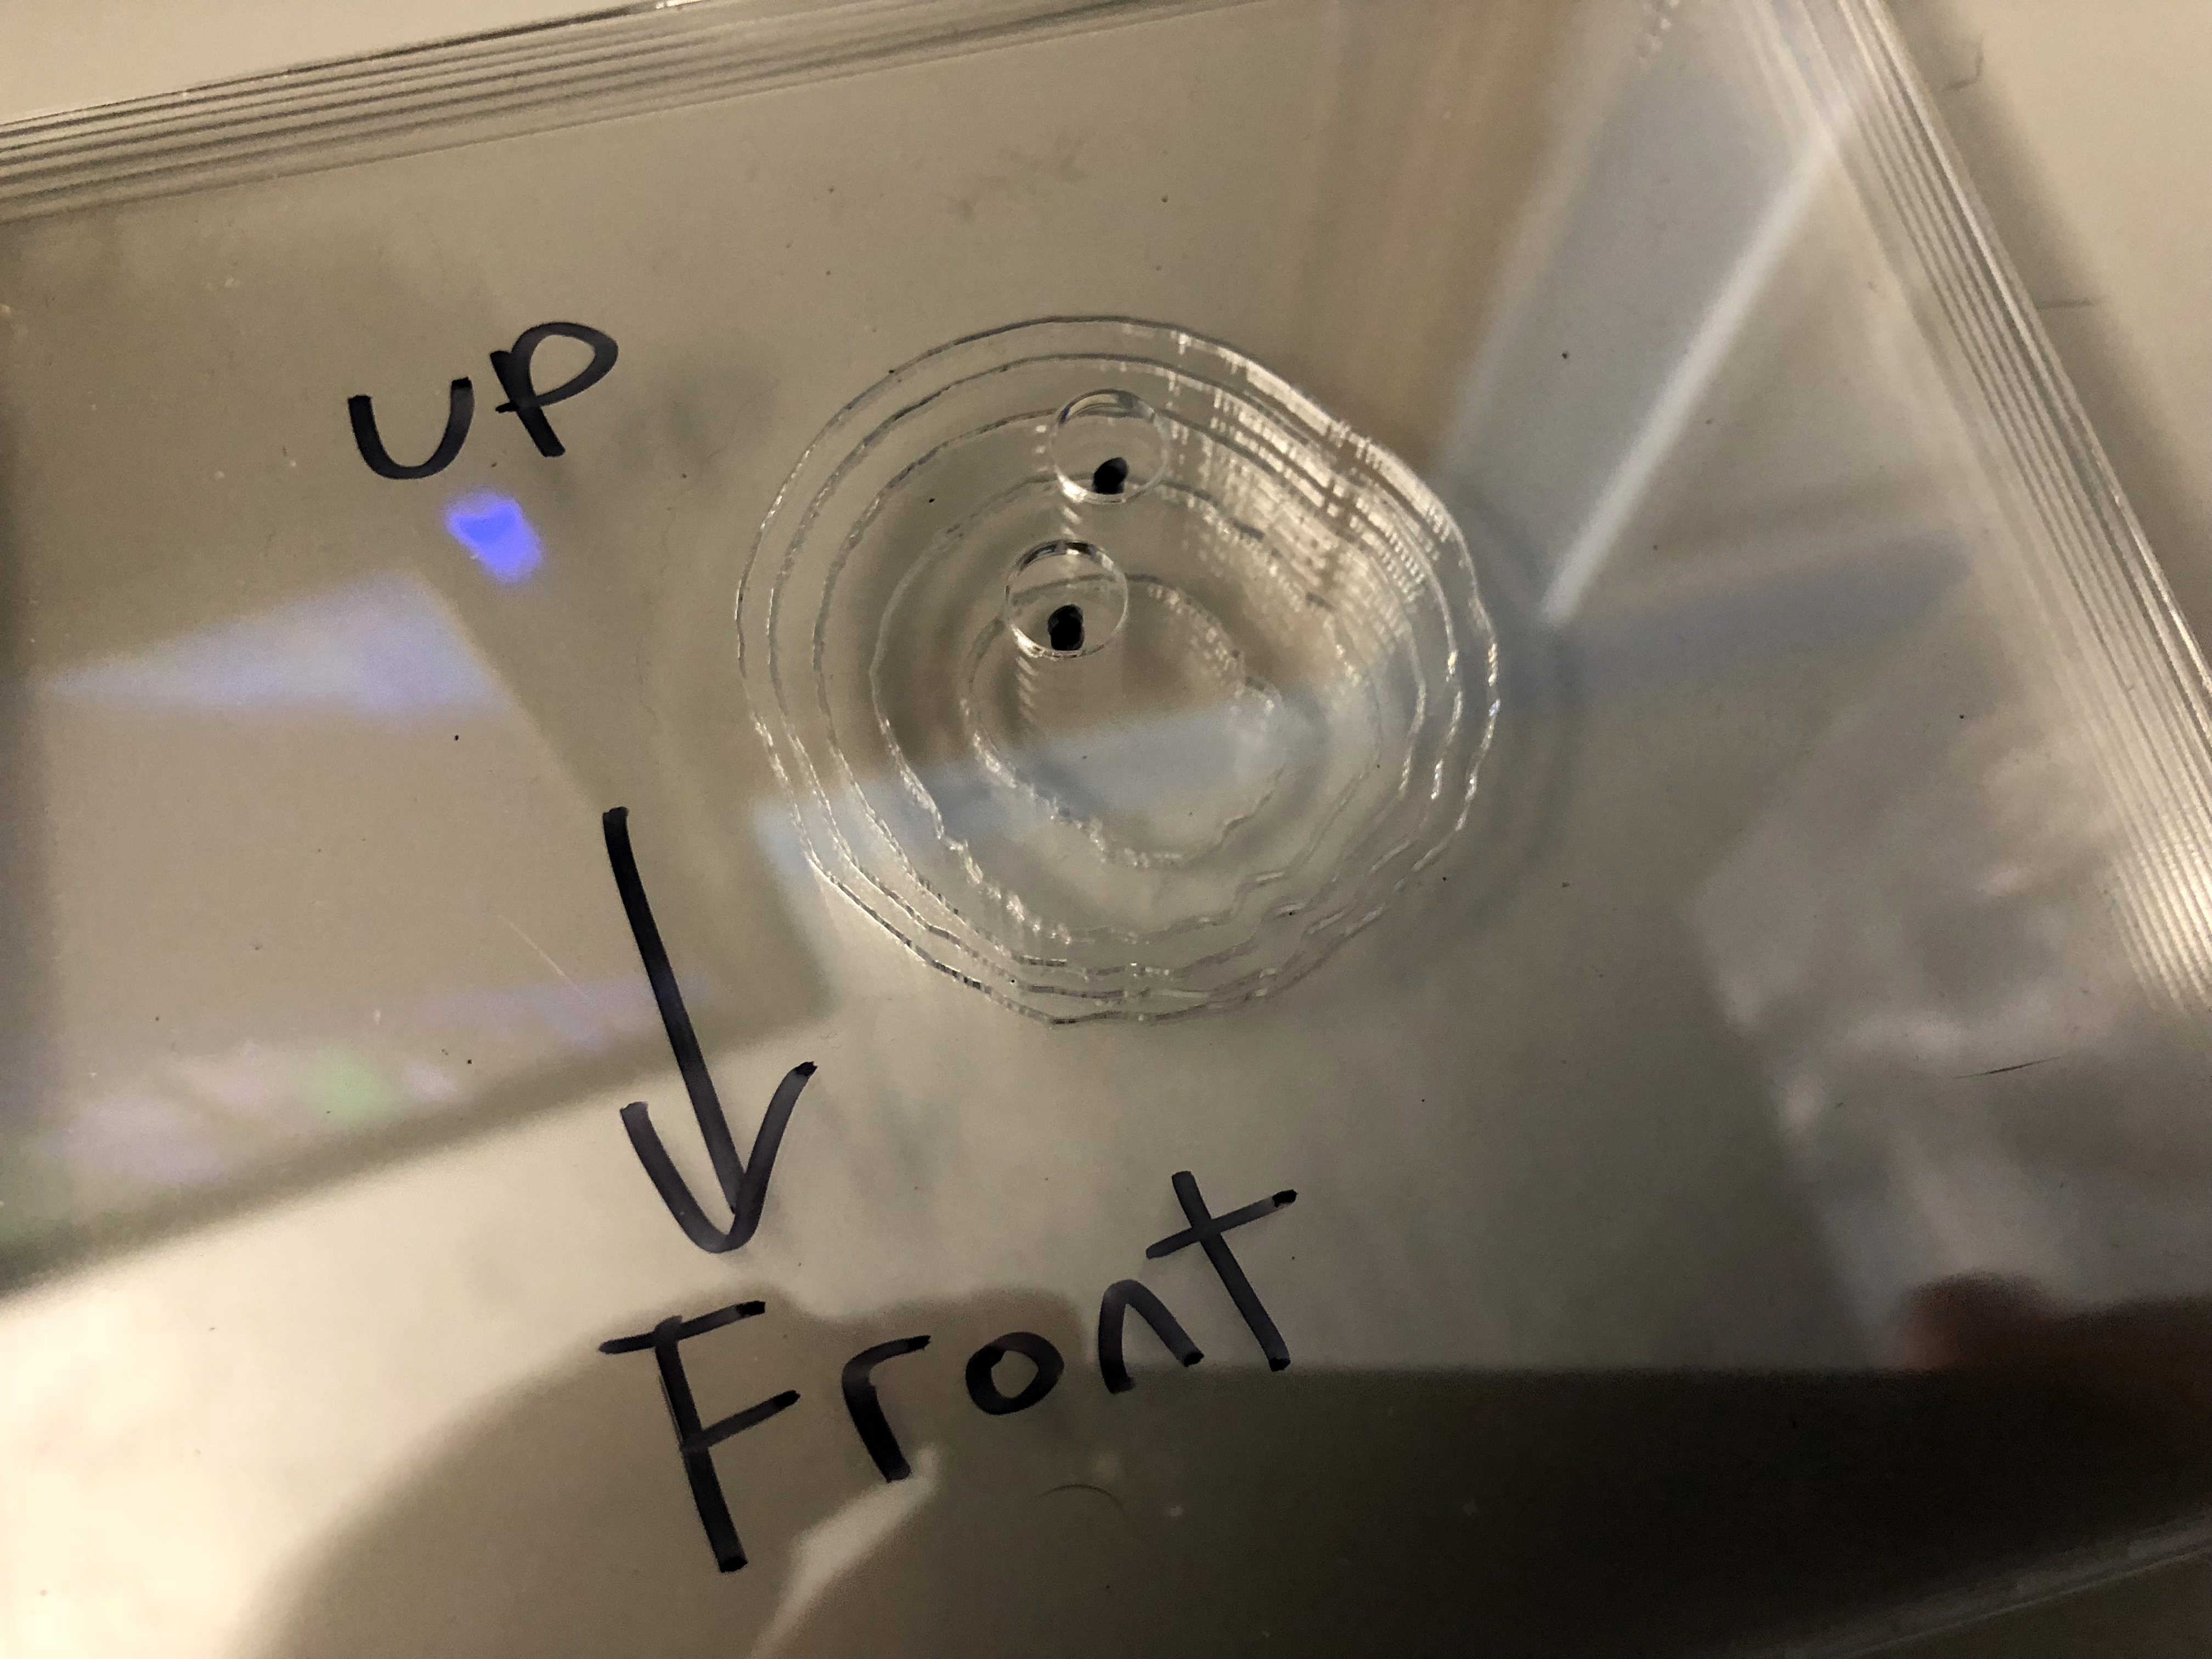
In my initial tests it looked like both the glue and the sharpie wouldn’t be visible.
It took an hour or so to mark all 175 sheets.
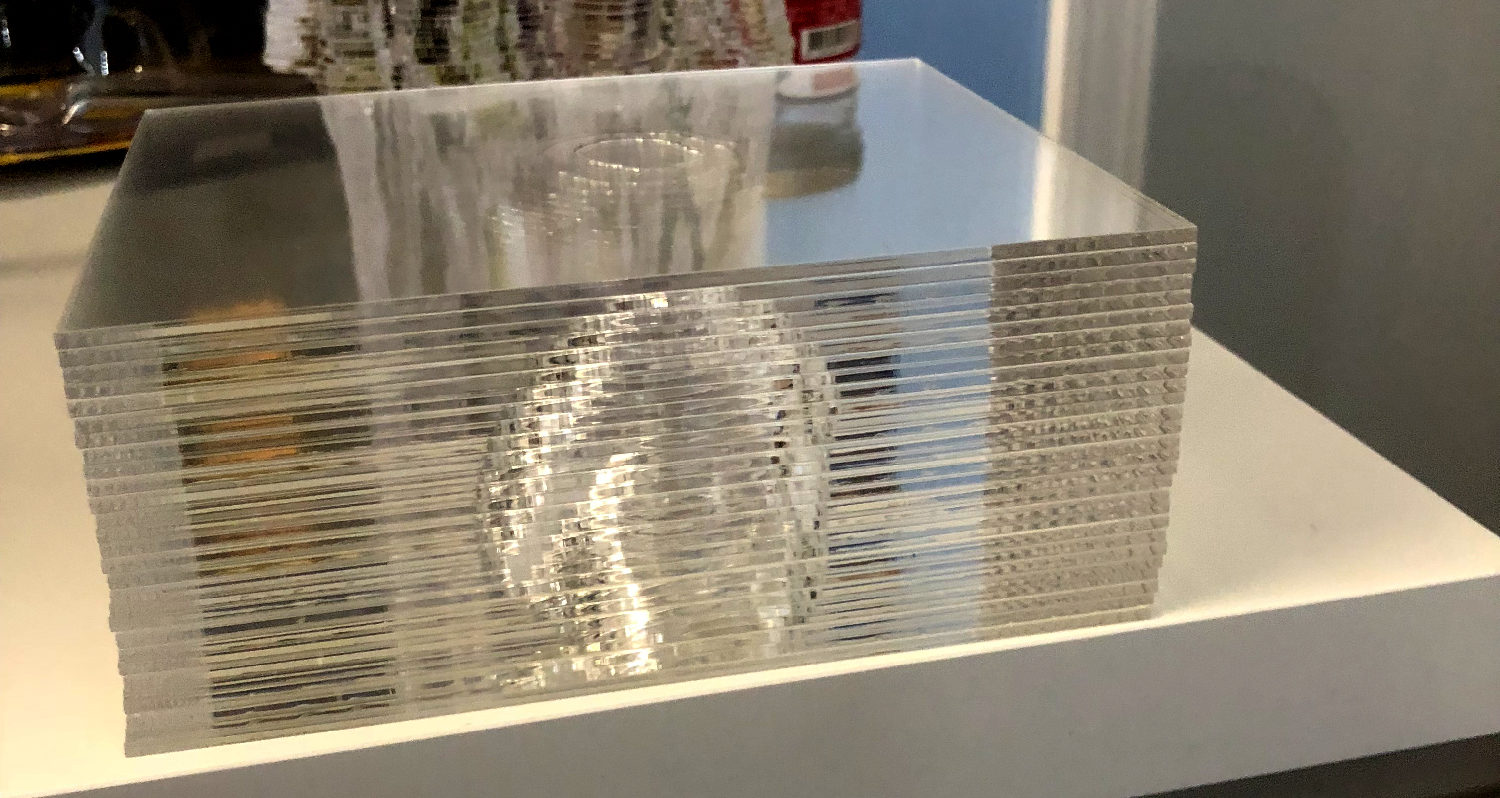
However at certain angles you can see a blue line running through the plexi (which is still cool). I should have used 4 pinholes.
I was going to weld each sheet using acrylic weld but I am allergic to a lot of chemicals and instead opted to use a super glue gel. (The aftermath of which was me being deathly ill for 2 days anyways). The gluing went well, you can’t see it from the side. But several slices weren’t as flat as they needed to be and the adhesive just wouldn’t work. For those few spots I used a clear epoxy (more death for me) and that explains the duller lines you see on some of the slices because – they just don’t lay as flat.
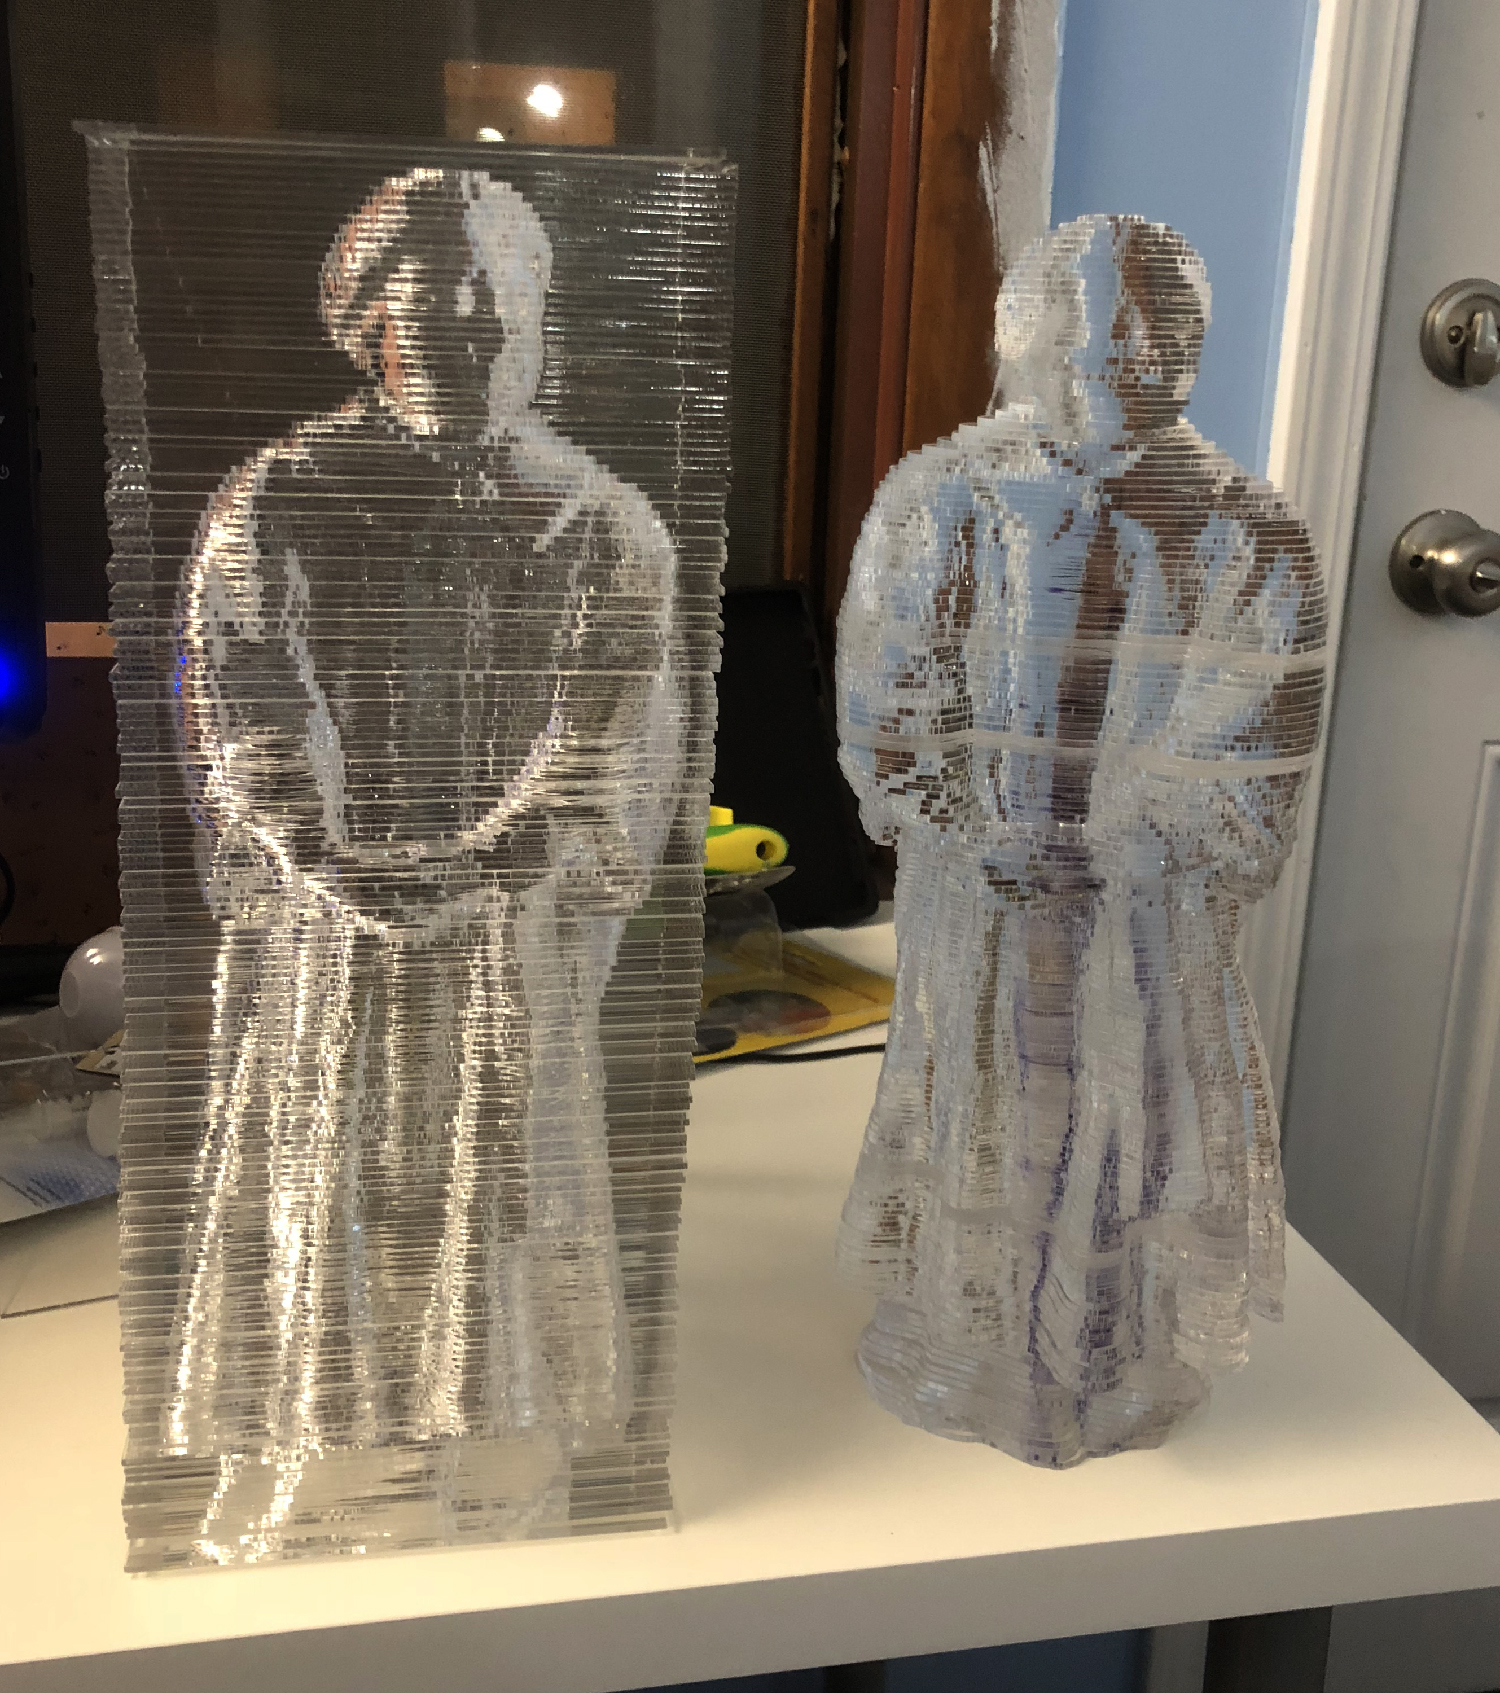
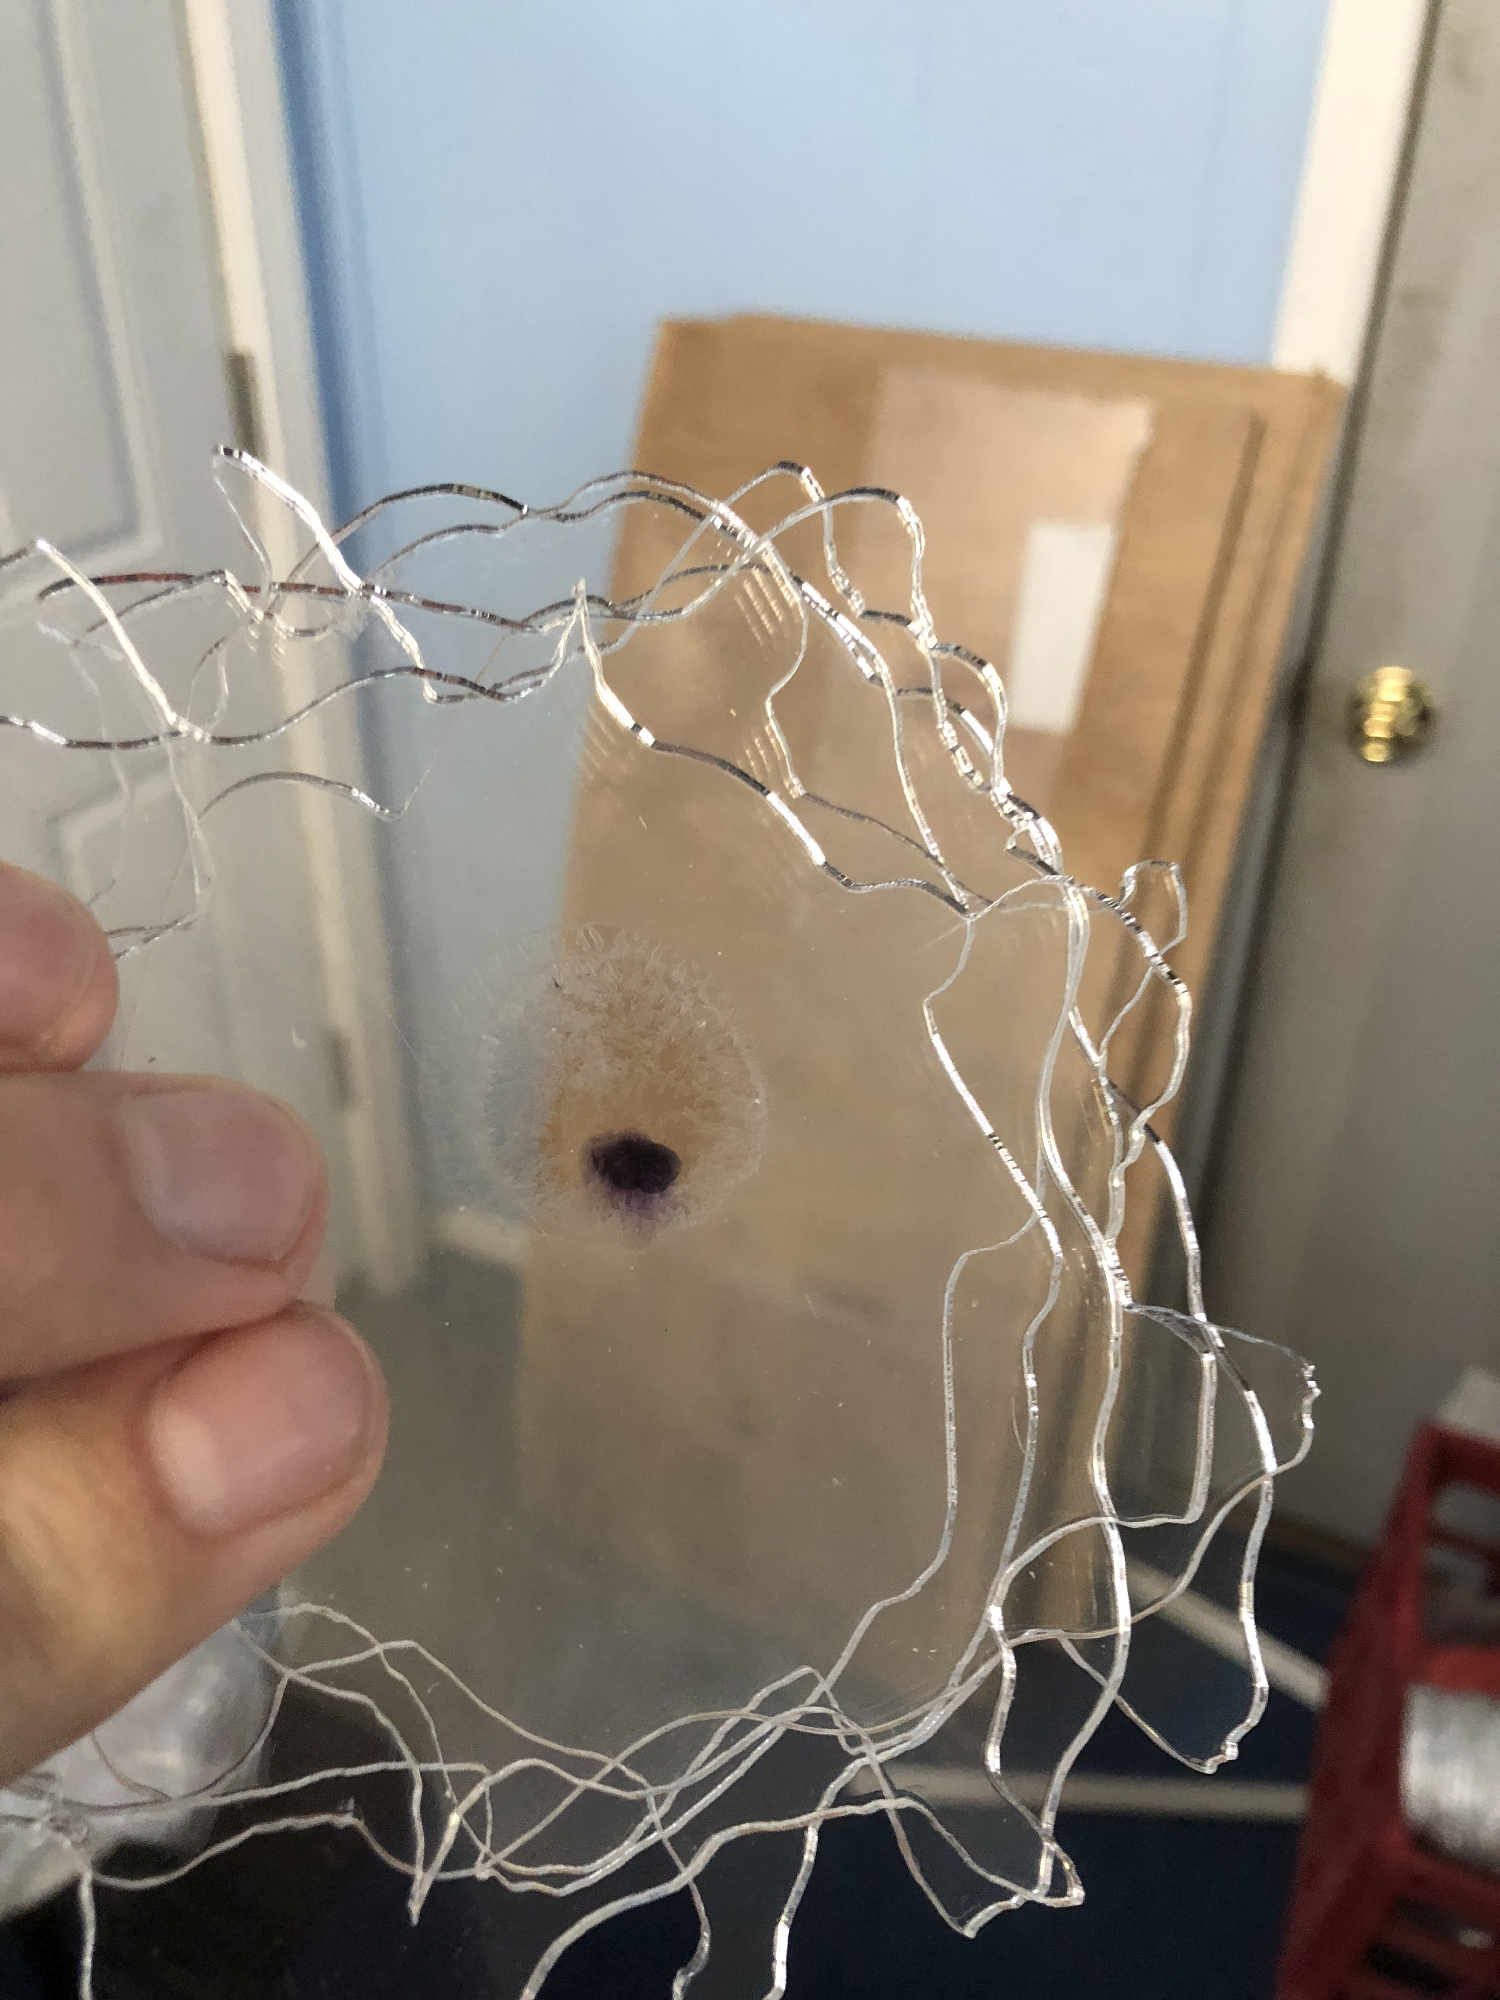
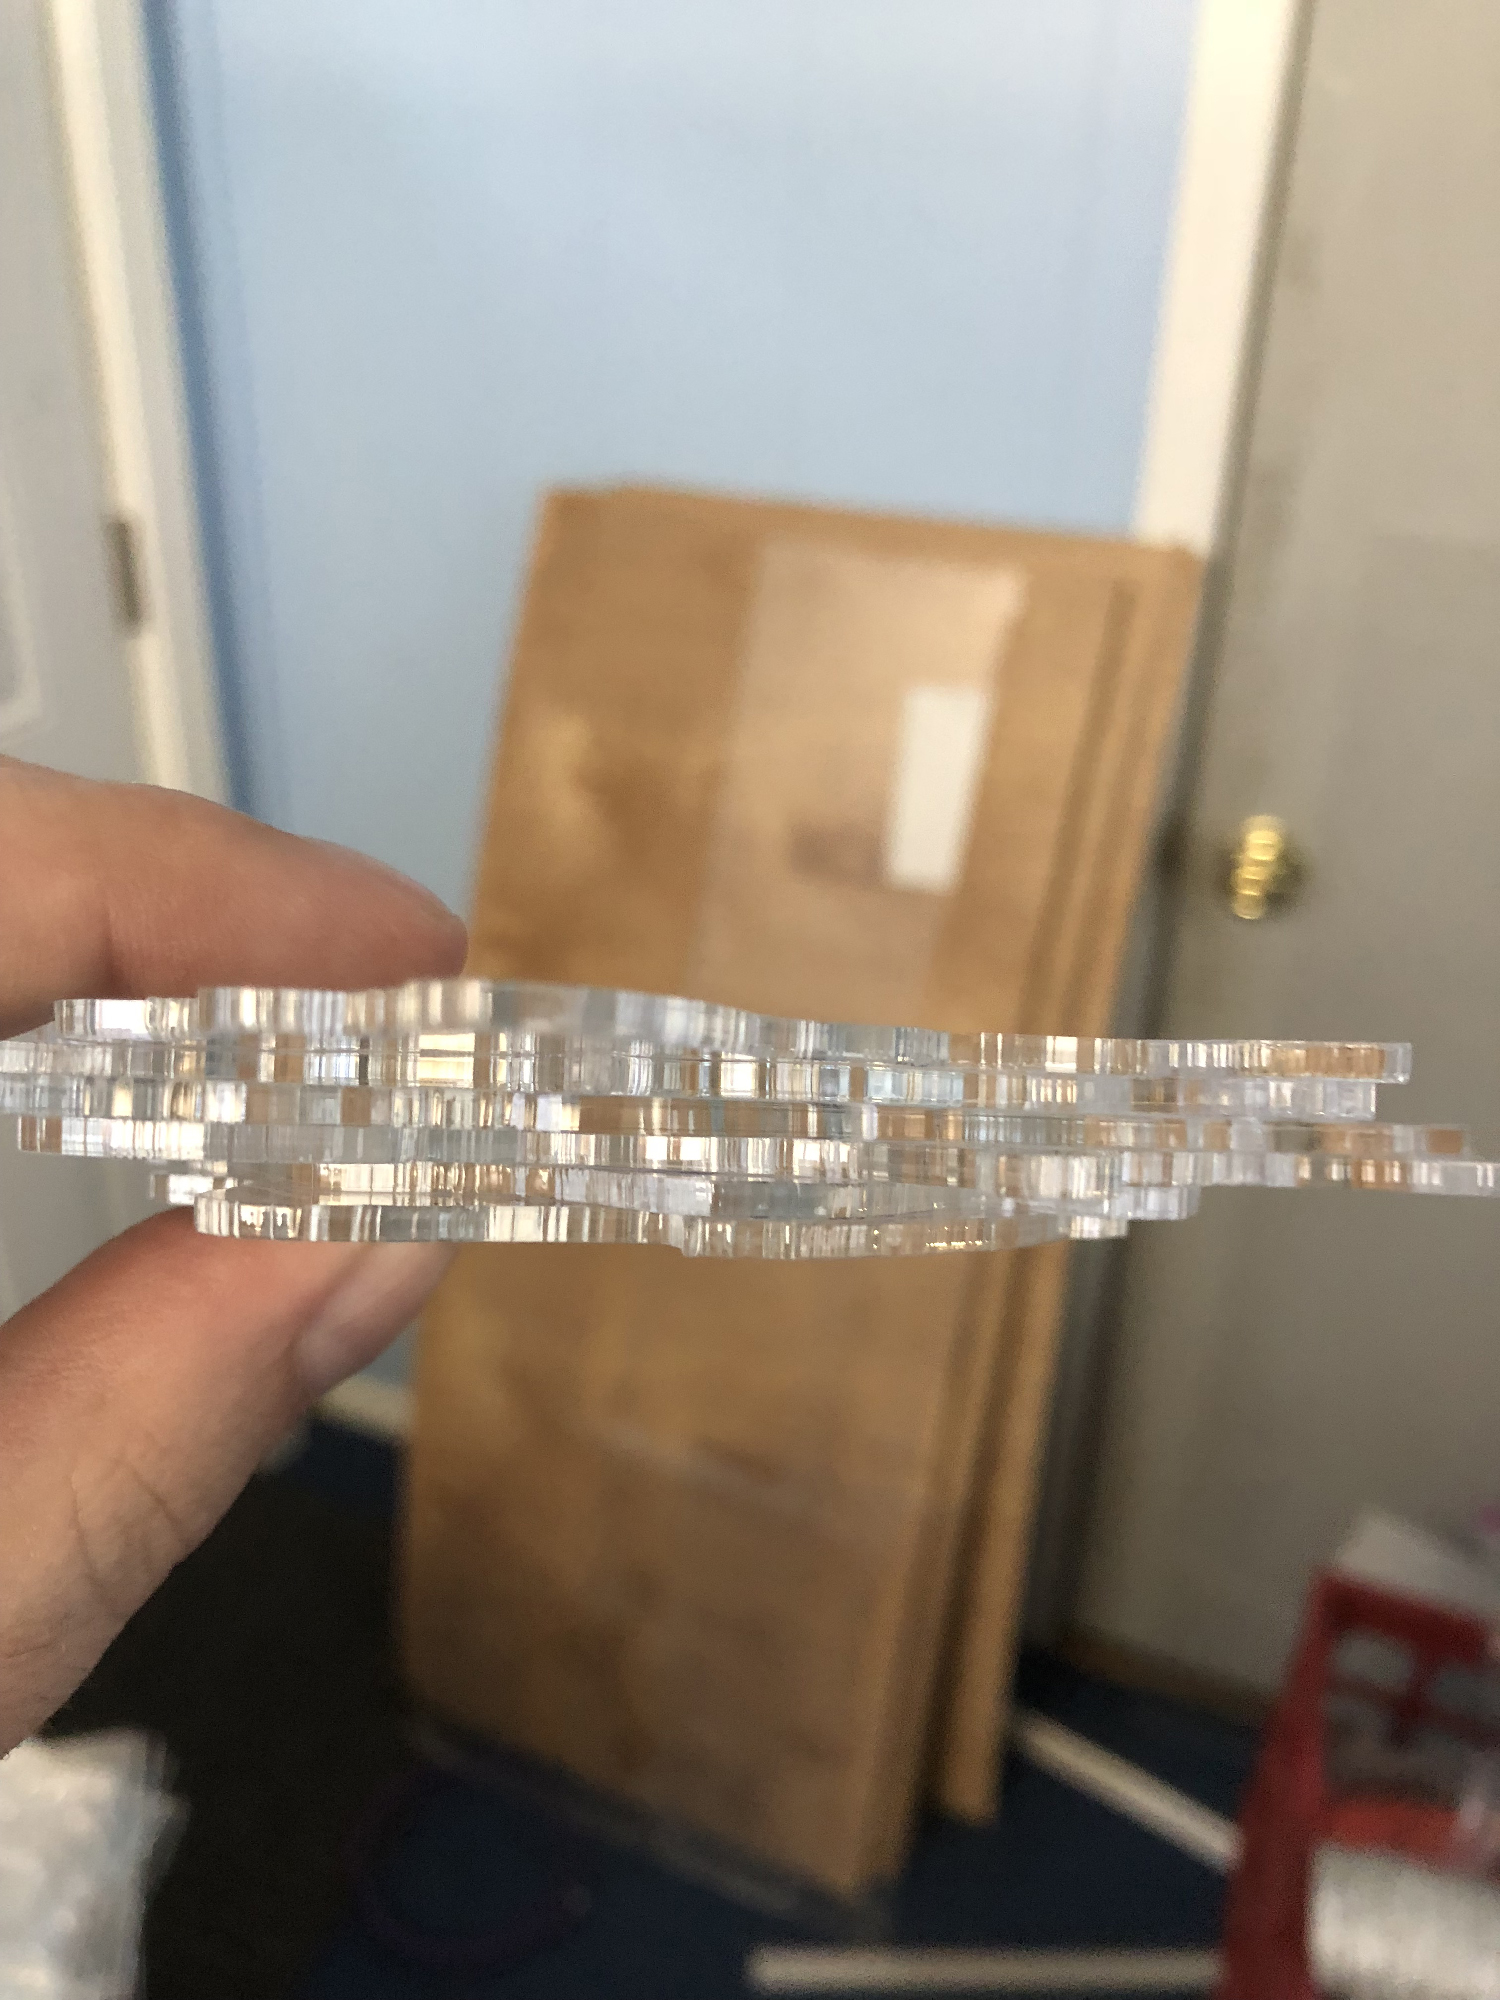
The negative space model is amazing. But I am afraid to glue it, so for now it is just a careful stack. I created 5 sides of plexi which I used scotch tape to hold as a sort of box until the weather turns nice enough outside to play with the acrylic weld.
Next time I am going to cut things out of a circle!
So 5 copies in 3 materials!
But wait there is more!
And in a future post I will discuss how we got the object to work in augmented reality with HP Reveal, augmented reality again with the Microsoft Hololens, back on the web using HTML5, and a few other interesting output techniques!
Hope you enjoyed.
One last note: Take this all with a grain of salt. This is just how I do it – or did it – this time. I am sure there are better ways – there are always better ways and I appreciate learning new things as I go.
