
I built an arcade cabinet! Woo hoo! You want one too, right? You could go to your local pinball shop and pickup a prefab multicade or something like that or go online and order something that ships to you all put together. But if it isn’t already put together – the moment you start delving into the arena of “kit”, you are building something. Once you are consider building you might want to take control over what you are making.
Disclaimer: This post is dated 5/28/2018 and the information is current – here & now. Time will pass, prices will change. Also, I have no affiliation with ANY of the companies listed nor am I getting any affiliate kick-backs. If you want to say thank you just email me, showing me what you built and say “Thank you!” And if you REALLY wanna say thank you my PayPal email is jaredjared@earthlink.net or Venmo me @jaredx2 .
Last fall I was commissioned to design a custom video game and I built my cabinet for this art installation. For previous art projects, I custom built installations using parts from XGaming. They have a USB control board as well as buttons and switches that make it really easy to map to a keyboard. The rest is just carpentry and figuring out how to incorporate the monitor.
However each art installation became its own machine. And after I build them I have to destroy them (they take a lot of space and only get used a few times). This time I wanted to create something a little more universal . Something that I could run off of a computer but that would also be fun to own and play when not running the art installation. And because I am greedy I wanted it to be able to do everything that I possibly could imagine!
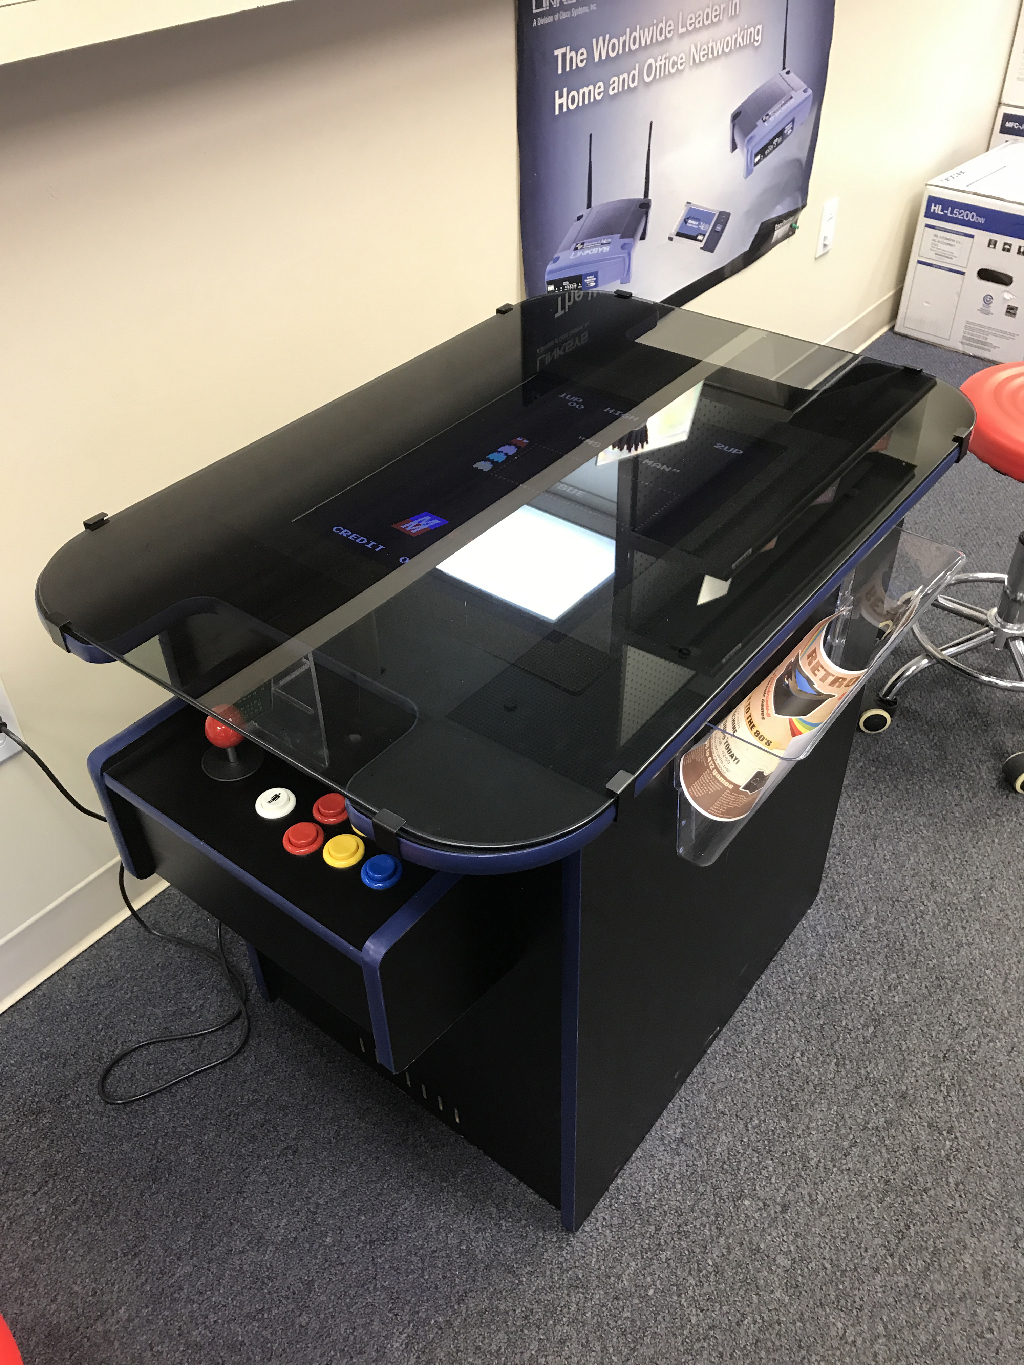
The first decision I was going to have to make was which of the three major configurations was I going to go for: standup, cocktail, or bar style. Most people dream of the standup arcade cabinet because it looks cool. It is big and sexy. But I had a few other considerations. The first was portability – I was going to need to move it! I also wanted people to be able to gather around it and watch. This would be easier with the bar style or the cocktail style. I decided on the cocktail style because it is completely stand alone, i.e. it doesn’t sit on a table like a bar style, and it also affords multiple type of game play. I also love the idea of how inviting and casual the unit is. It whispers… come sit and play me. One thing to note though is that glass top cocktail arcade cabinets do not like overhead lights – they can reflect.
I started to look at the various cabinets online for reference and I soon realized that certain elements of the construction would be out of my control. I wanted a glass top table and a bezel-less LCD display and these would become limiting factors. I also realized when I started to design “the box” that there were way too many other things to consider and that maybe for version 1 I would modify a kit so that in the future for version 2 I could build the box from scratch. This of course is strictly for the carpentry aspects, as the guts I would have to “assemble” from a variety of sources.
During my research I found several people that sold kits. But each company only sold a part of what I wanted. And then I found Holland Computers. They sold EVERYTHING – well almost everything – but much more than any other company that sold parts online. And then I discovered that they were local – 45 minutes away! I could just go and get what I wanted without waiting! I could even make mistakes and go back again!
The goal was to build a cocktail style arcade cabinet that had the most utility possible. This included 4/8 way joysticks, trackballs, multiple buttons, multiple player (side by side or head to head), video pinball, and the capacity to use a computer and/or a dedicated gaming box.
This was going to involve a lot of questions and a lot of compromise. Oh, and it would cost about $2,000. A full breakdown is at the end of this article.
4-way or 8-way joysticks?
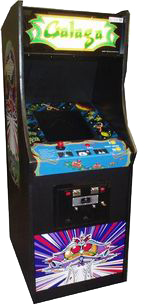
Old school games like PacMan use a 4-way joystick. That means up, down, right, and left but NO diagonals. With a 4-way joystick not only do the diagonals not trigger, but you physically can’t move the joystick that way. When we talk about how a game feels we sometimes overlook the subtlety of the physical mechanisms we are playing with. However some games like Street Fighter need the diagonals – hence the term 8-way joystick. 8-way games are impossible to play on 4-way joysticks and 4-ways games feel horrible on 8-way joysticks.
Some joysticks are configurable inside the machine – so they can be set to 4-way or 8-way. But then I found the Mag-Stik-Plus Arcade Joystick. This joystick has a neat feature in which you can pull and twist and change it from a 4-way to an 8-way and back again without opening the machine. It is pretty cool. There are a million things to look for in a joystick, some people talk about the springs and the handle etc. I am building a fairly casual machine that will have the broadest utility and this solved most of my problems.
To trackball or not to trackball?
My favorite arcade game is Tempest. It a unicorn of arcade games. It uses a vector based display and a spinner – a spinner! There really aren’t that many games that ever used a spinner and it would be impractical to incorporate into my arcade machine. OK, that distraction aside, my next favorite game is Centipede and that uses a trackball. While not many games use a trackball I wasn’t willing to give up Centipede (and Tempest isn’t bad with a trackball). I was determined to include a trackball. I would love a nice big one but I was going to settle for a smaller one.
Which Layout?
This part was killing me. There really is no “standard” layout for an arcade machine. How many buttons and how are they arranged? It is easiest to start with the “knowns” or constants. I am building a cocktail style table. This means the controller will be for one person and the screen will be in portrait mode. This also means that a second player will sit across from player one and have their own controller. Interestingly enough this type of 2 player configuration (where the players sit across from each other) is NOT known as head to head.
I was going to add the side controller unit which would allow to players to sit side by side – this is called “head to head” because the players can play the game at the same time. In this configuration the screen is landscape.
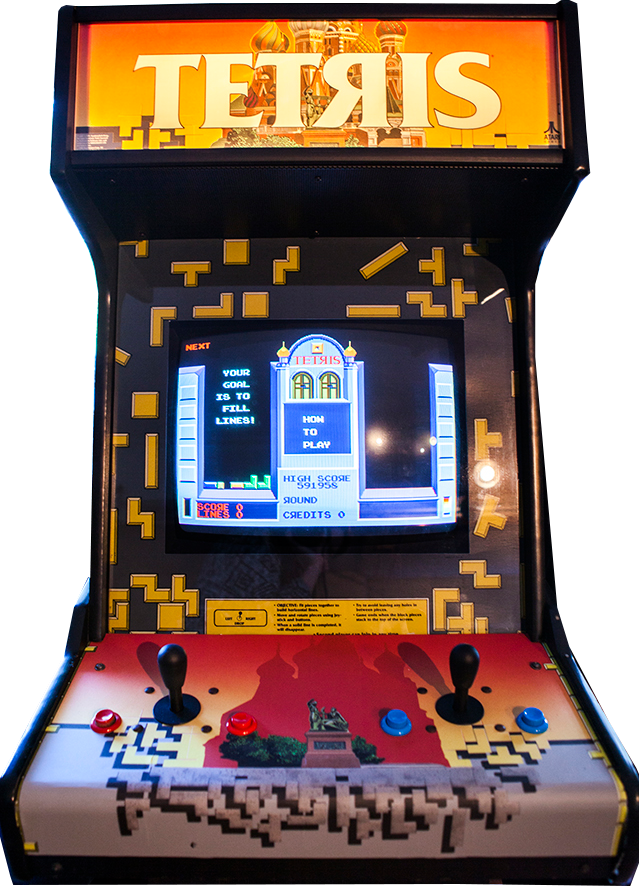
The side by side or “head to head” unit is the easiest to make decisions about. Landscape multiplayer games tend to use 8 way joysticks and have a lot of buttons. The standard configuration is a joystick on the left and 6 buttons on the right (as well as a player 1 and player 2 start button). Personally I wanted head to head just to play competitive Tetris!
However, for the individual controller Holland Computers has two different configurations.
The first has a hole on the left for a joystick and 4 holes on the right for 3 buttons and a start button.
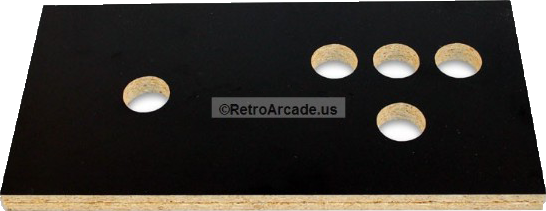
The other has a hole on the left for a joystick and 7 holes on the right for 6 buttons and a start button.

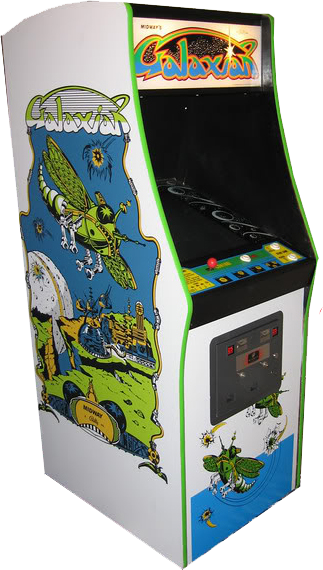
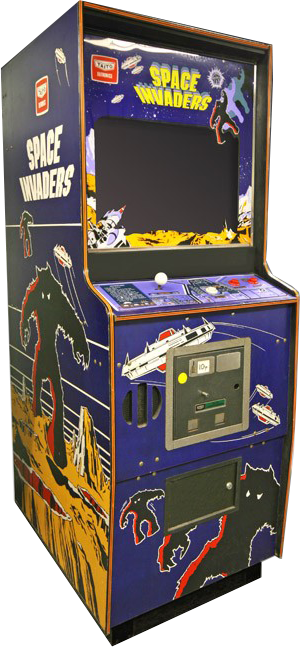
While either of these would have been fine – I wanted more. I wanted to squeeze in a trackball. Now let’s review for a moment. In classic arcade games you control the joystick with your left hand and you control the buttons with your right. I always find this interesting because you would think that since most people are right hand dominant that you would need more control on the joystick than the buttons but not so. Here are several classic examples all with the joystick on the left and the buttons on the right:
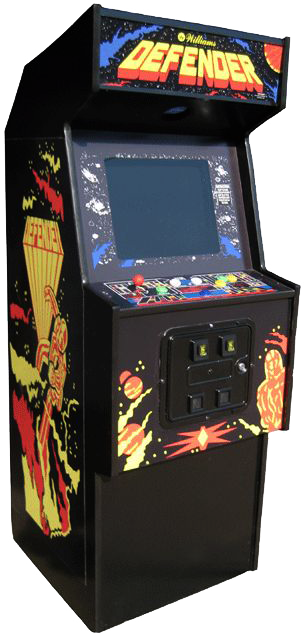
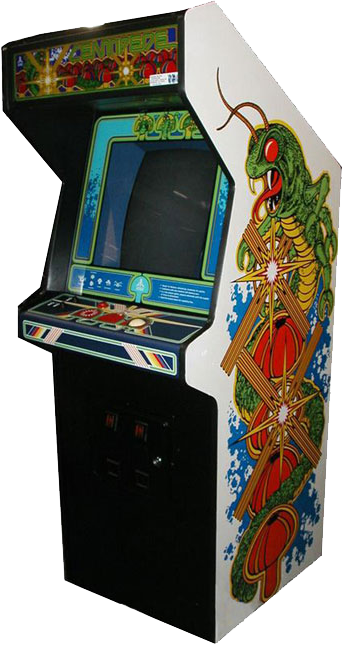
Centipede however is reversed. You control the trackball with your right hand and fire with your left:
You would think that would mean I would want the joystick on the left, the buttons in the middle, and the trackball on the right. But I love symmetry and that configuration would KILL me! I wanted the trackball in the middle. With the joystick on the left and the buttons on the right it would be easy to ignore the trackball in the middle. But how was I going to fire when playing Centipede and others? Video Pinball to the rescue! Video Pinball you ask? Well, if I incorporate flipper buttons on the sides then I could use configure the left flipper as button 1 and the right flipper as button 2 and be able to use the trackball and fire from the side flipper which should feel good (and does).
So that was the final decision. Joystick on the left, trackball in the center, 3 buttons on the right, with left and right flipper buttons. I could put a start button on the front which would be out of the way. The head to head panel would have a joystick on the left and 6 buttons on the right for each player and start buttons also on the front as.
It all starts with this kit
This is the cocktail table kit that they sell at Holland Computers and would be the base for my project. The base kit is only $360, but don’t let that fool you – by the time I was done I spent over $2,000. Again, at the end of the post I have a complete breakdown of parts and pricing. I did return several times to Holland Computers for more stuff, hopefully my experience will make your experiences better.
For the rest of this article I will post all the pictures at a medium resolution and have them clickable for a full size image.
Unboxing
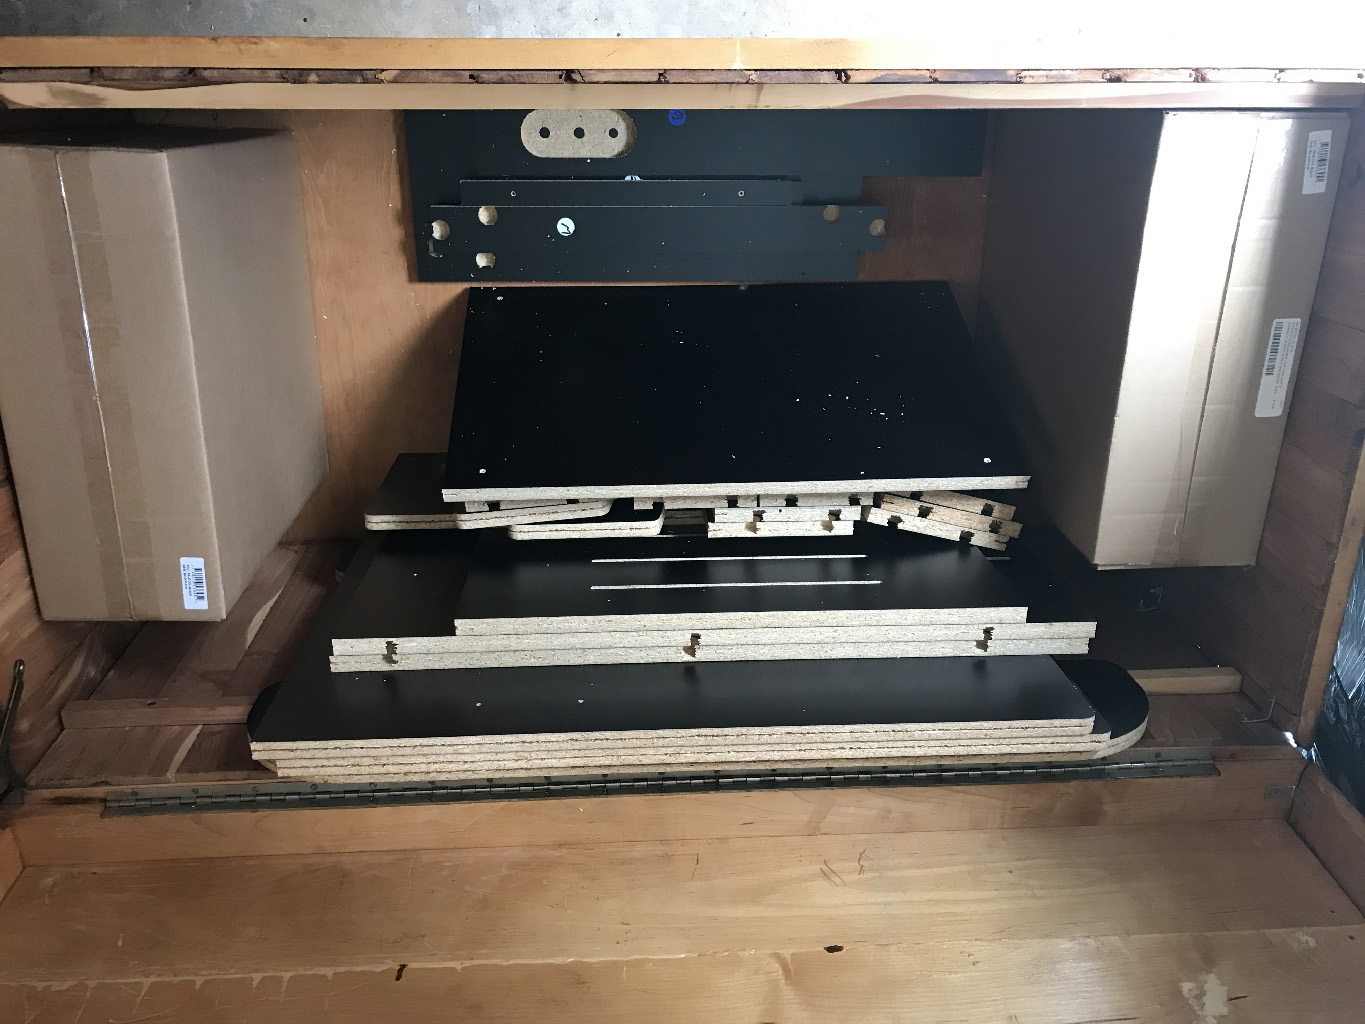
The basic kit is 3/4″ particle board covered in melamine. The melamine is a nice coating but will chip something awful – so you have to be careful when cutting or drilling. Some of the edges have been pre-routed for T-molding. There are screws holes and bored holes for the furniture cams. I purchased several extra boards – the tops and sides of the controllers – since I knew I might make a mistake (and I did!). I also purchased a replacement “C-panel” which was pre-drilled and cut for the “head to head” unit. This is not an item they have on their website and while it saved me from having to drill the holes and cut the opening they forget the bore holes for the cams and I had to do those myself.


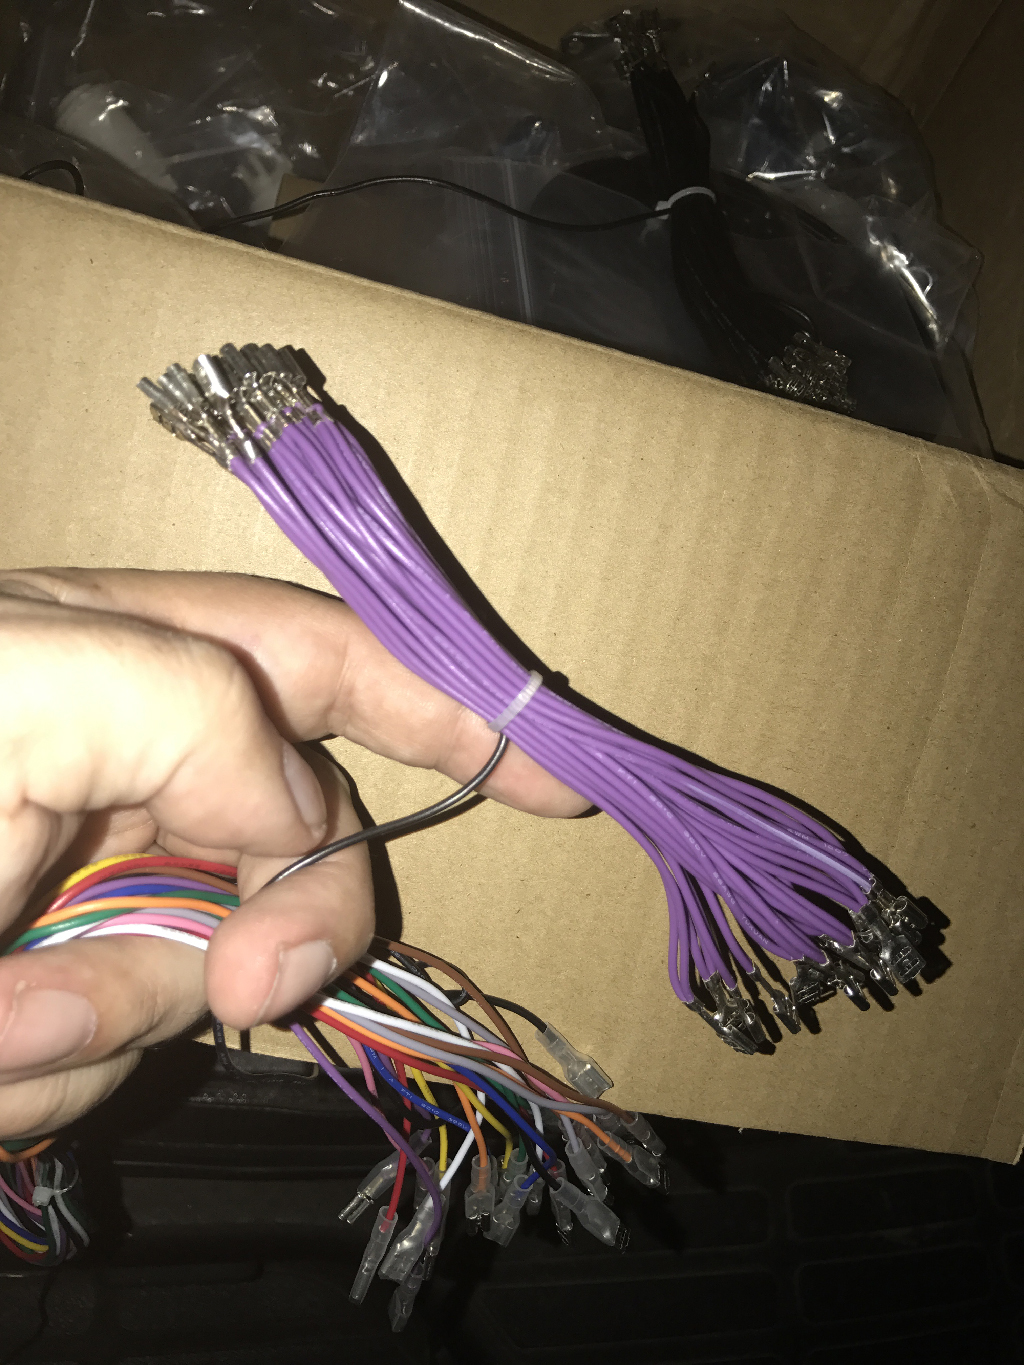
And this is most of the stuff (not all) that was going to go into the unit. Notice those giant bundles of cables. These are JAMMA cables and is the standard that the internals of this machine are being built to. JAMMA is the Japan Amusement Machine and Marketing Association and have established a series of connection standards that allows you to swap out the main board of a machine and have everything else work pretty much the same. I will get to the “brain” of this machine a little later in this article. Because I was doing 2 players and a “head to head” I purchased a 3 way JAMMA connector – this is a lot of wires. The JAMMA connector is a blade type connector (like the card inside of a computer) and I purchased an extension cable because it would be easier to plug and unplug cables from each other than to mess with the hardware directly. I also purchased an extra JAMMA cable so I could cut it up and use for spare wires and connectors.
But I am jumping ahead. You can’t do the wiring until you have the box designed and built.
Designing the Controller
![]()
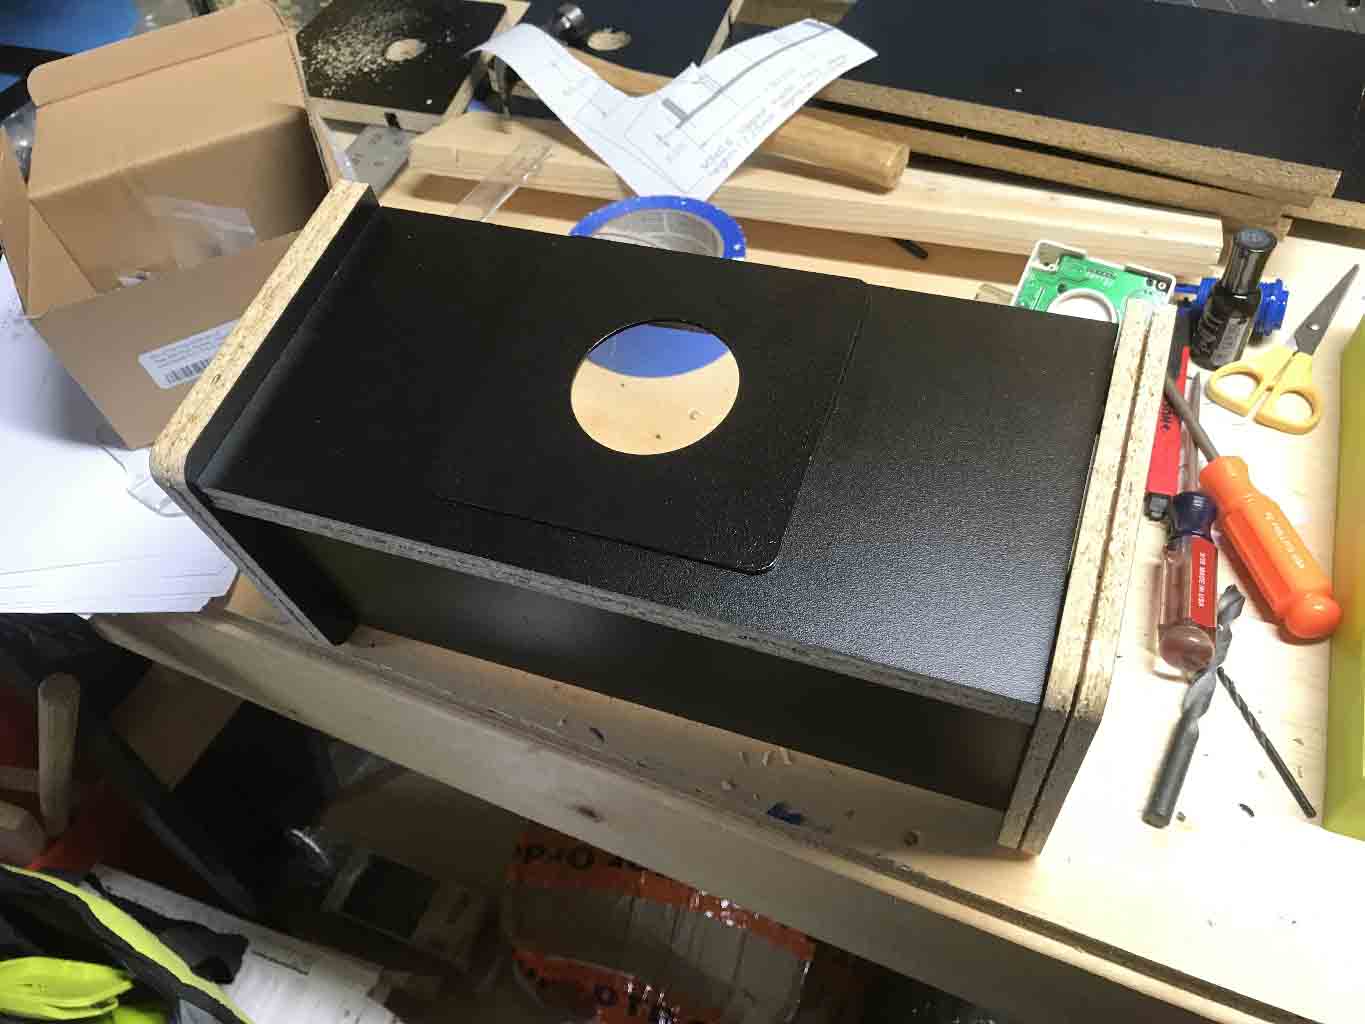
The kit comes with the controller predrilled for the joystick and 4 buttons. I instead started with a blank.
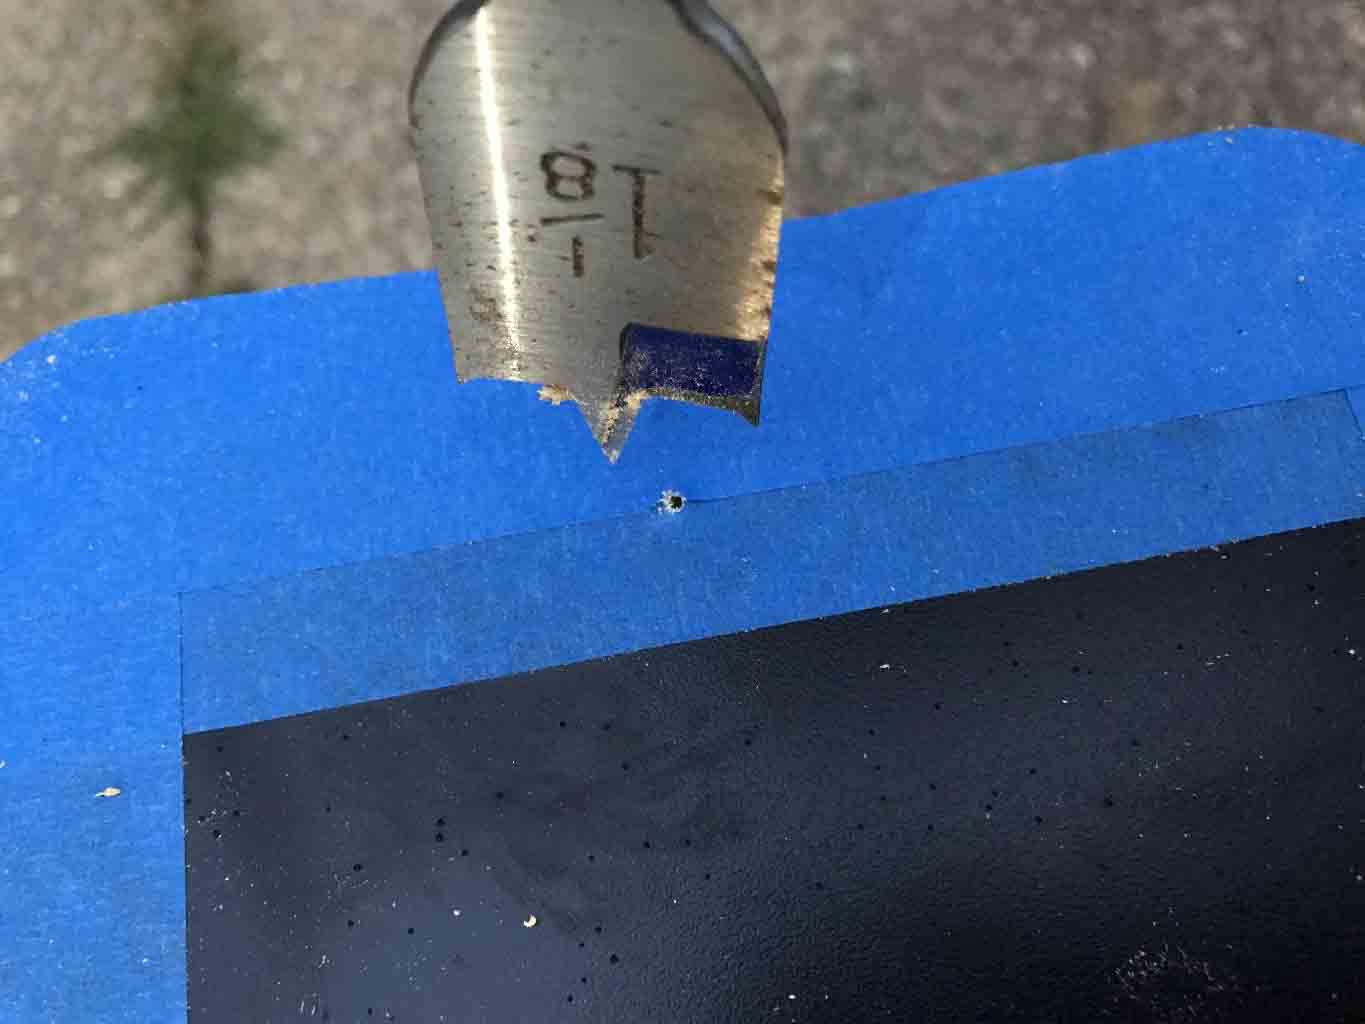

Some things to know about drilling into melamine coated particle board. Practice on a scrap first! Also tape the surfaces (front and back) to keep the chipping to a minimum. All of the holes for the buttons and for the joysticks are 1 1/8″ and I use a flat blade bore. Spend good money on this and go very very slowly. There aren’t that many holes to drill – be patient!
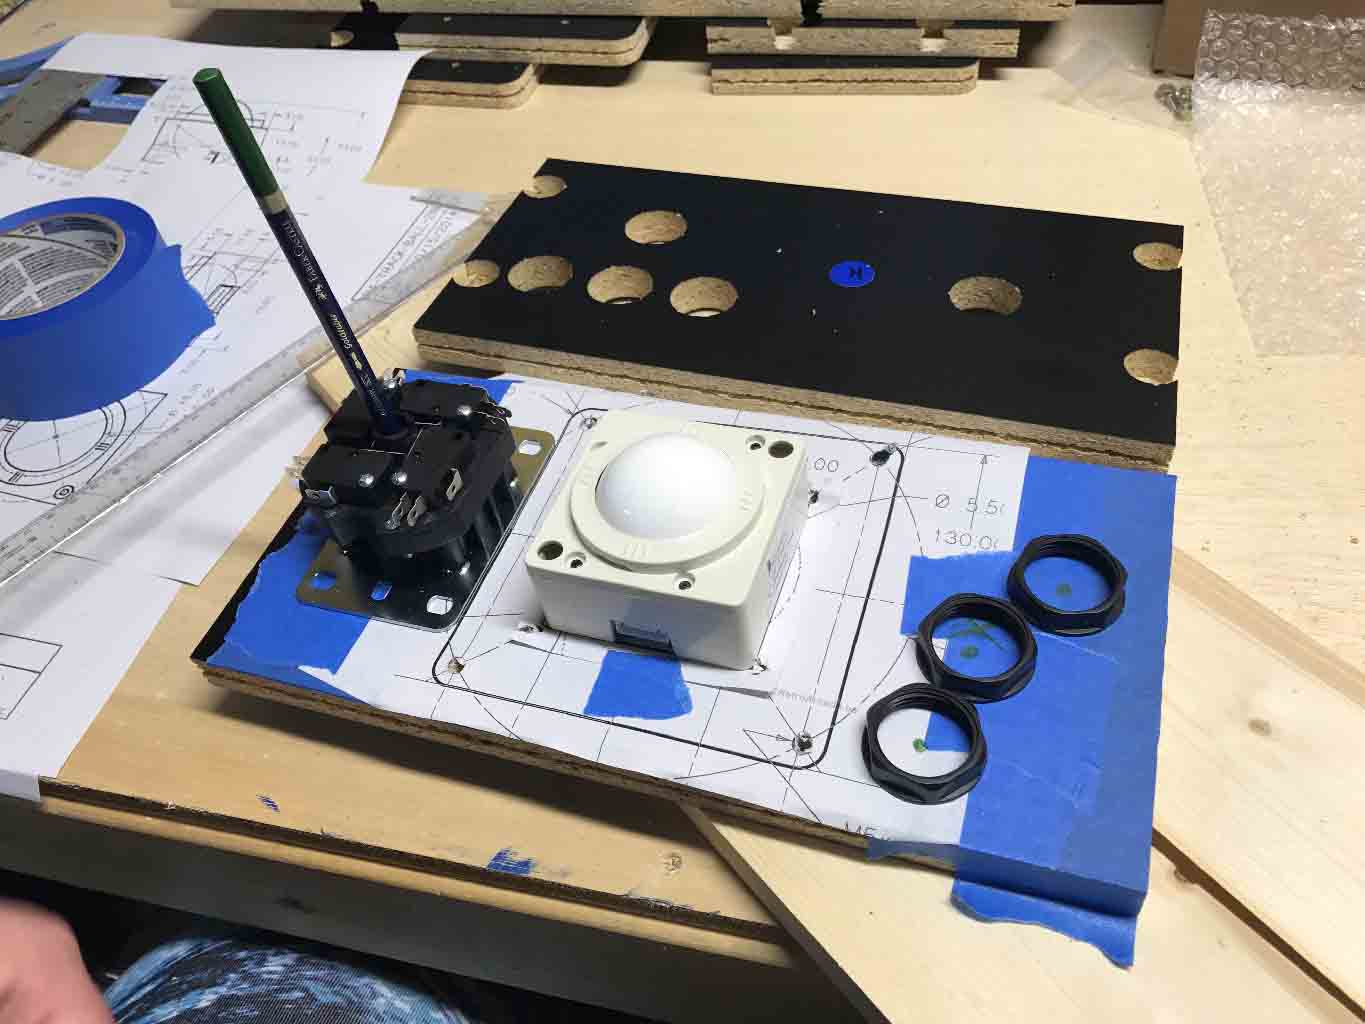
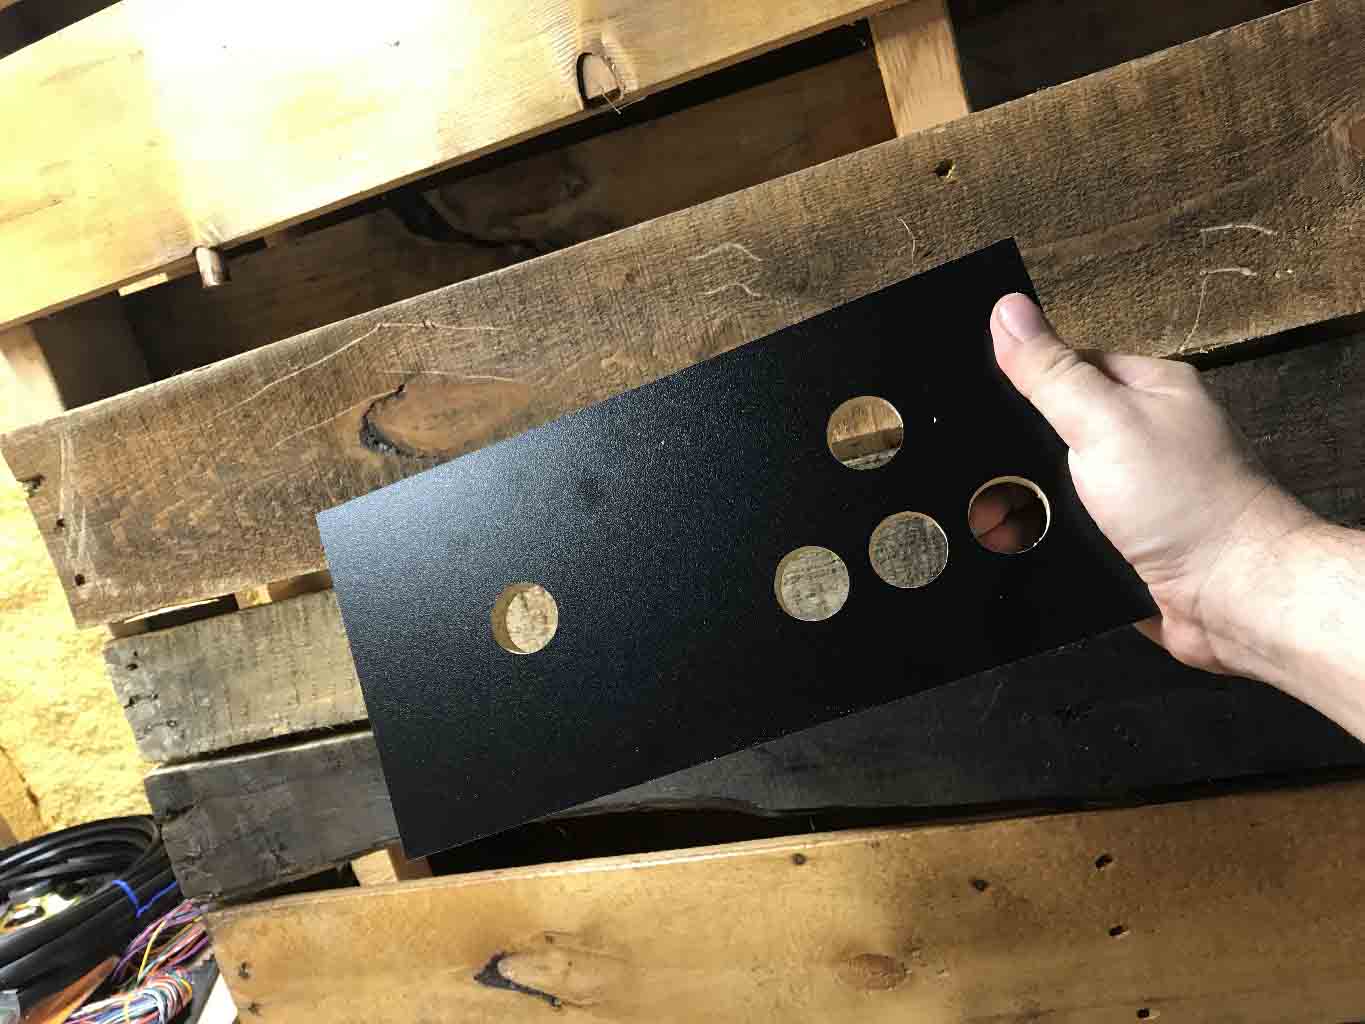
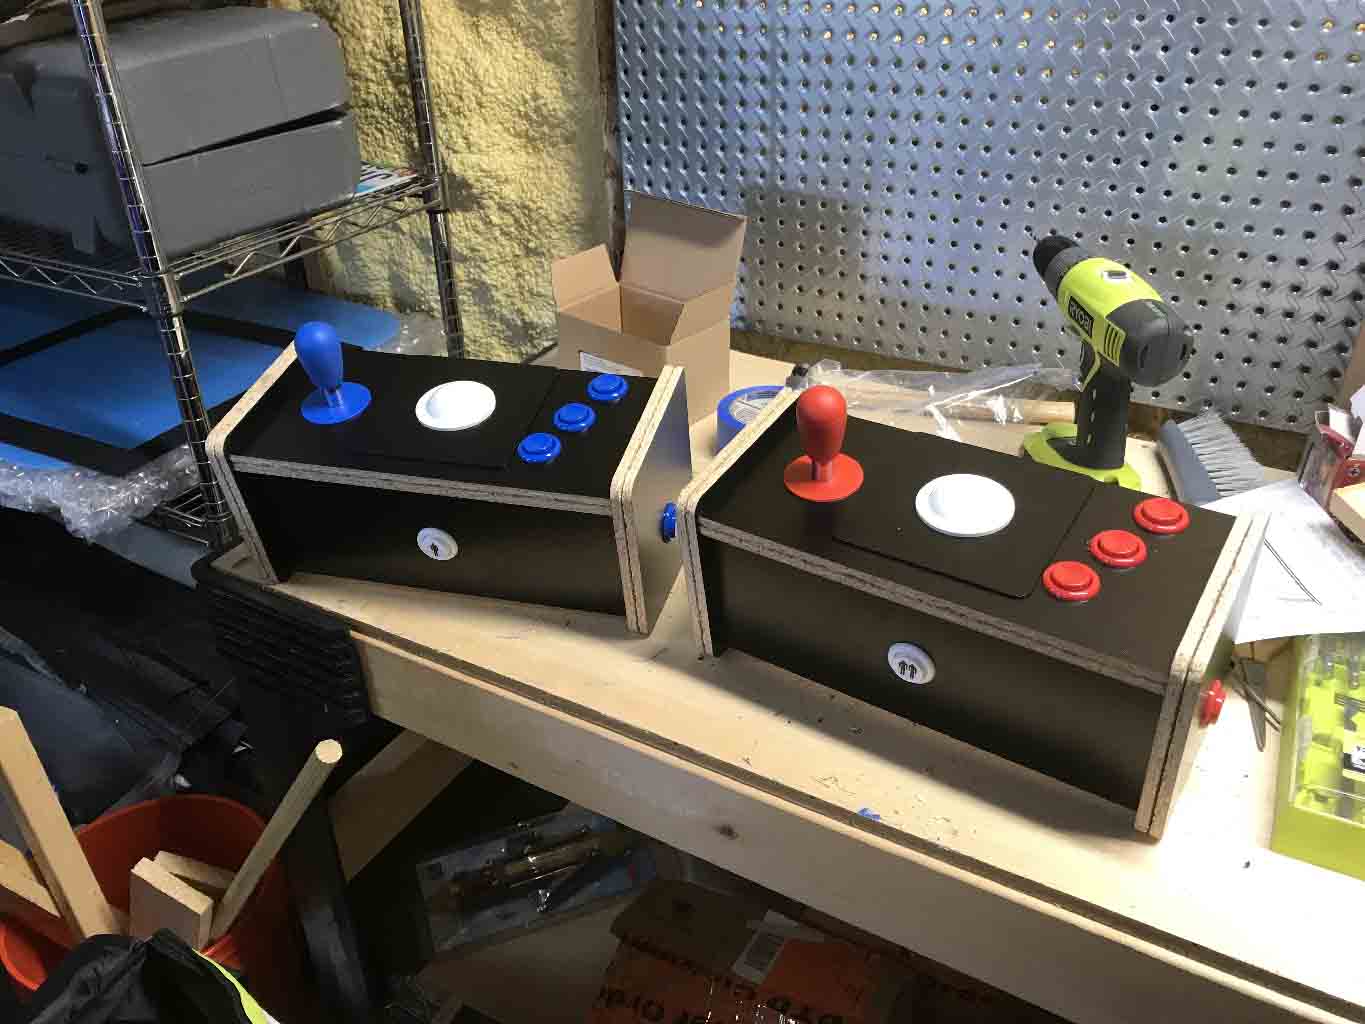
I arranged everything the way I thought I wanted it to look. On the left is the the joystick with the stick removed (that’s a pencil in the hole). On the right are the nuts for the buttons which helps to make sure that the spacing is enough. And in the center is the trackball unit – without the metal mounting plate. I centered everything both horizontally and vertically – this would turn out to be a HUGE MISTAKE!
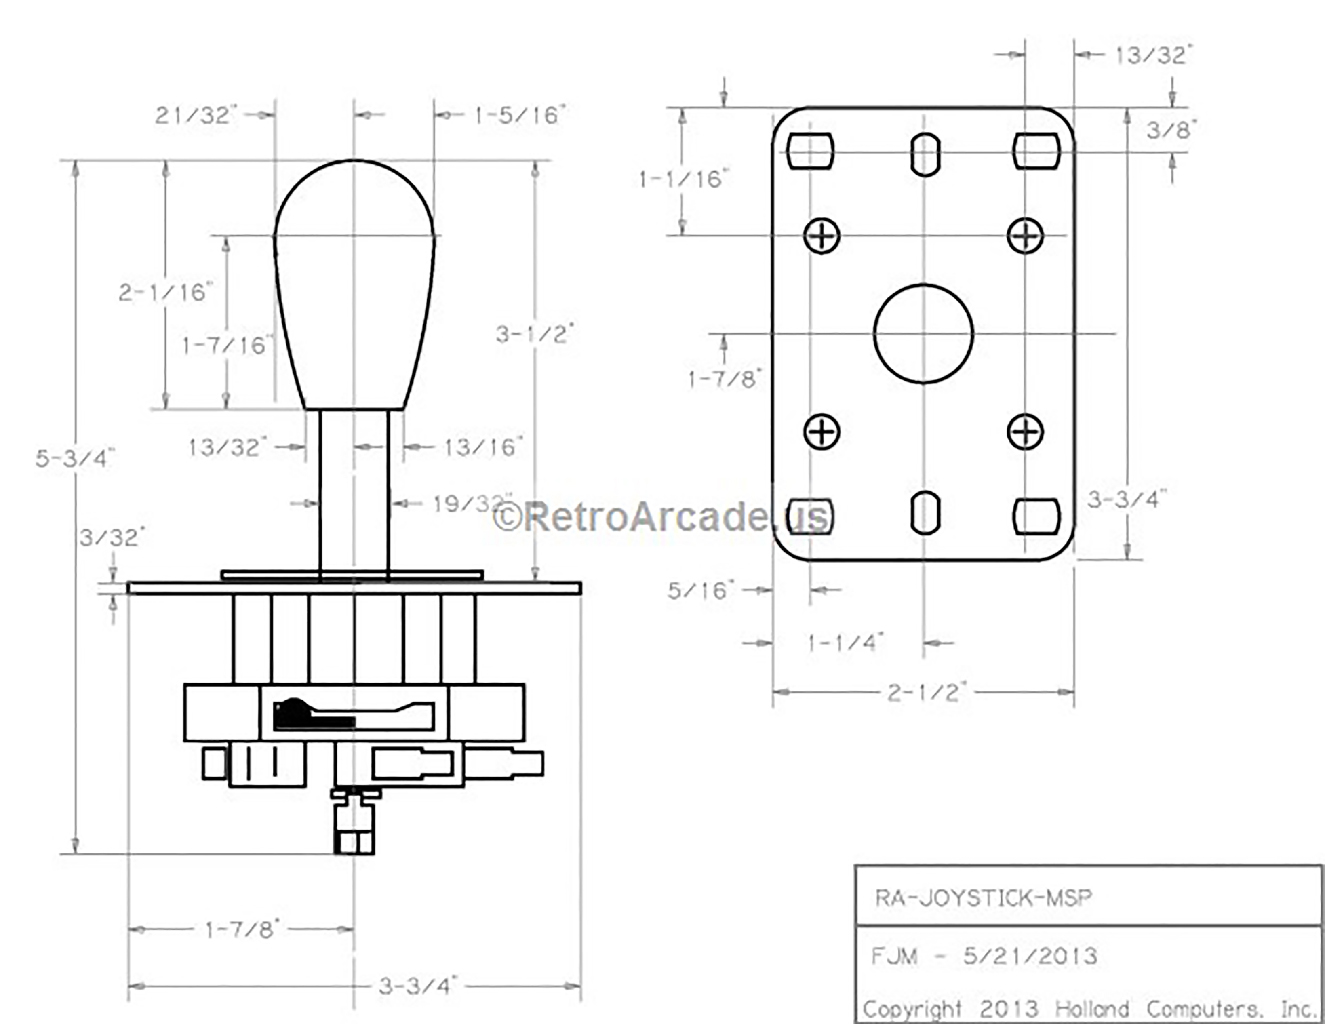
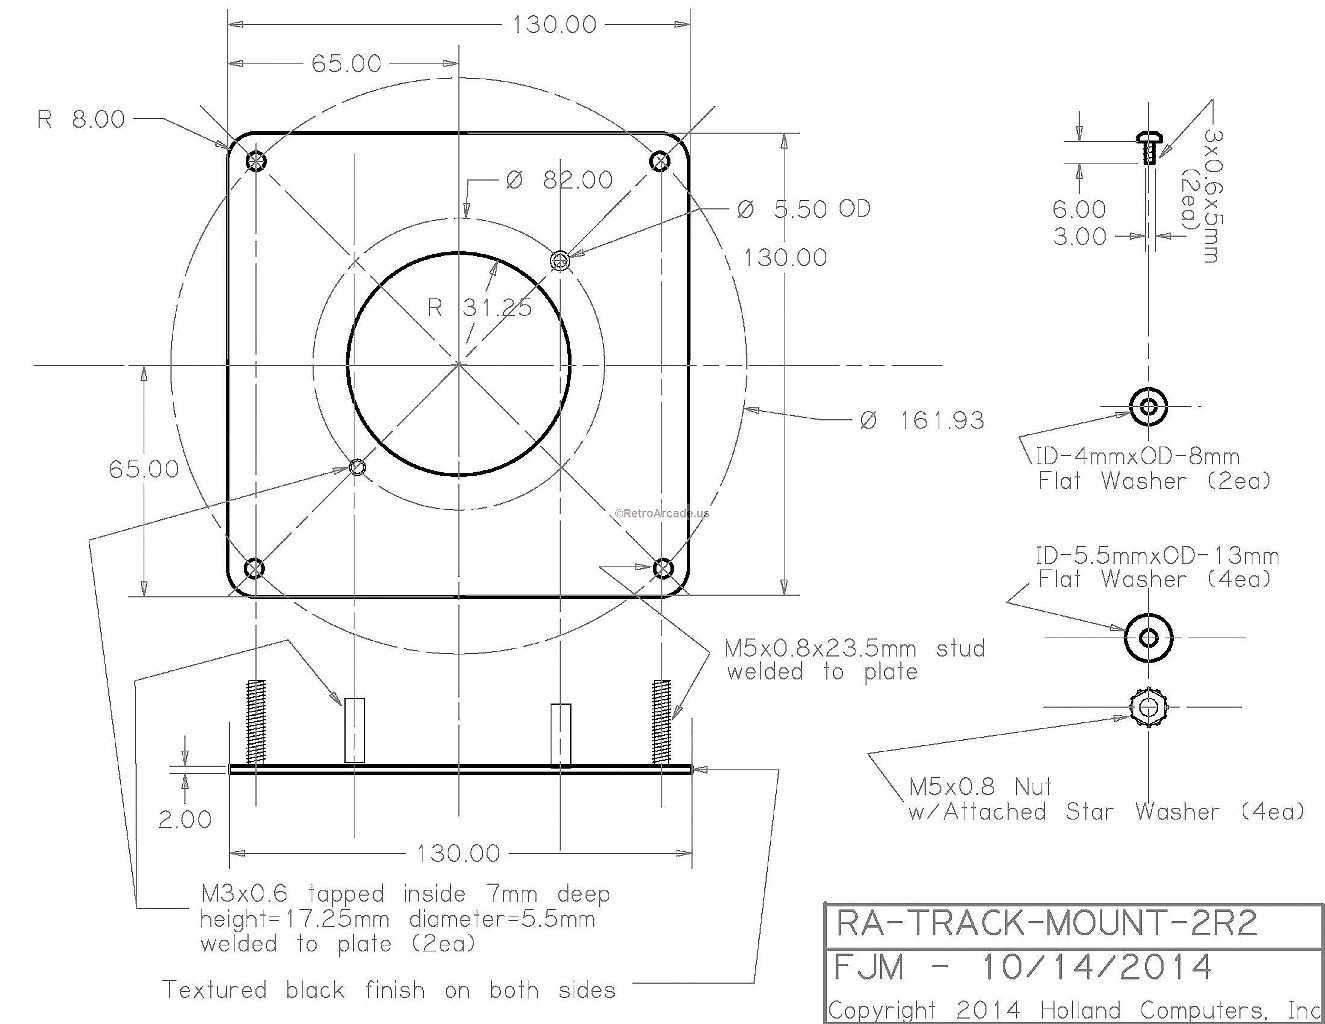
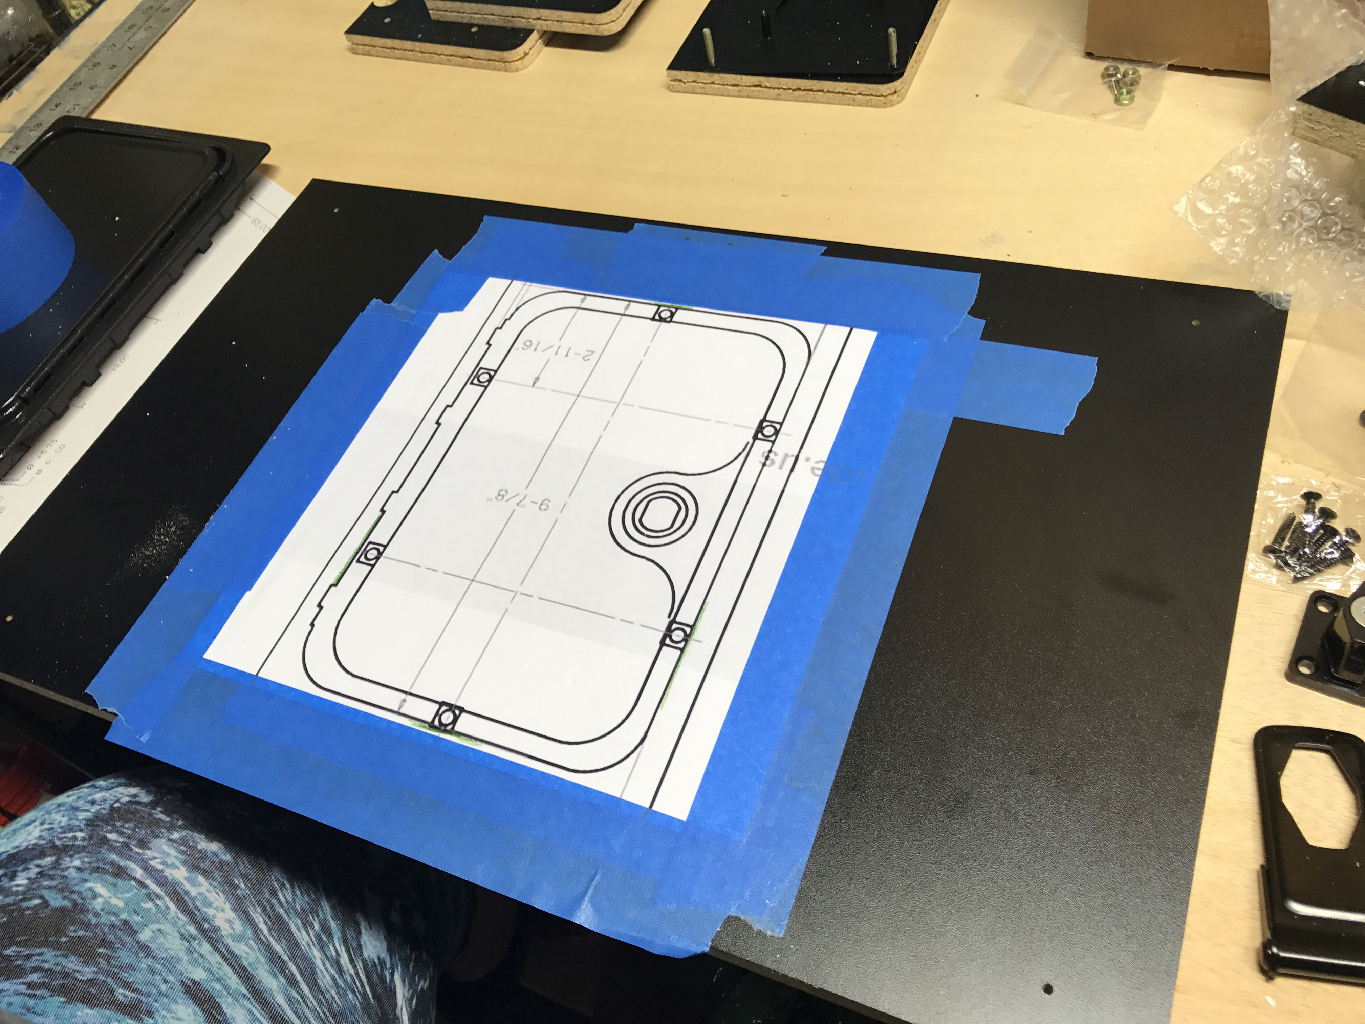
The joystick and trackball both have drawings online – though neither was to scale. I was able to scale them and make printouts so that I could use them to lay out the controller.
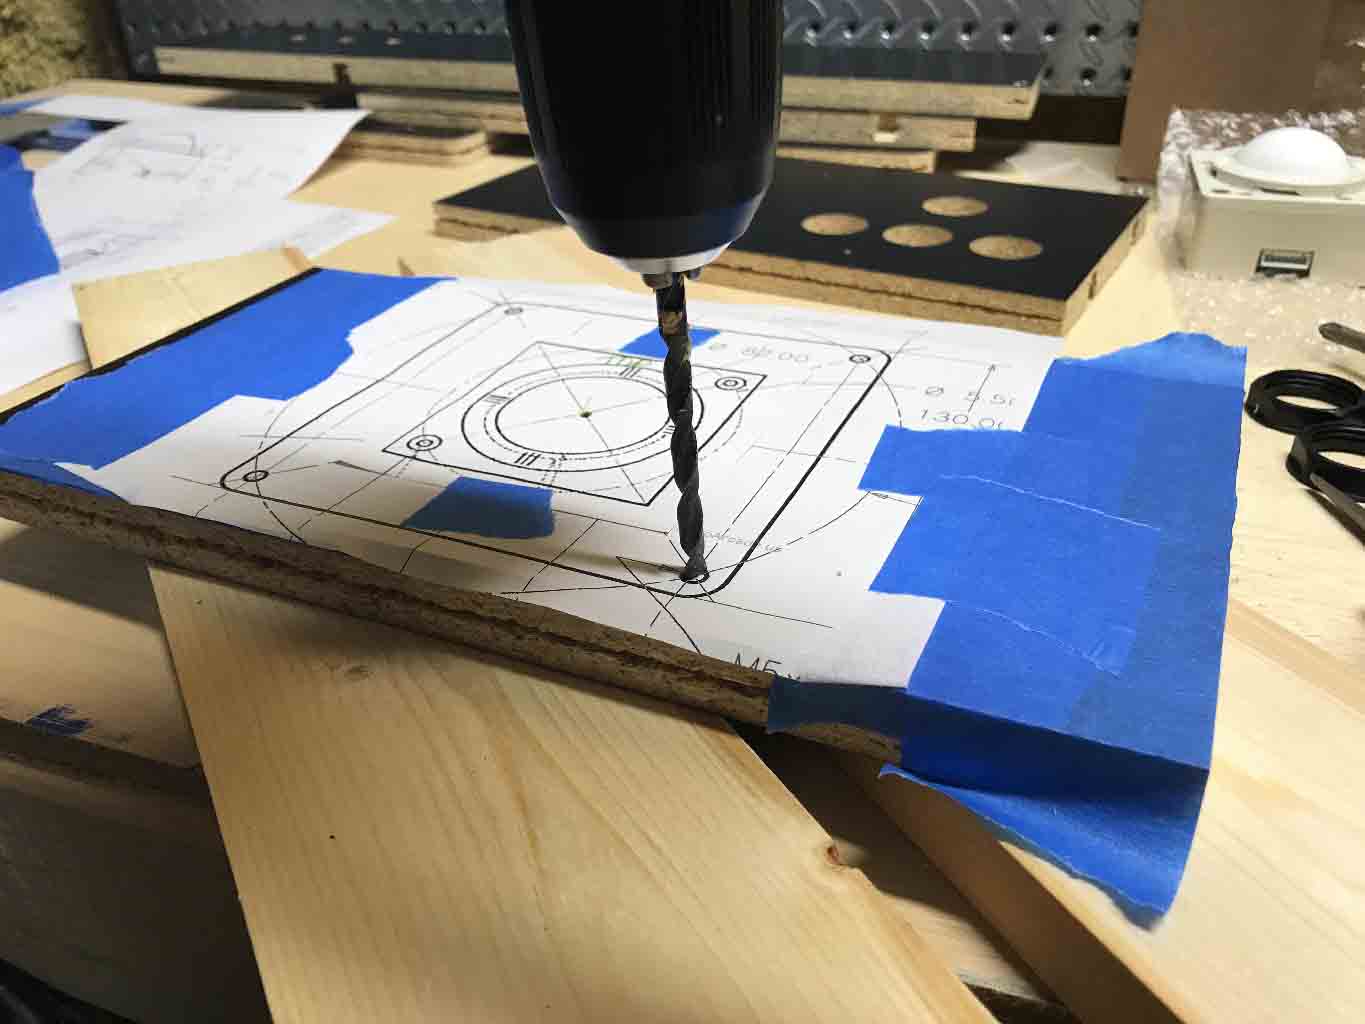
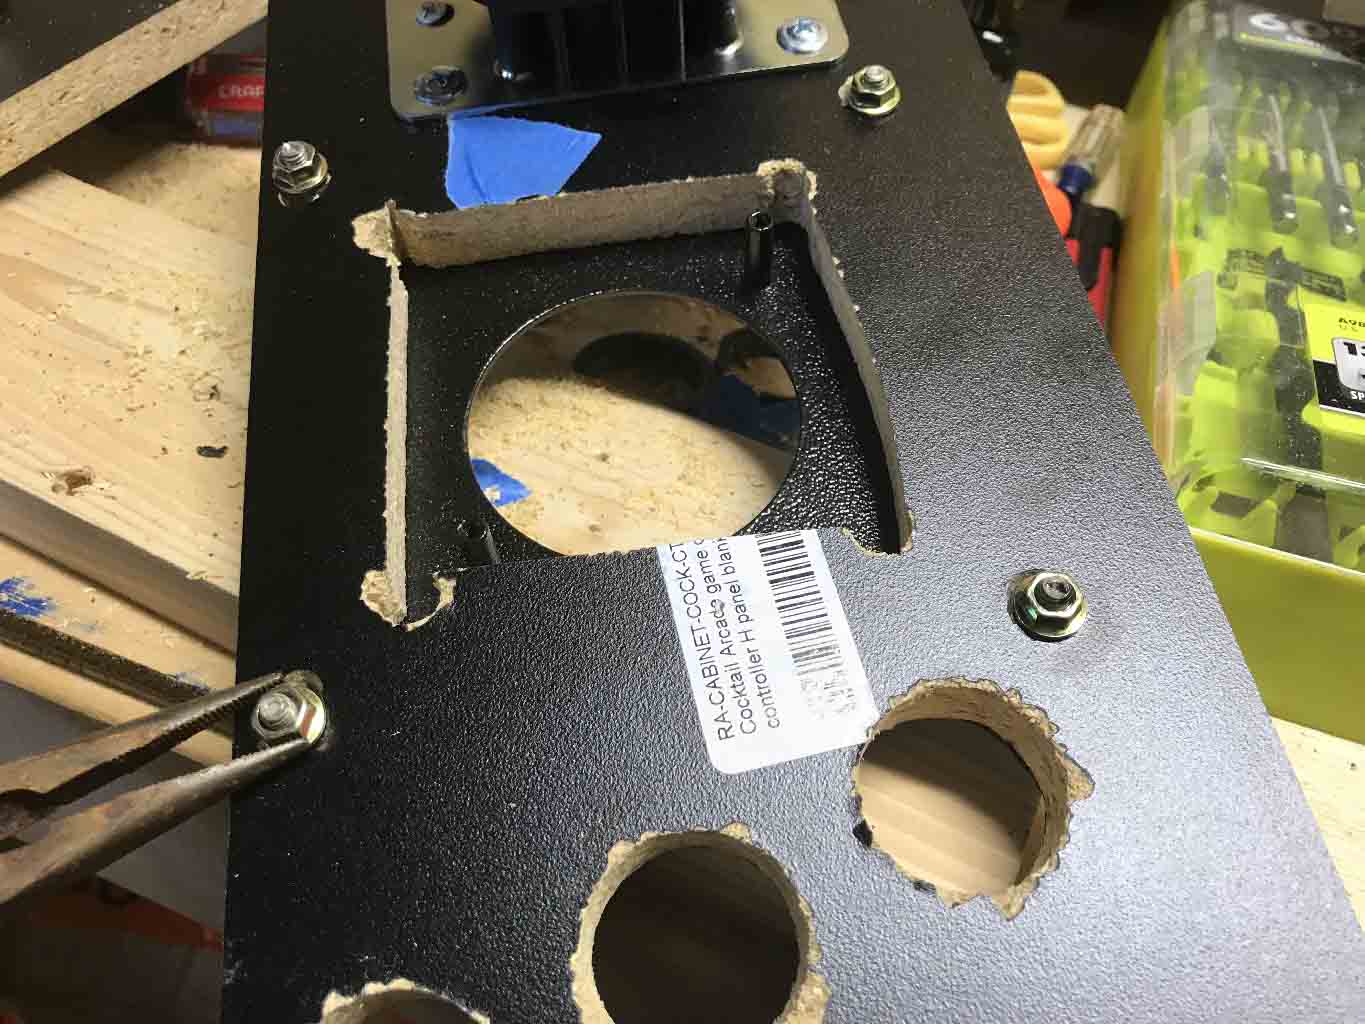
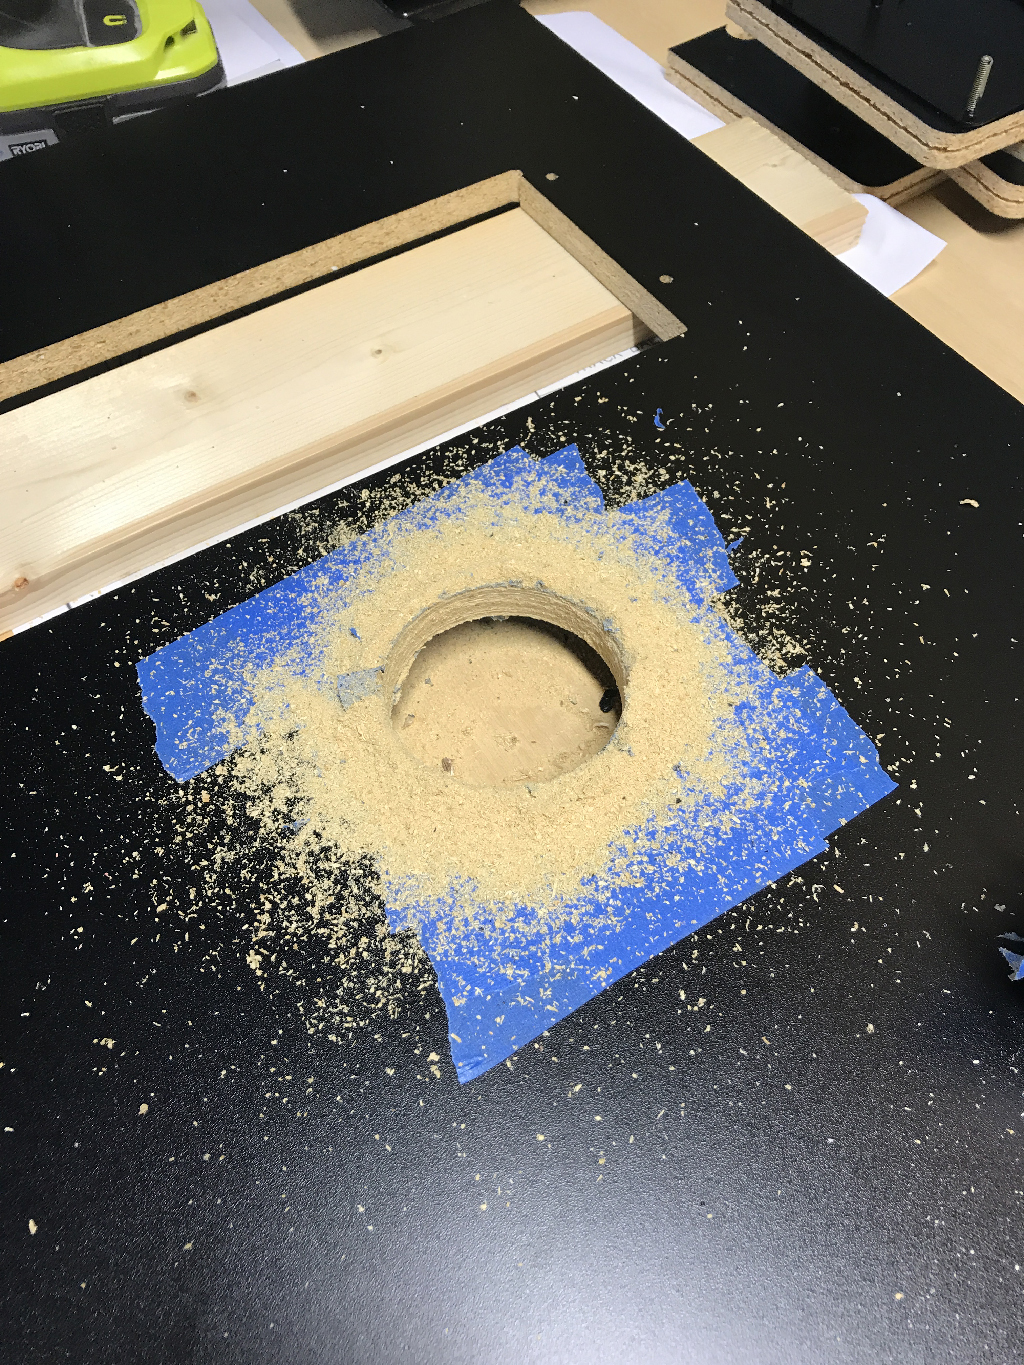
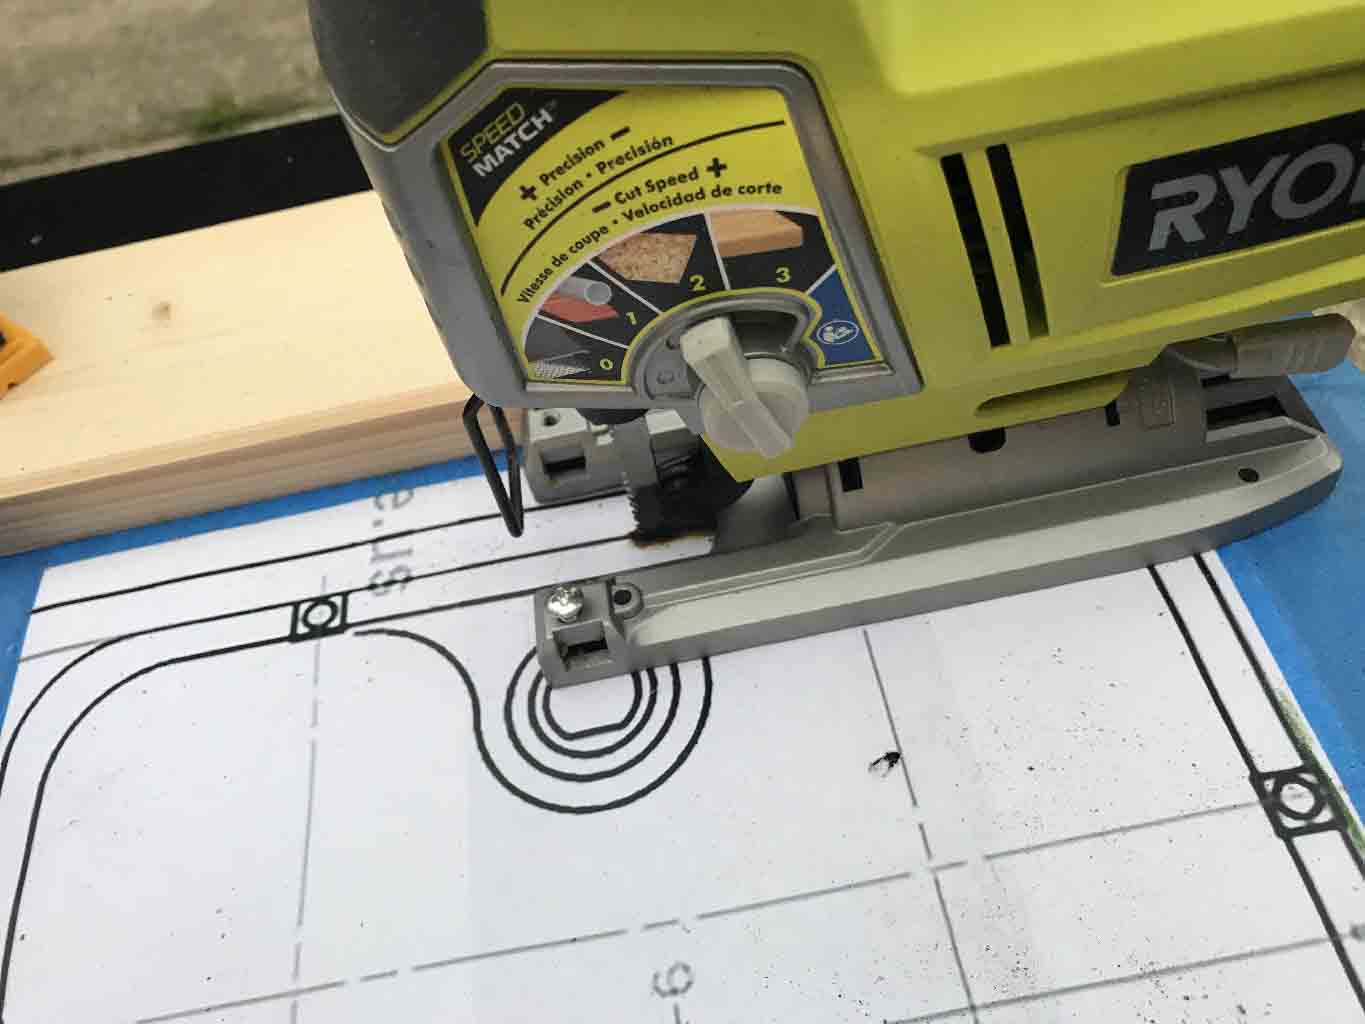
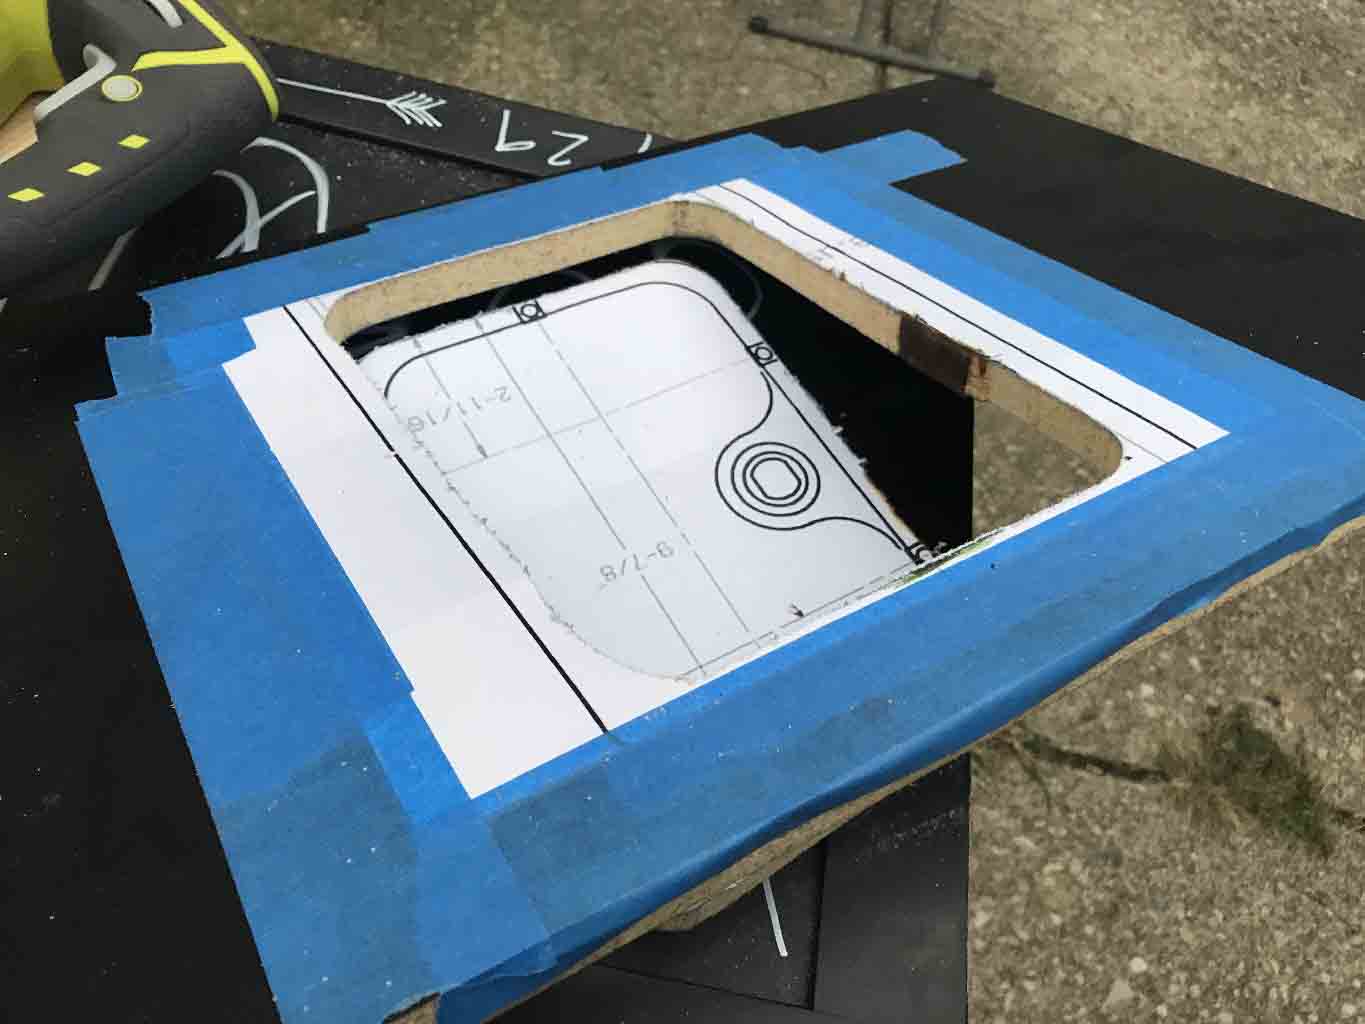
The mount for the trackball uses four drilled holes and a cut out square. Luckily the cut out area has a lot of room for play – so it didn’t need to be “perfect”. After drilling the correct size holes I drilled starter holes in the corners of the cut-out area and then used a jigsaw to cut the rest of the opening.
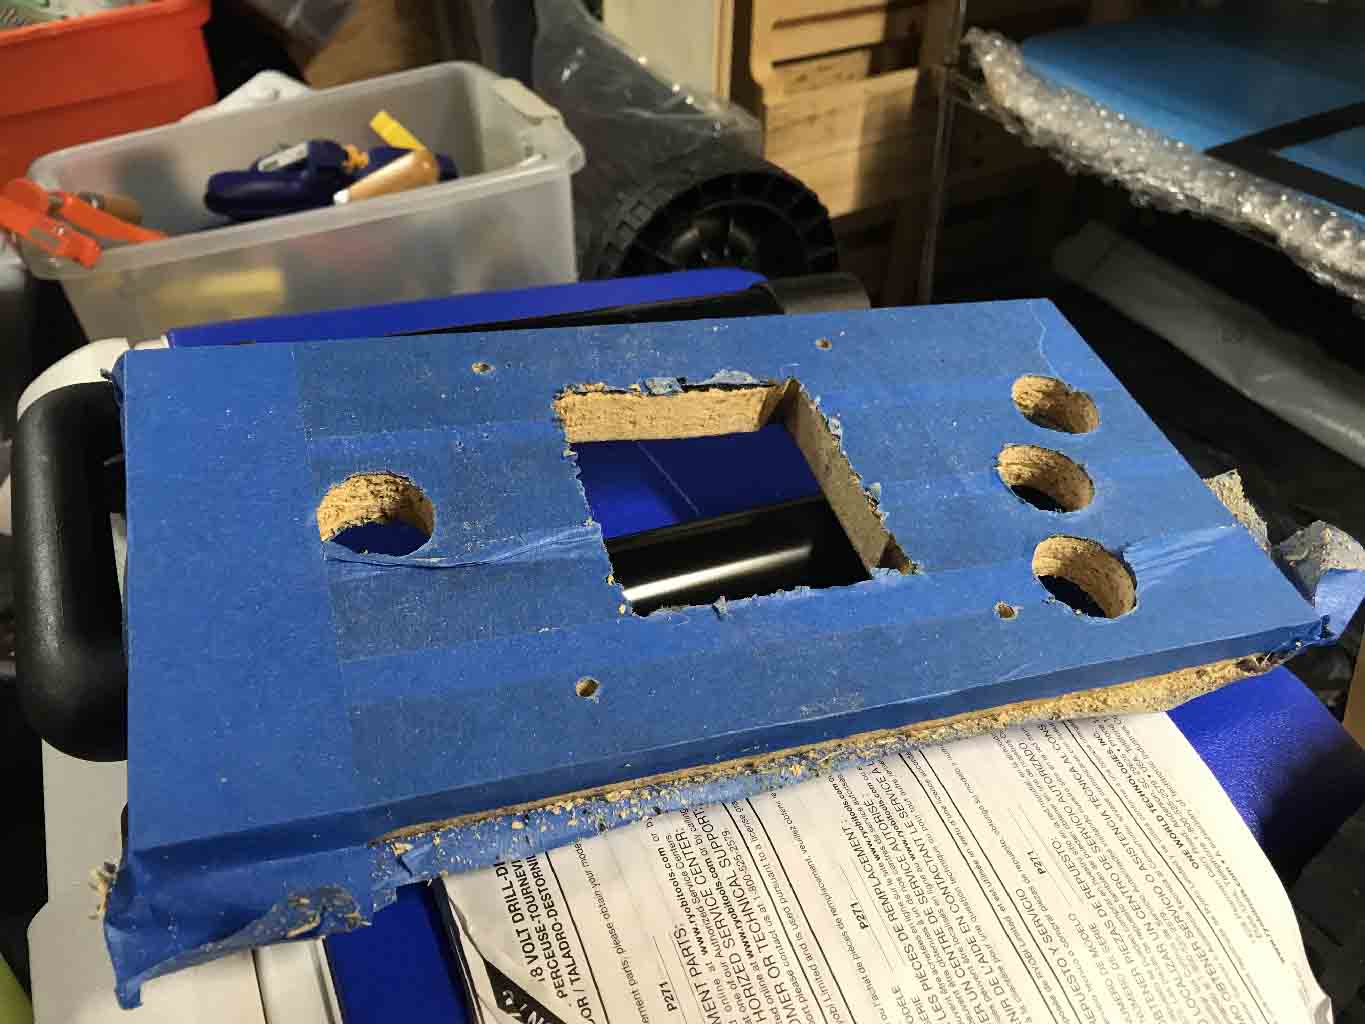
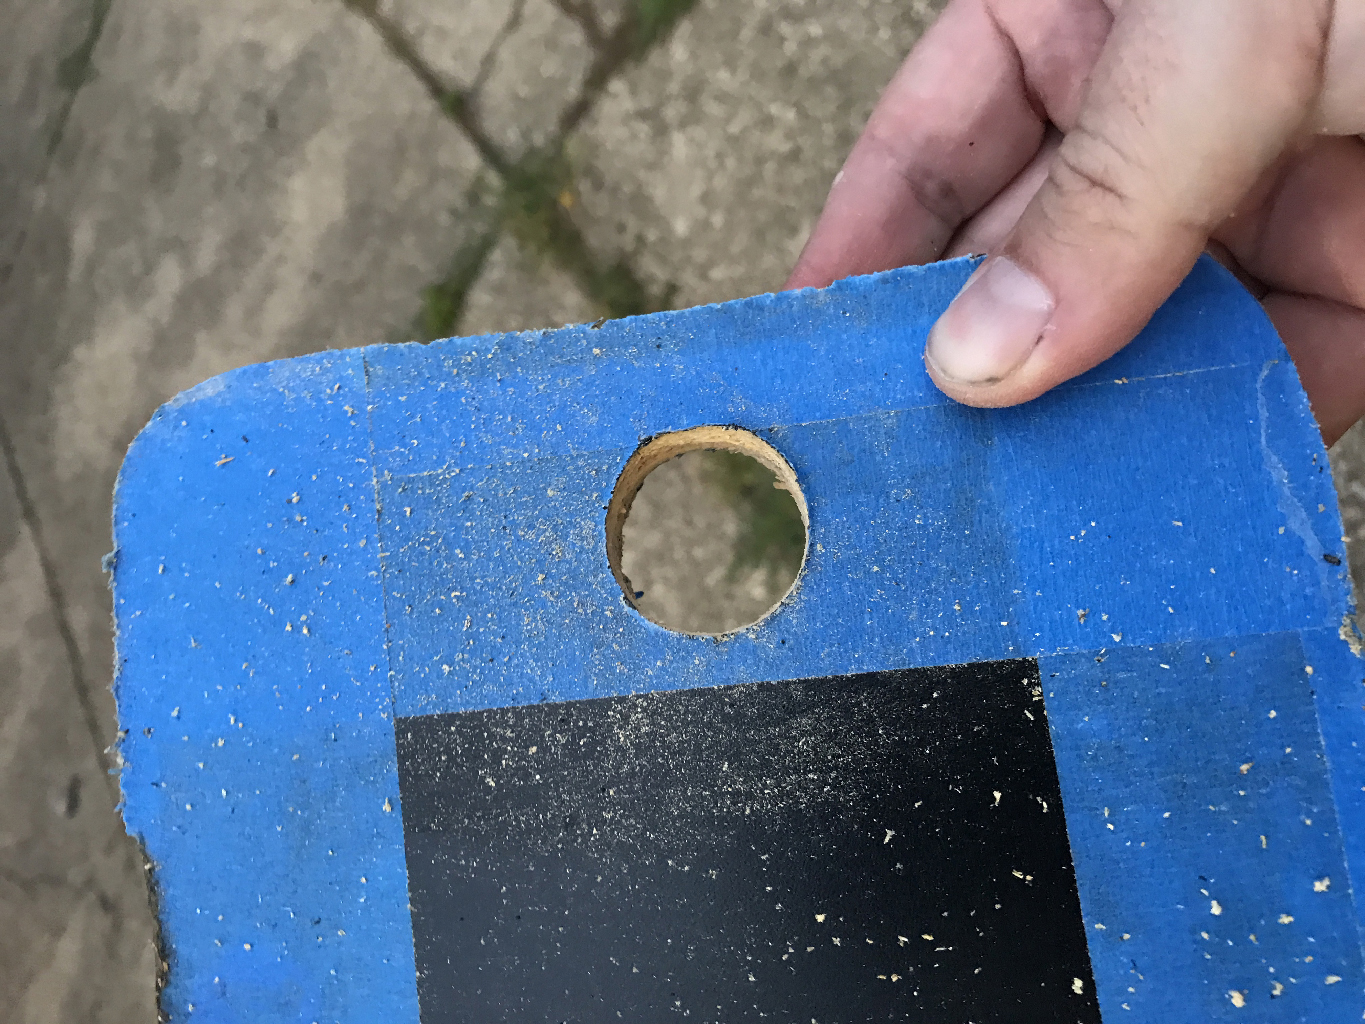
I covered both sides of the panel with painter’s tape to keep the melamine from chipping too badly. Before you cut, be sure you have the wood panel oriented properly. Which is top? Which is bottom? Which is front? Which is back? How the trackball gets mounted is pretty interesting!

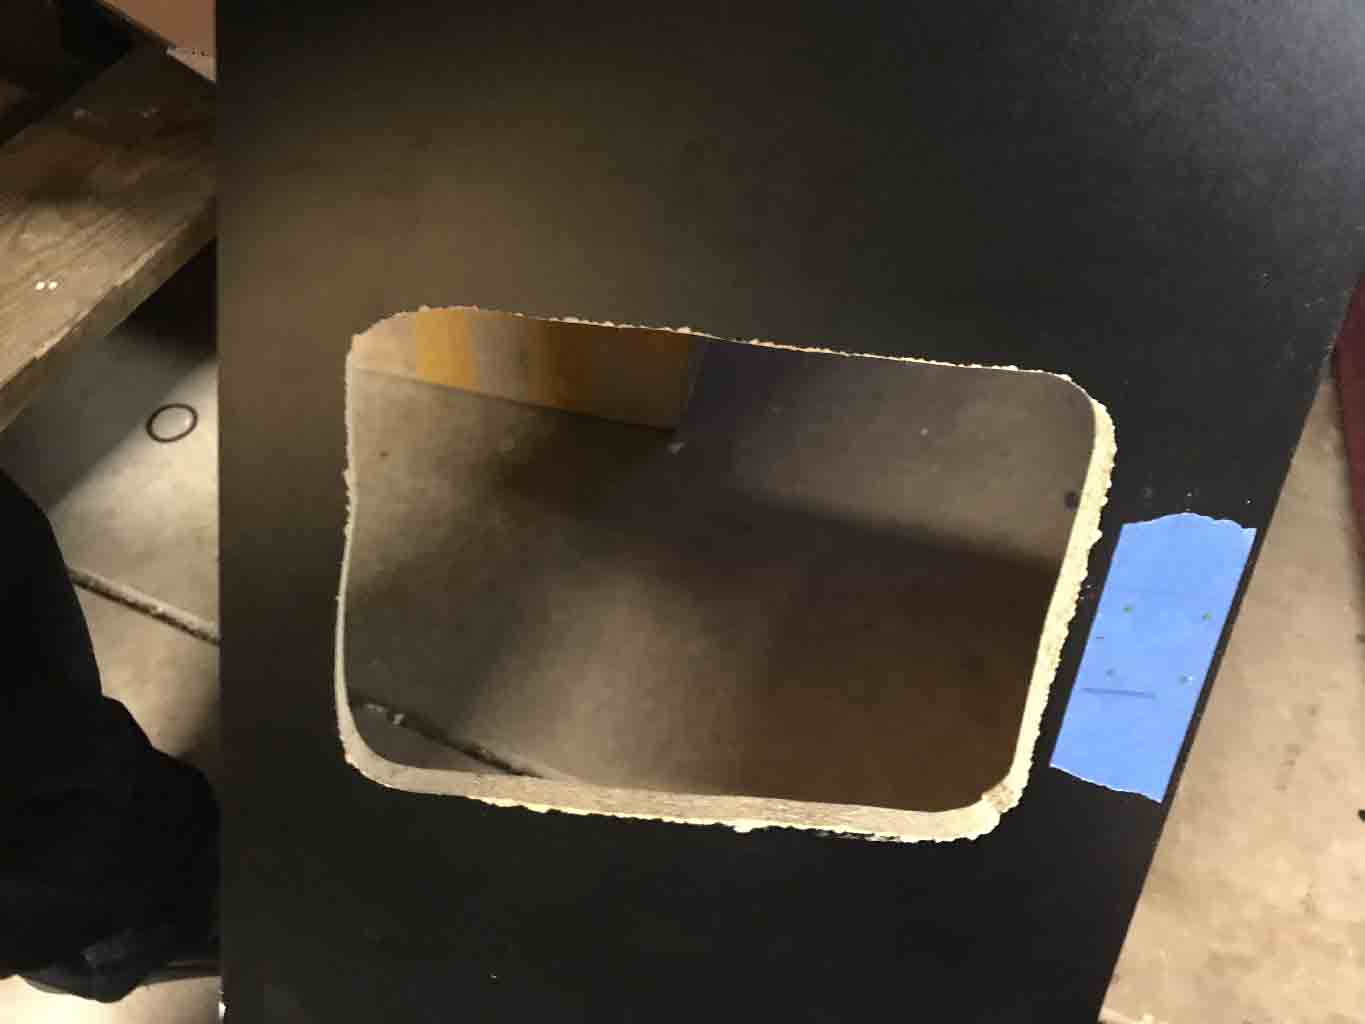
Looks good right? Well, it isn’t – but let’s get back to that.
I also drilled the holes for the side buttons i.e. flippers.
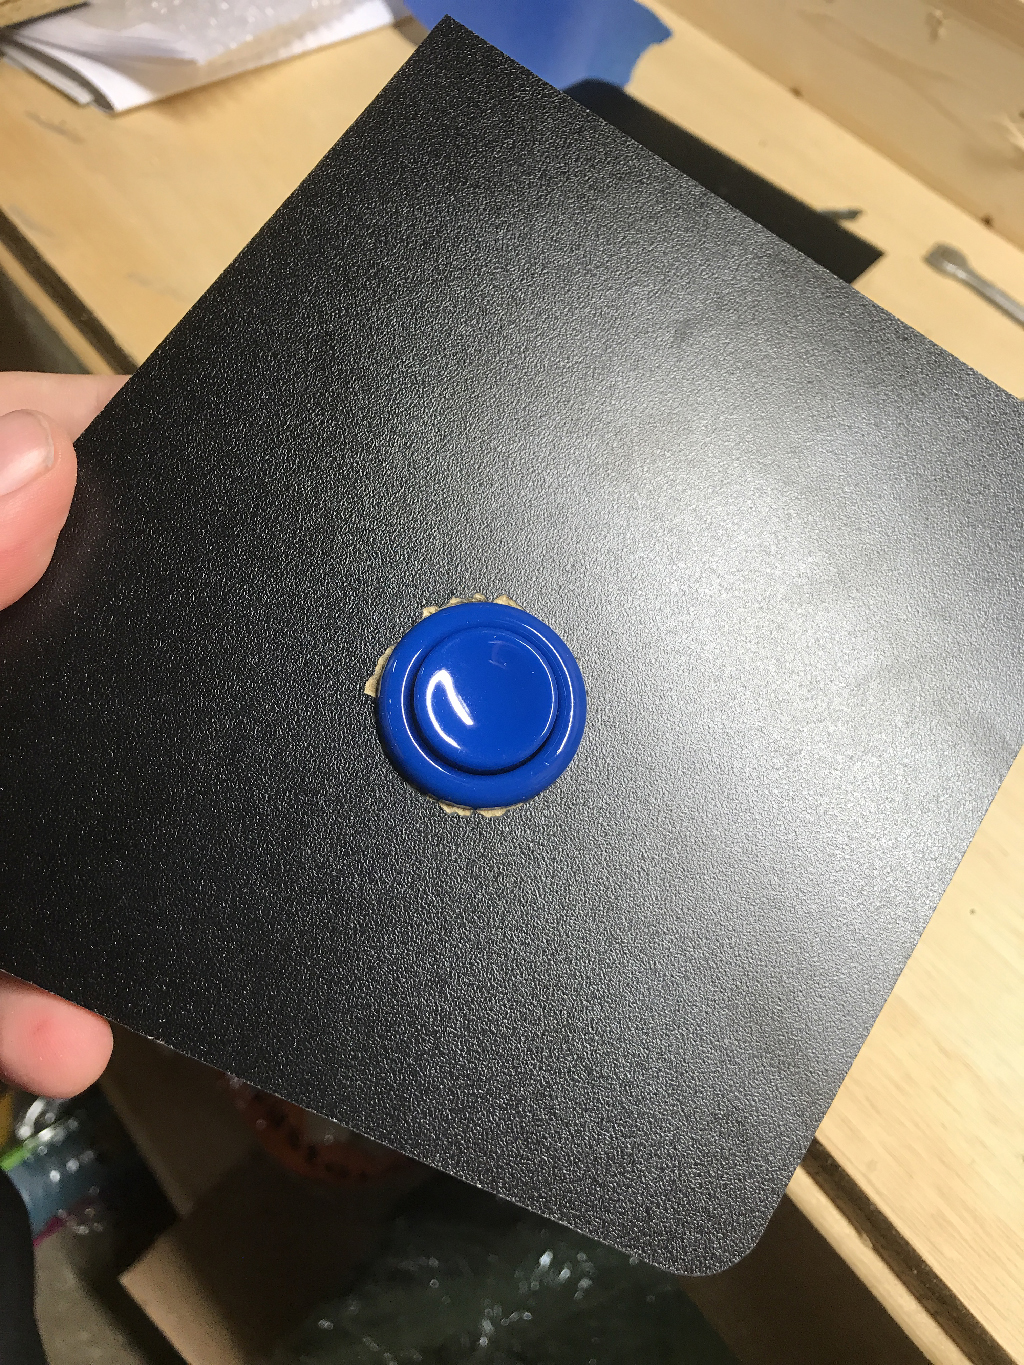

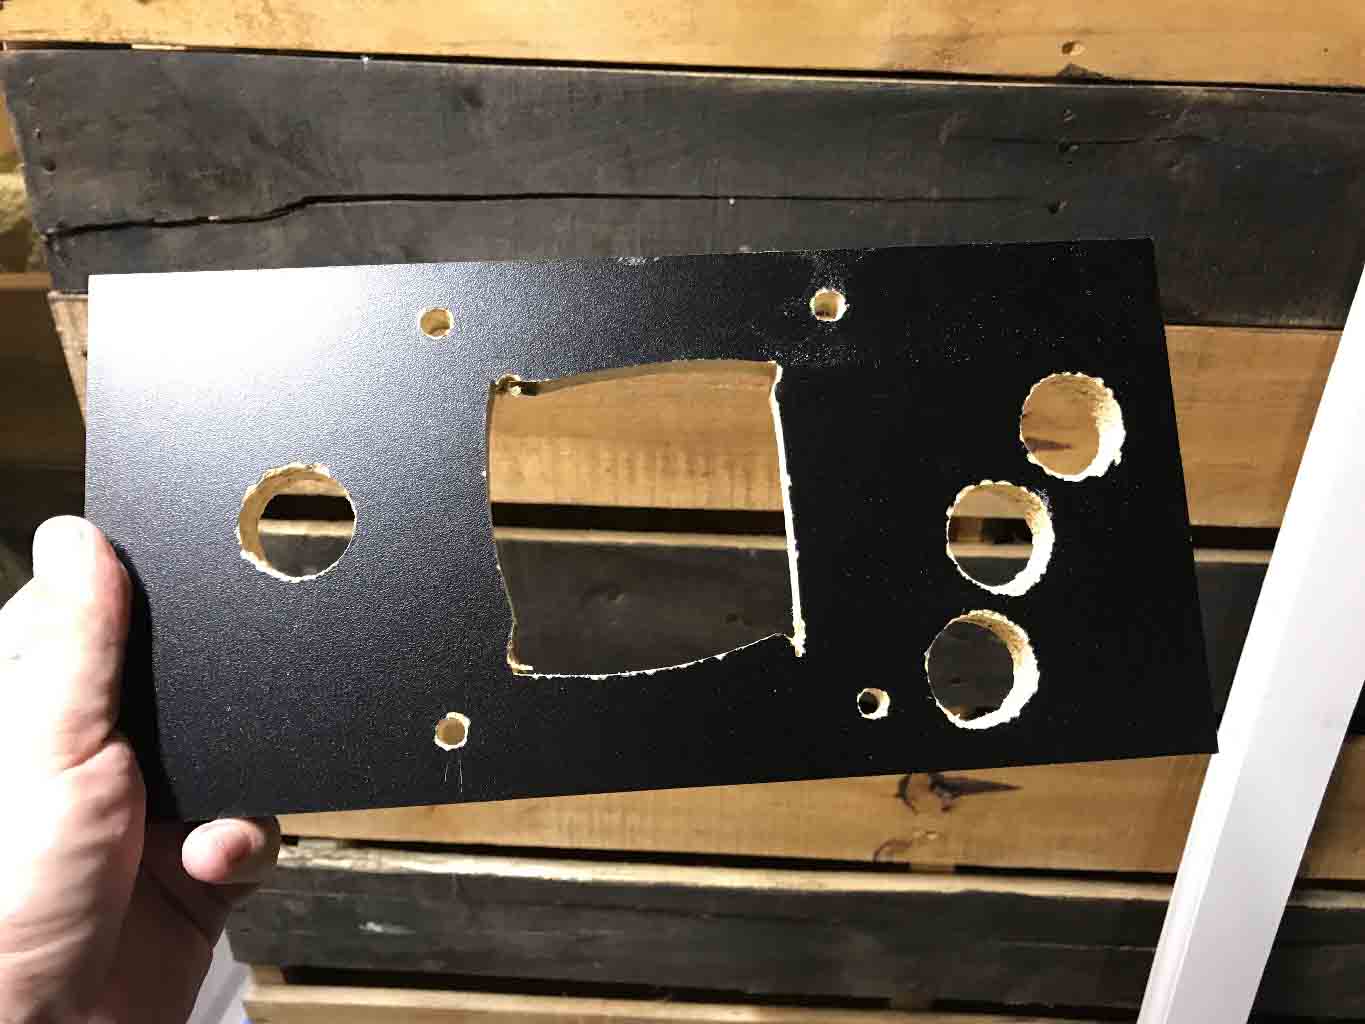
Even though I taped the board the melamine still chipped. Chipped so bad you could see it around the buttons (and yes 1 1/8″ is the right size). I used some black enamel (i.e. nail polish) to seal the chipping and cover up the damage. It might look obvious here, but you can barely see it in the finished unit.

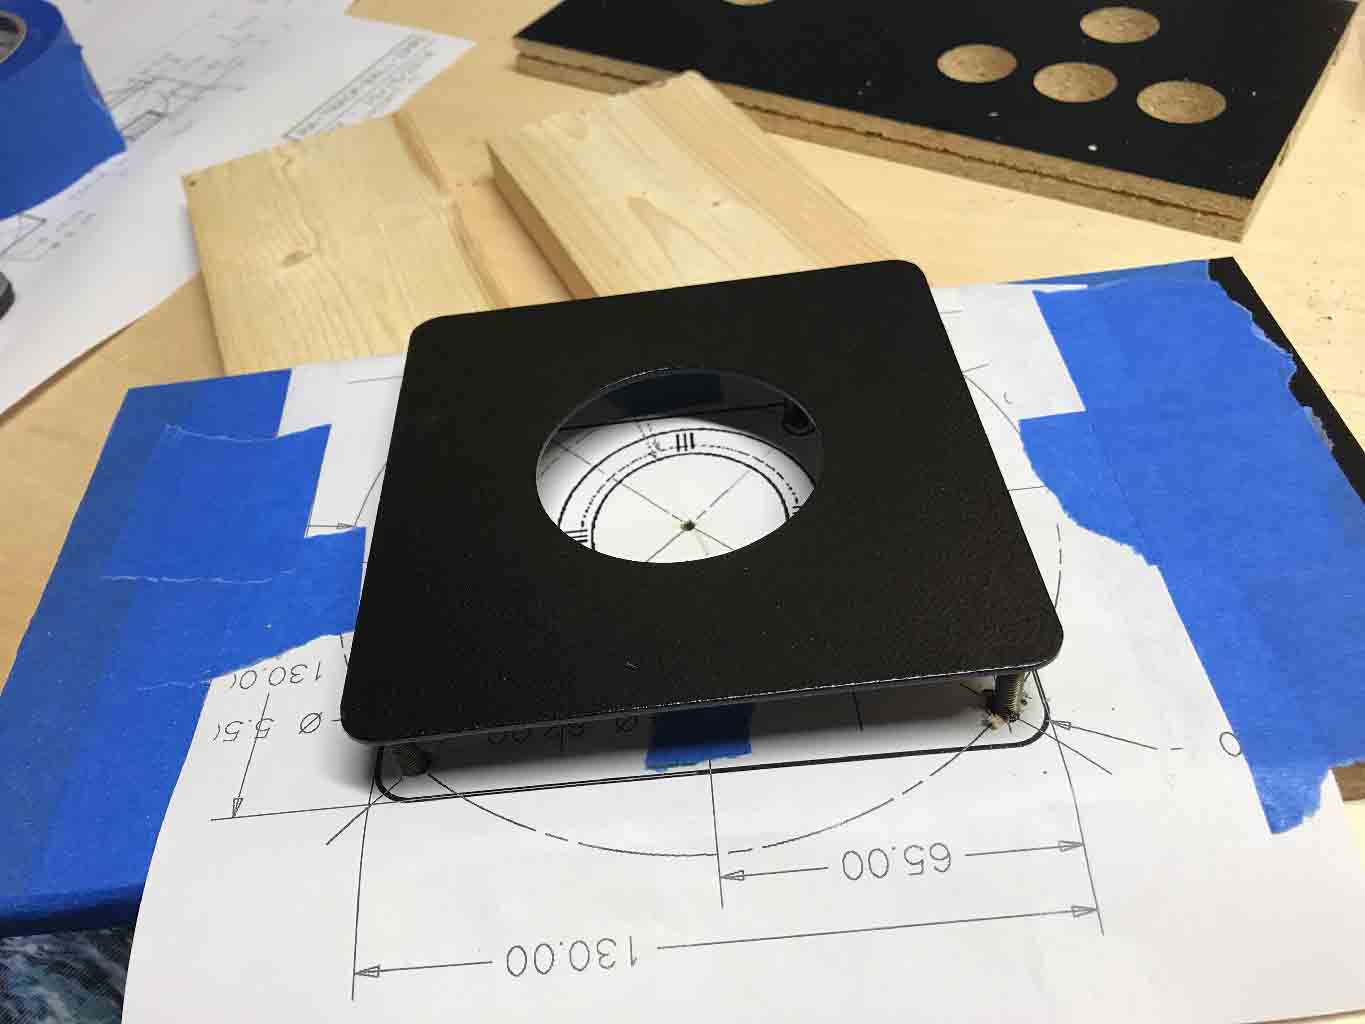
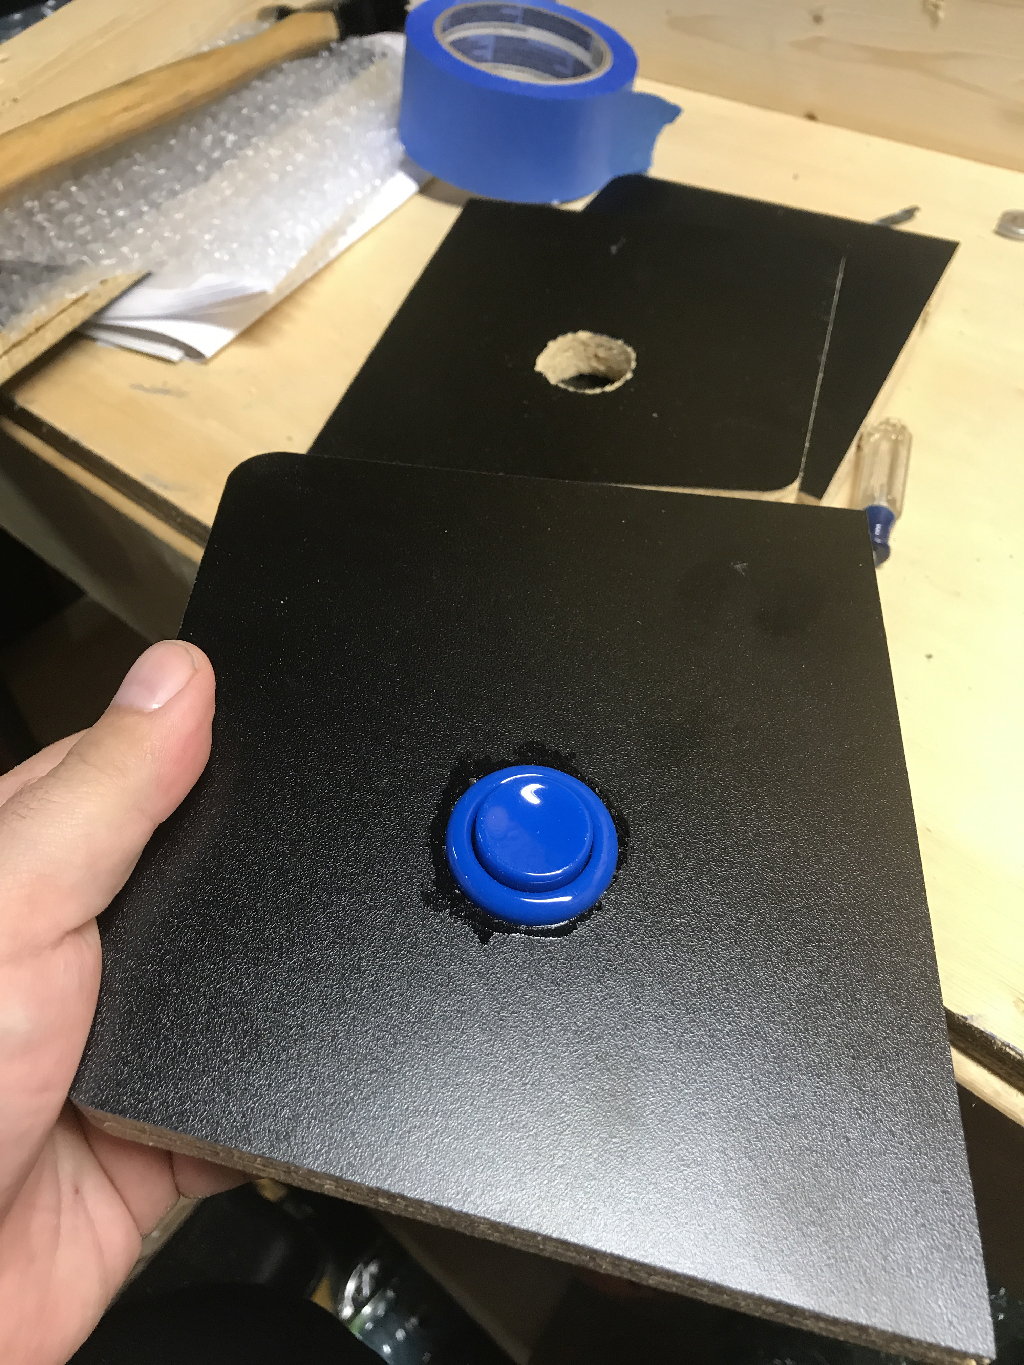
Now it’s time to assemble the boards using the cams. And that’s when I realized I screwed up. I didn’t take into account the front overhang. The metal posts for the trackball mounting plate would go right through the front board – which doesn’t work! 🙁 Luckily I purchased some extra blanks – and printed out some extra templates – and had more blue tape.
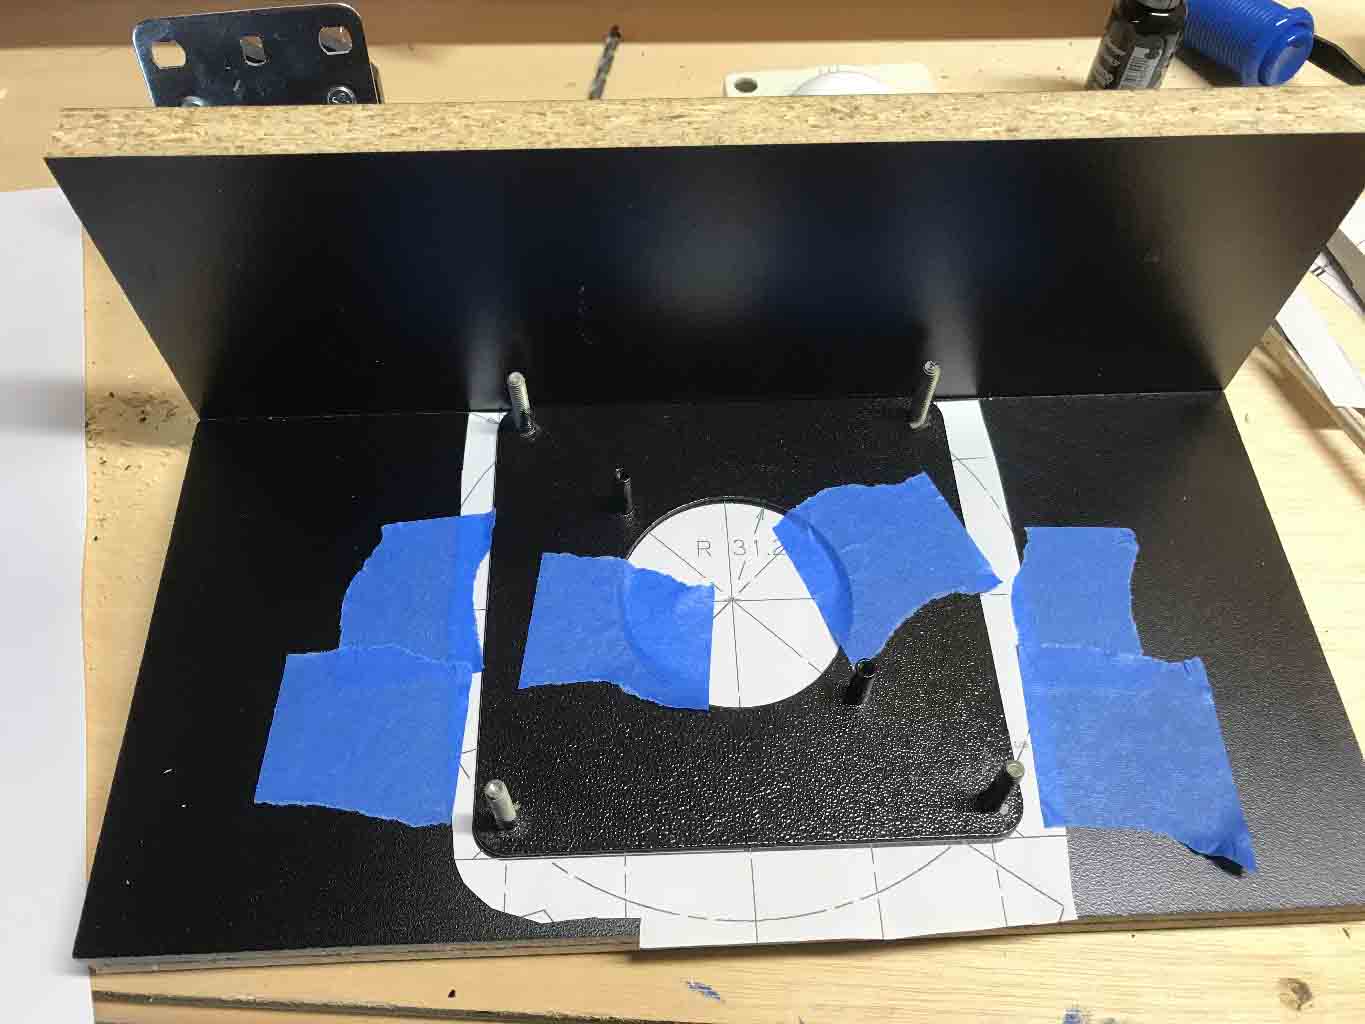
This time I centered the trackball left to right but pushed the mounting plate the the very EDGE of the board (away from me). The board in the picture on the left is there just to keep things flush.
![]()
Re-cut and re-drilled (on a new board) it was still going to be a tight fit. After screwing the mounting plate into place the nuts would till hit the front panel. But now there was enough clearance that I could partially bore or chisel to make room for the nuts to be covered but not go through the front board.
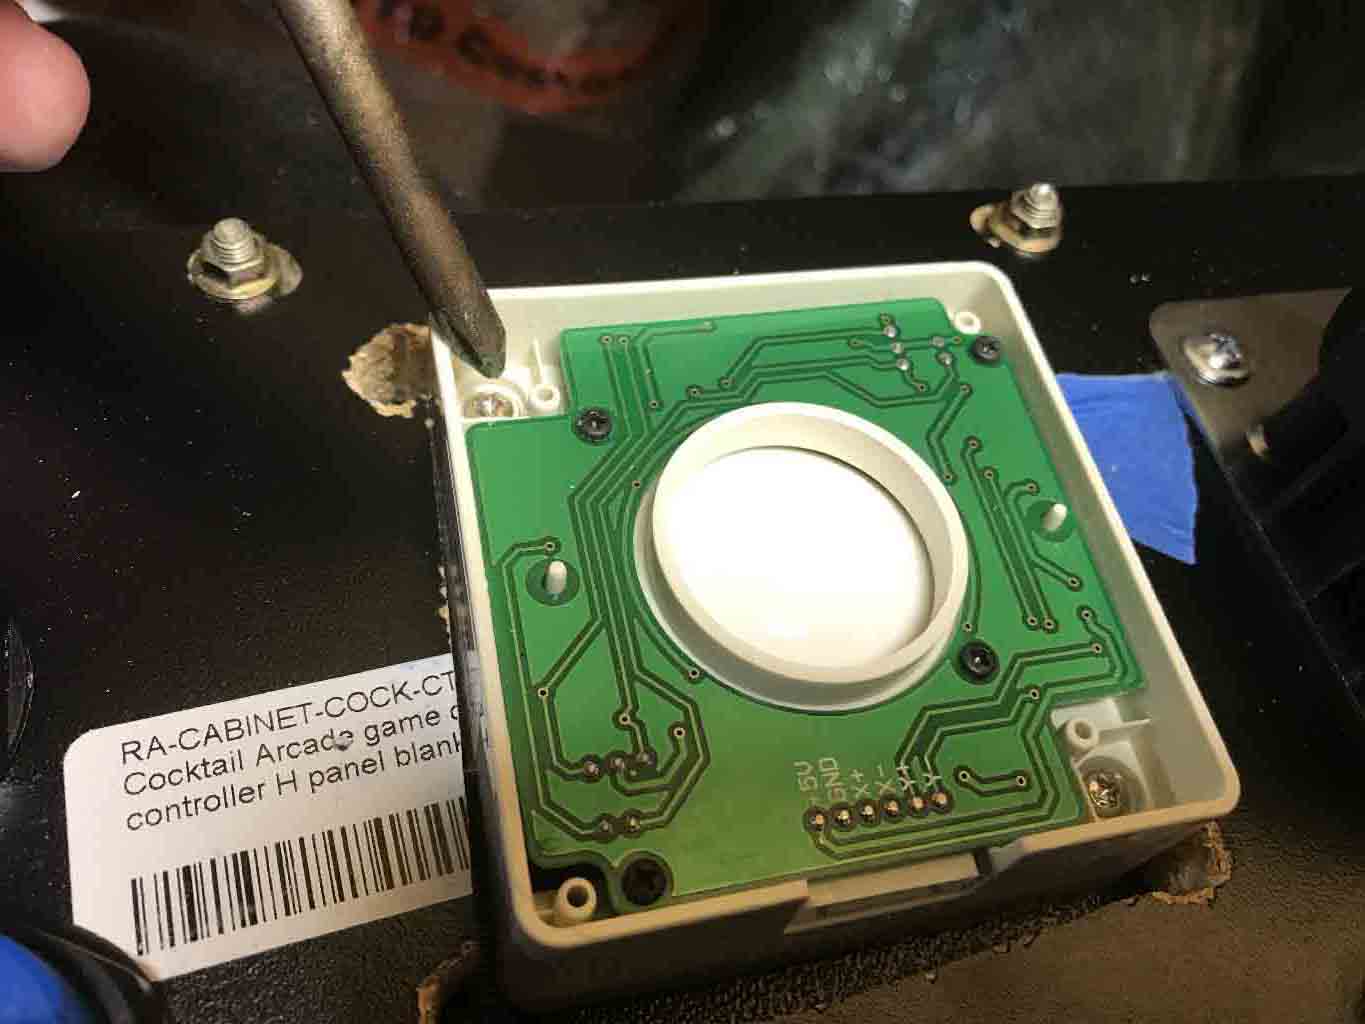
The trackball gets screwed into the mounting plate.

And I drill into the front boards for the start buttons.
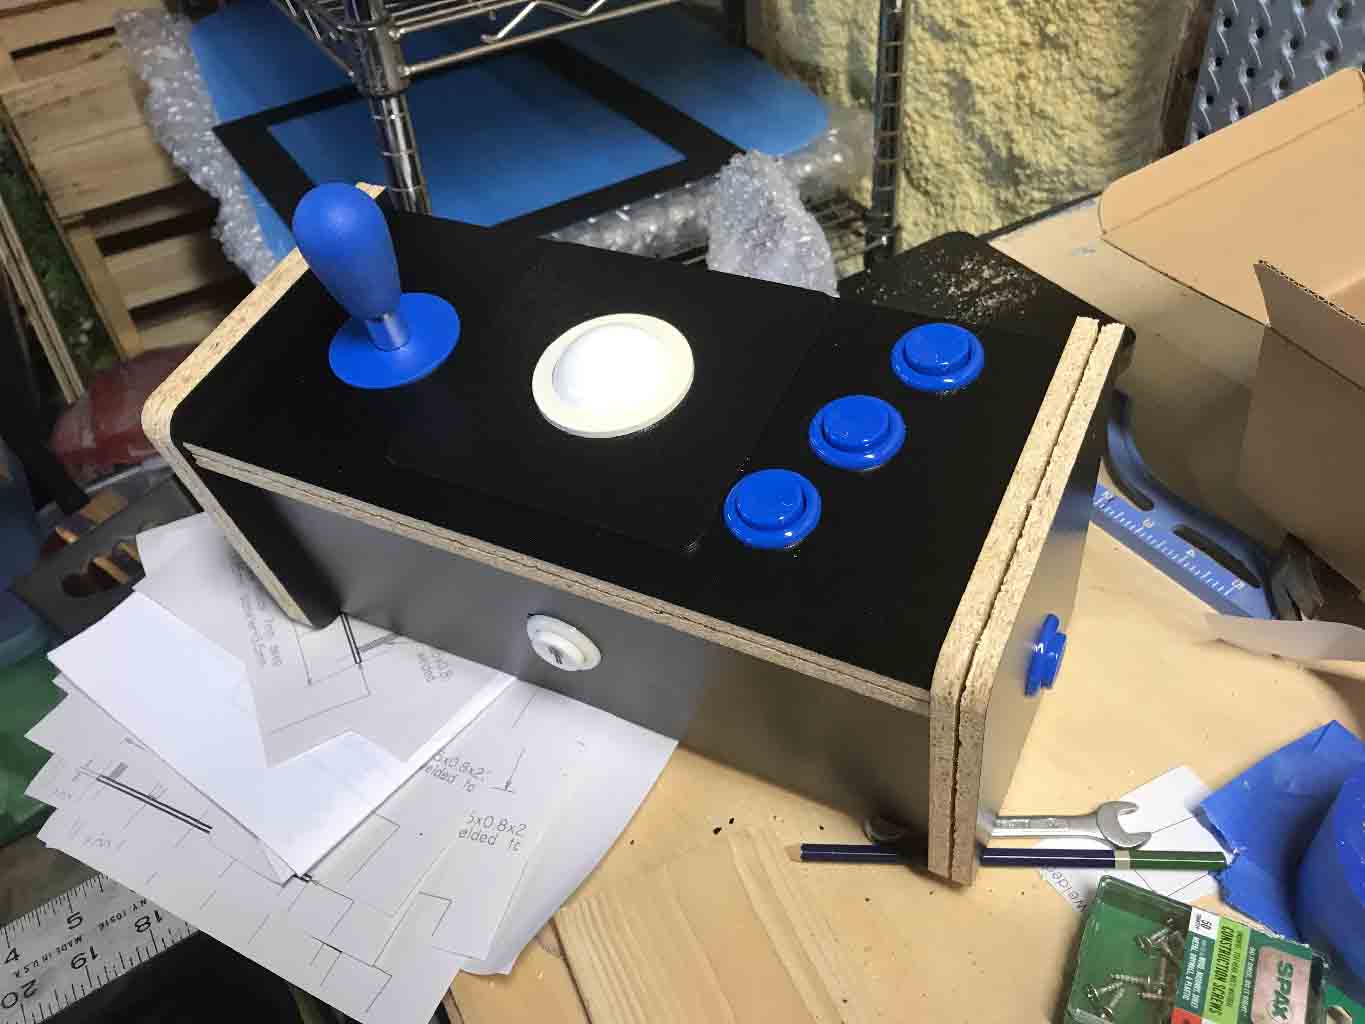
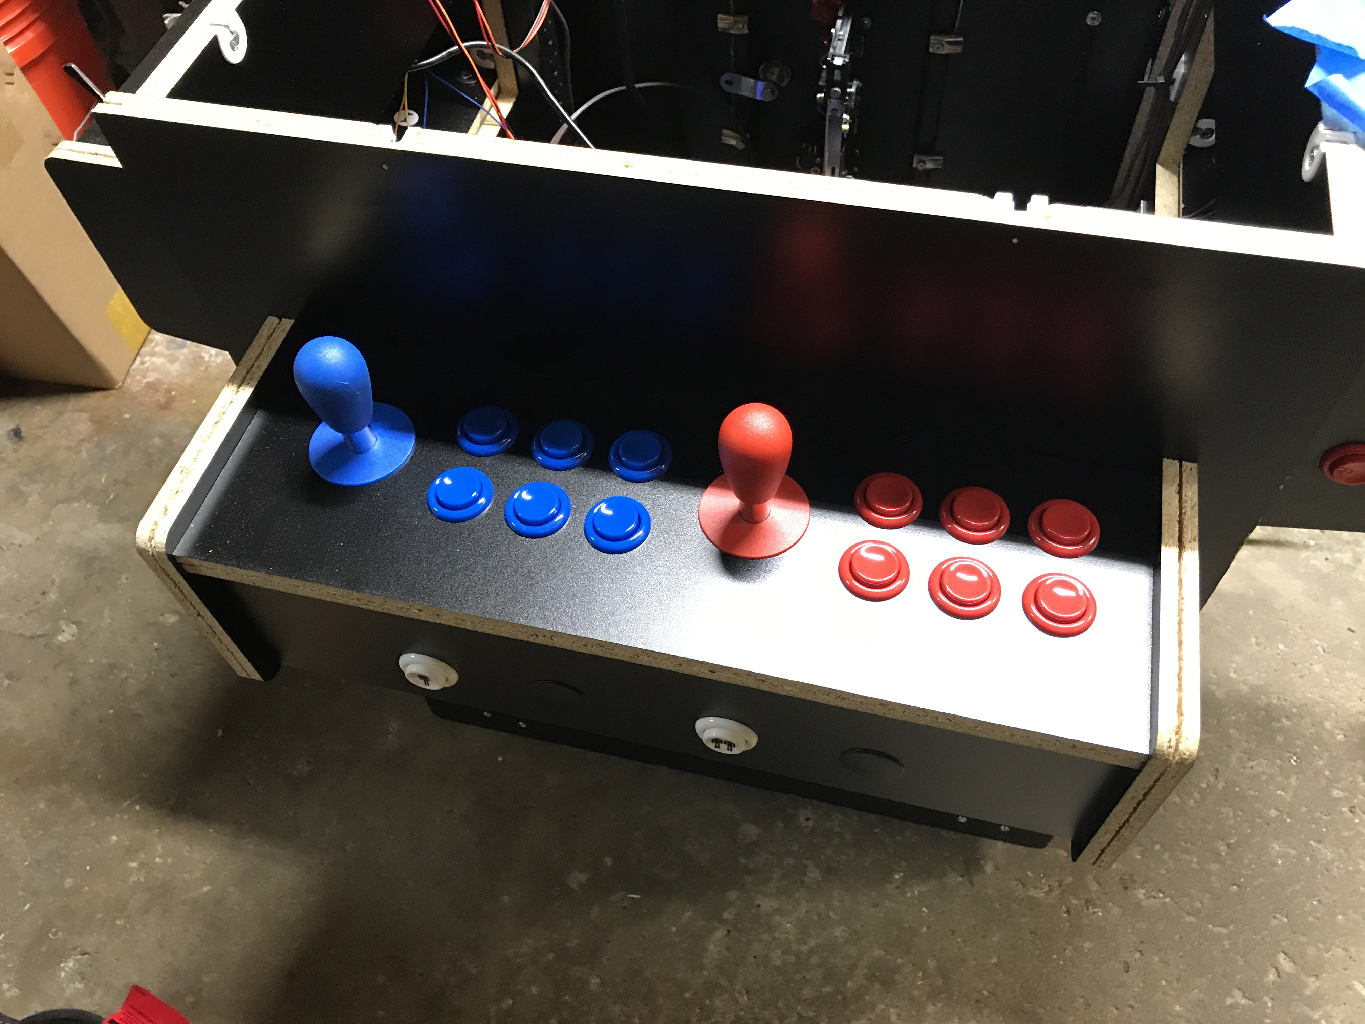
Tada! Now it all fits. 1 joystick, 1 trackball, 3 game buttons, 2 side flipper buttons (a repeat of buttons 1 and 2), and a front start button. And then do it all again for player 2!
The Head to Head Controller


The head to head kit was already pre-drilled so it was just a matter of putting it all together. There were extra front button holes so I used button caps.
Stereo Speakers
Most arcade units have one single speaker. I wanted to put stereo in (or even dual mono) so that for Player 1 or Player 2 or Head2Head it would sound good.
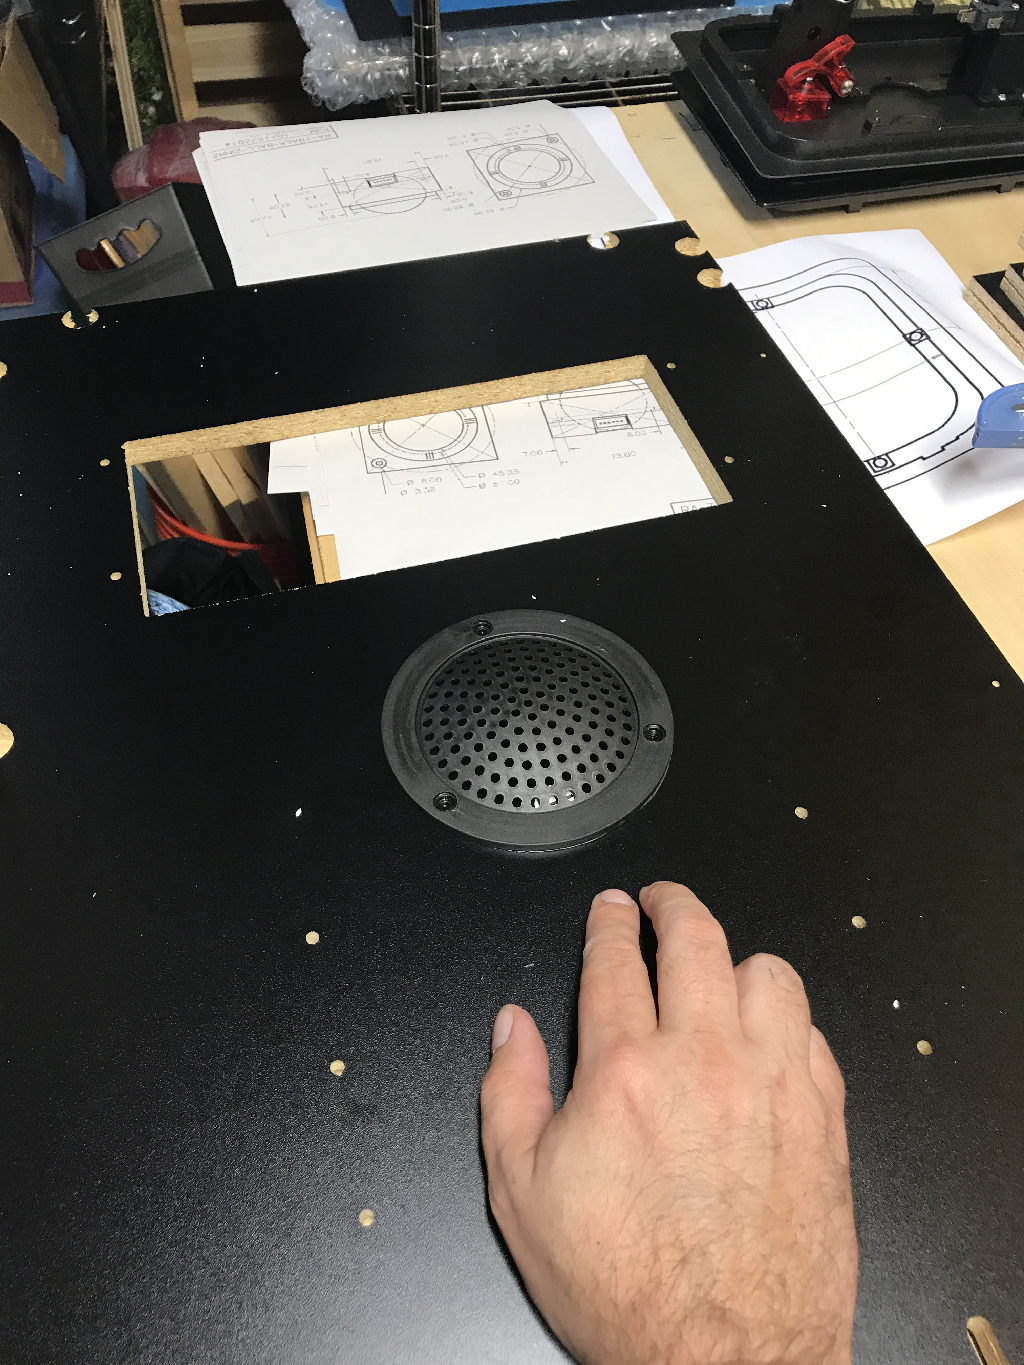
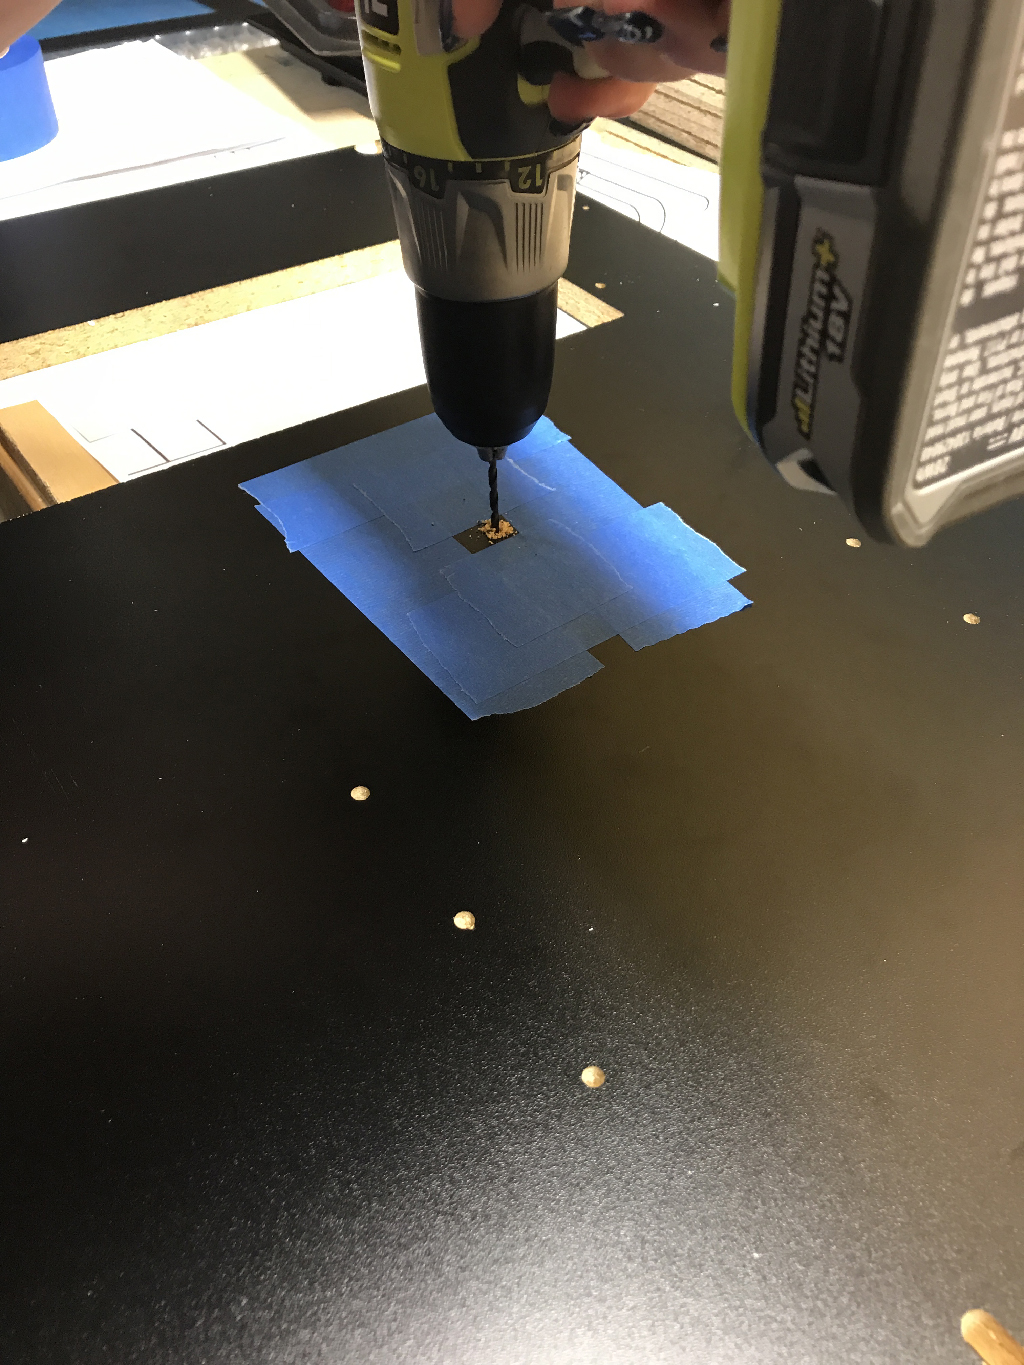
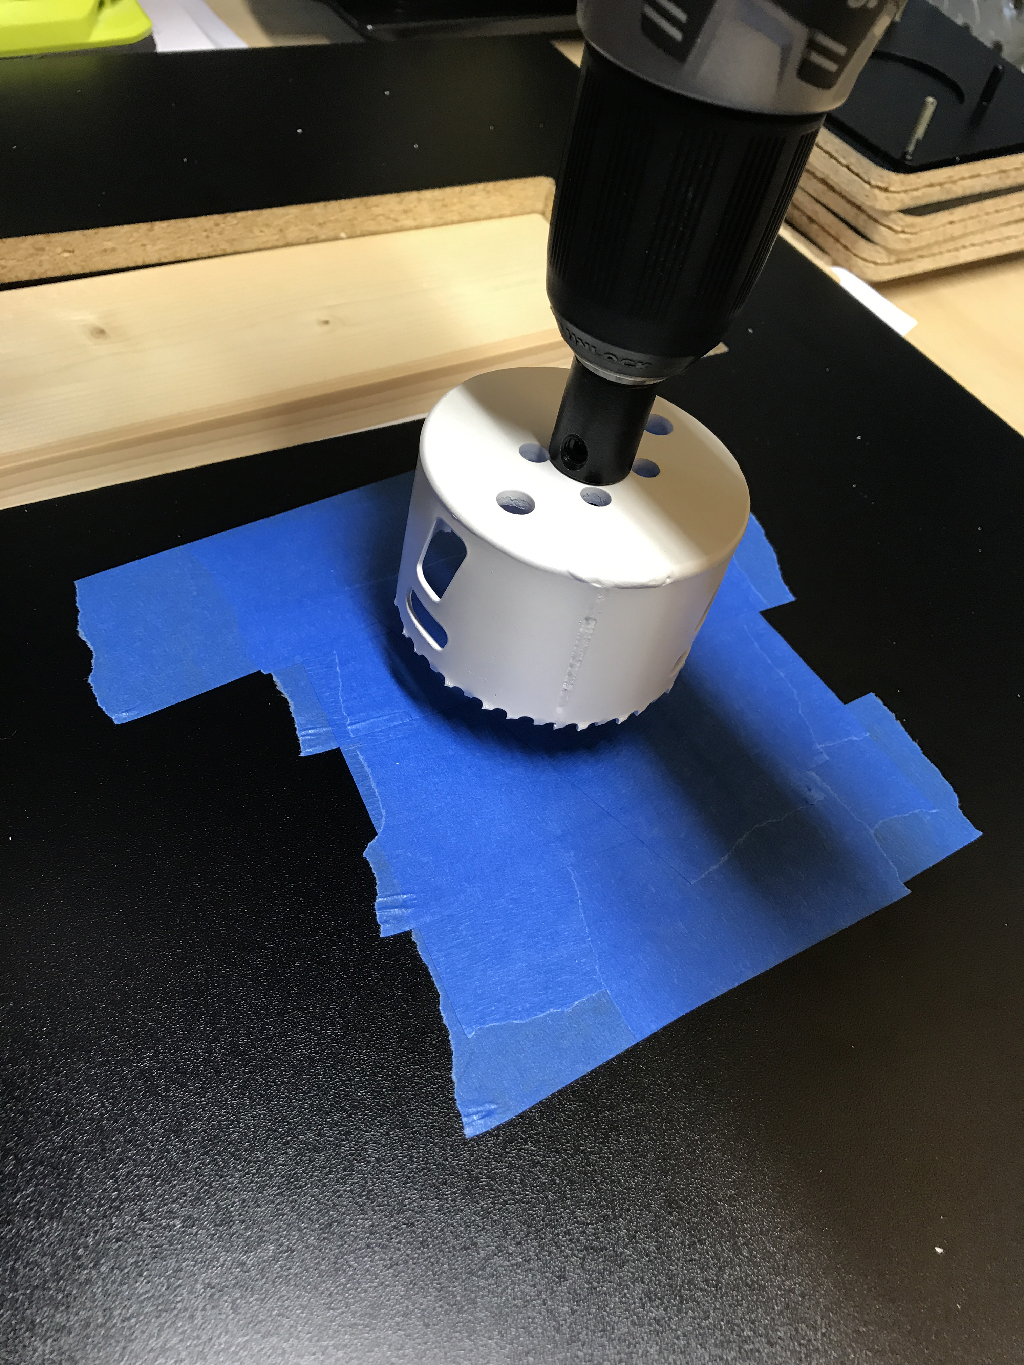
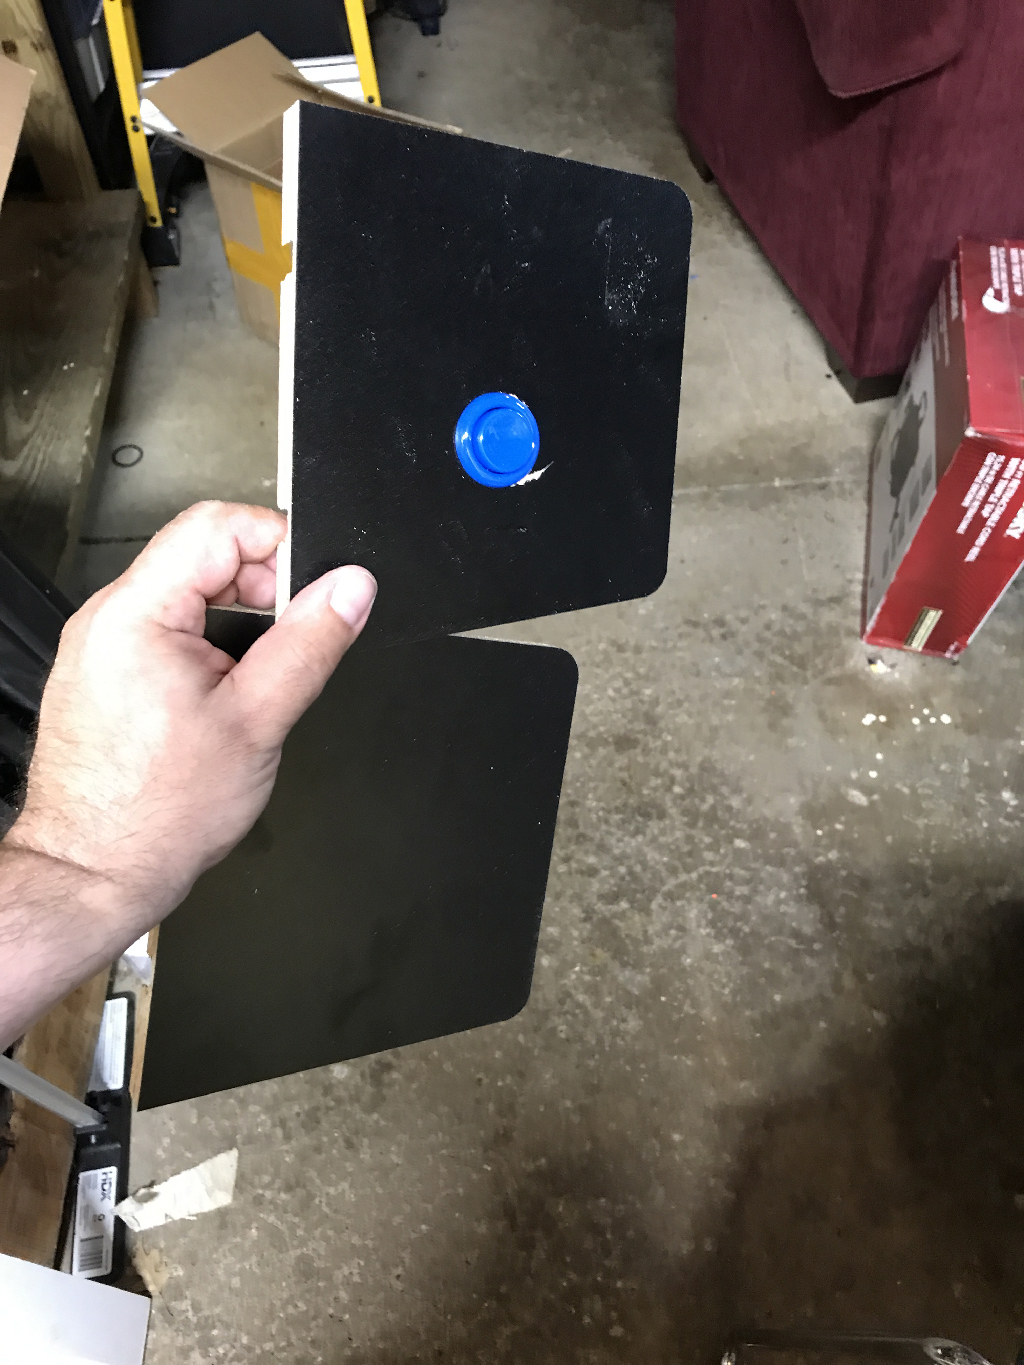
I decided where the speaker would go. Taped the spot (both sides), drilled a pilot and then cut the holes.
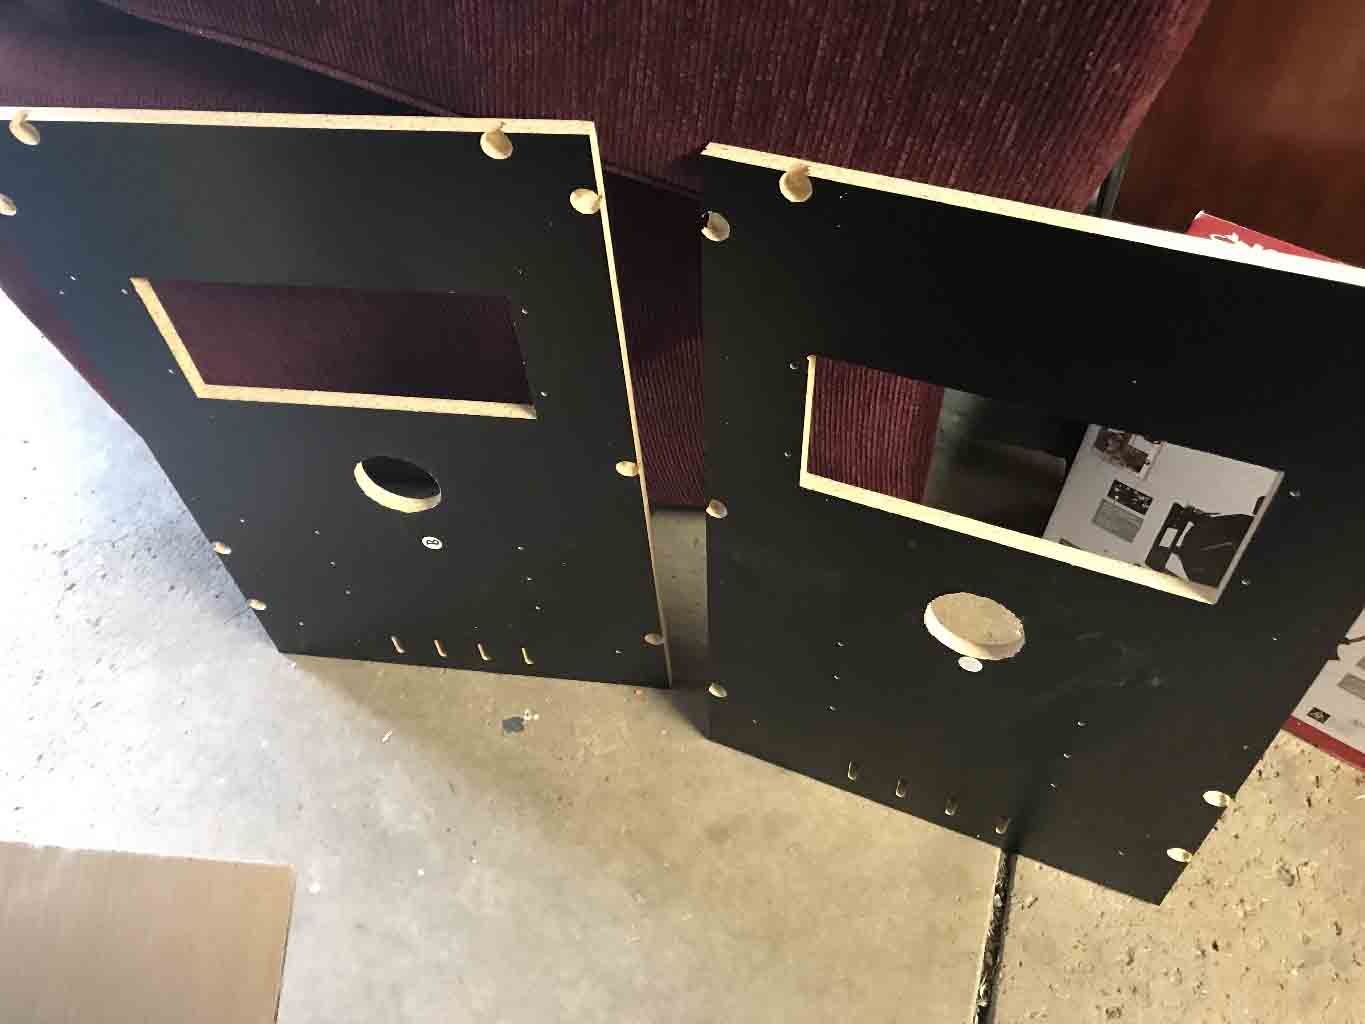
Both panels cut!
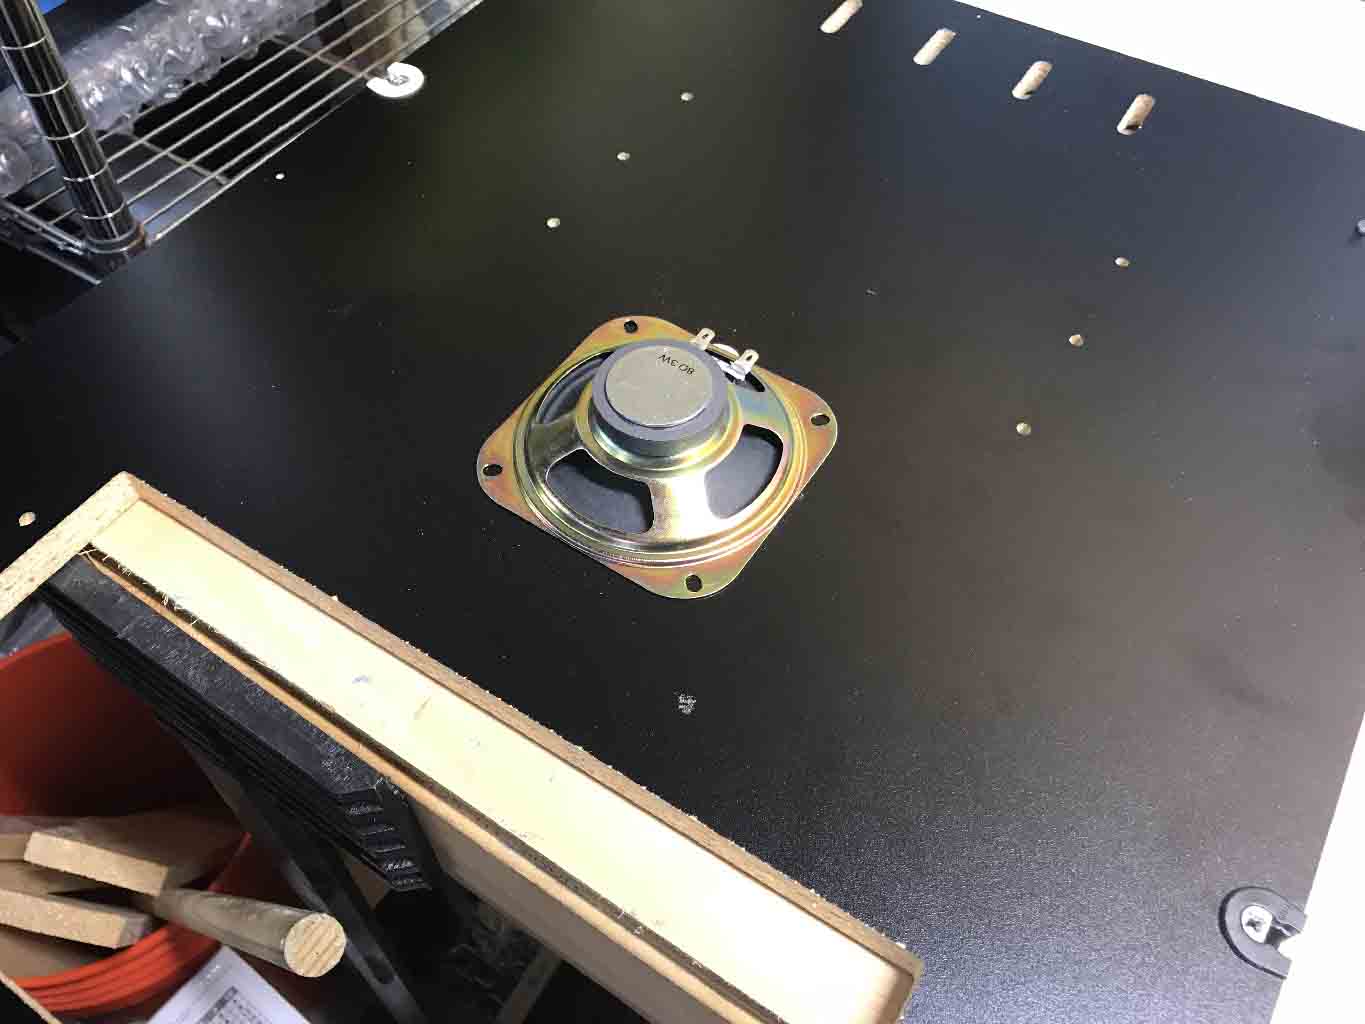

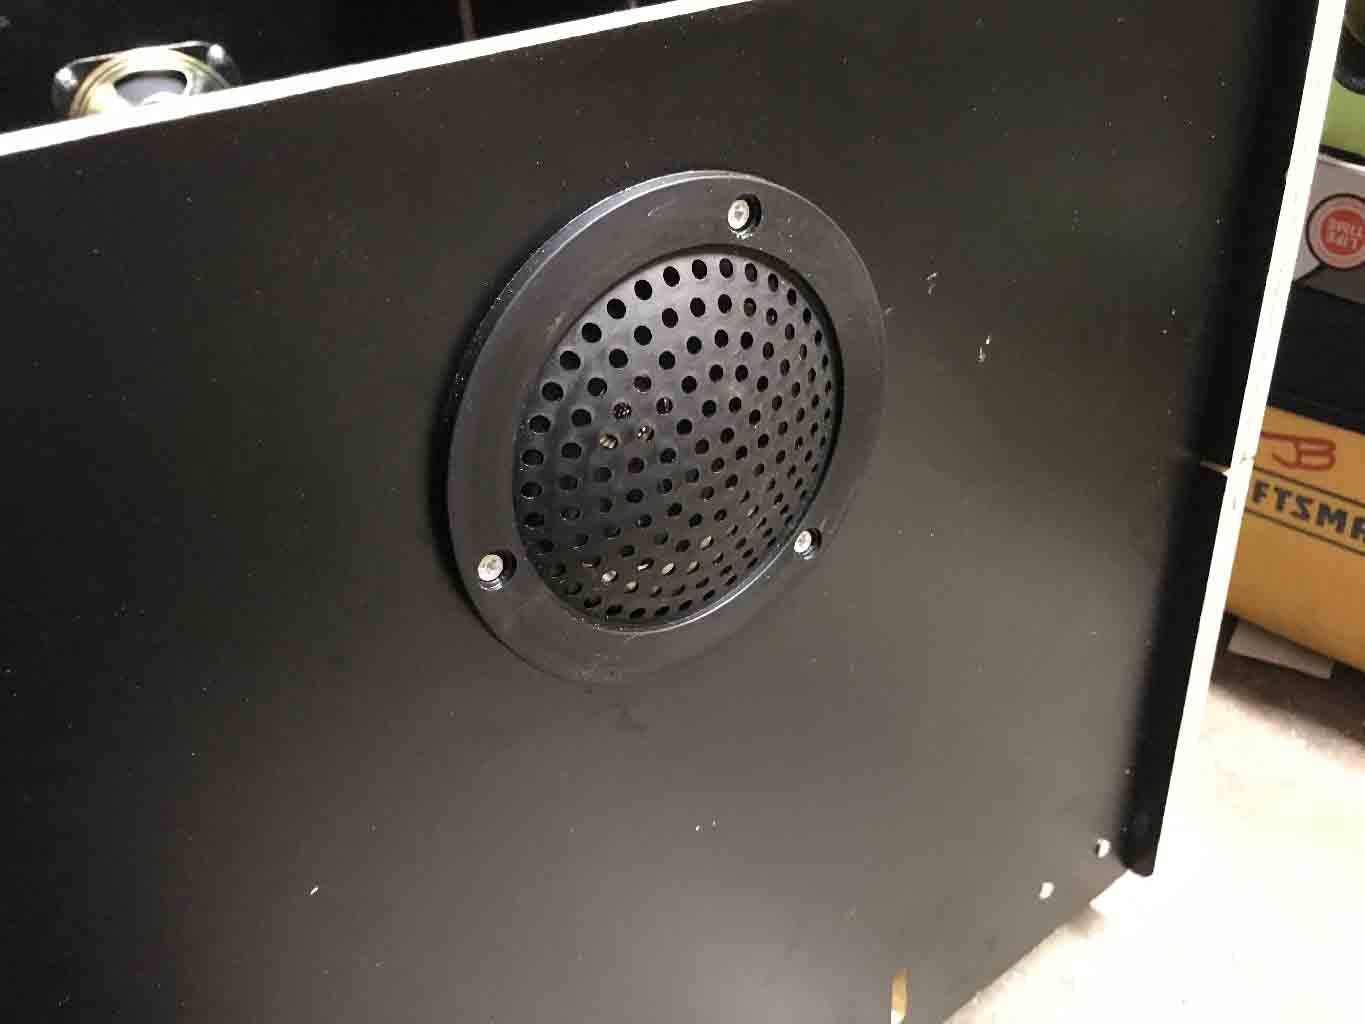
The speaker gets screwed in from the back and the grill gets screwed in from the front. The grill comes with plugs to cover the screw holes.
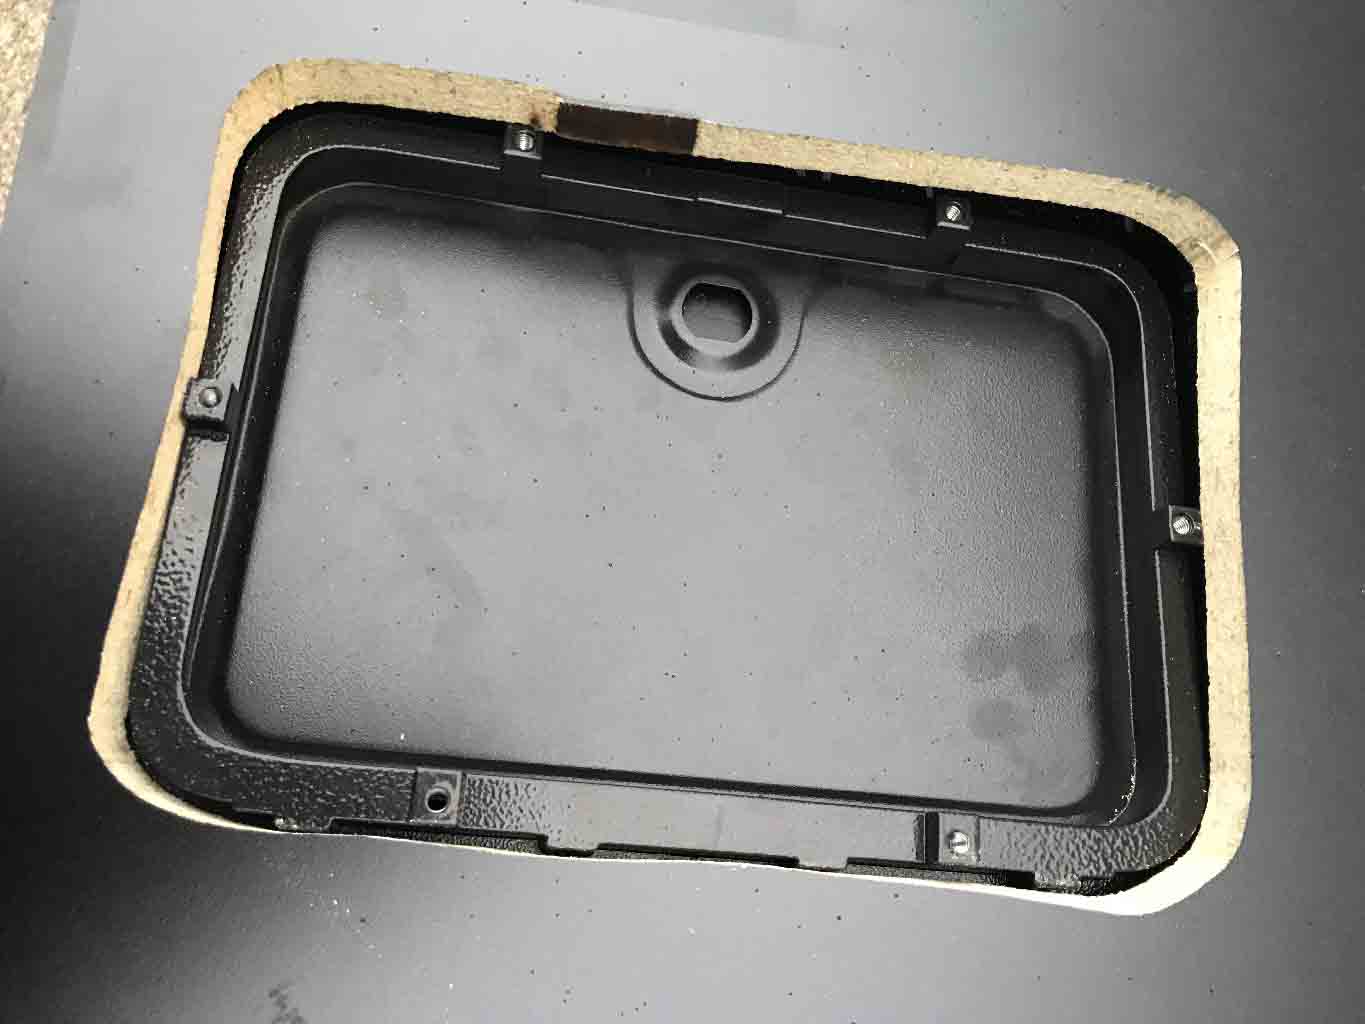
The Coin Door

I originally was going to put in 2 doors. One would be the coin slot door and the other for access. I quickly realized that the access door wouldn’t be big enough to do actual maintenance. The kit assumes that you will build this pretty much one time and uses one of the boards as an access panel that gets screwed into place. But this is particle board and this would never work as a long term solution for me to repeatedly go inside the box. As the coin door and the access door were the same size, I used the access door for layout even though it never actually got installed (yeah extra parts). Once again I found the drawing online and printed it to scale. With my box having three controller units I opted to put the coin door on the 4th side. I also had decided this was going to be the side I would access the unit from.
Particle board is hard to cut and luckily there was still some (but not a lot of room) to wiggle. Again I started with a drill and then used a jigsaw.
It was a very tight fit and I had to go back a few times to get it to fully fit into place. Once the hole was large enough I used the coin door instead of the access door.
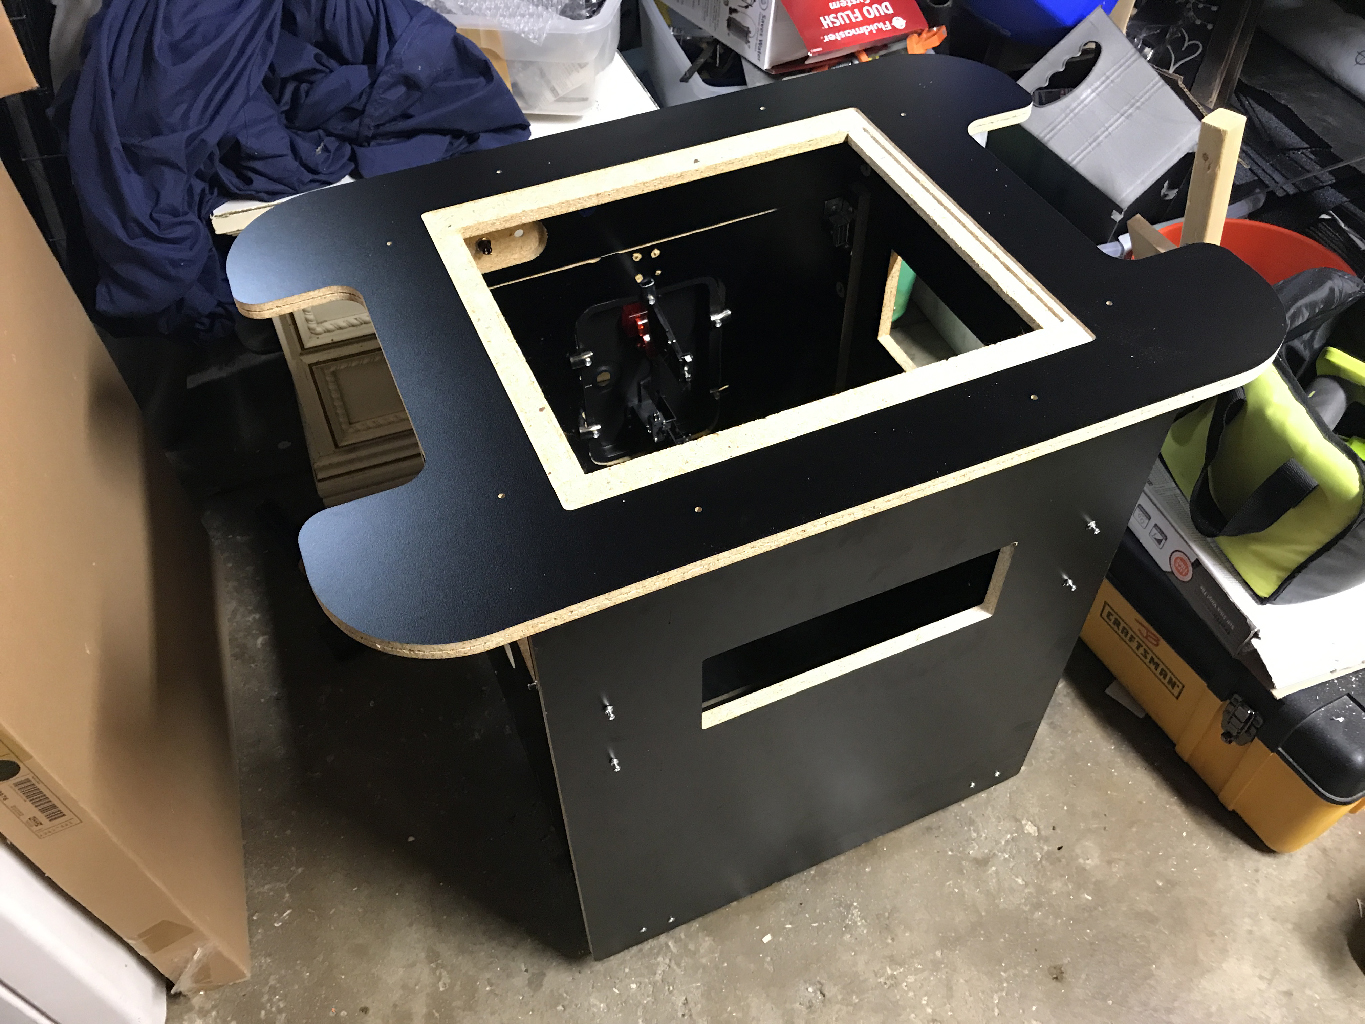
The Rest of the Box


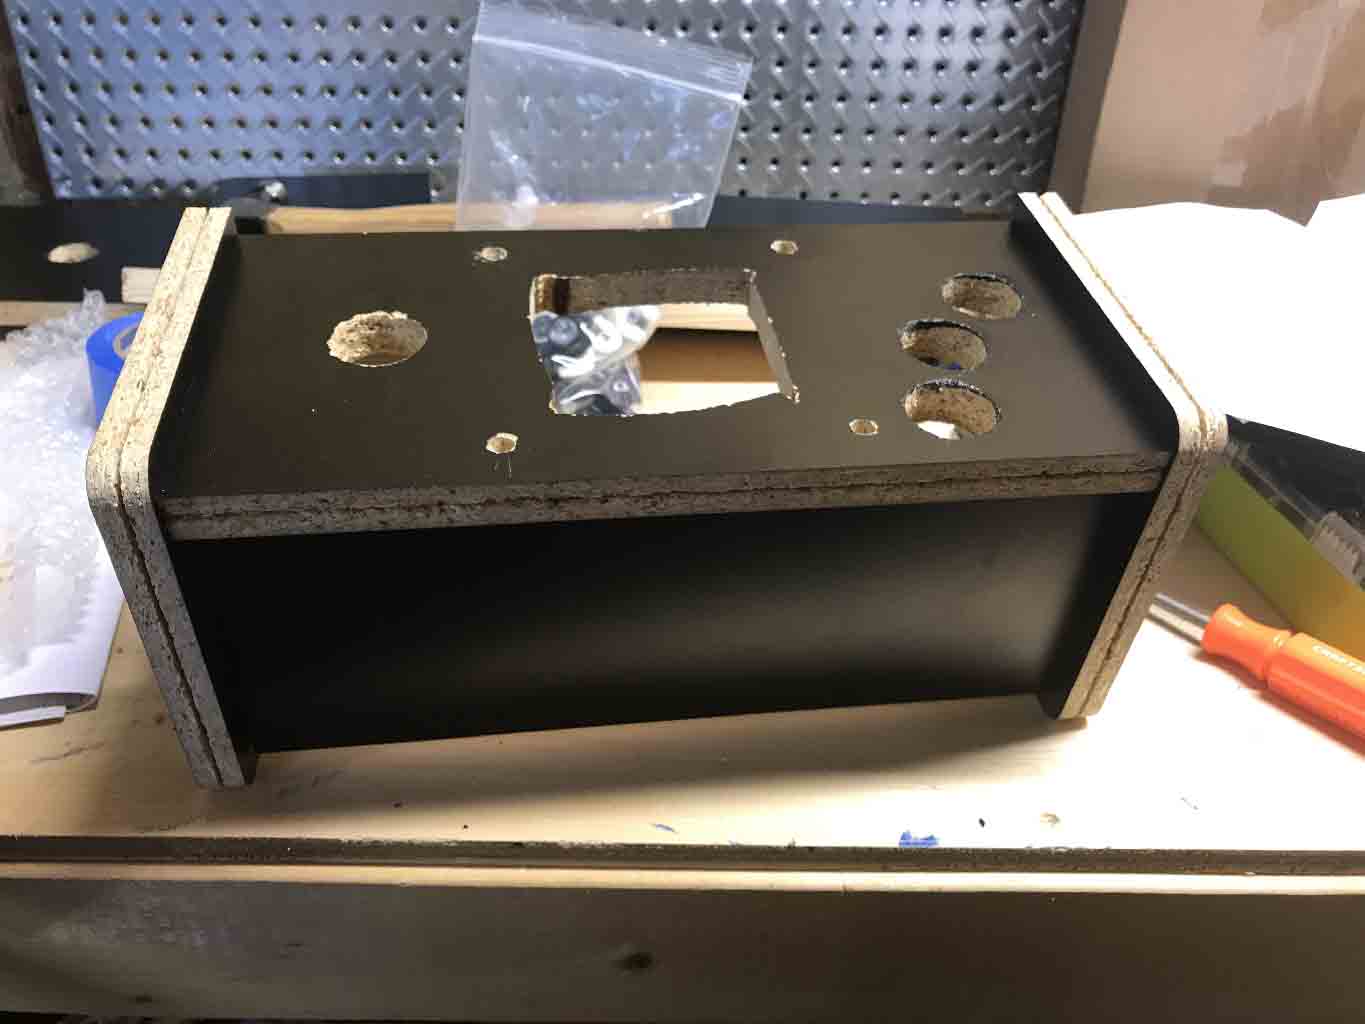
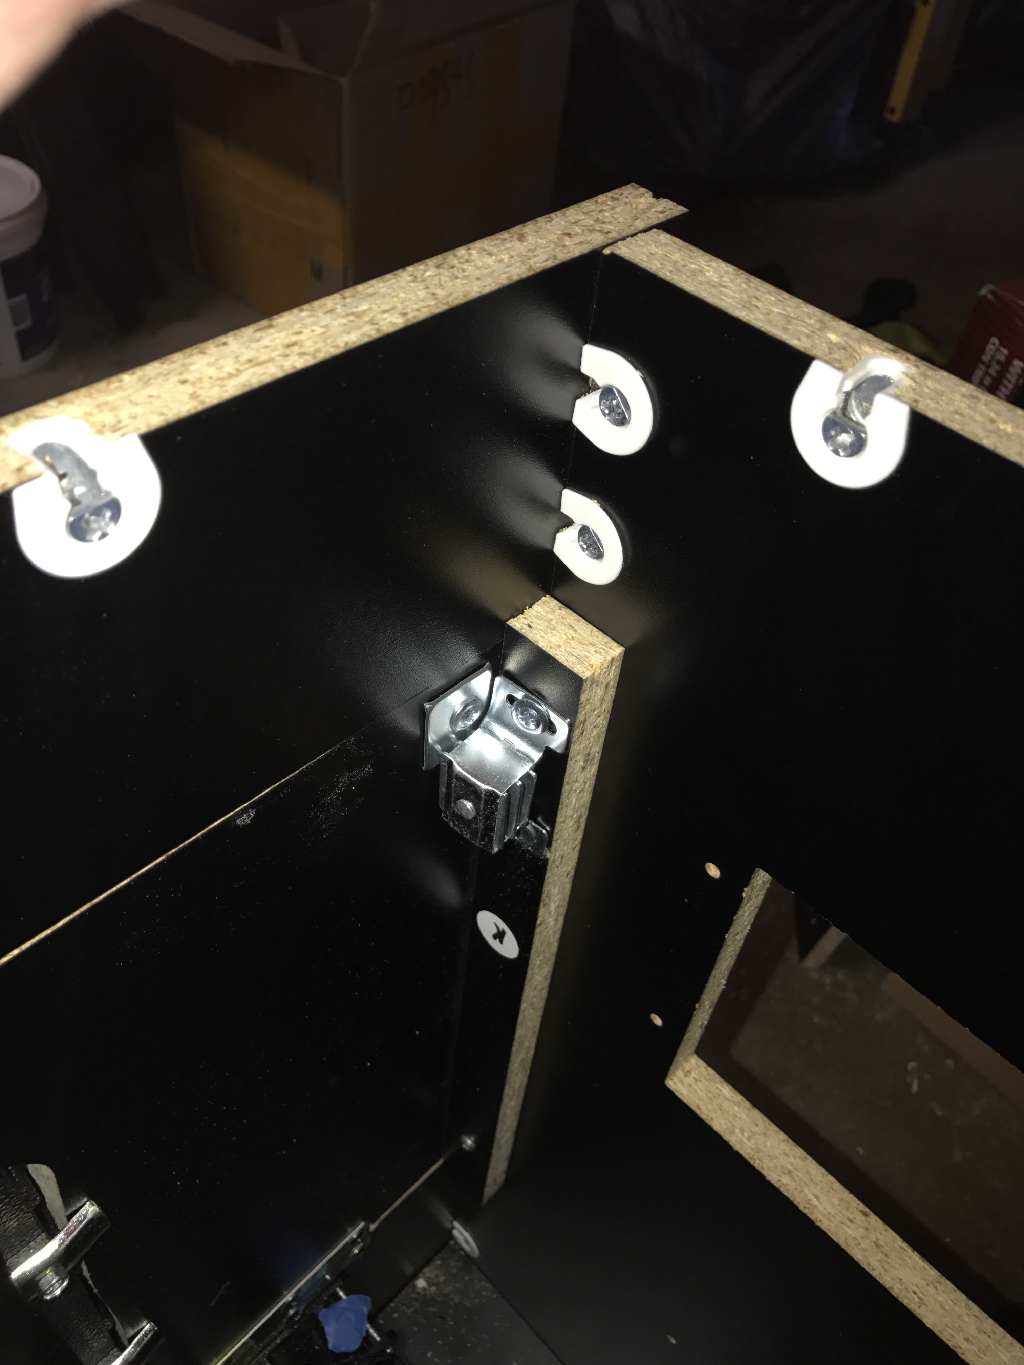
At this point it is just about following directions. And using the furniture cams I was able to attach the two sides (with the freshly cut speaker holes and mounted speakers) to the side panel. This side panel in the kit comes as a solid piece but I was able to purchase (in person because it isn’t on the website yet) a pre-cut “C” side panel that had the opening and drill holes for the head to head controller (but mistakenly not with the bored holes for the cams). I then attached the bottom board. The problem with furniture cams is that they tend to offer strength in one direction. For instance the bottom of the box is great if you push DOWN on it but any force from below pops out the cams. The reasons this is important will be clear in a moment.

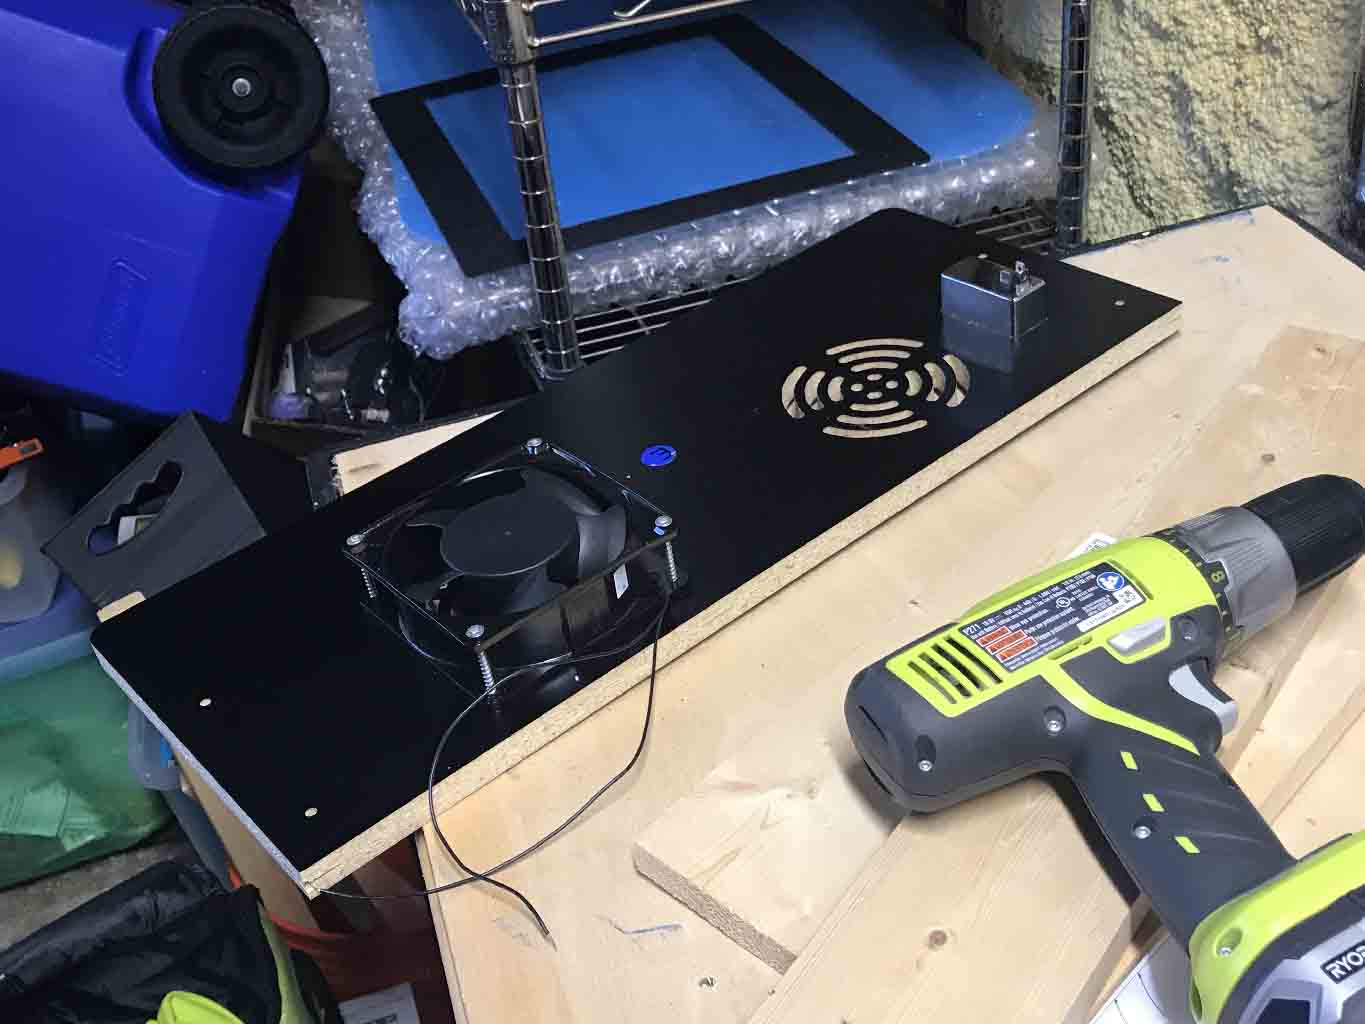
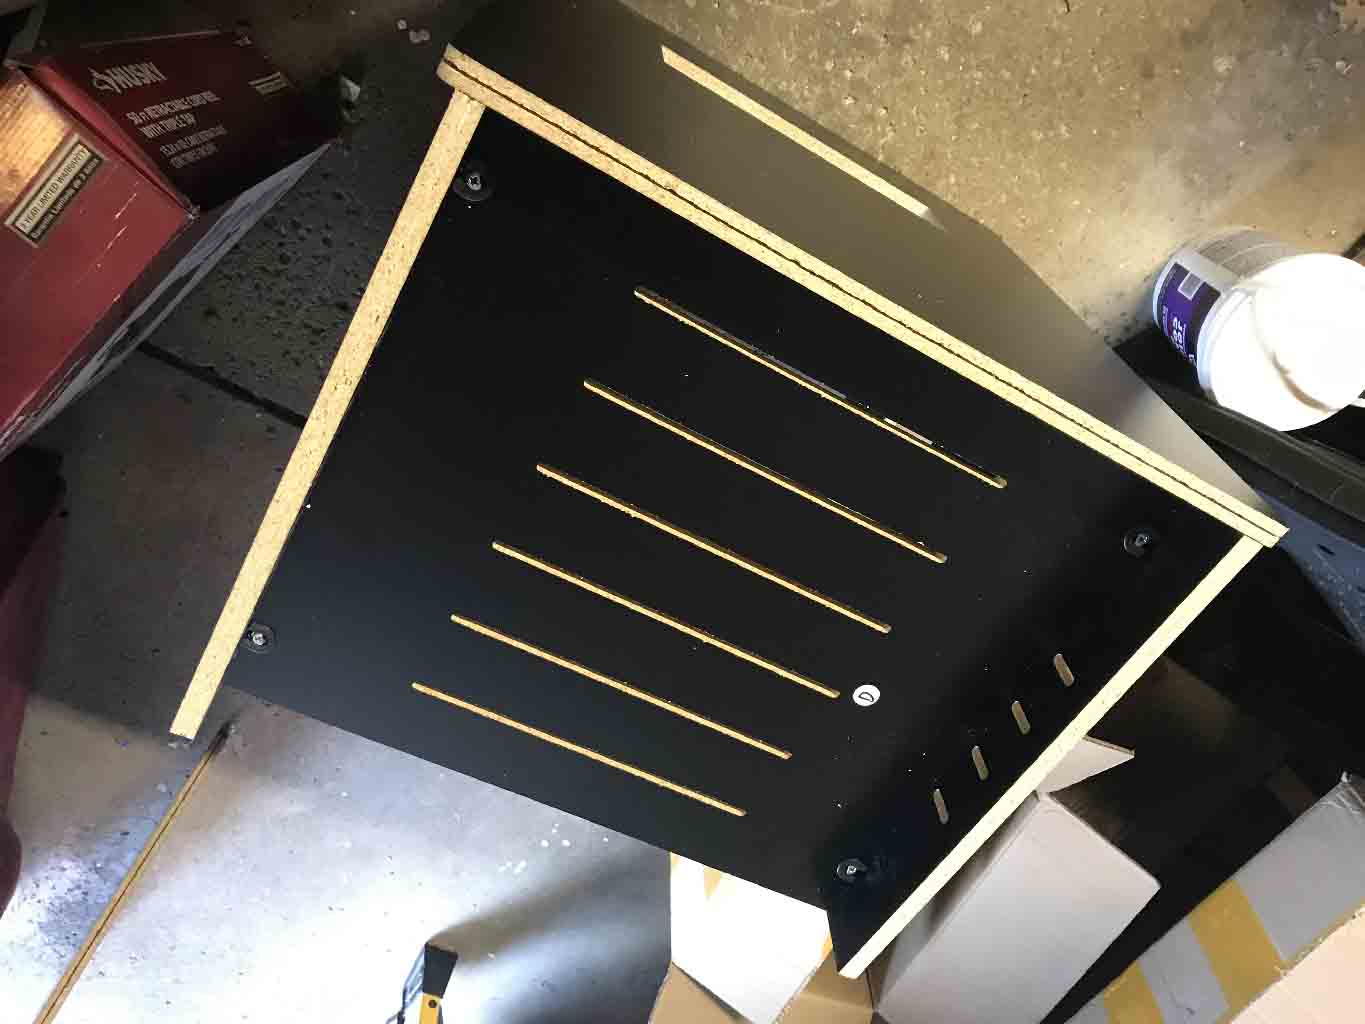
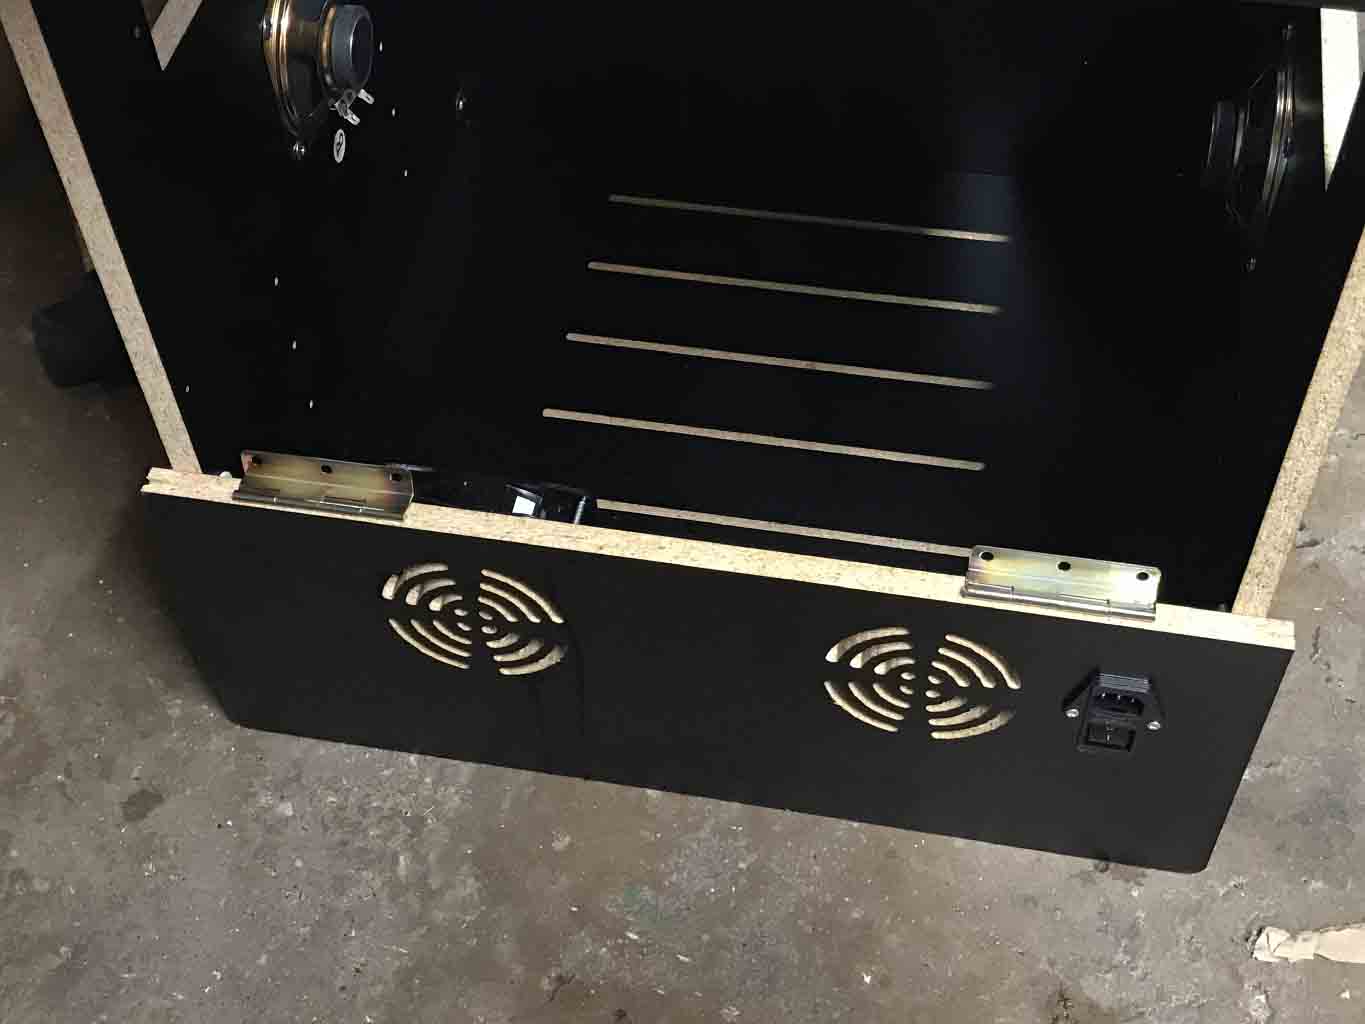
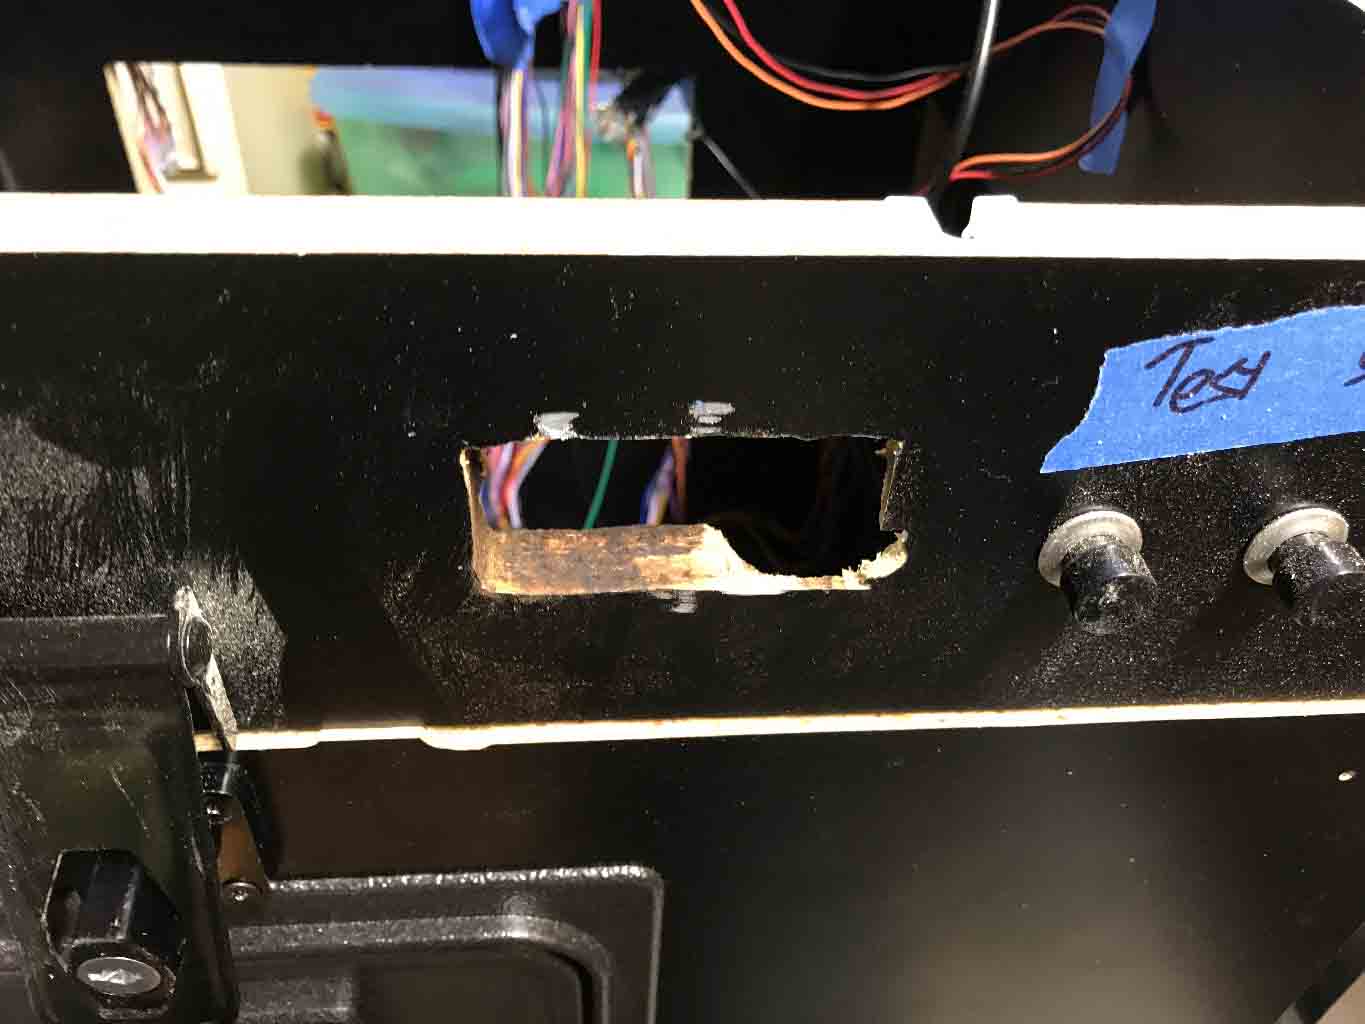
The fourth wall is made of three smaller boards. The lowest board is for power and venting. The vents are already cut as is the hole for the power switch. The power switch also has the power cable and screws into place. The fan is a 110volt AC exhaust fan. This is an AC (not a DC) fan so the direction of the flow is indicated on the fan itself. Make sure you find screws that can make it through the entire fan and into the wood.

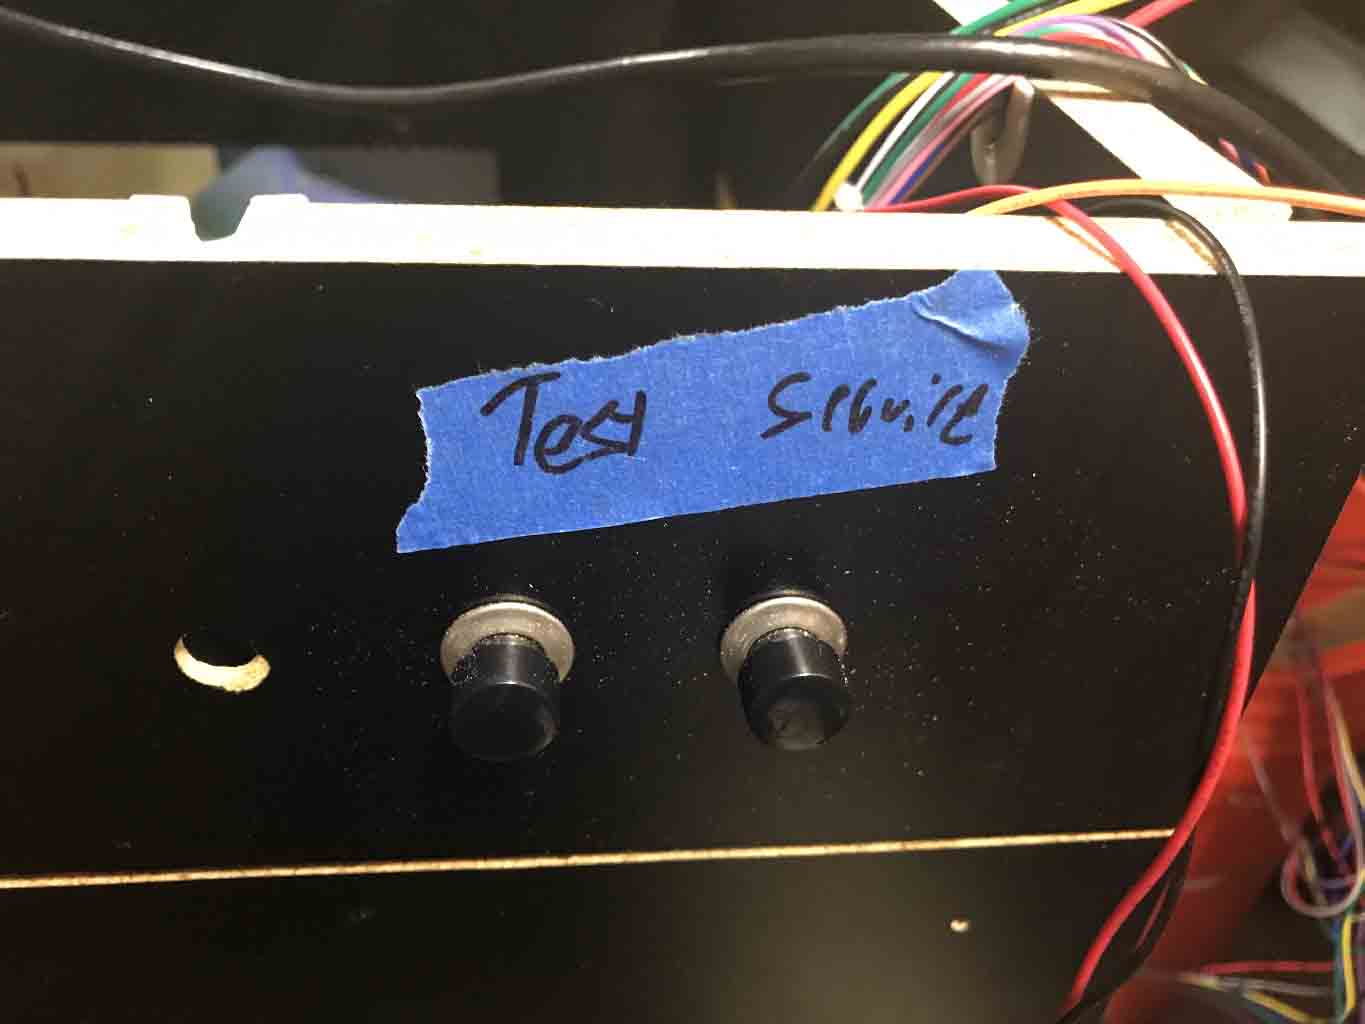

The top panel has three holes in it. Two of the holes are more momentary buttons – “test” and “service”. The third hole is for a volume control knob – but I have a different solution for volume.
The Bottom of the Box
According to the kit instructions the box just sits on the floor. As all the edges get covered with a plastic T-molding this is generally a fine solution. But I need to move this box and it might be indoors and it might be outdoors so I need something a little more flexible and decided to customize a solution. Regretfully, I ended up customizing it three times – i.e. I made a mistake or two.
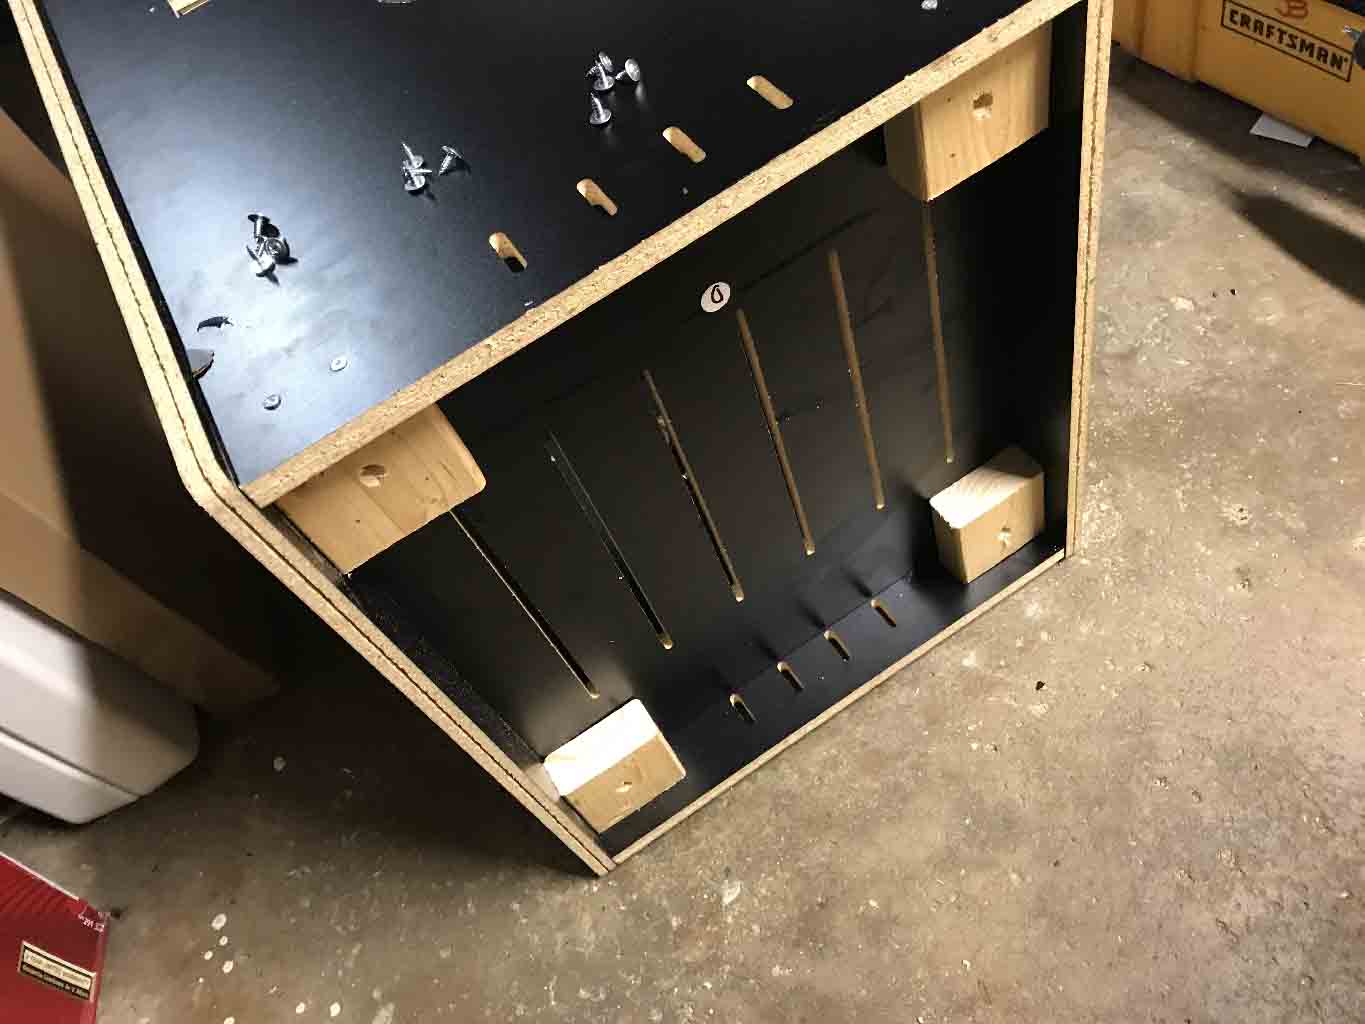
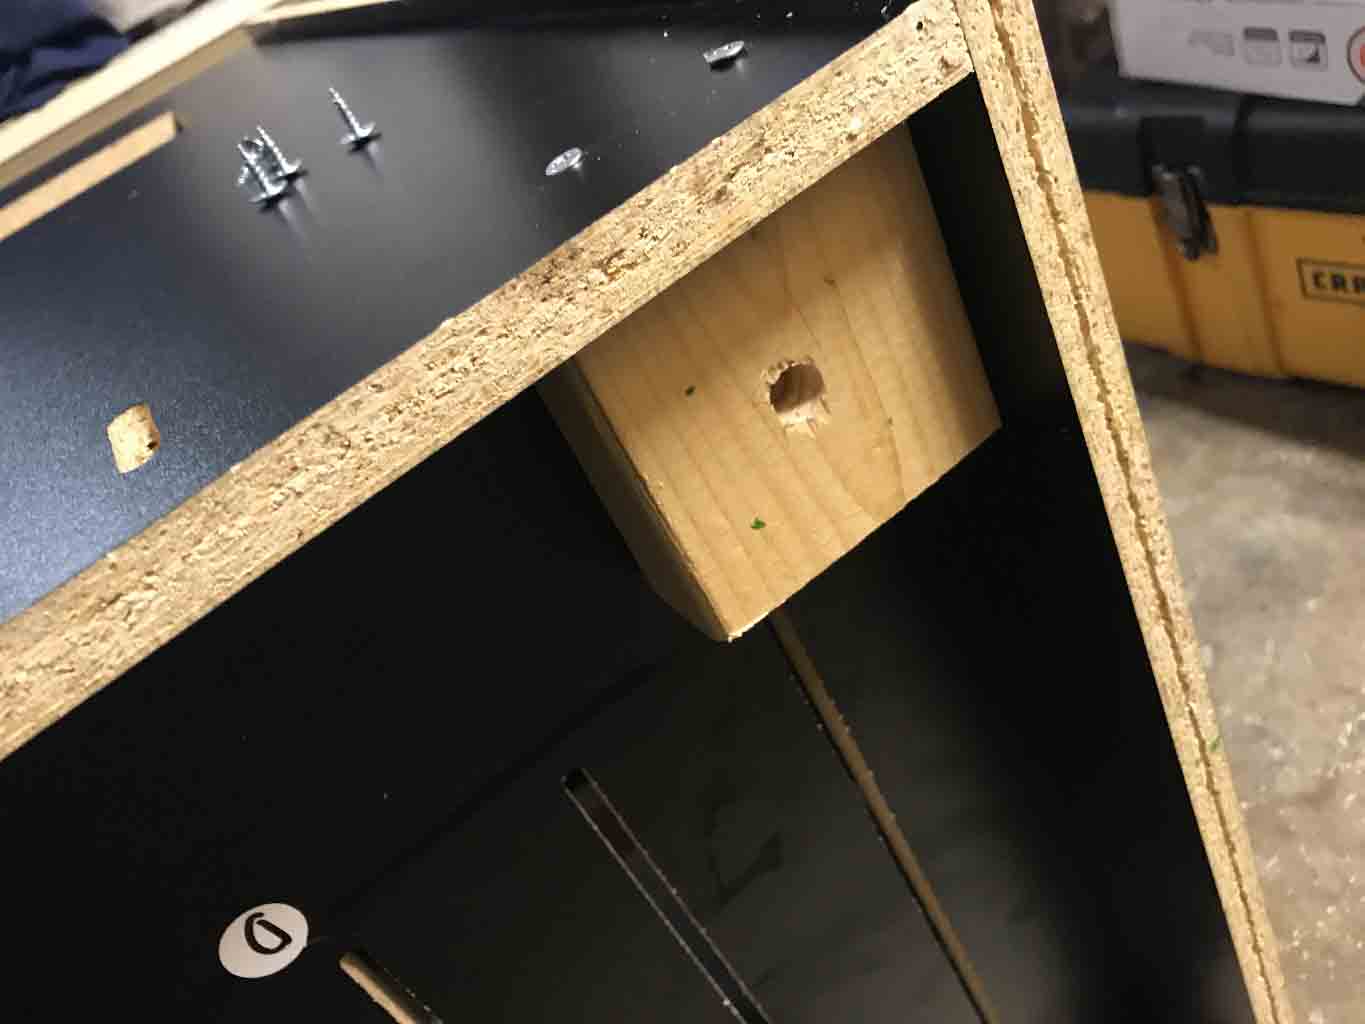
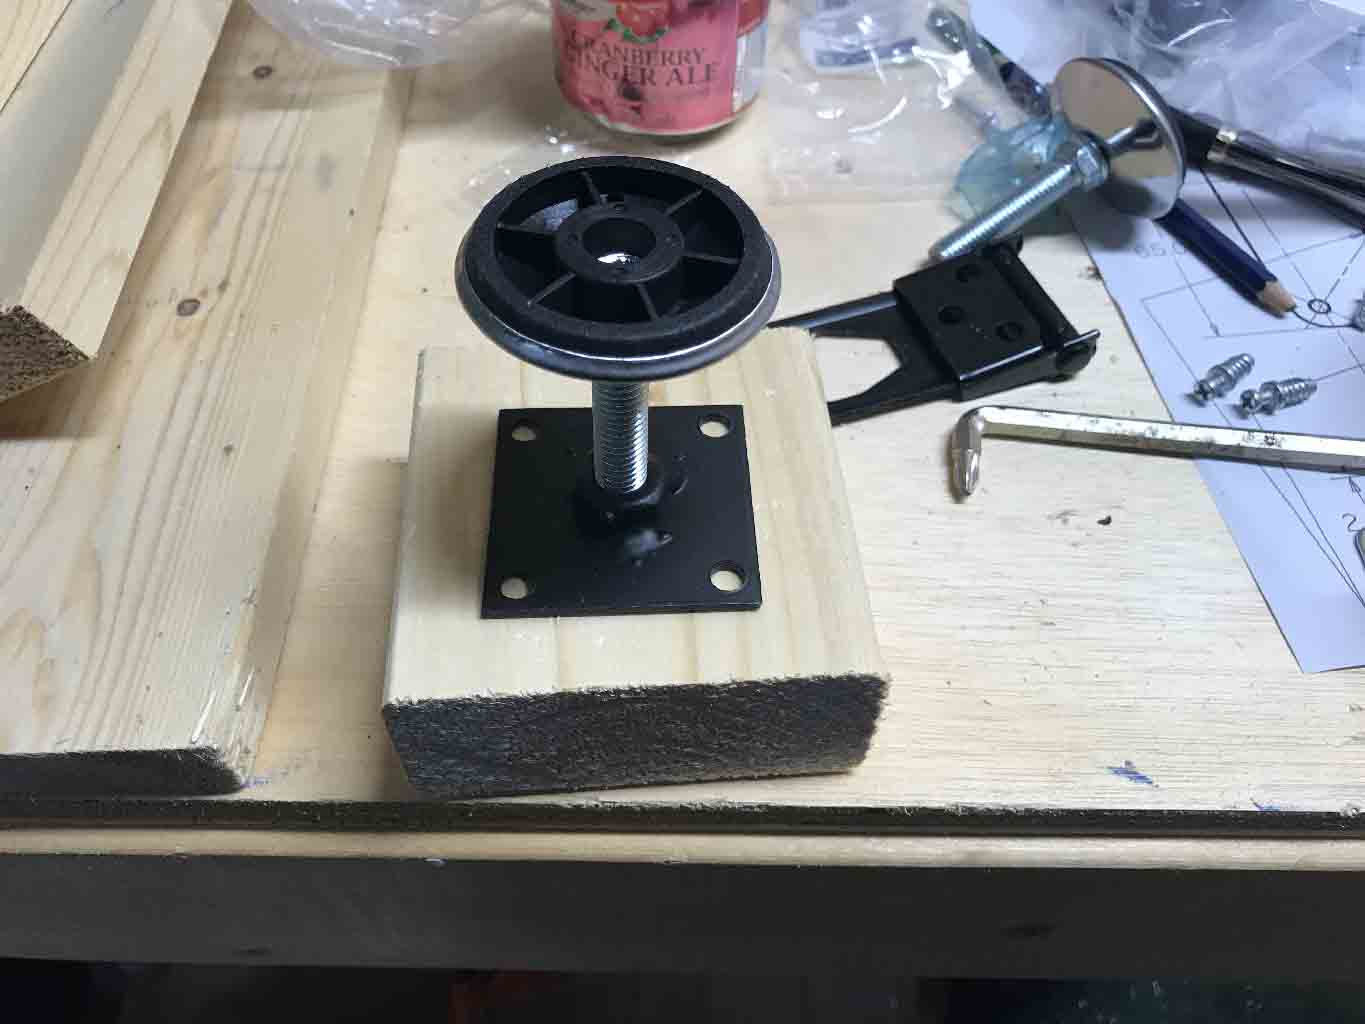
First, I screwed wood blocks into the corners. Not only did this provide reinforcement but it also prevented the bottom board to pop when pressure was put from below. I used heavy duty leg levelers, I drilled the center hole so that the center post would have room in either direction. With 4 legs the unit was raised and flat – but way to heavy.
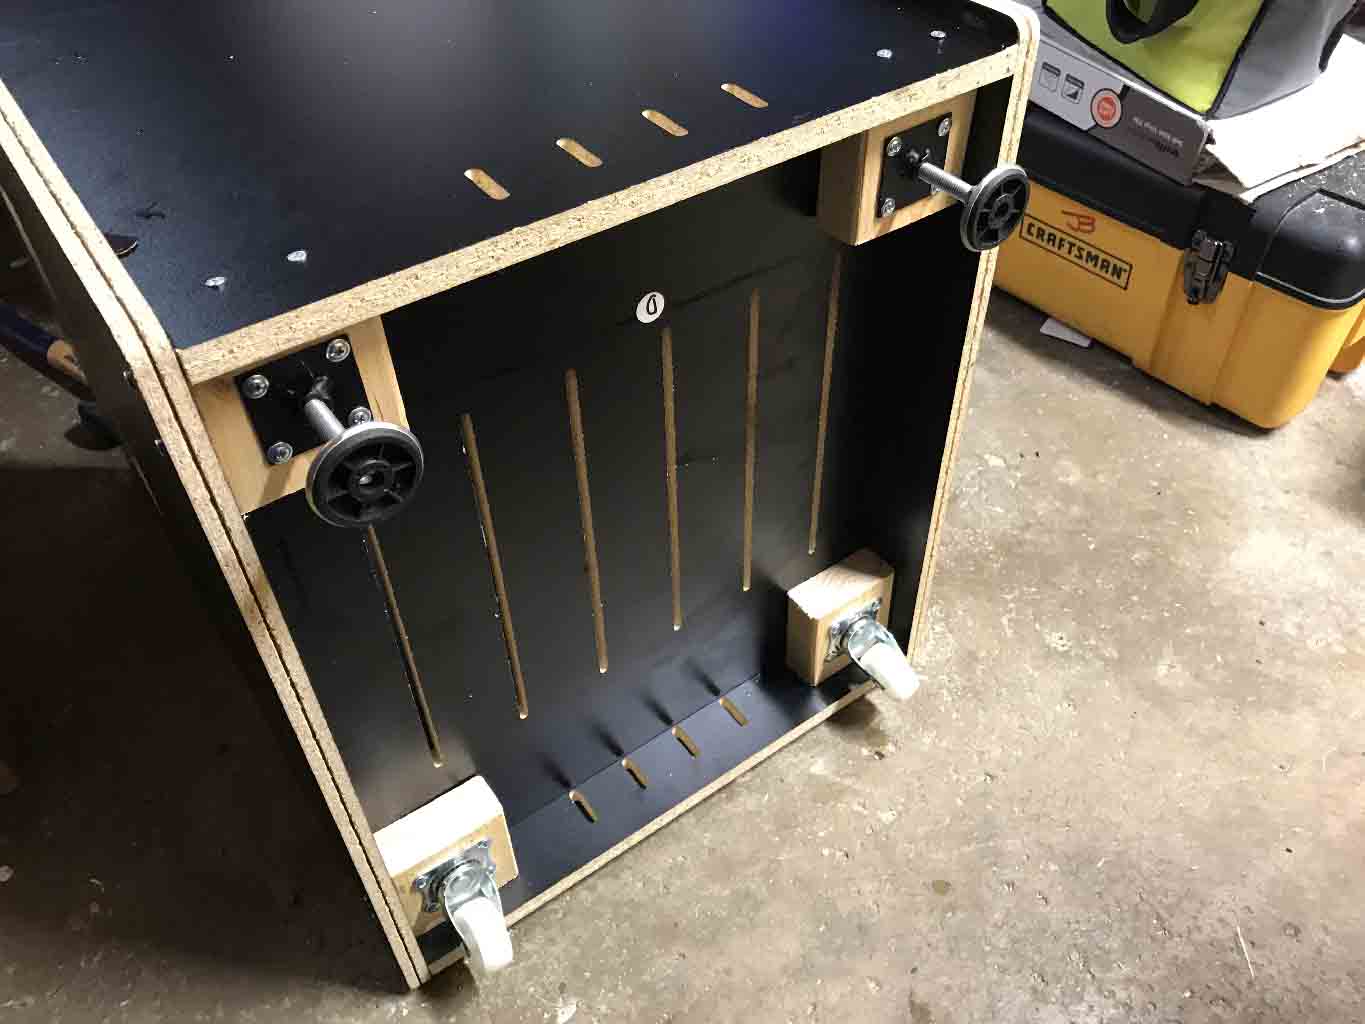
In my next iteration I used two heavy duty leg levelers and two swivel casters. This was better but then the unit would slide around too freely.
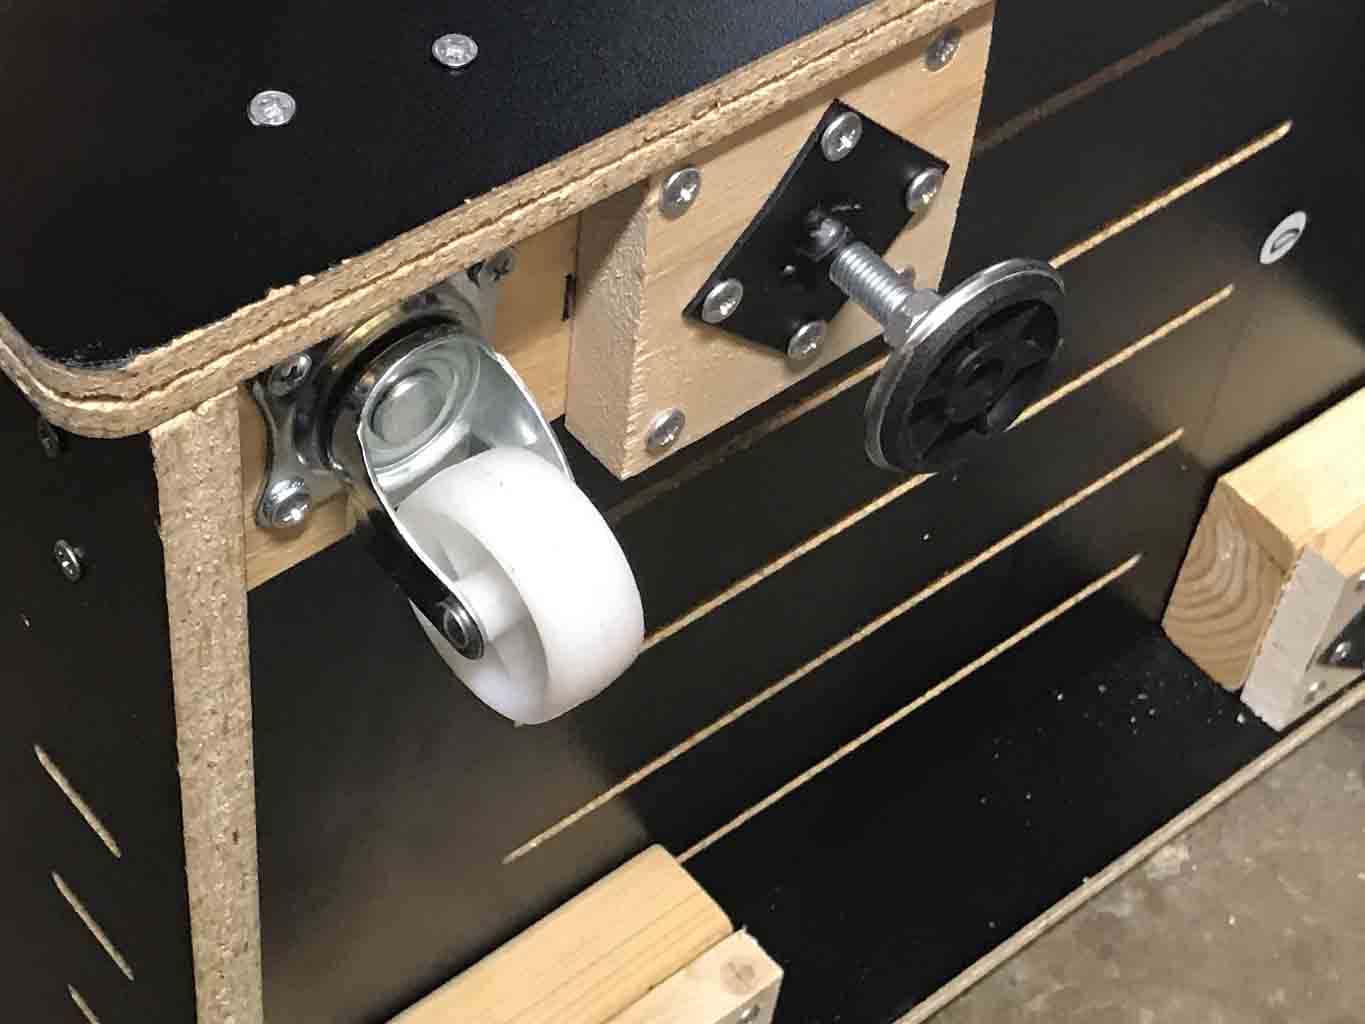
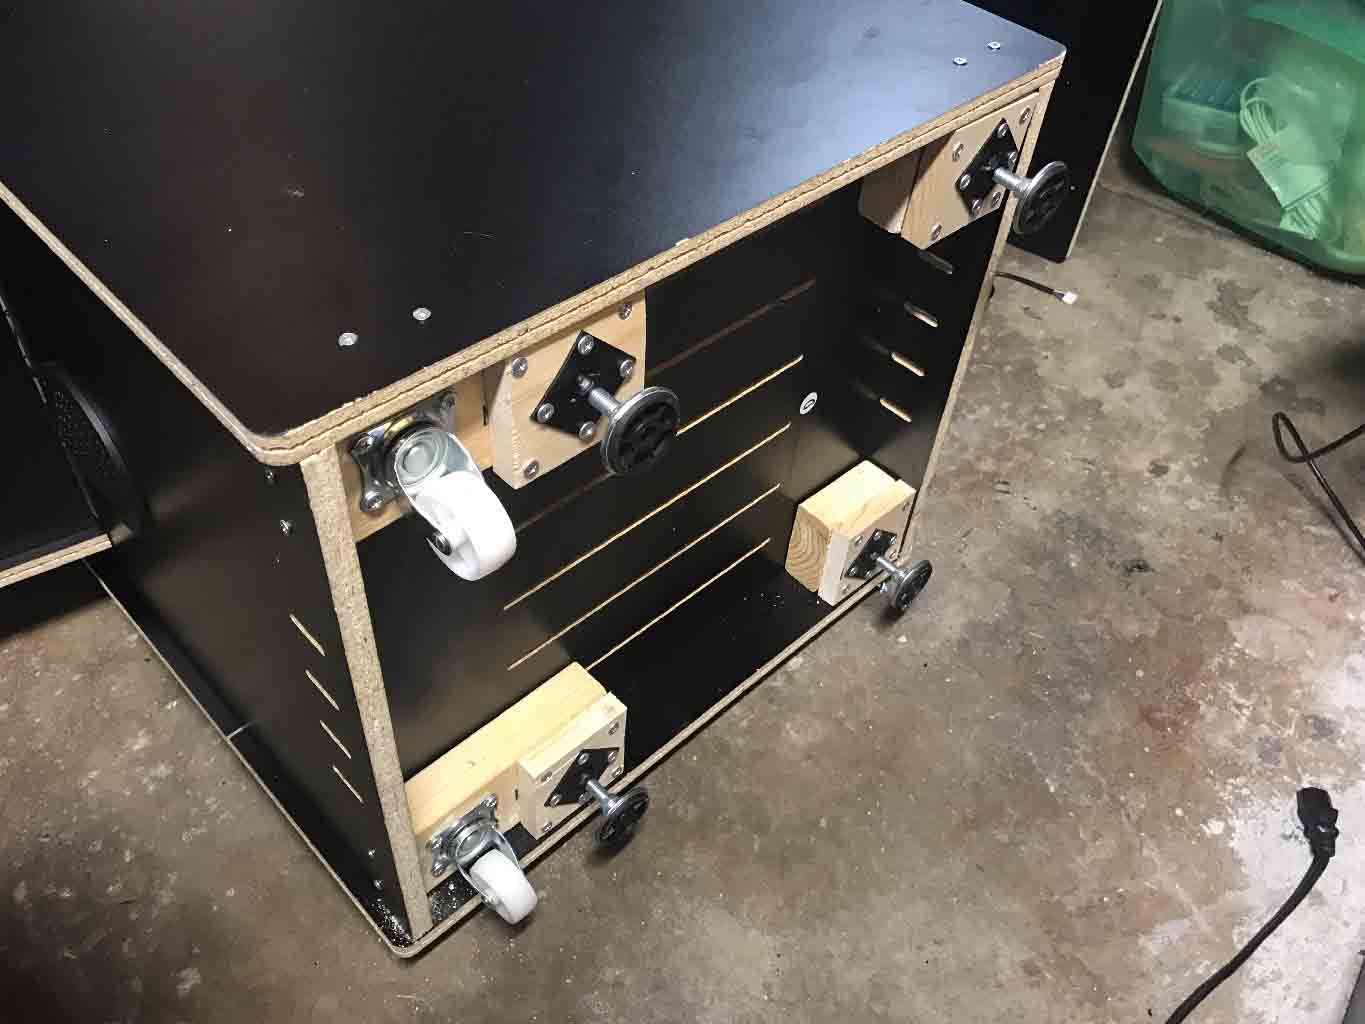
In my final version I added some more wood (as spacers) and used four heavy duty leg levelers and two swivel casters. The legs were set just beyond the casters so that with just a tilt of the unit it could me moved like a dolly but otherwise be completely stable.
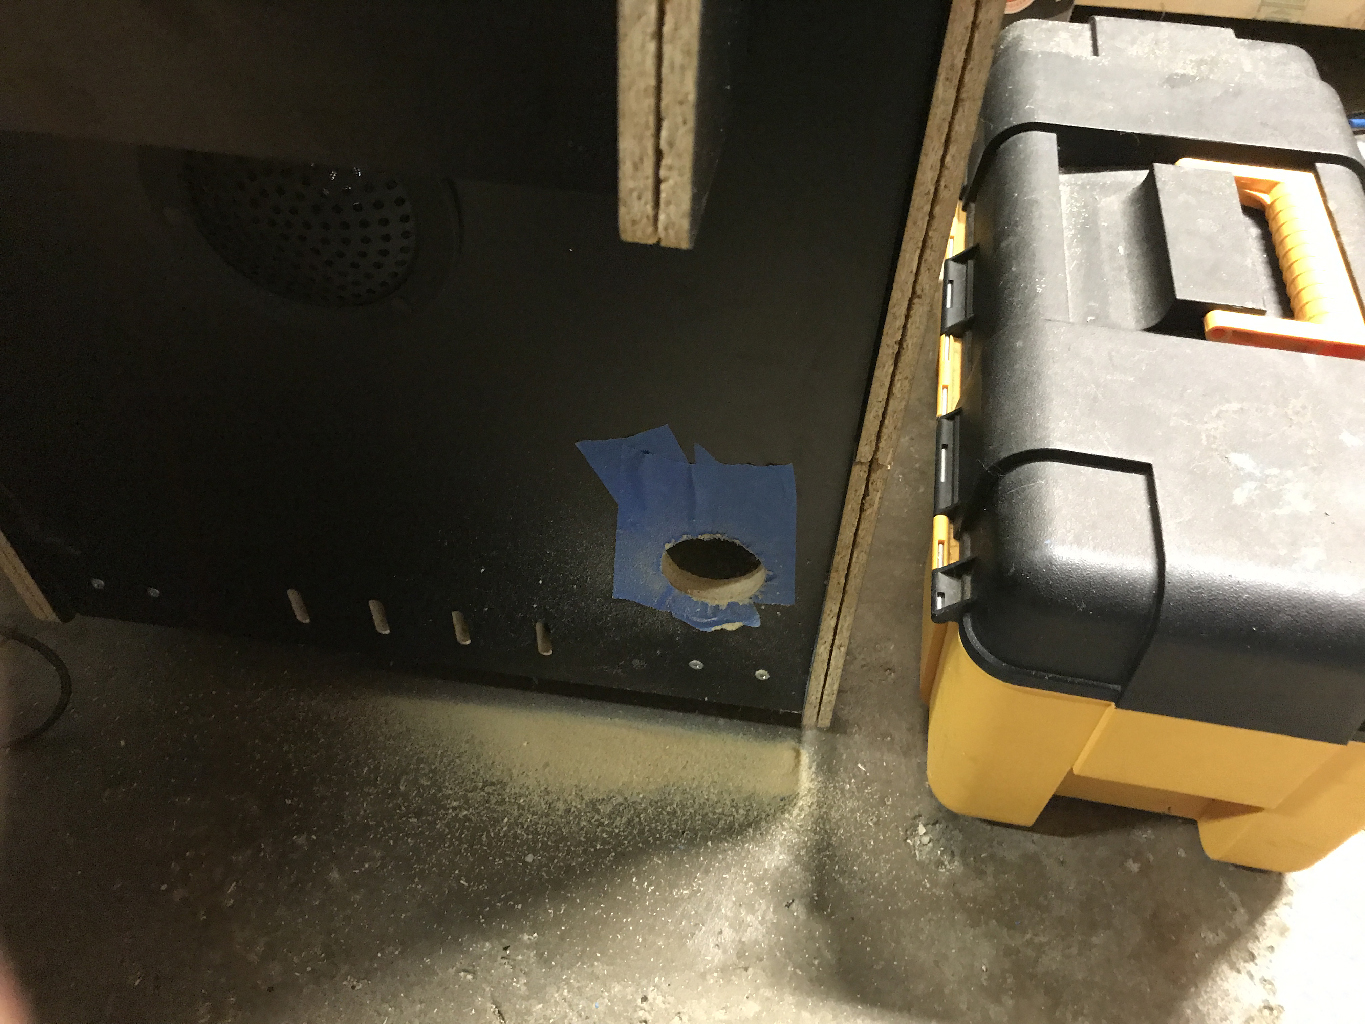
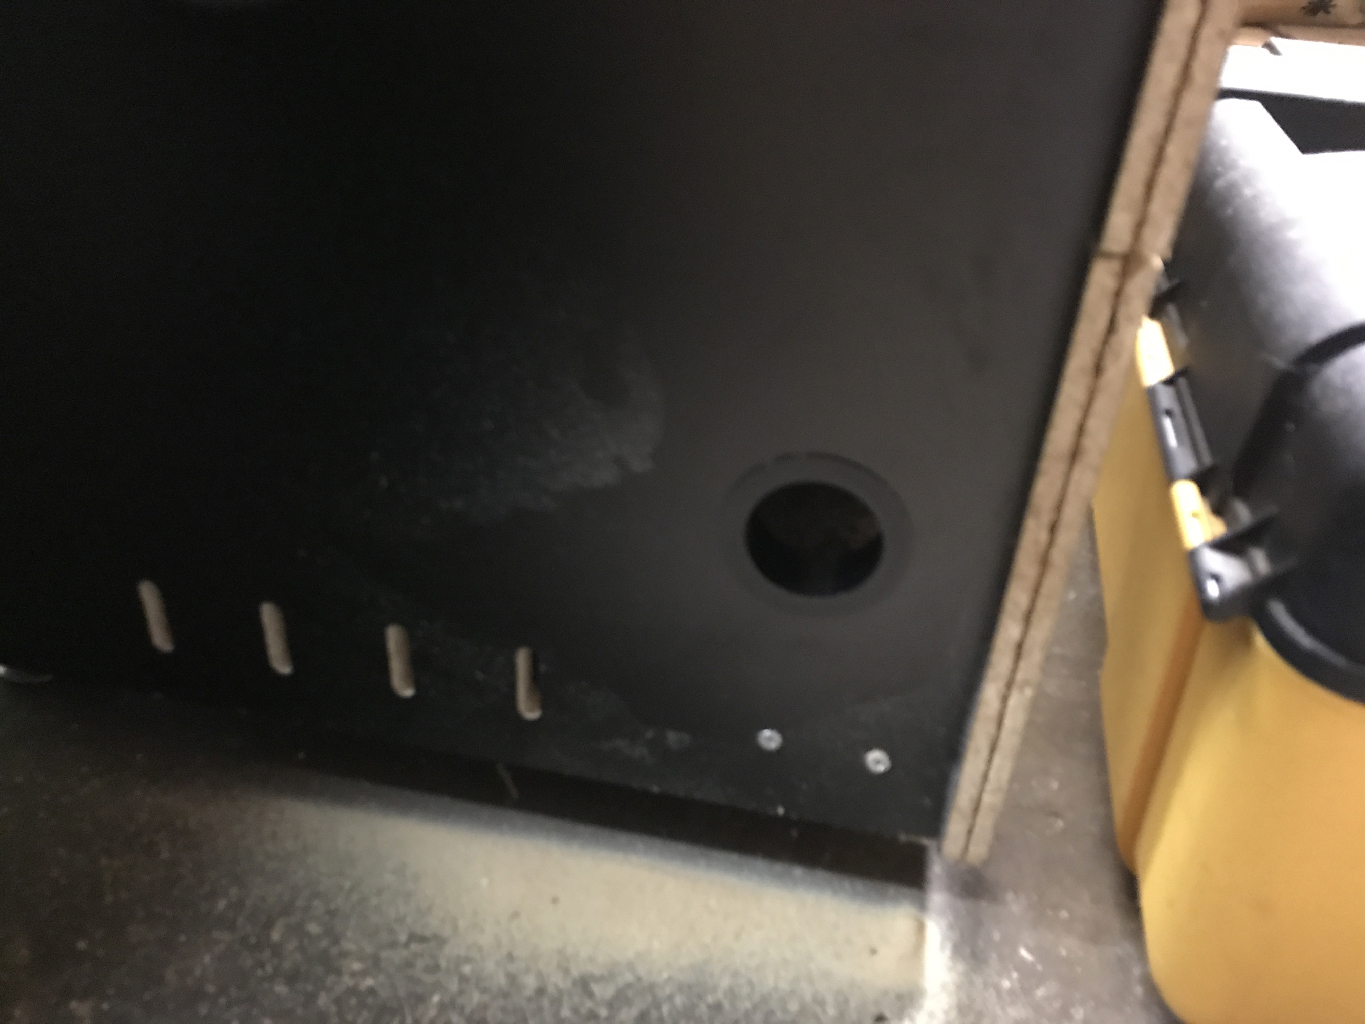
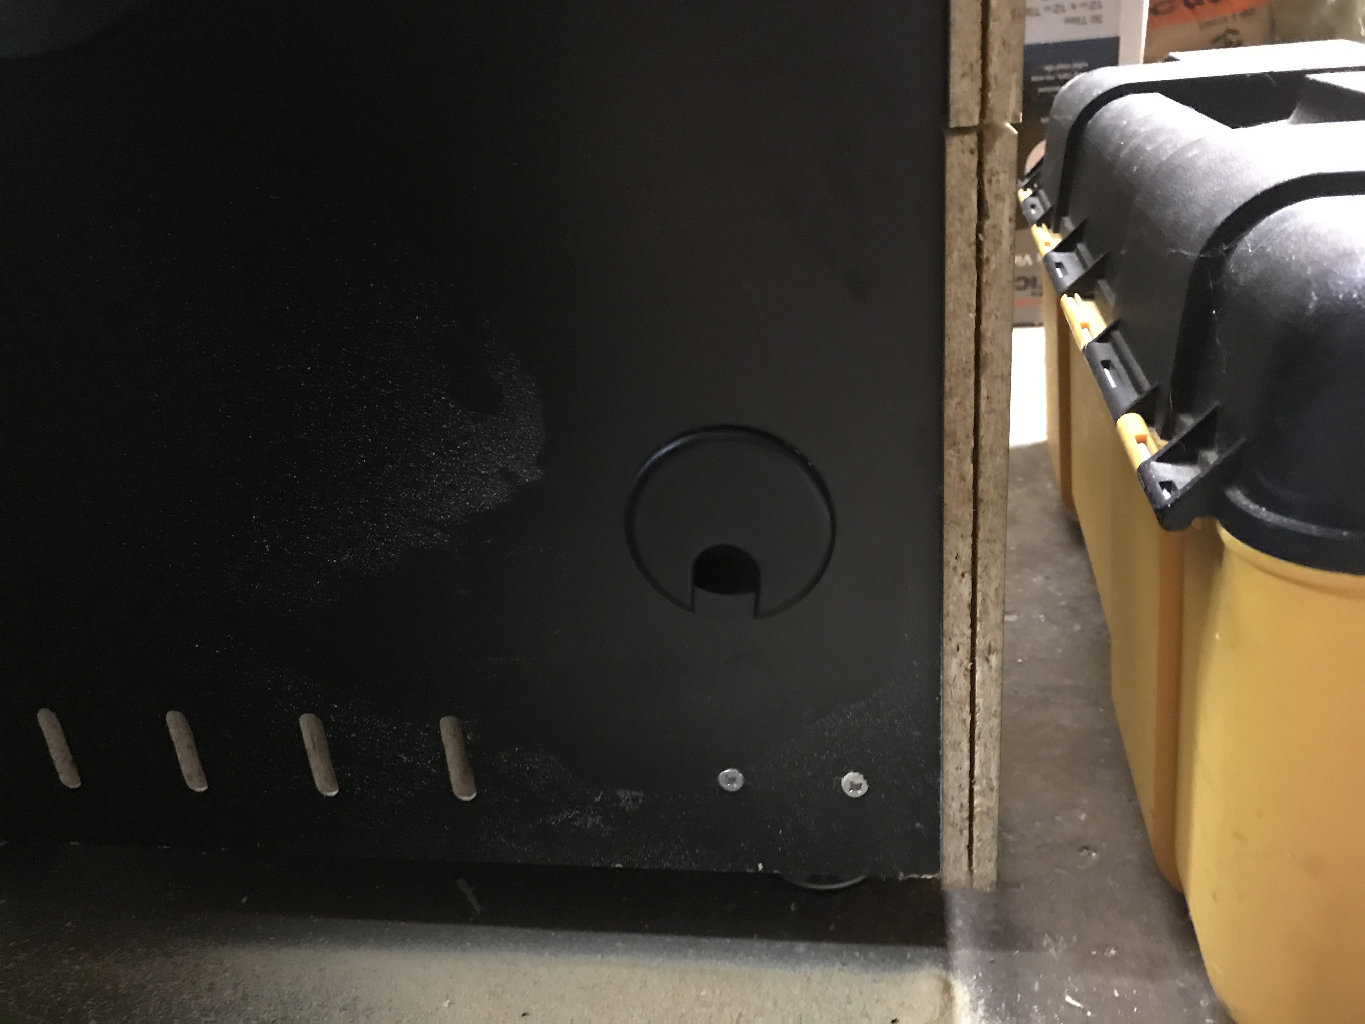
I also cut another hole in one corner for cables. While my overall intention is that everything could be self contained inside the box – I thought it could be nice to be able to run the cables to a laptop or computer sitting outside of the box.
The Access Panel
So instead of screwing the access panel into place, I decided to use hinges. Of course I wanted it to look nice so I used a router table to add grooves for the hinges to hide in.
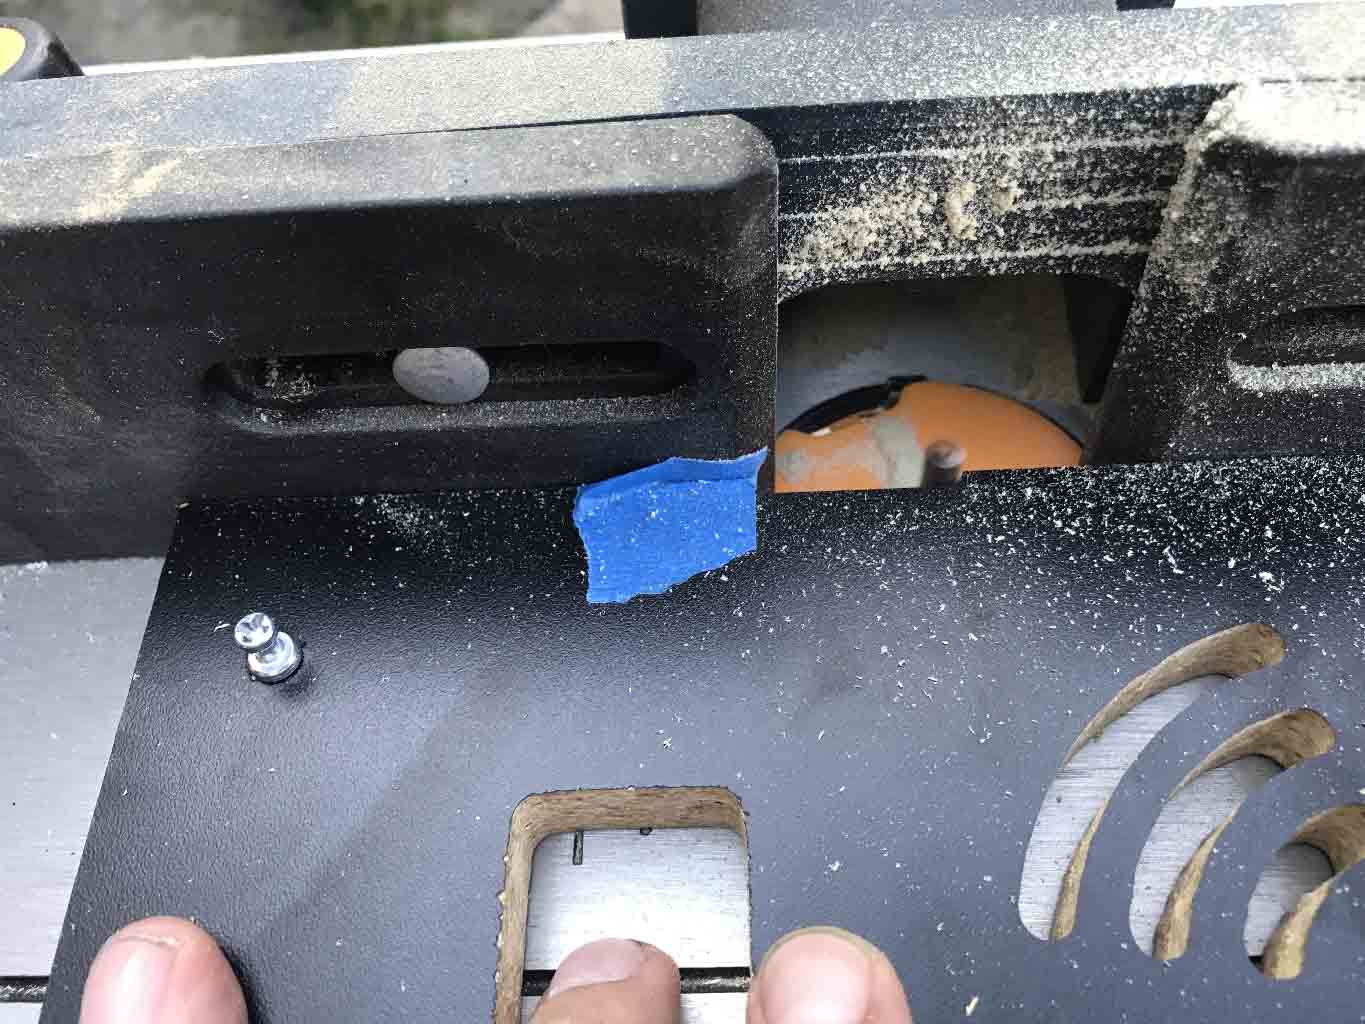
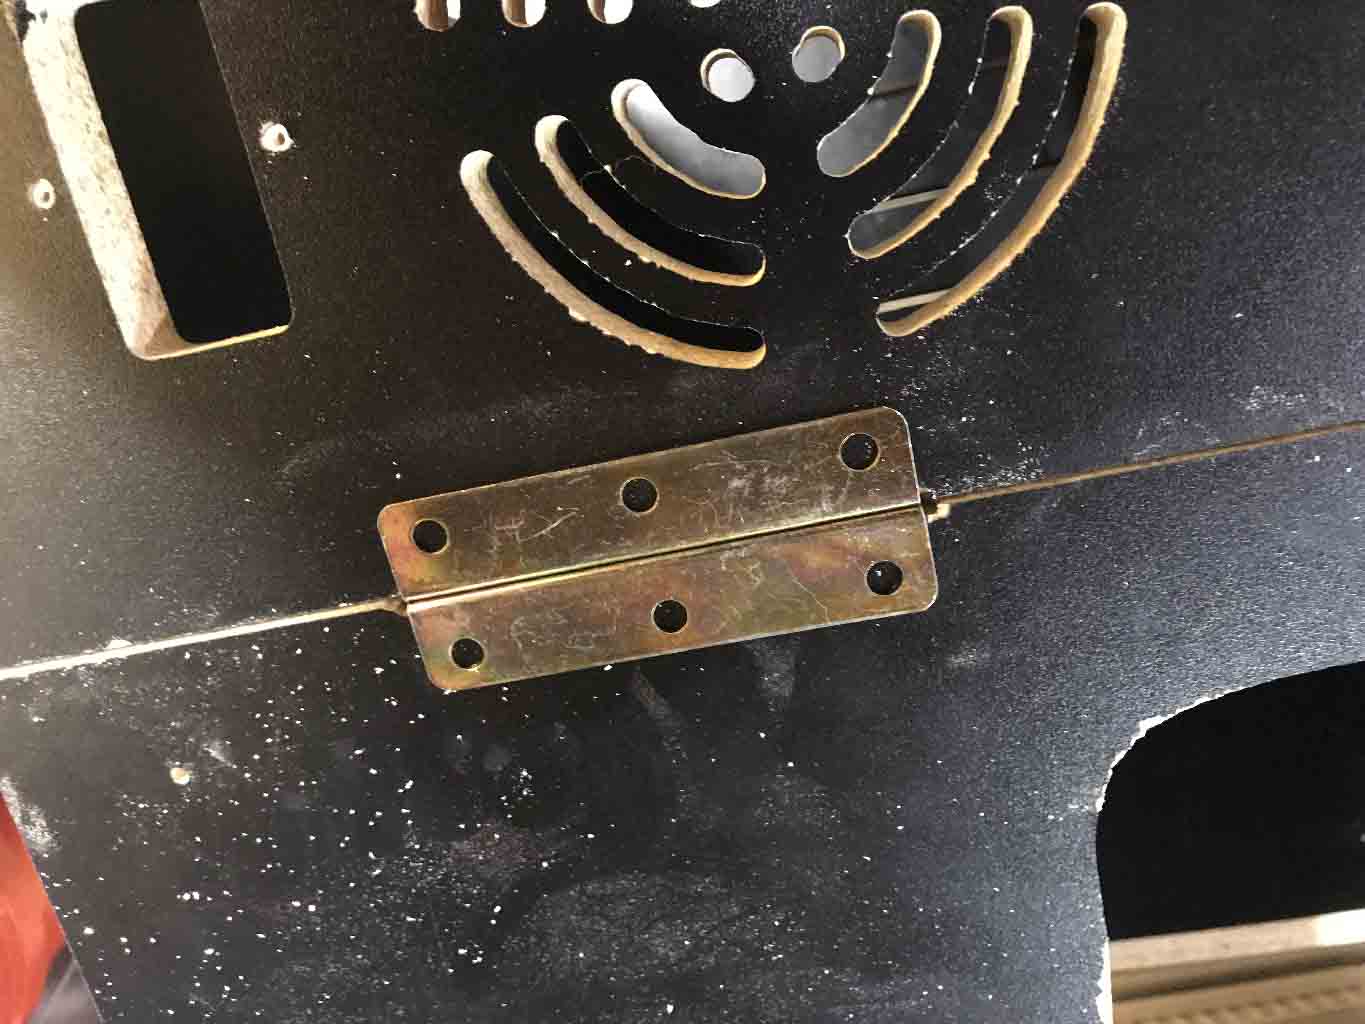
Because the panel is designed to push into place (and not hinge into place) the panel was slightly too large for the opening. I used the router table again to take off a small amount of the panel to give it clearance. I later painted this edge (more black nail polish) so it wouldn’t be noticeable.

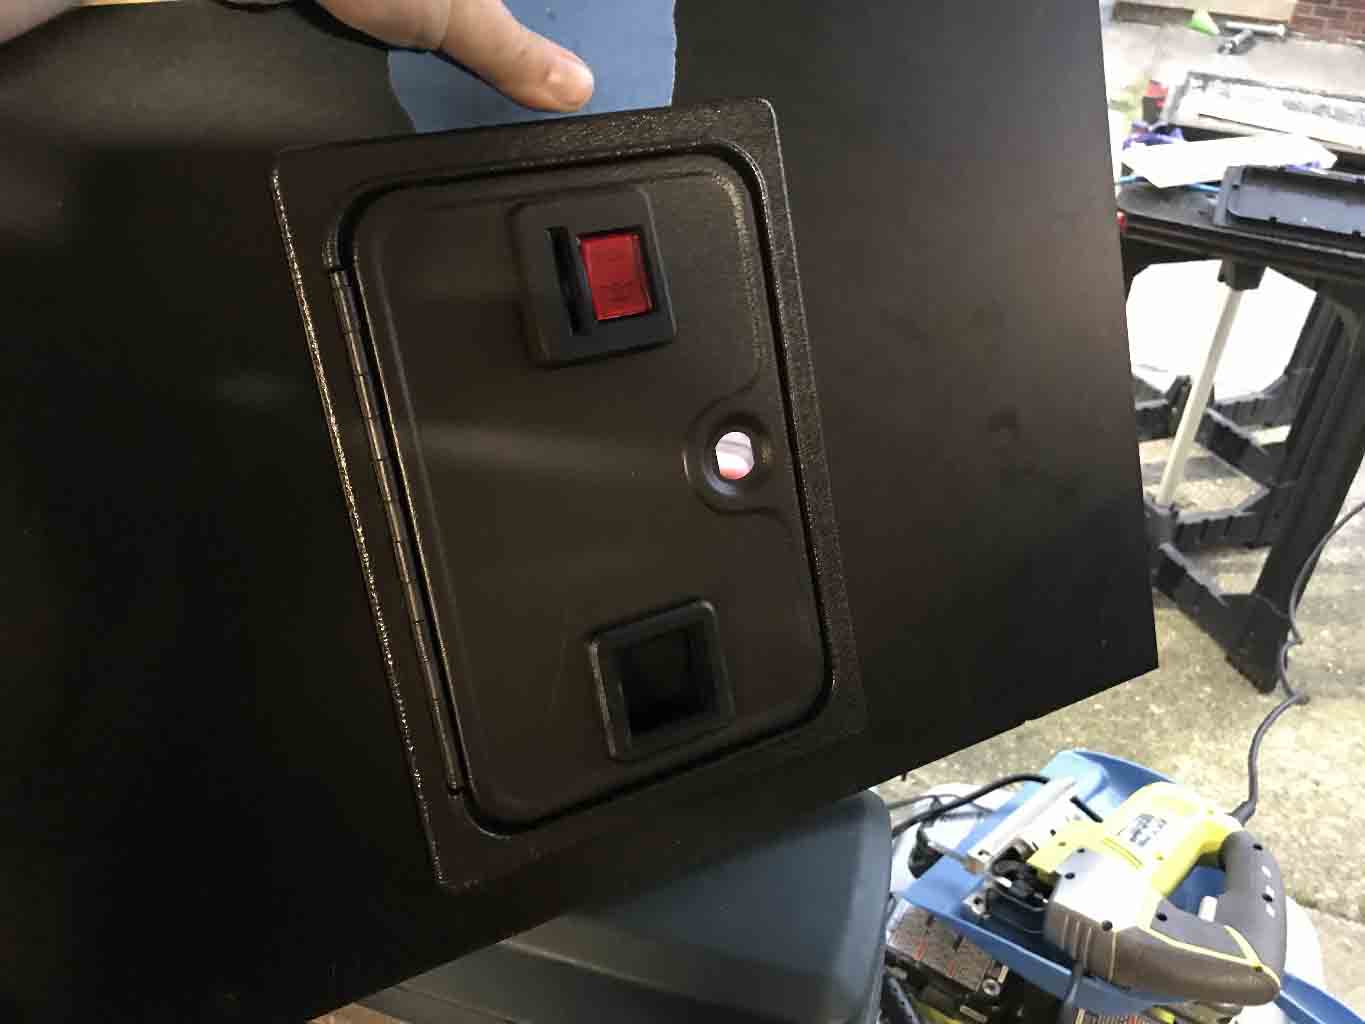
Open and closed!
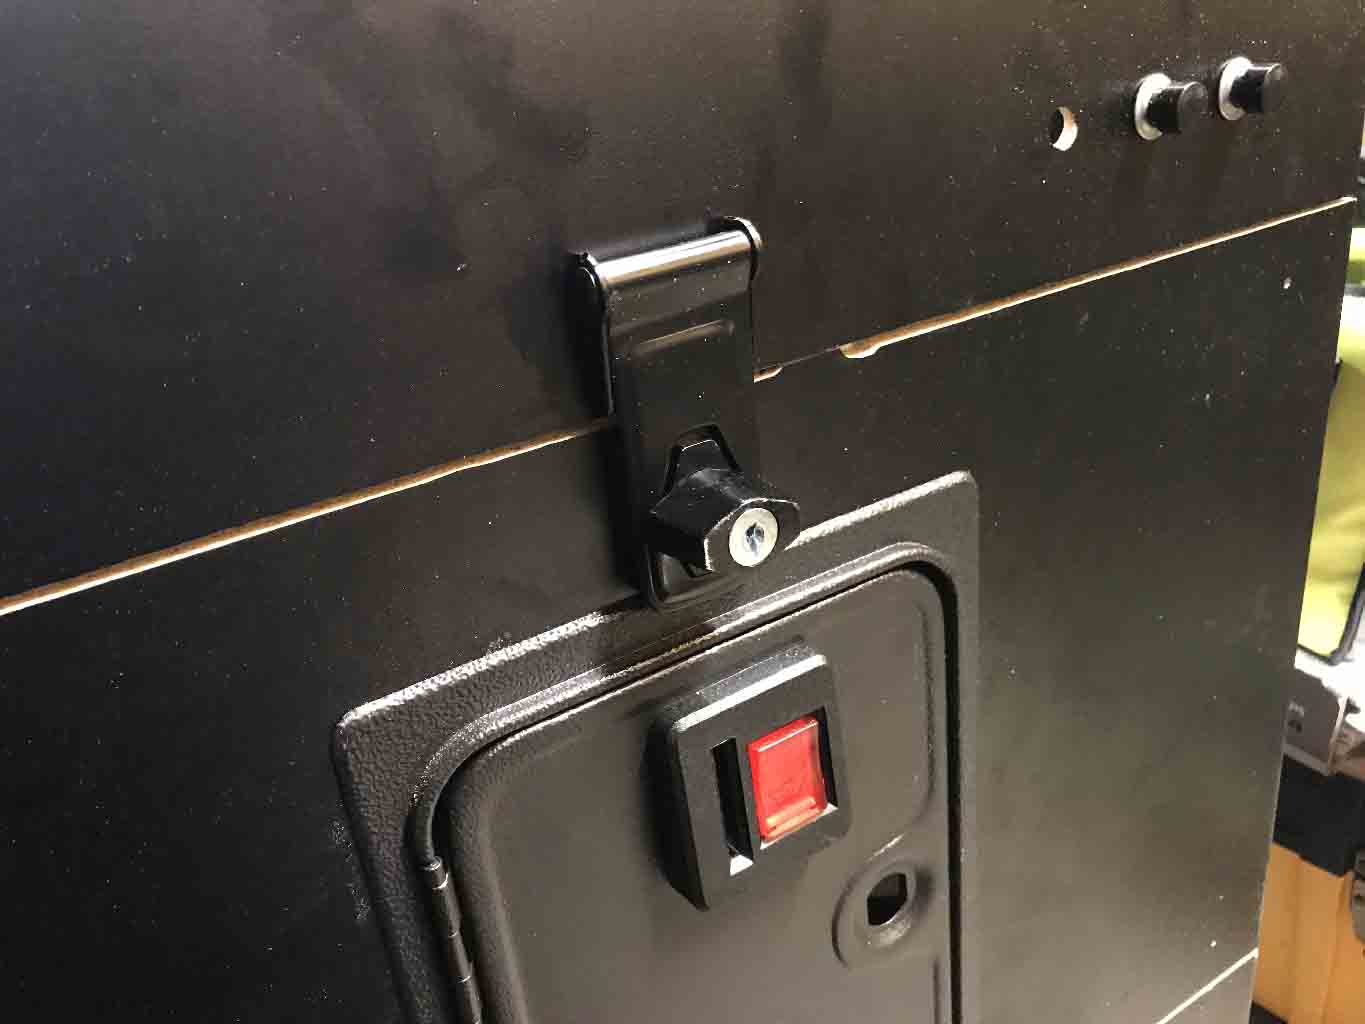
To help keep the unit closed I added magnets and a strike plate on the inside and a locking hasp on the outside.

Probably my favorite goof up was the shelf. It is the exact width of the box. Which would slide into place except I already mounted the speakers. The shelf is actually in my unit but it did require that I take something apart. My advice: Put the shelf in while you are adding the sides!
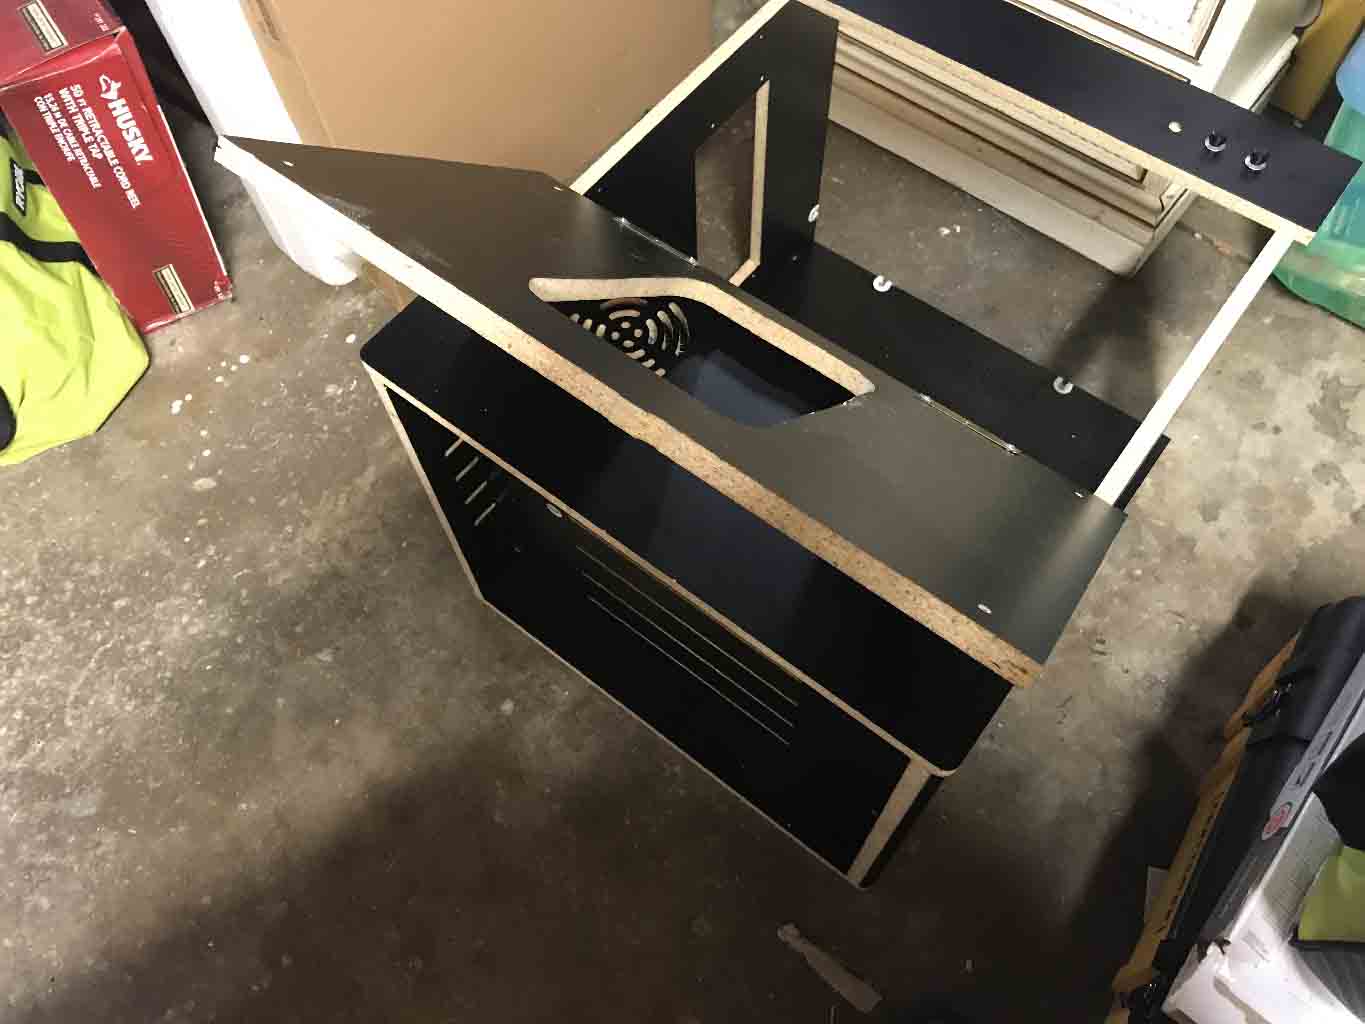
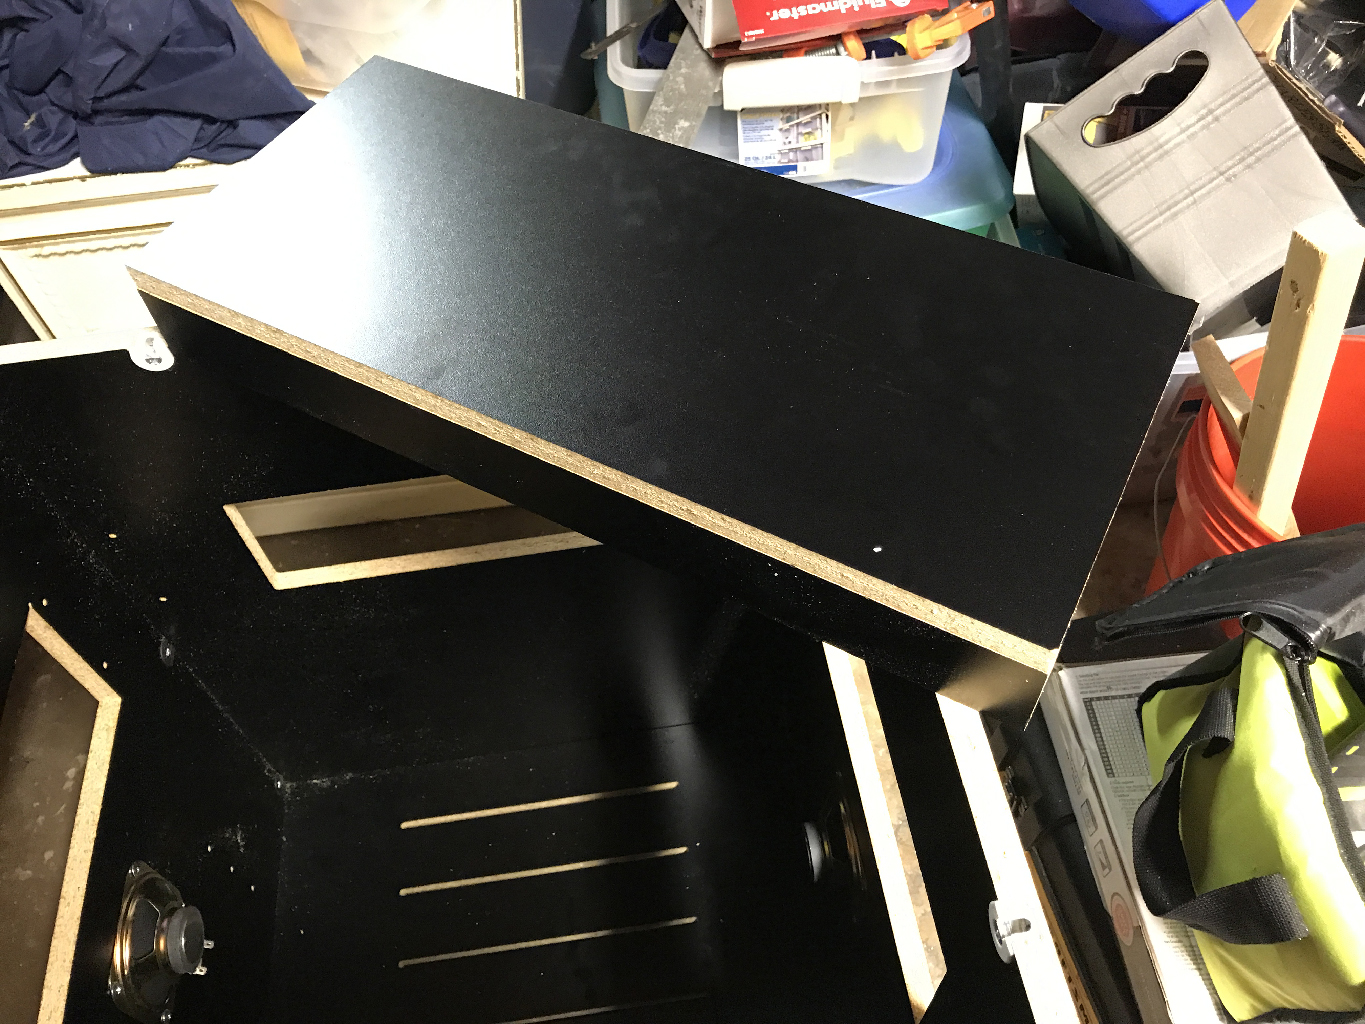
Other than the controllers there is only one panel left – the top panel. I just placed it on top to see what it would look like. I am nowhere near ready to install it. But at this point but it looks so cool!
The tragic part of all of this is that technically I just have a giant and fairly sturdy box.
Power
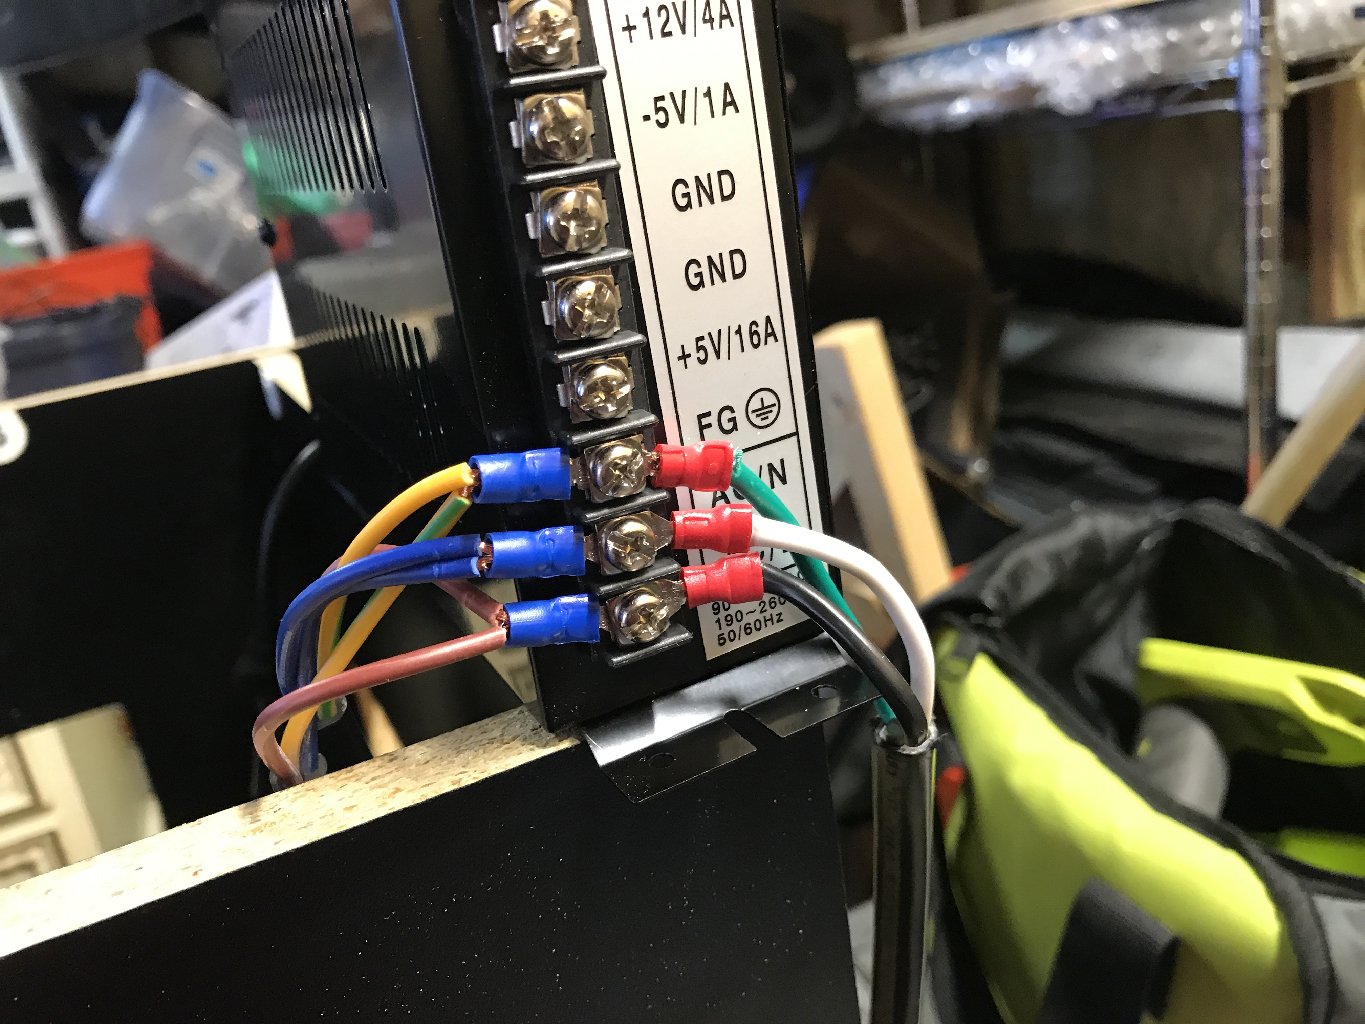
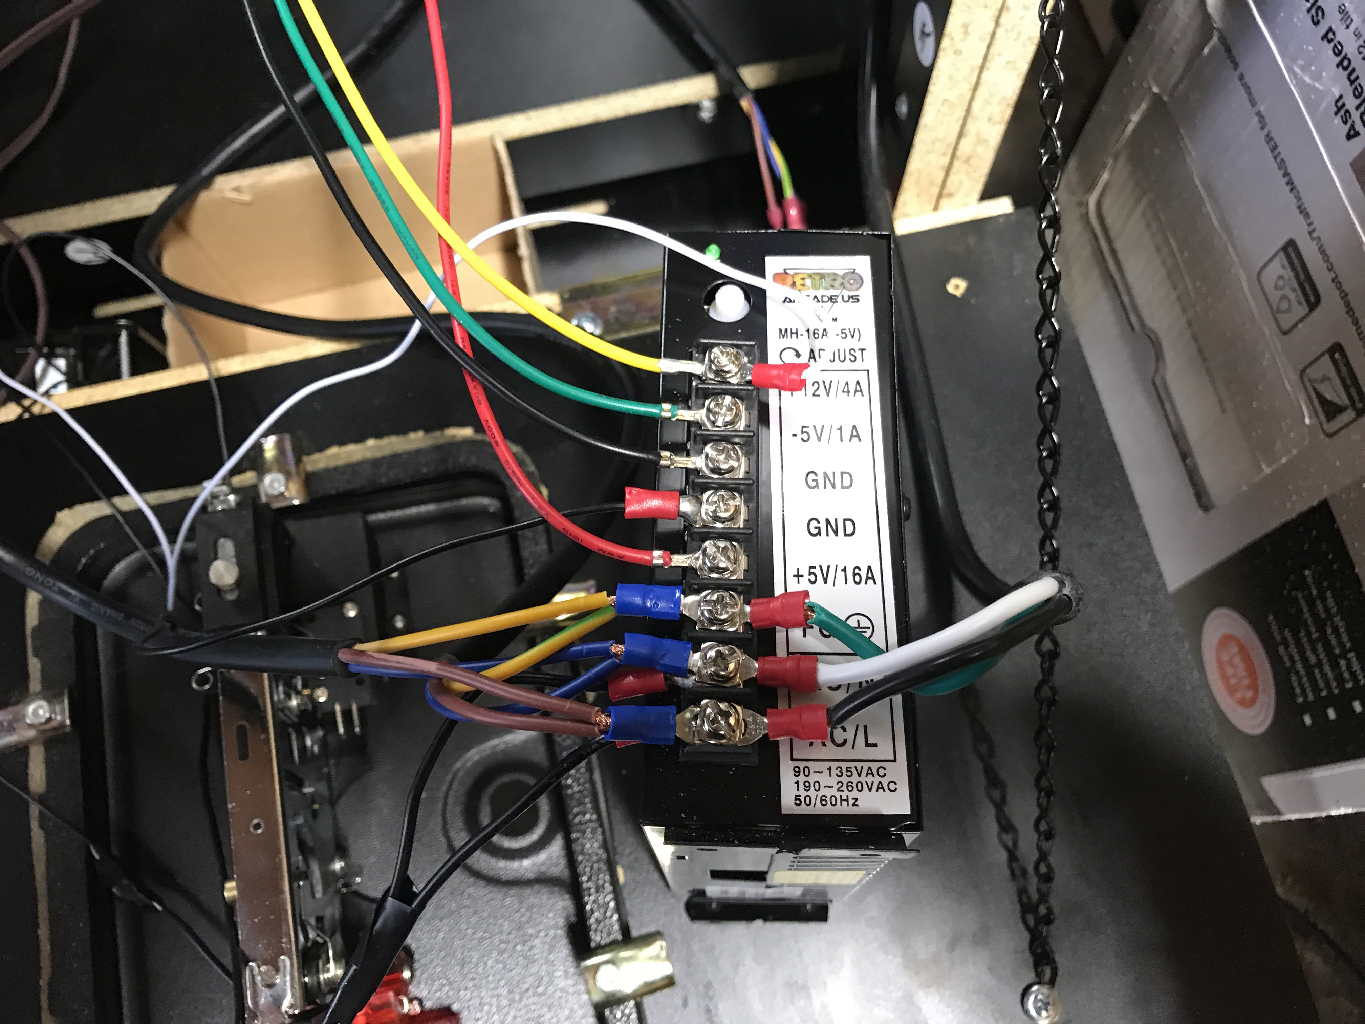
So I started with the power supply. The rocker switch I installed on the back of the box has a standard 3 prong cable going into it from the outside. On the inside is another power cable that runs the AC to the power supply. In the picture the 3 cables on the left with the blue tips are from the internal power cable.
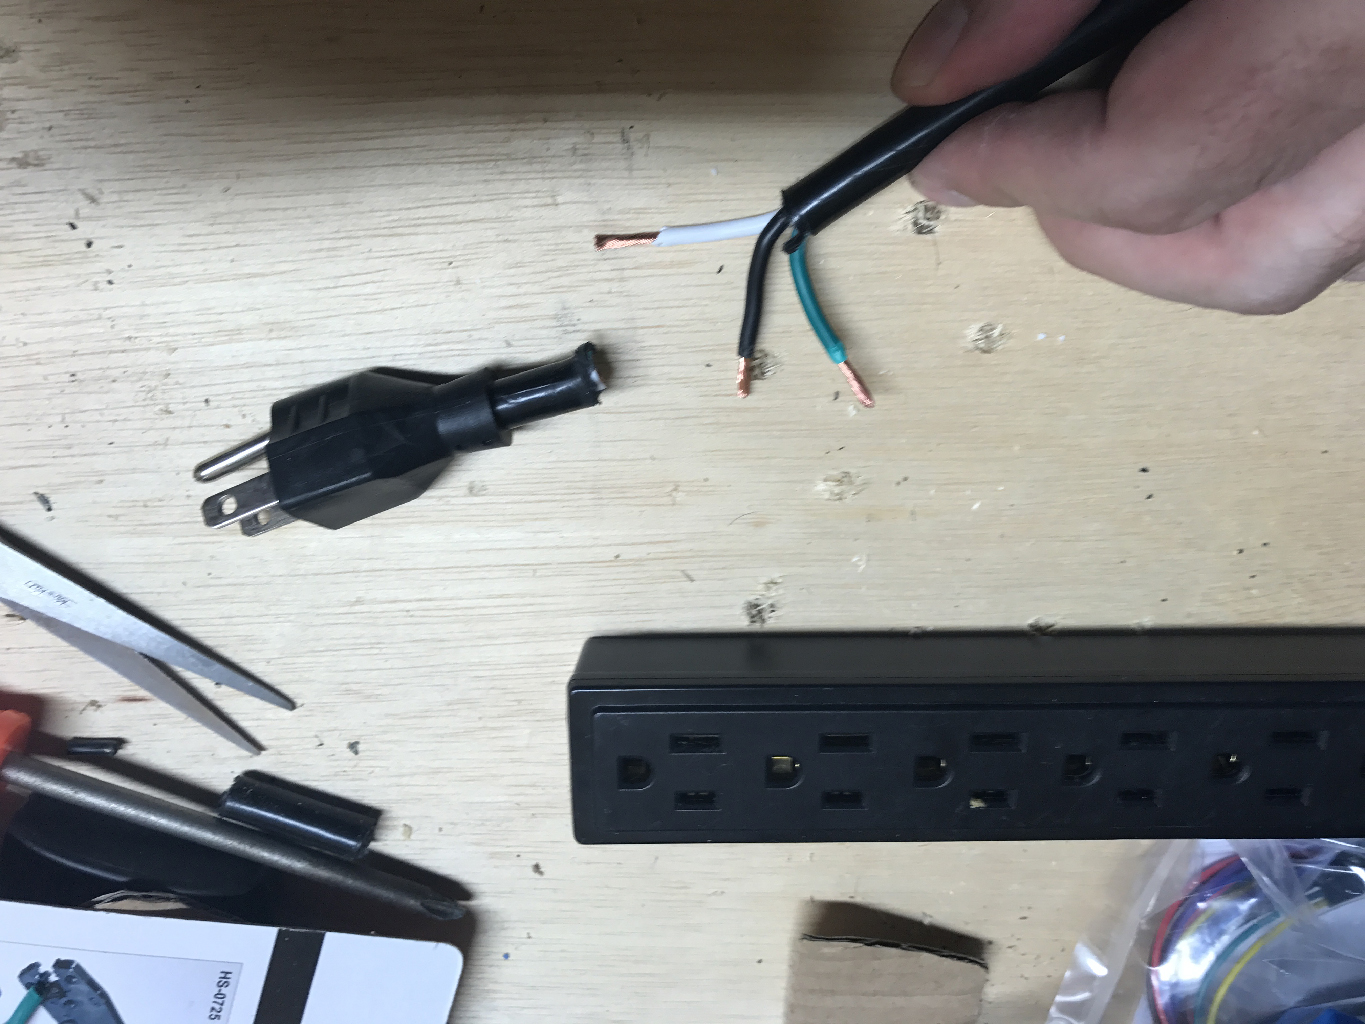
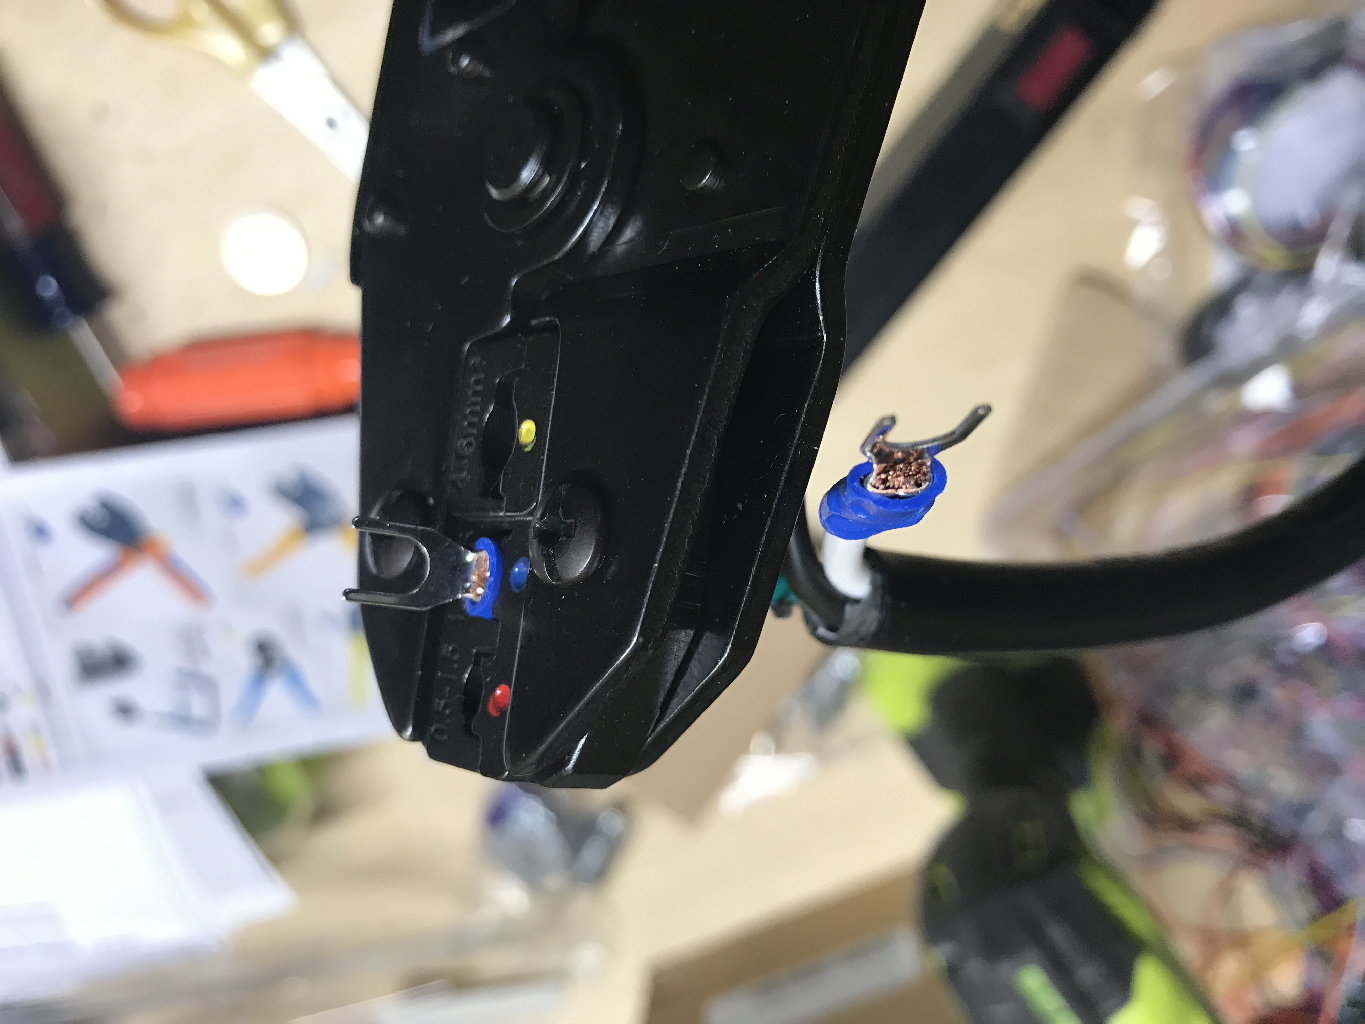
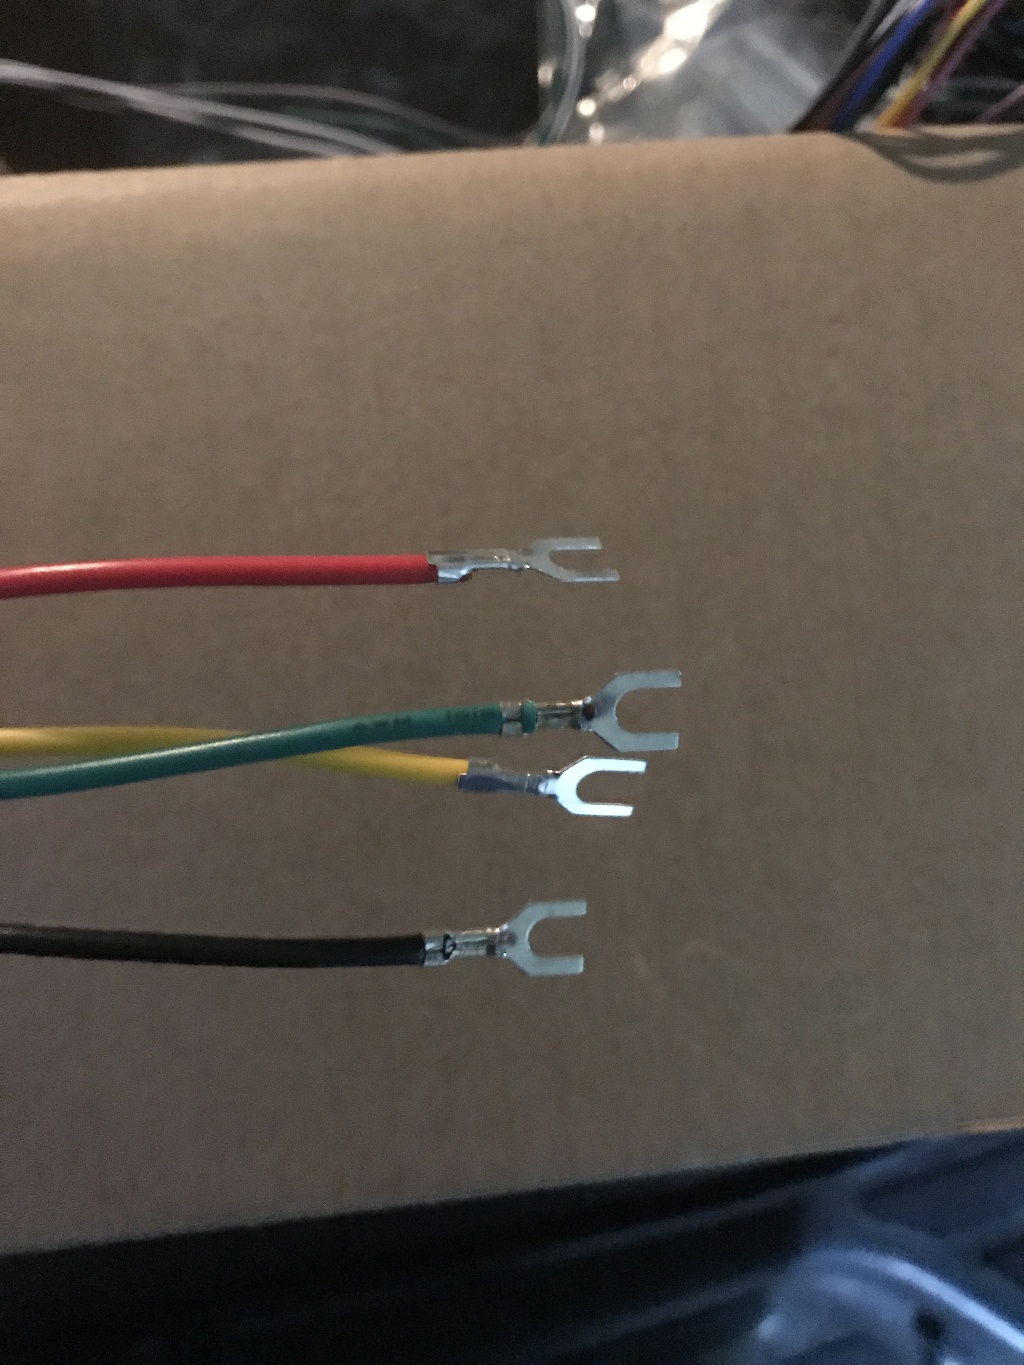
I knew I wanted an outlet inside the box. Since there was already power running inside I took a power strip and cut off the end. I then crimped on hook ends and attached them at the screw post. Learn your ground, neutral, and hot colors. Green is ground, white is neutral, black is hot.
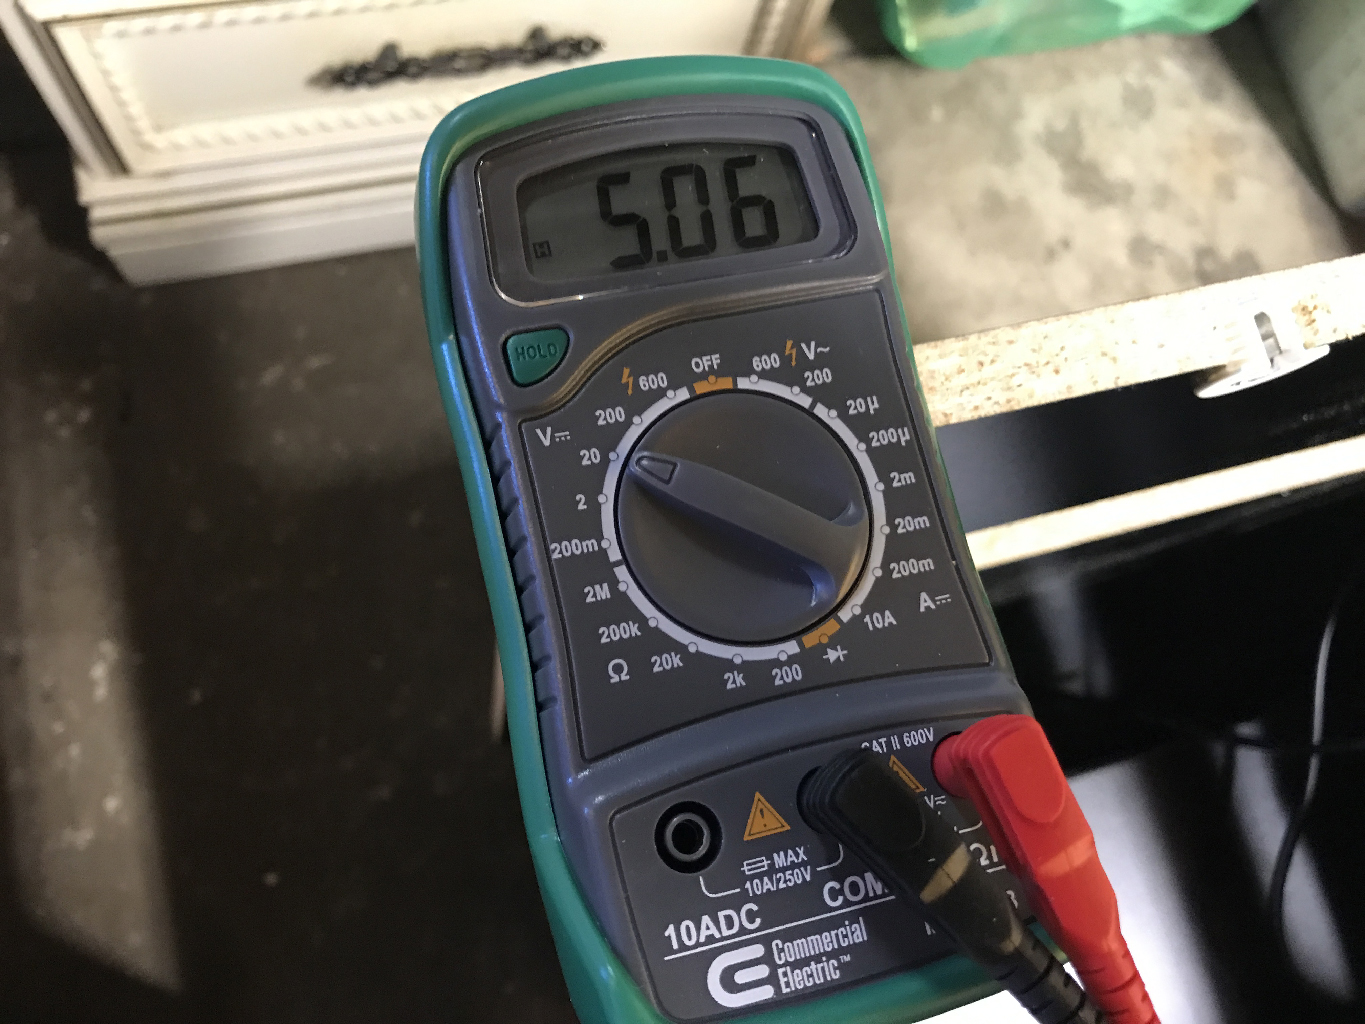
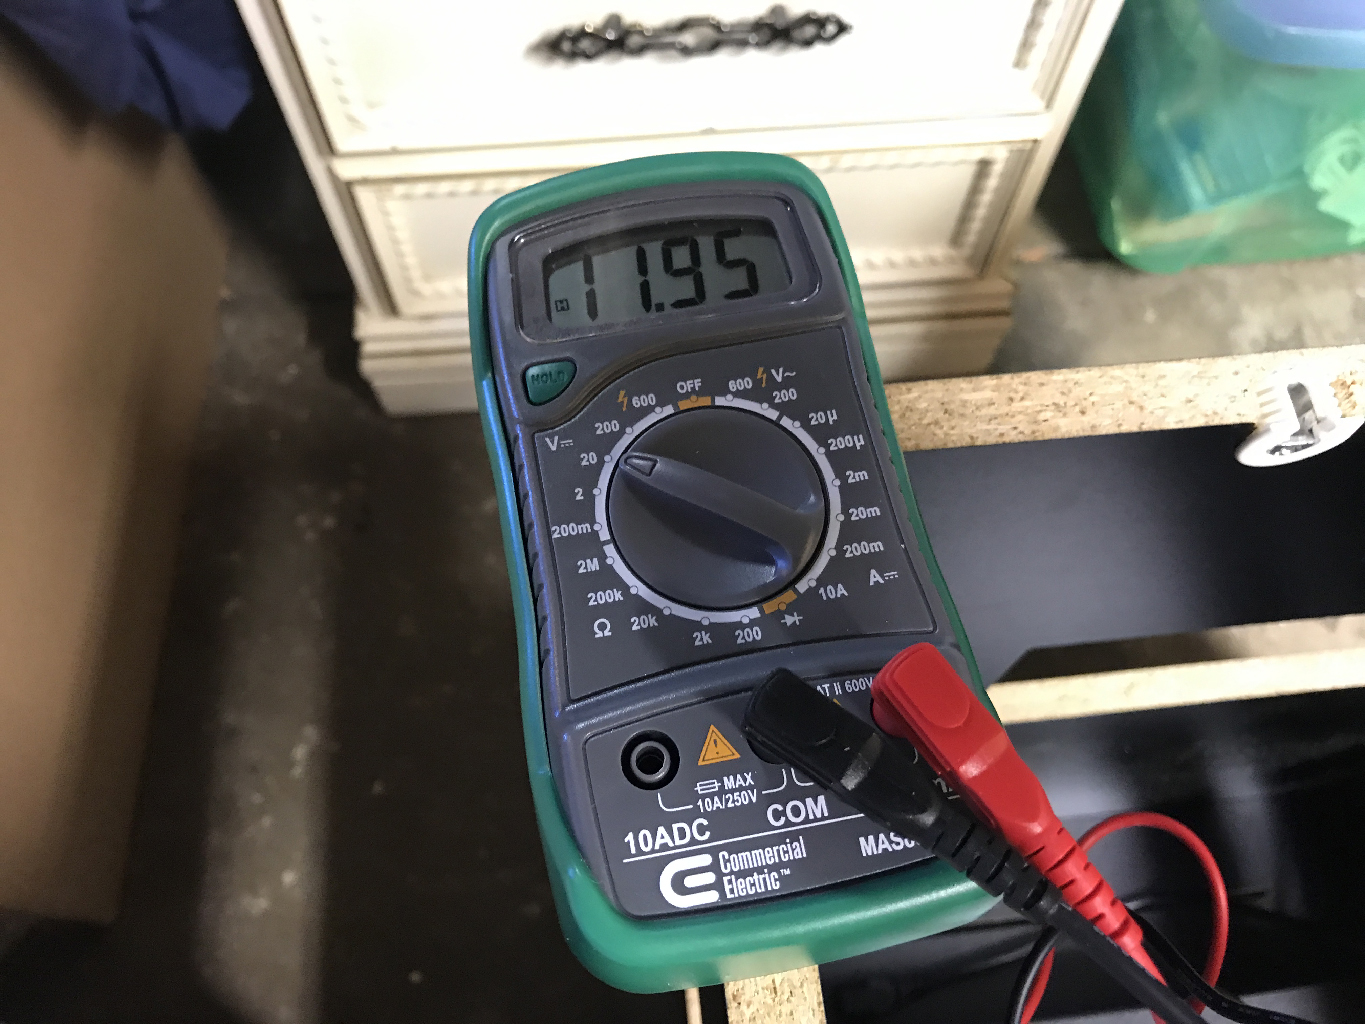
The power supply puts out multiple voltages – namely 5 volts and 12 volts. There is an adjustment switch on it and before you hook anything into it you need to tune the voltages to be as close as possible to 5 and 12 volts. I already owned a nice meter but this was the first time I got to use it.

The internal AC power cable also has a split that goes to the LCD monitor’s power brick. Several other items run to the power supply. The fan goes to the AC side of the power supply but the audio amplifier is DC.
The Brains

The heart of a JAMMA box is this connector. The basic idea is that the arcade cabinet uses a standard wiring that terminates in this standard JAMMA connector. With this connection, a variety of boards can plug in and be played. For example the above is a JAMMA board from a Space Invaders & QIX arcade machine. In the classic sense – everything comes in and out of the JAMMA board, power, controls, audio, and even display (remember most old video games are CGA or EGA). However, I was going to use more specialized JAMMA boards and didn’t need to worry about audio or video.

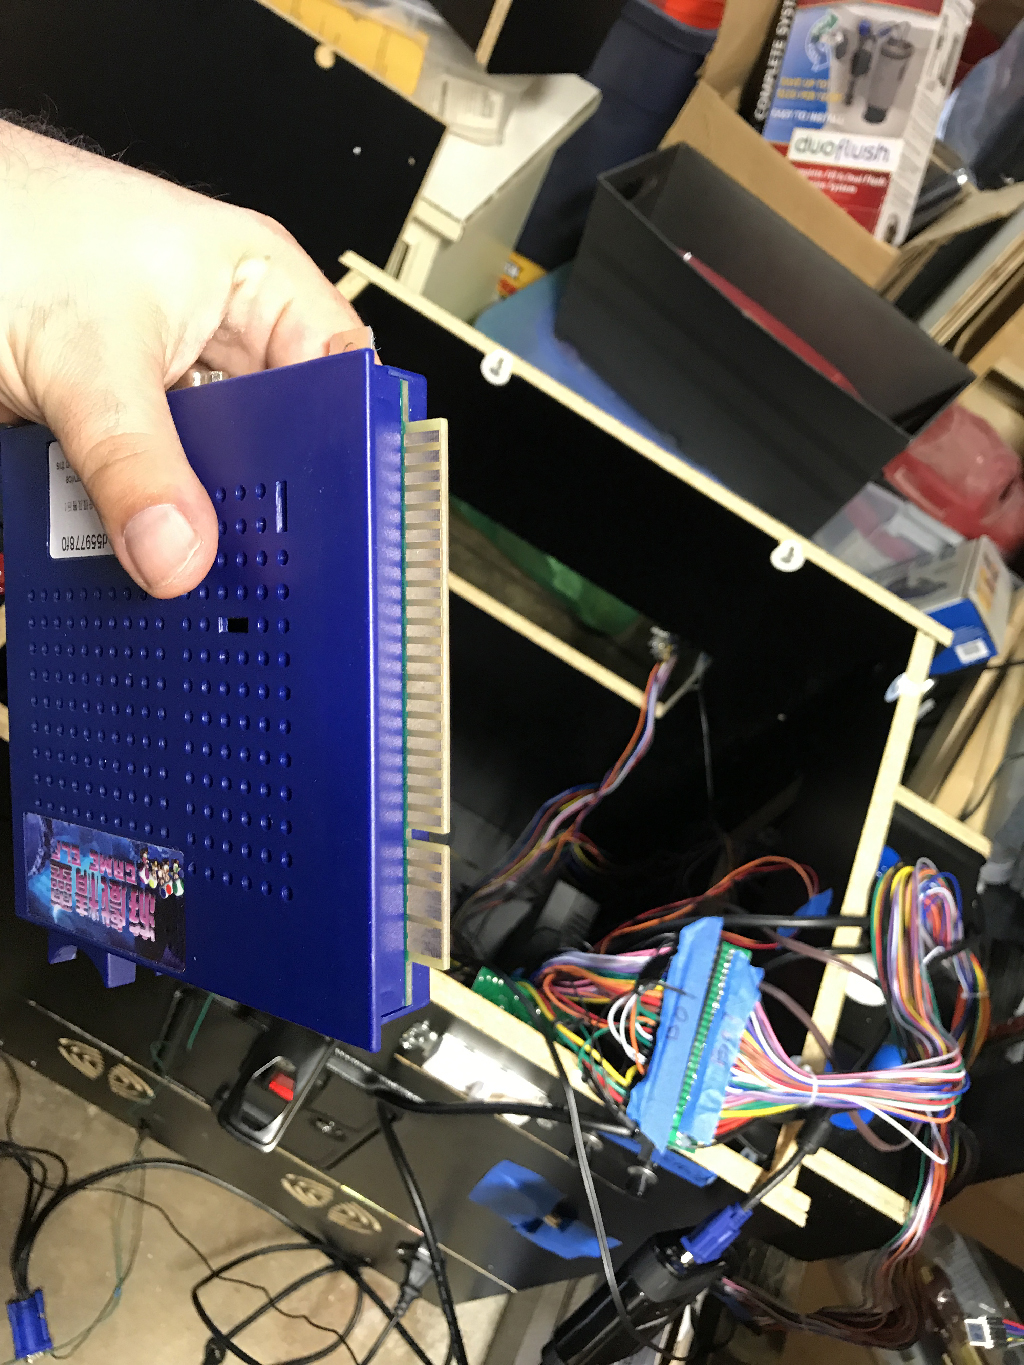
These are the JAMMA boards that I use. The one on the left is a USB to JAMMA card that allows a computer to access all of the buttons. The one on the right is a GameElf “1162-in-one” JAMMA board. This board (which is really a box) has 1162 built in arcade games and is designed to work with cocktail style machines. This means it can play games vertically, flipped vertically (player 2), and horizontally. I got my GameElf 1162 from Holland Computers but it looks like they aren’t selling it anymore. You can still find it online from other places. Unlike a traditional arcade cabinet I am using an LCD display and an audio amplifier both of which bypass the JAMMA connections.


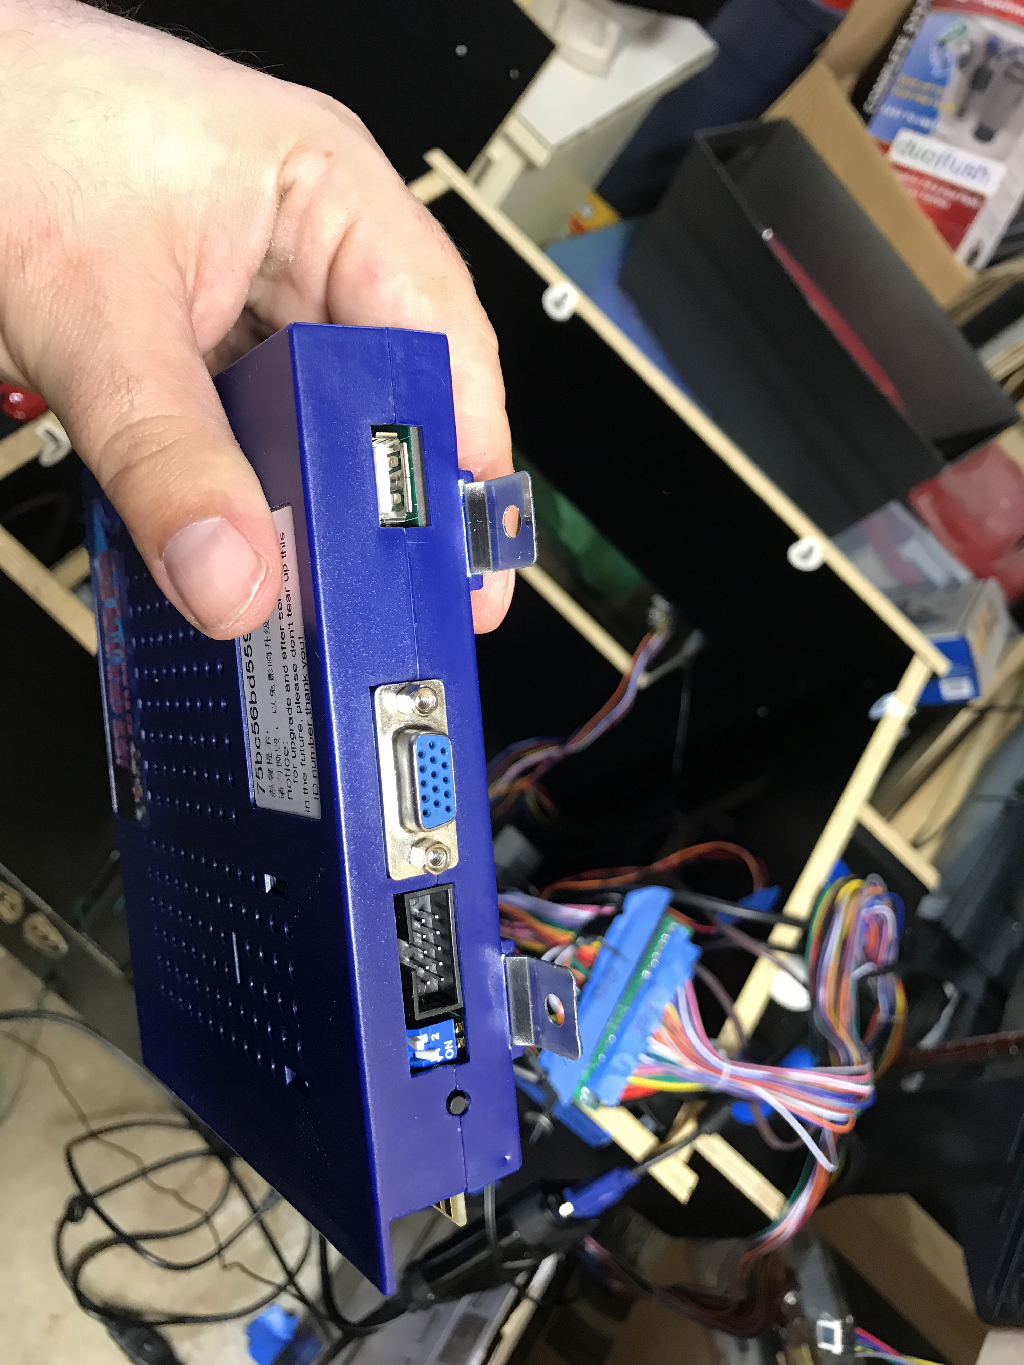
Let’s look at the other 3 sides of the GameElf 1162. On one side it has an SD card which contains all the games. From what I have read online – don’t touch the SD card! Note: Not every connector on the box is used. On one side is a 1/8″ audio output jack with a volume control and the other has a VGA connector for video. There is a USB port for a certain type of game controller – but that’s not the type of box I am building! Next to the VGA connector is the connector for the trackballs.
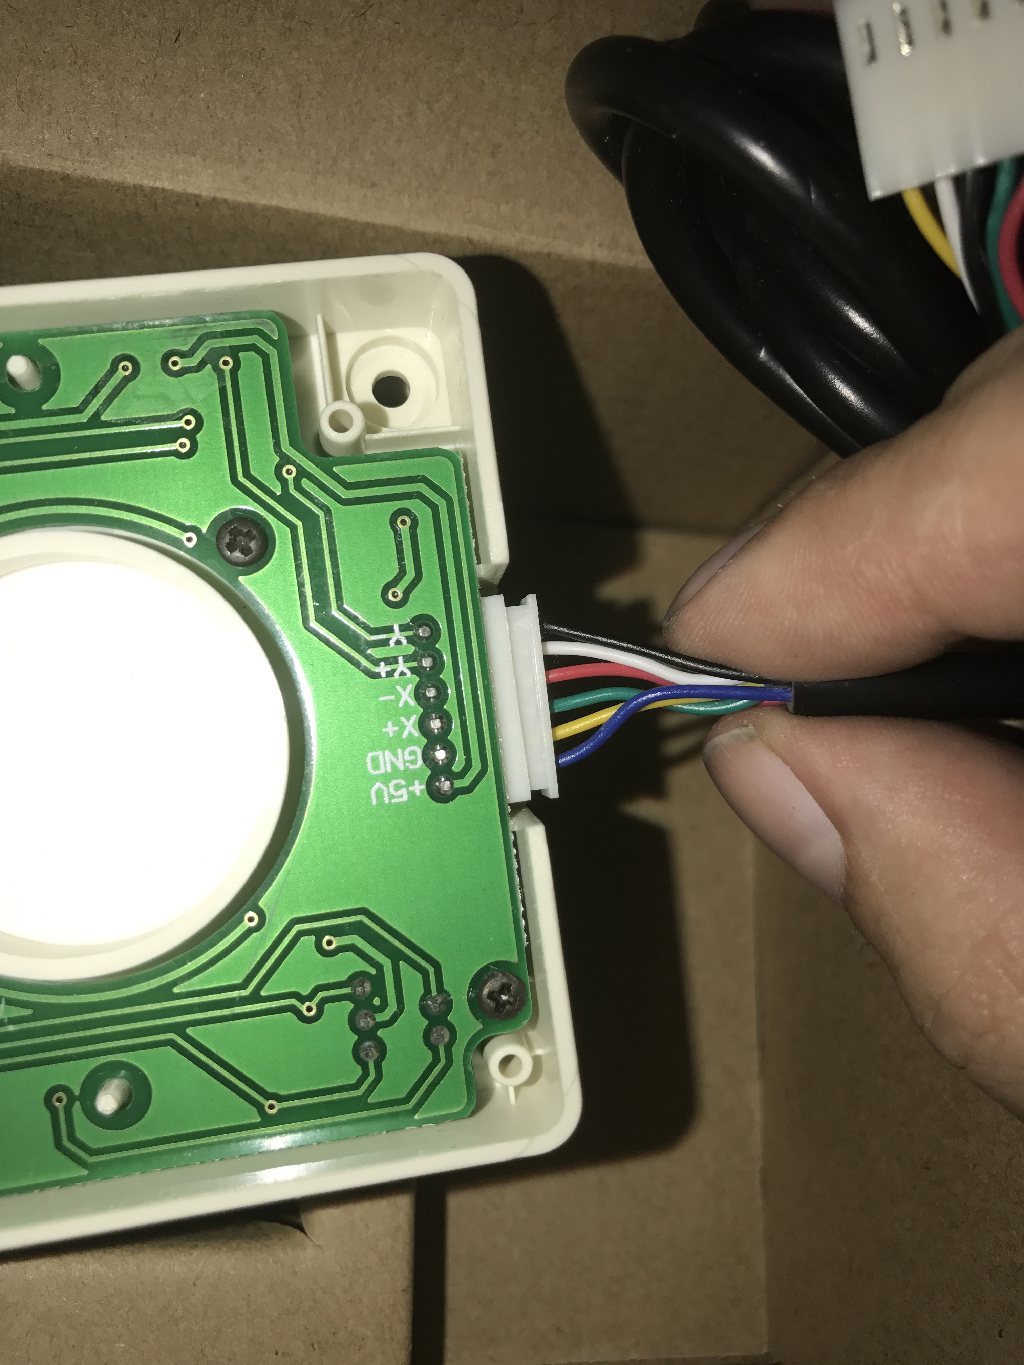
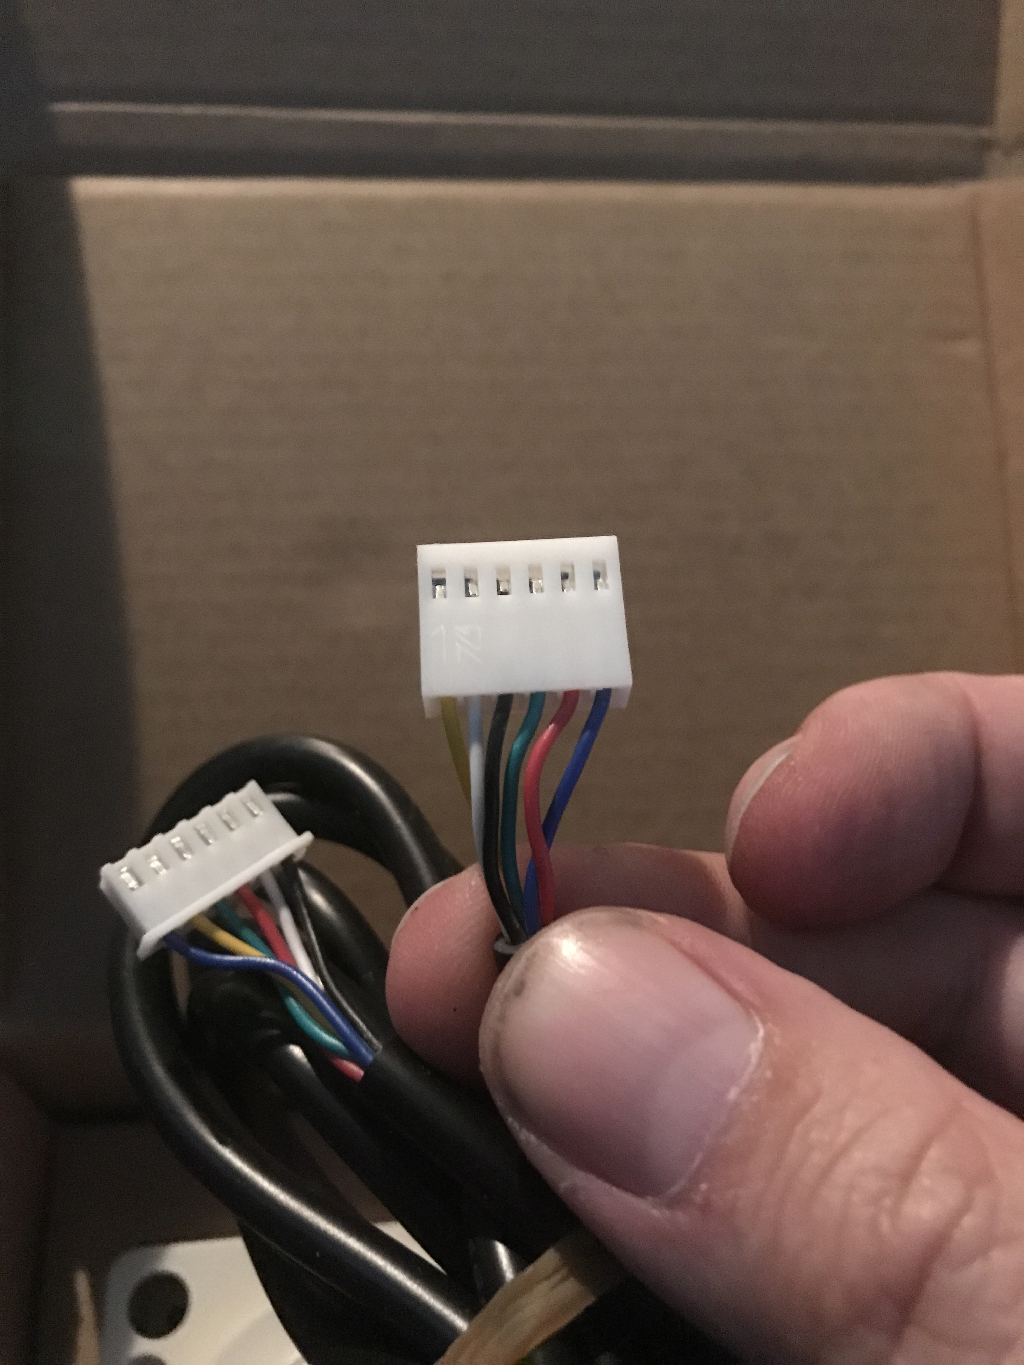
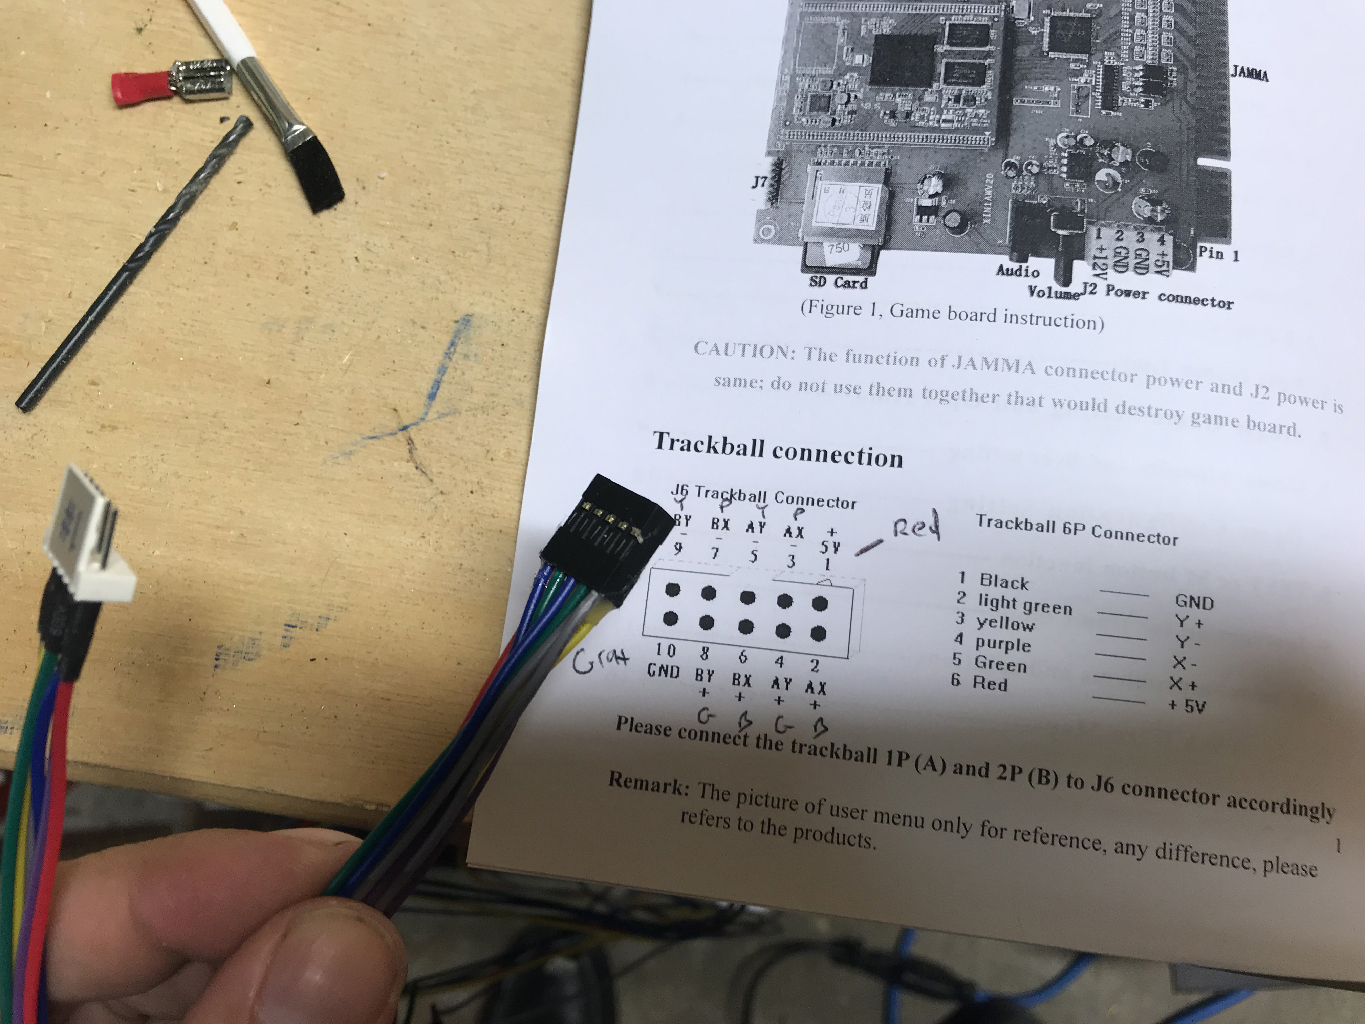
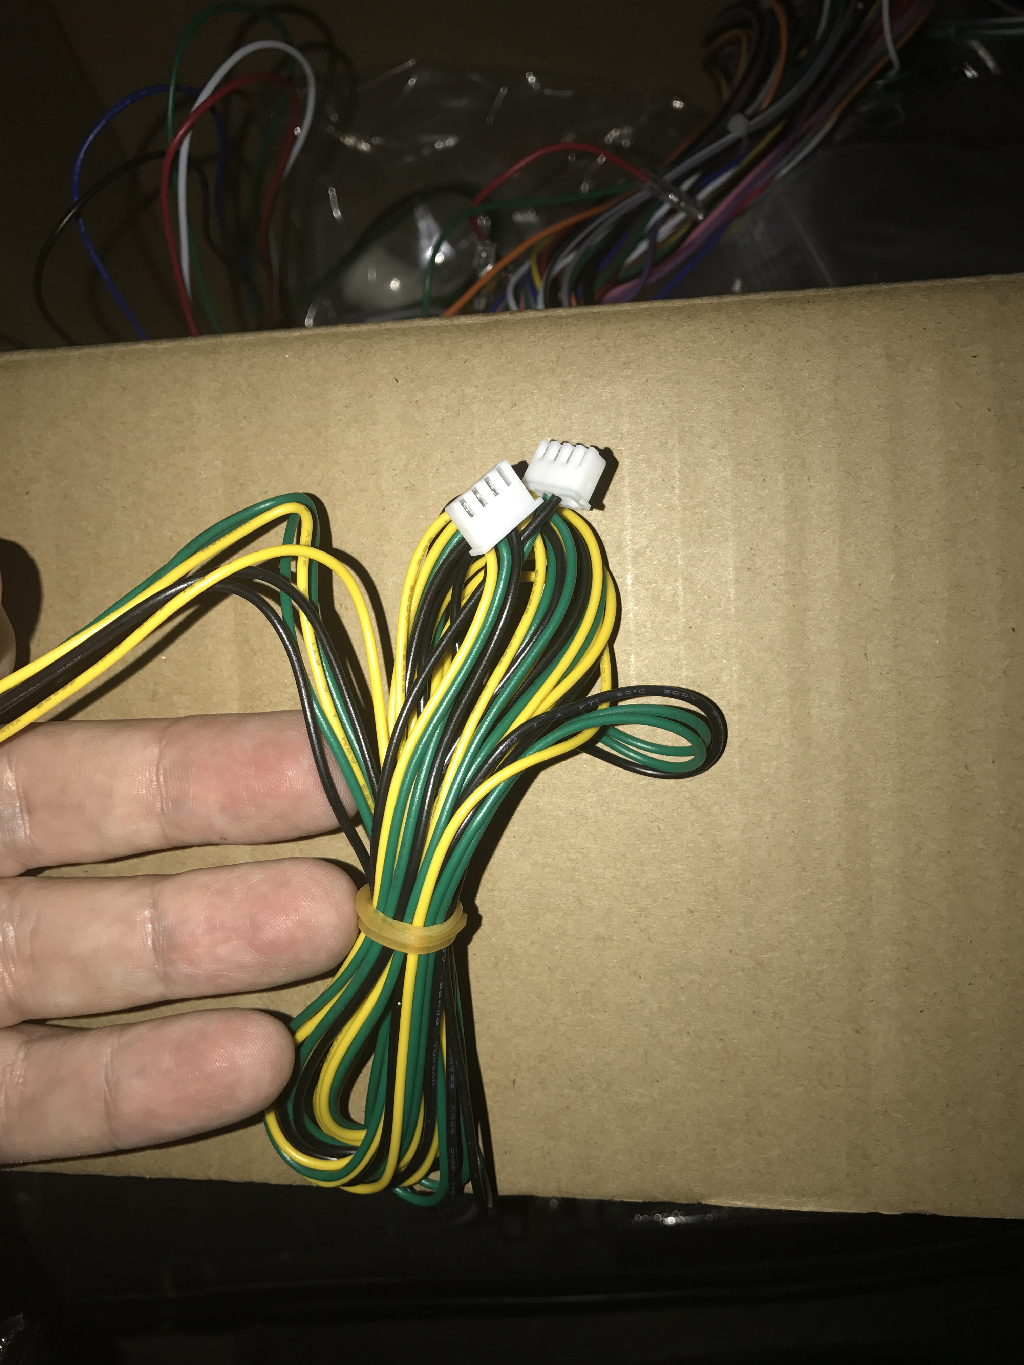
The 2″ trackball comes with it’s own cable.


To plug the trackballs into the GameElf you need a separate JAMMA Trackball Interface Wiring Harness. This is specifically for 2″ trackballs and for the 138-in-1, 412-in-1, 485-in-1, 619-in-1, & 1162-in-1 GameElf boards. What is nice about this cable is that it allows the cable coming from the GameElf to meet the cables coming from the trackballs with a quick connection in the middle. When it comes to connections I would rather unplug cable from cable than cable from hardware – which is why I purchased a JAMMA extension cable for the JAMMA boards.
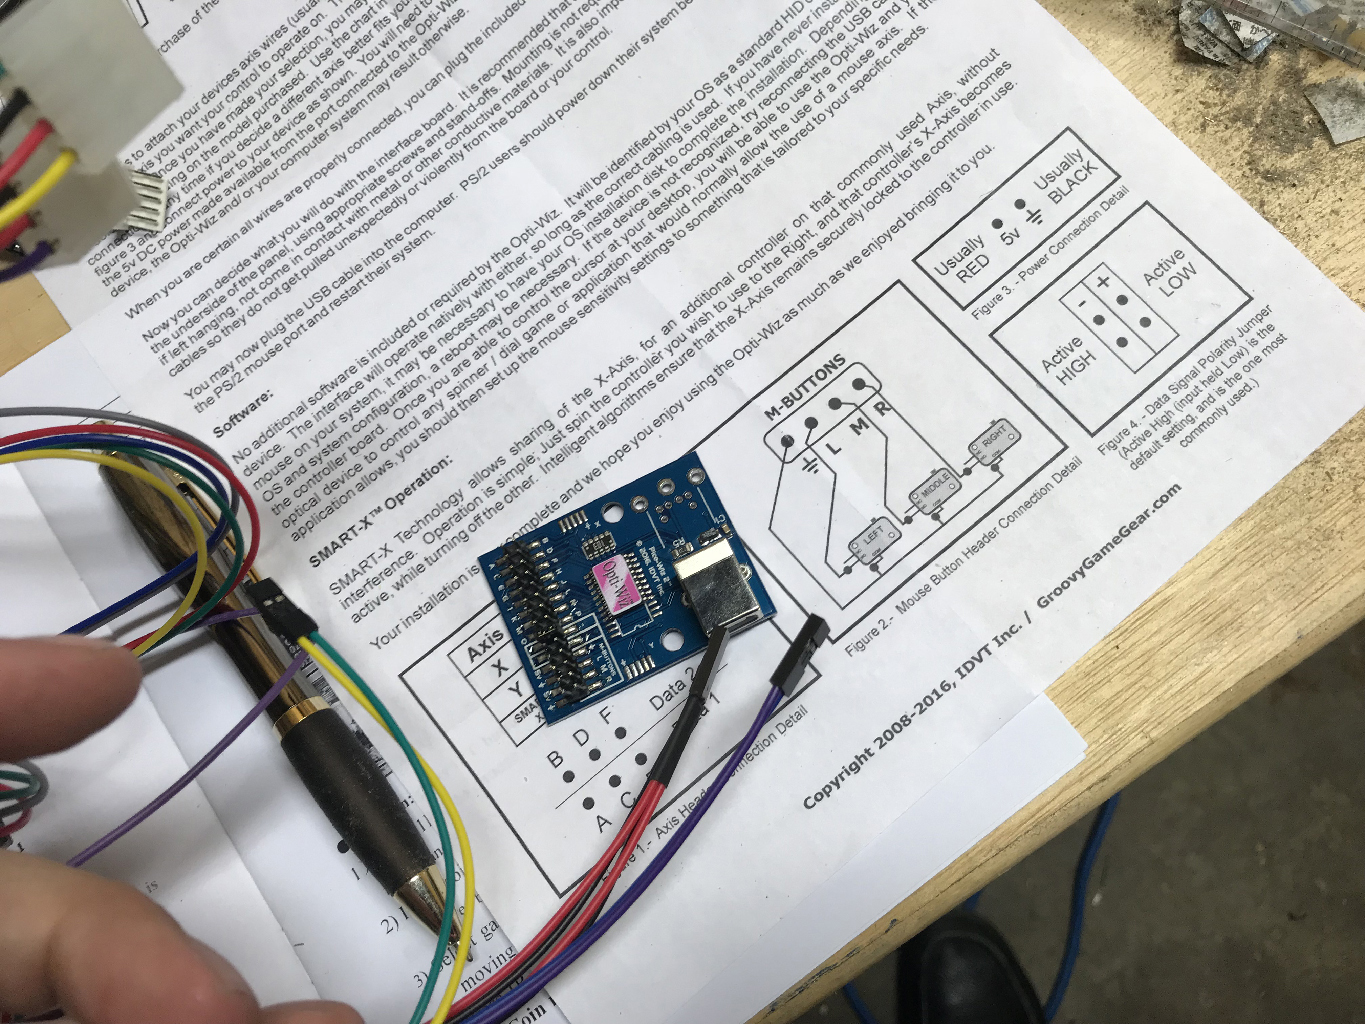
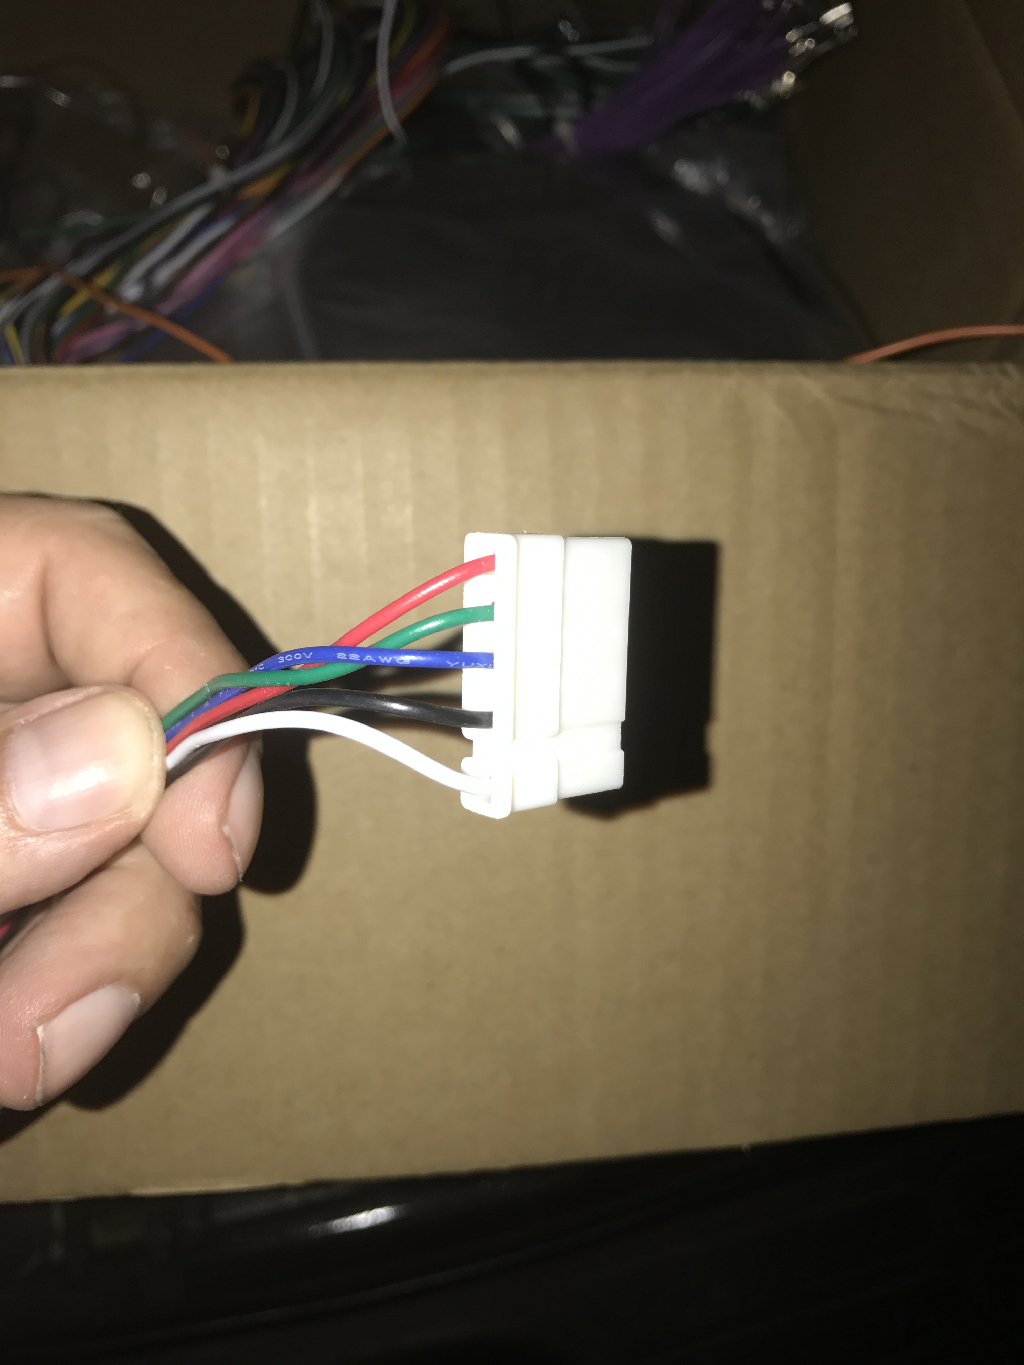
For the computer, you can only hook up one trackball. I purchased an Opti-Wiz Trackball and Spinner Interface. This is a USB board that allows you to plug (if you know the wiring – follow the diagrams) an analog trackball into a computer. I also purchased the Opti-Wiz 4-pin Molex connector for the unit so I wouldn’t have to solder onto the board. Since I want to be able to swap the trackball between this USB board and the GameElf, I need a quick connect / disconnect. I purchased an extra JAMMA Trackball Interface Wiring Harness (for the part that interfaces with the trackball – I cut away the other end) and wired it into the Opti-Wiz 4-pin Molex connector.

Now I have a quick connect for the GameElf and also a quick connect for the Opti-Wiz. Again this is only for player 1’s trackball.
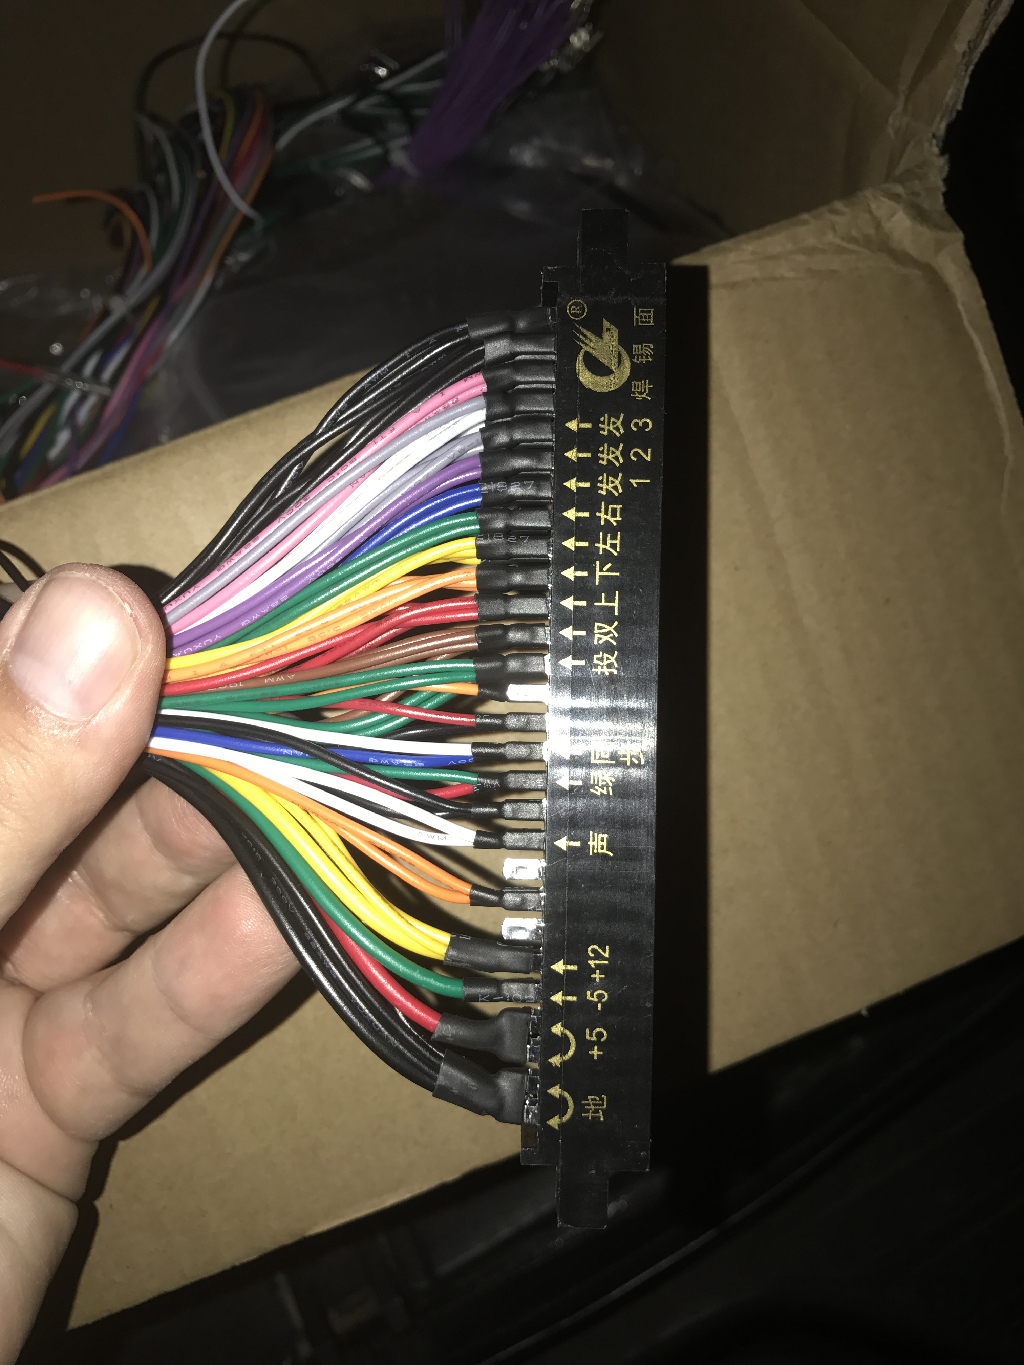
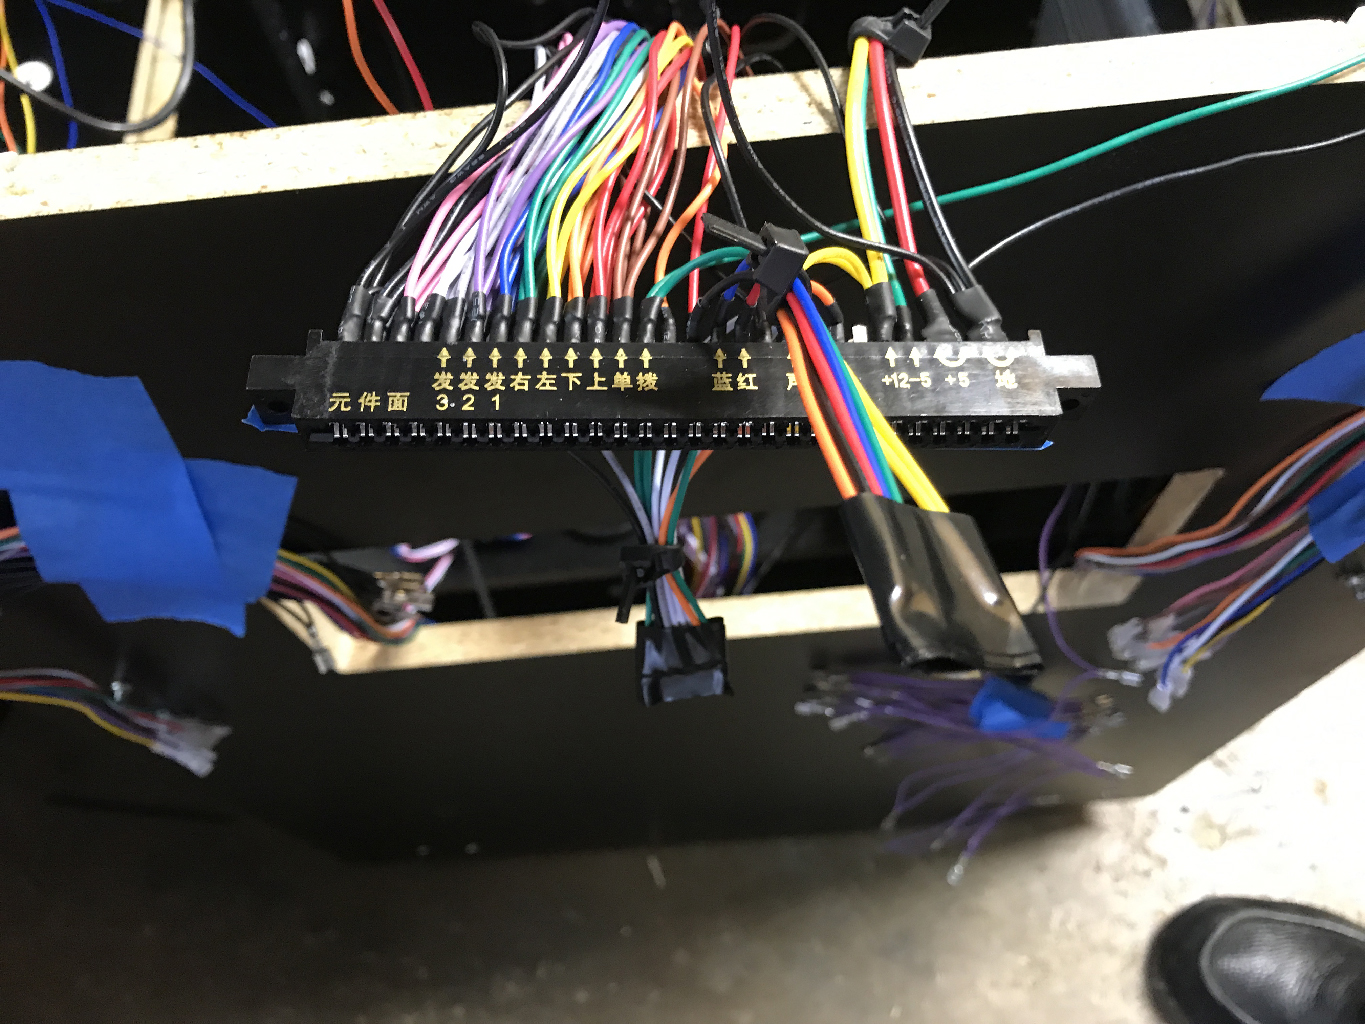
The JAMMA Connector
I am going to show the JAMMA connector again. If you build an arcade cabinet you are going to spend a lot of time looking at this. It is well documented online and because mine is technically a “3-way” (because it it is a cocktail cabinet with a head to head controller) it has almost twice the number of connections.


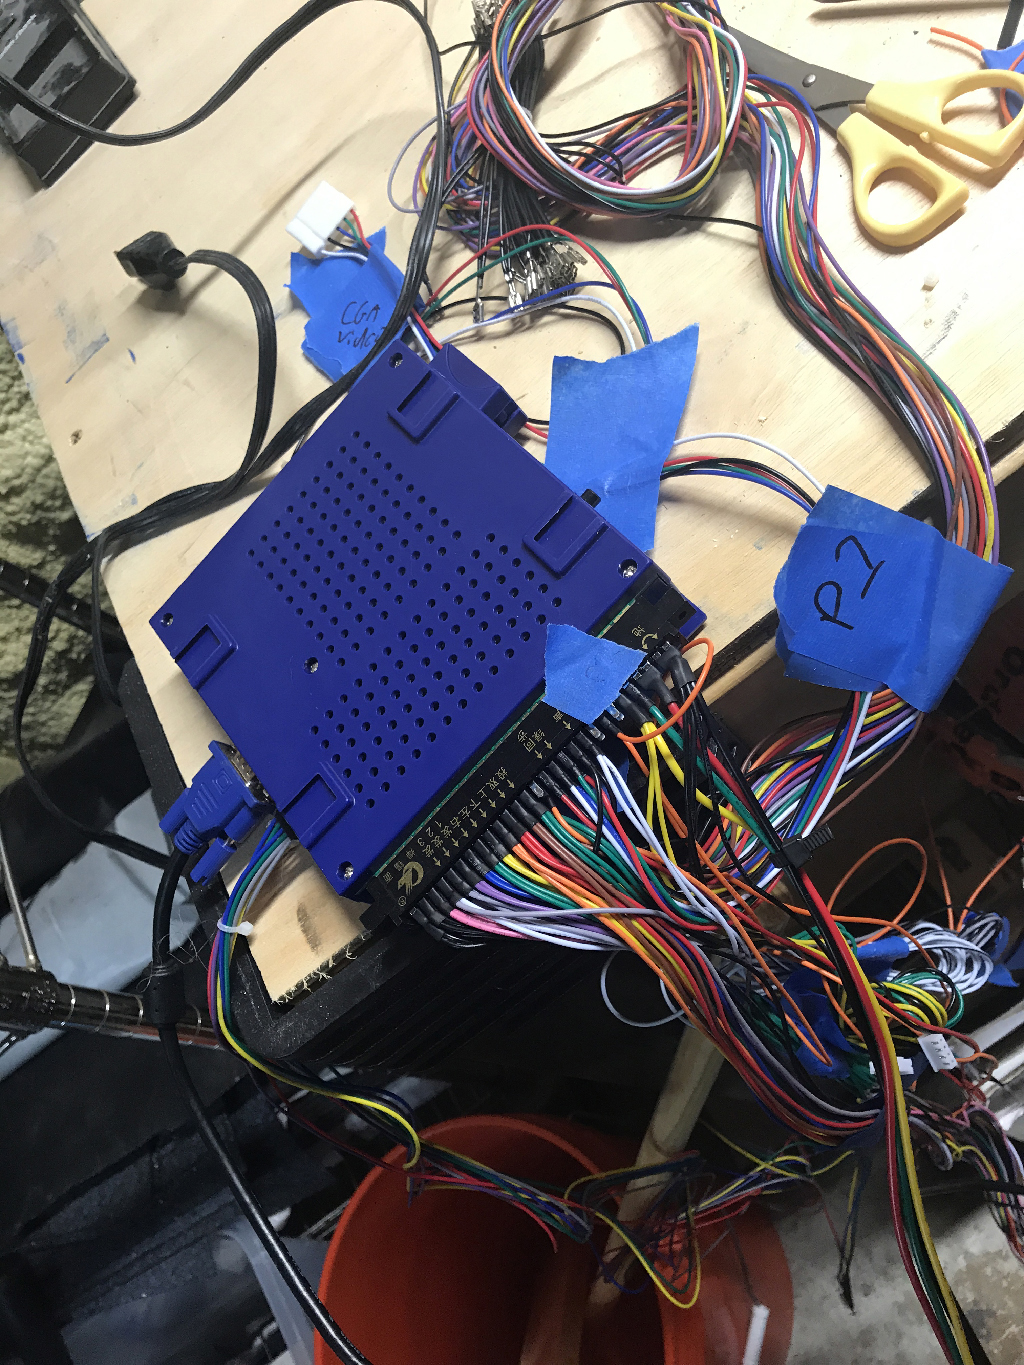
So many cables. First thing I did was organize and label!
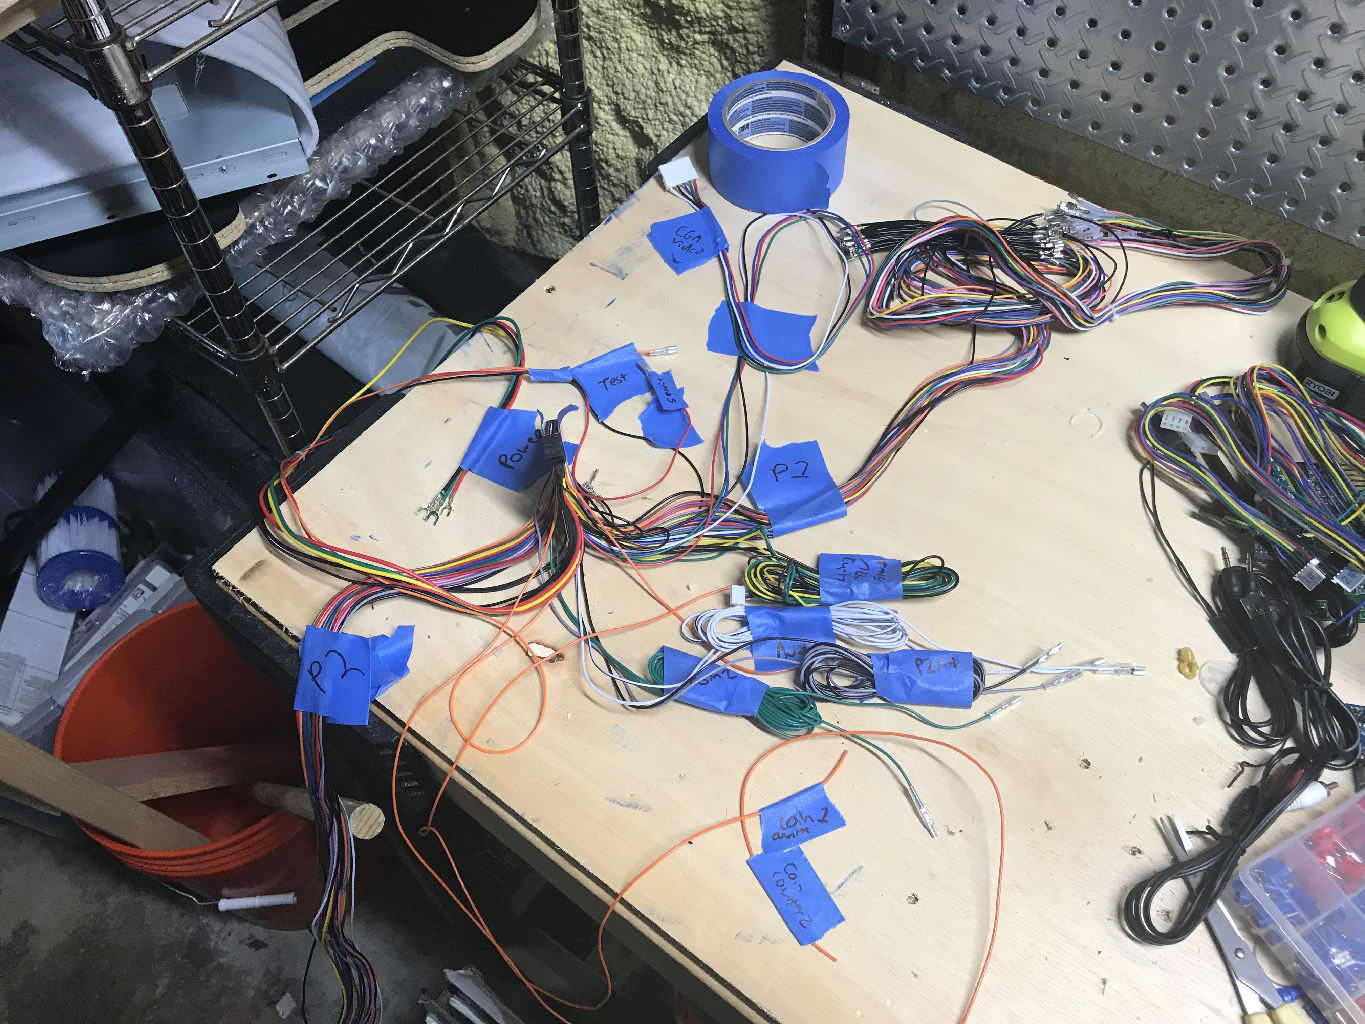
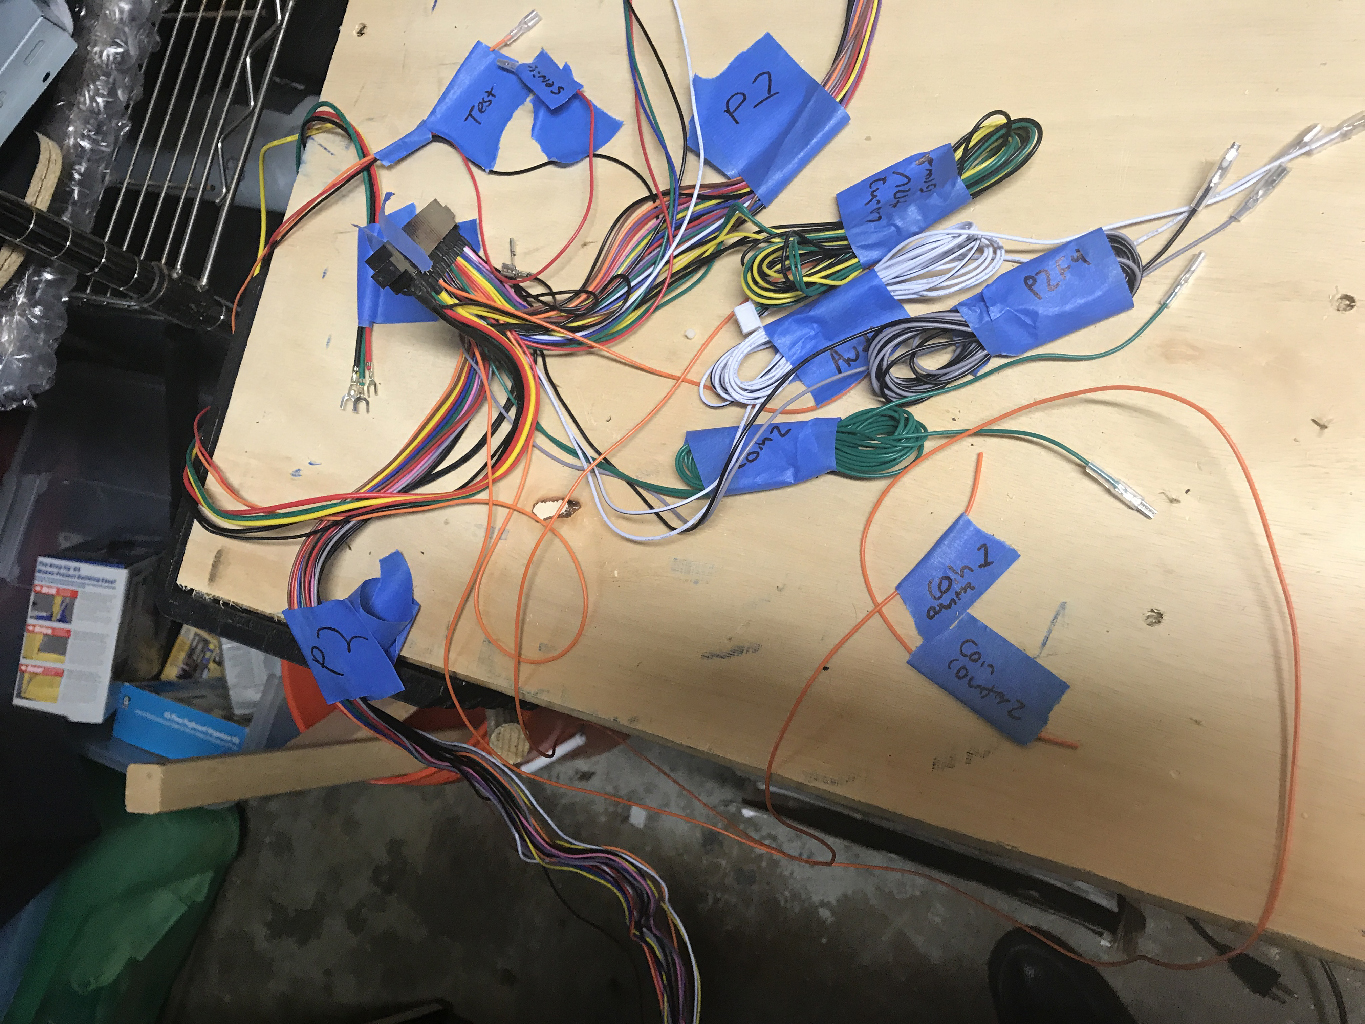
Not only did I organize and label, I taped the cables down to my workbench.
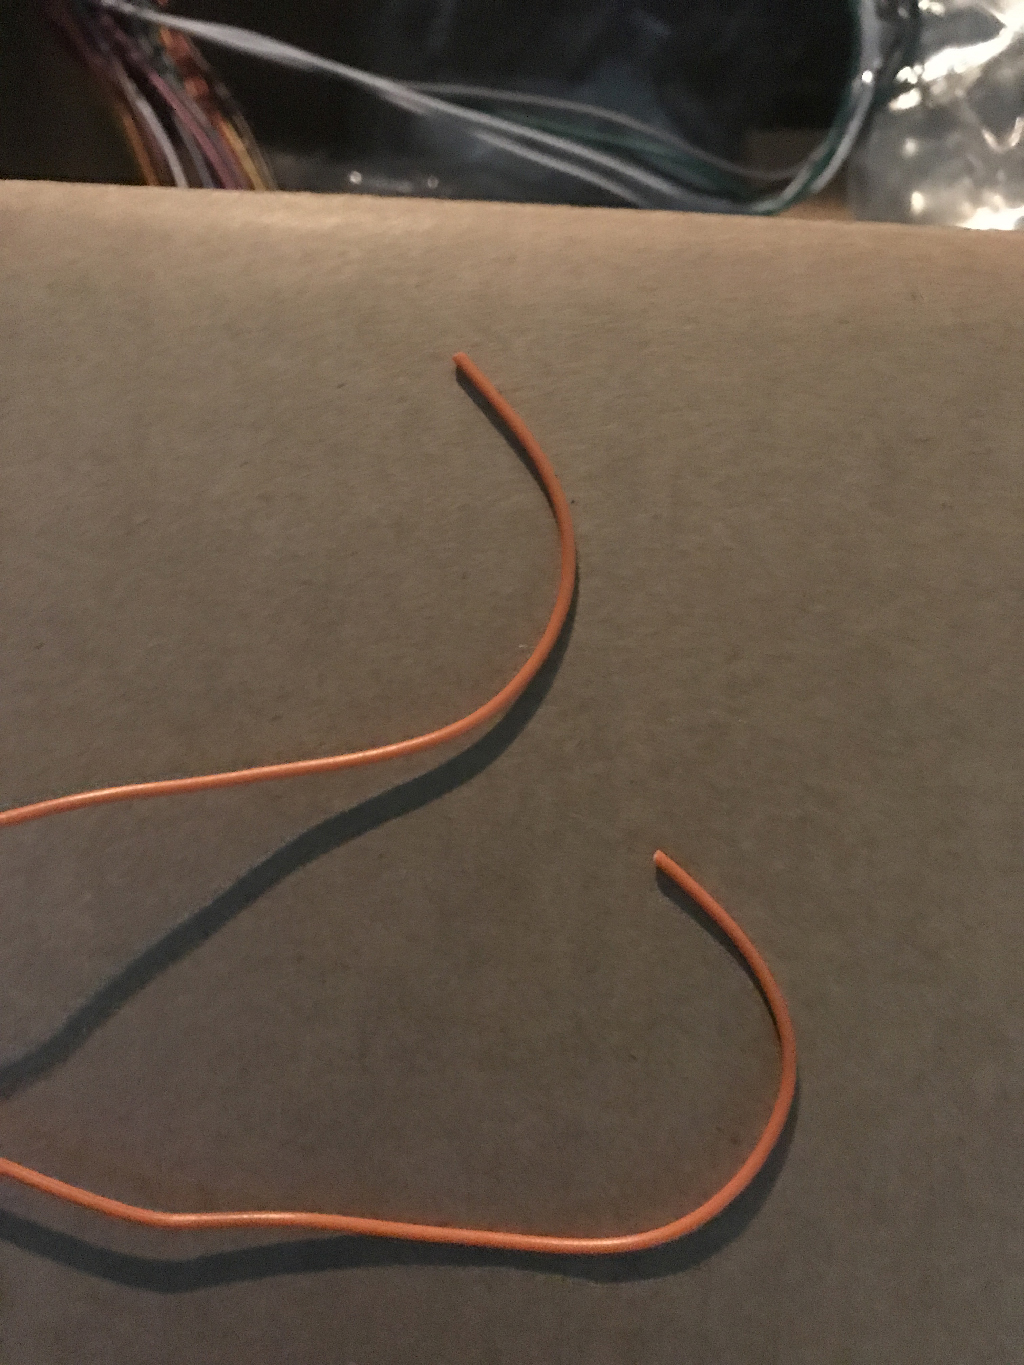
Once I realized that several of the cables didn’t apply to this box, I cut them off and capped them.
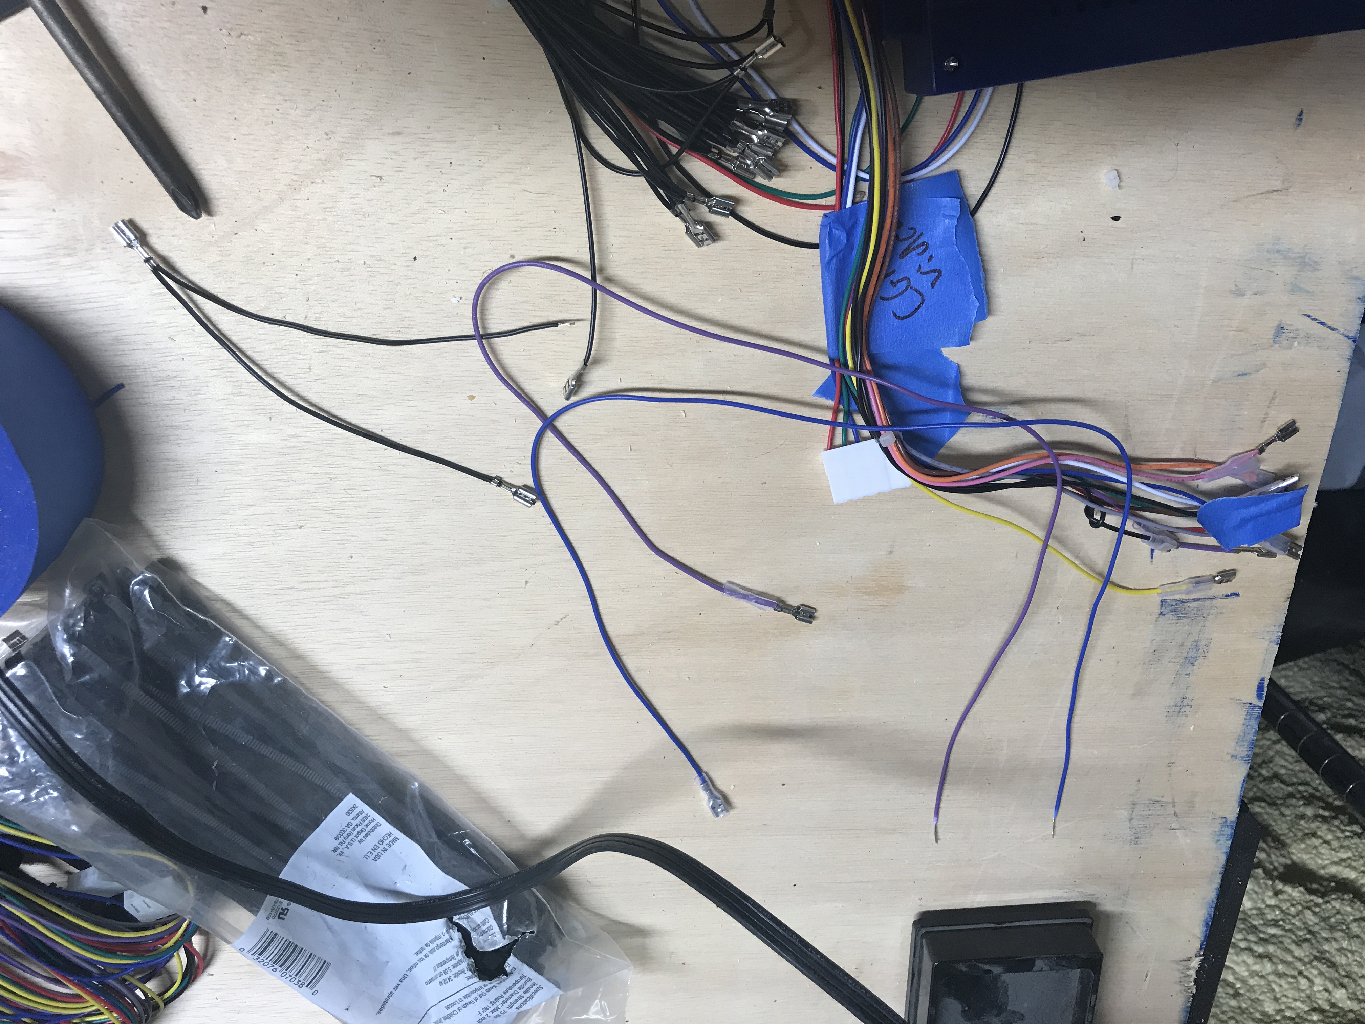
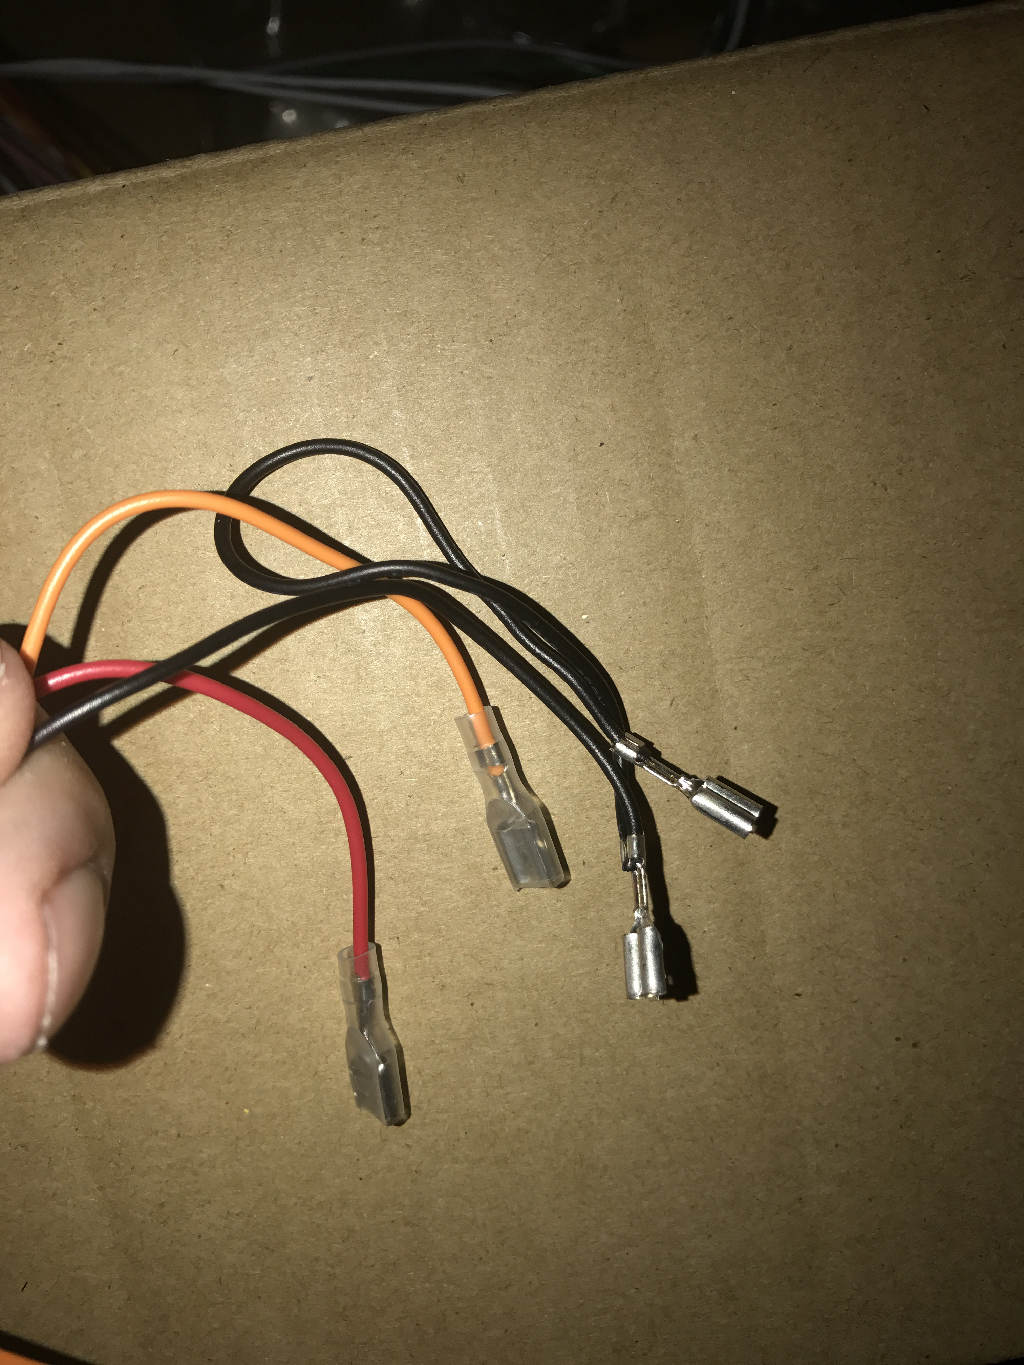
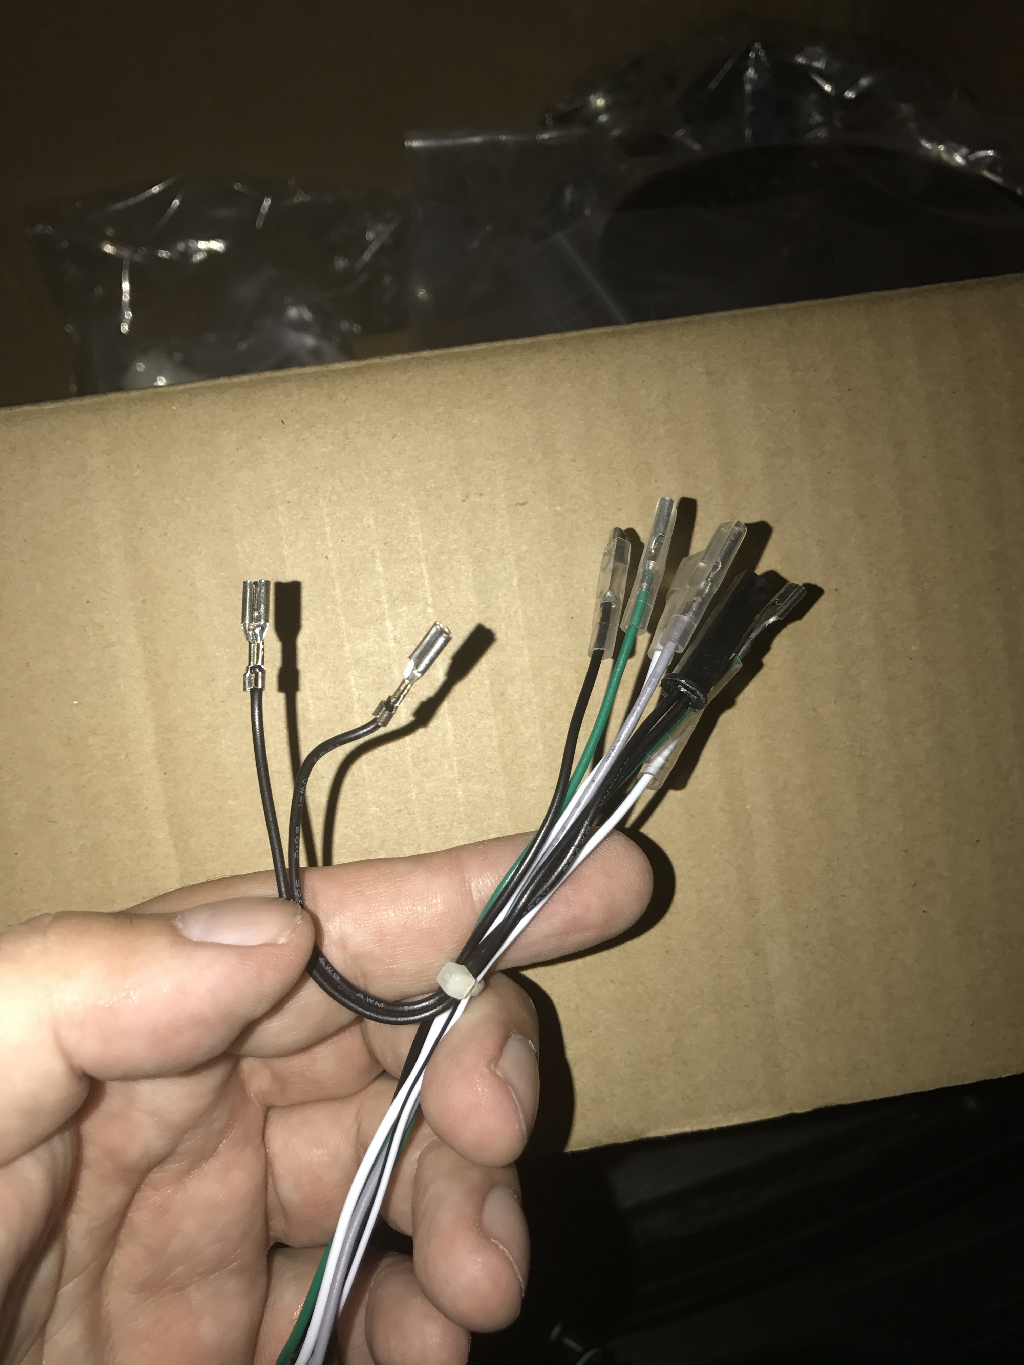
I tried to avoid soldering as long as possible. Because of the “flippers” / side buttons I would need to double those connectors. Luckily I had purchased an extra JAMMA cable to use for parts.
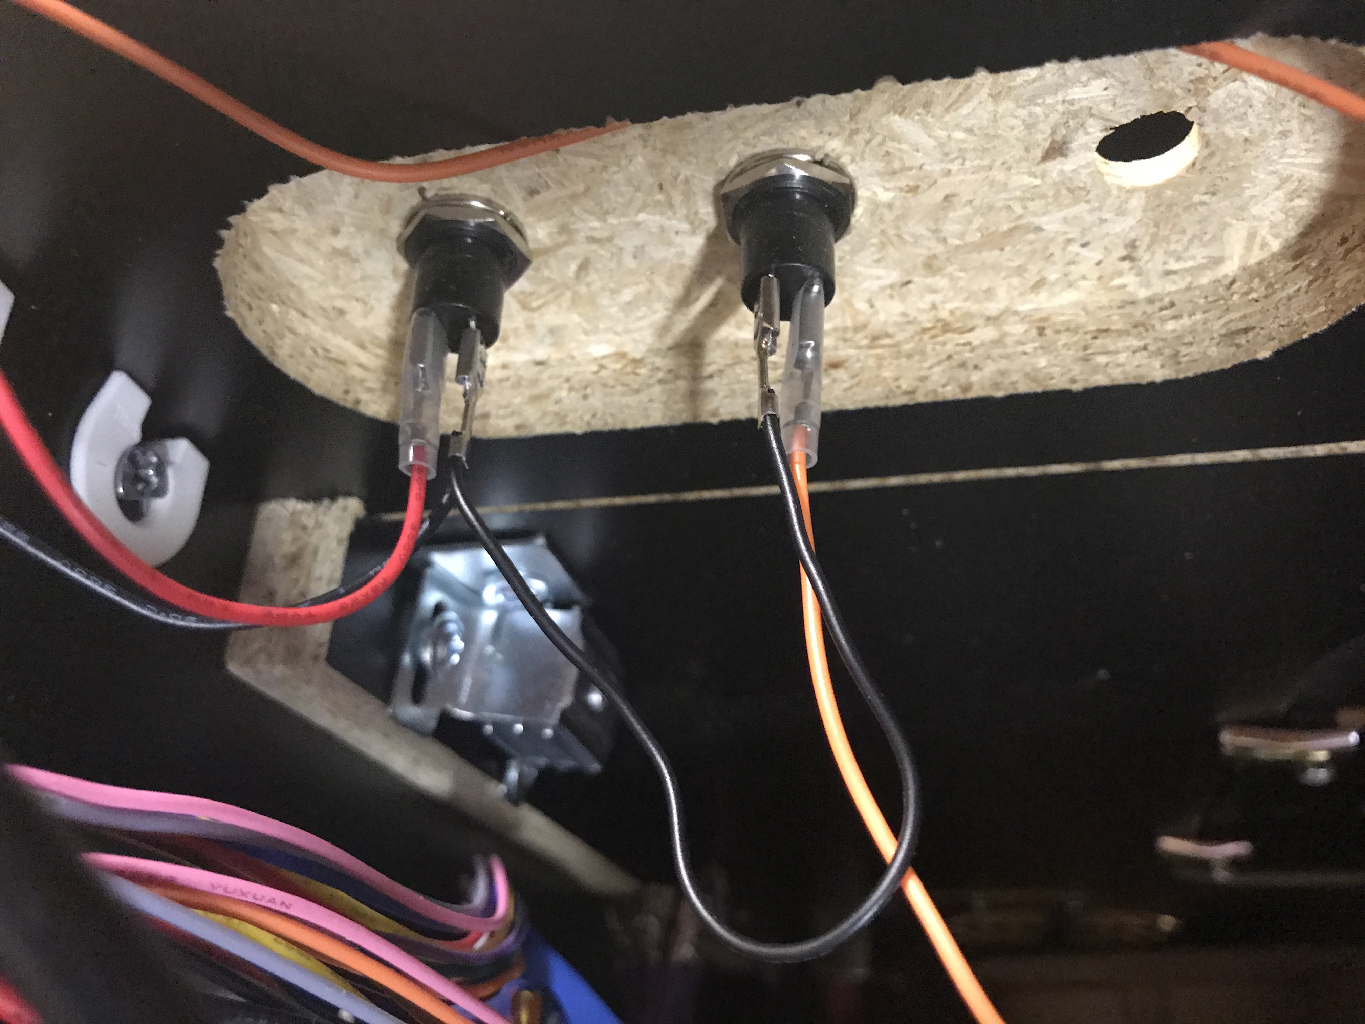
First I attached the power cables and then the momentary switches.
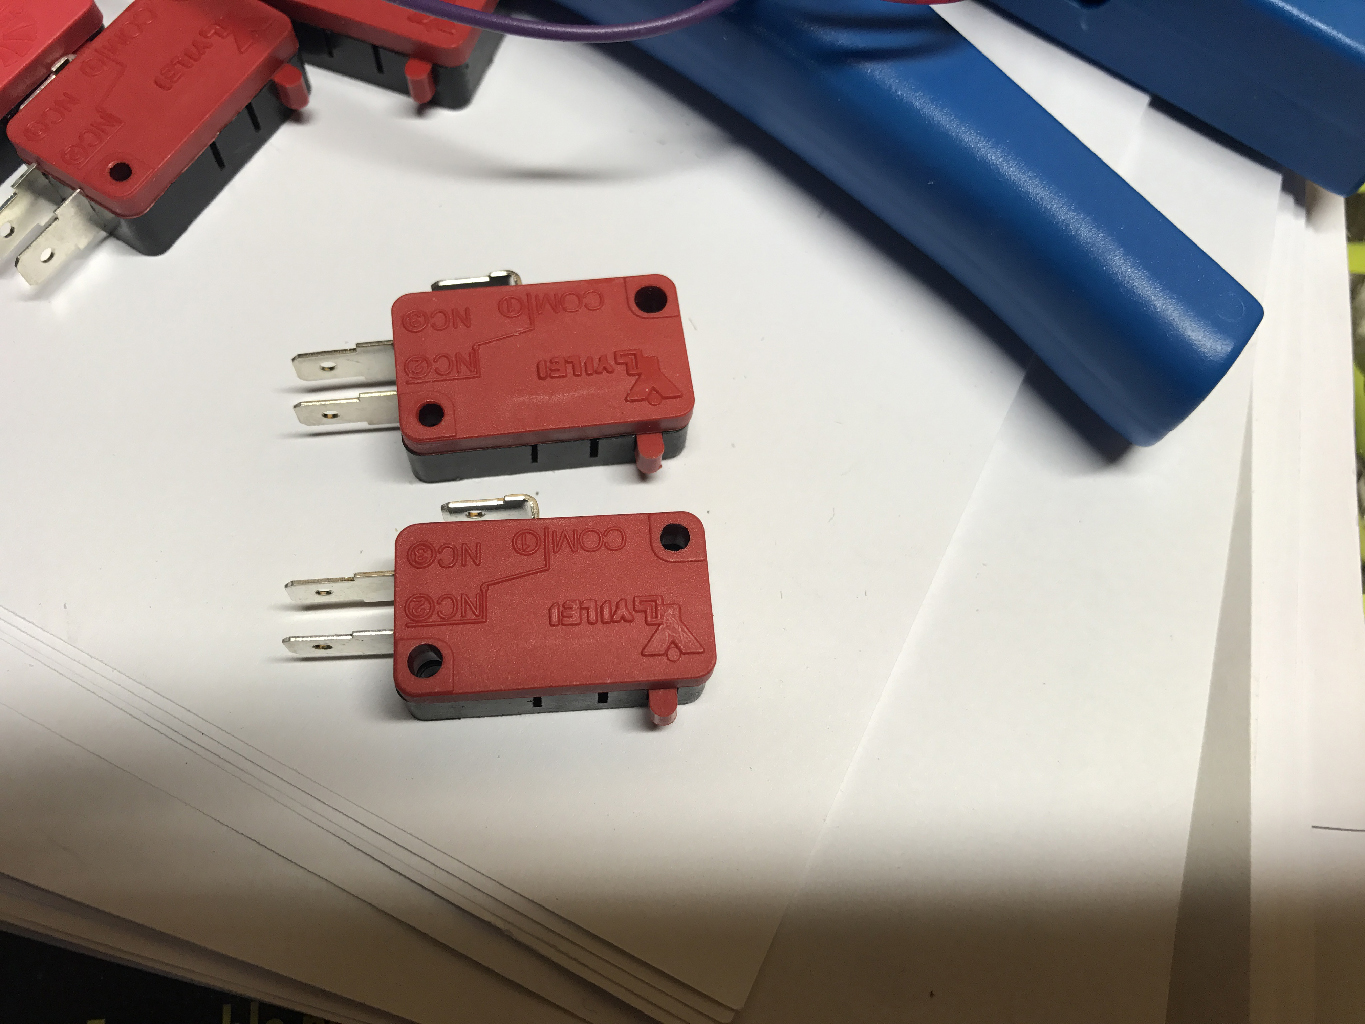
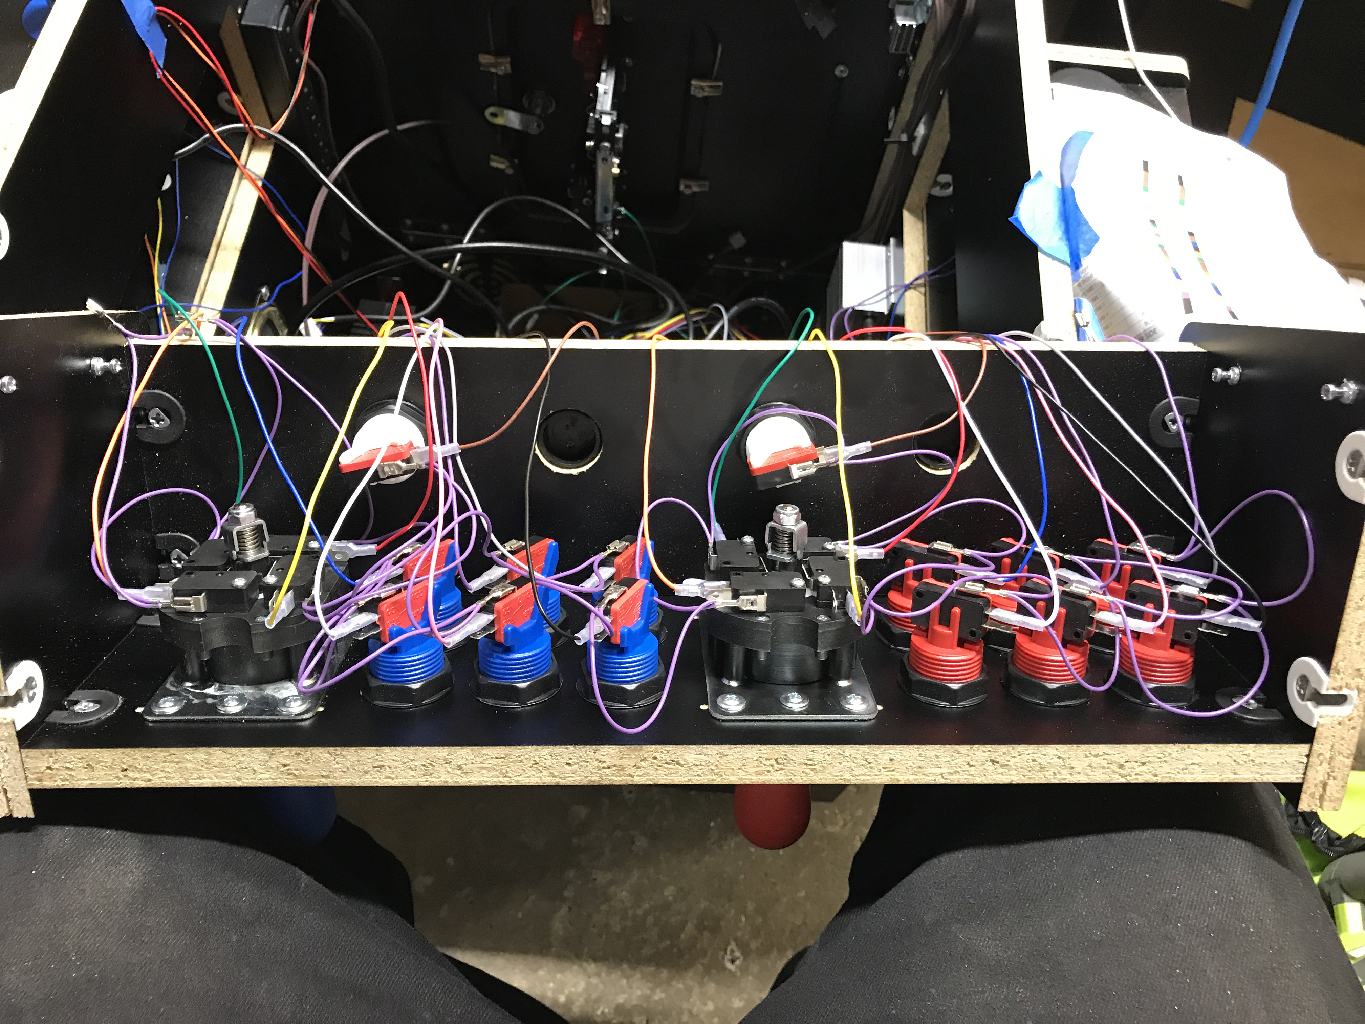
Now everything is about the switches – even the joysticks. The unique connection is the middle one and the top (farthest from the switch) is the common ground.
First the unique connections – everything is color coded. Then the common grounds.
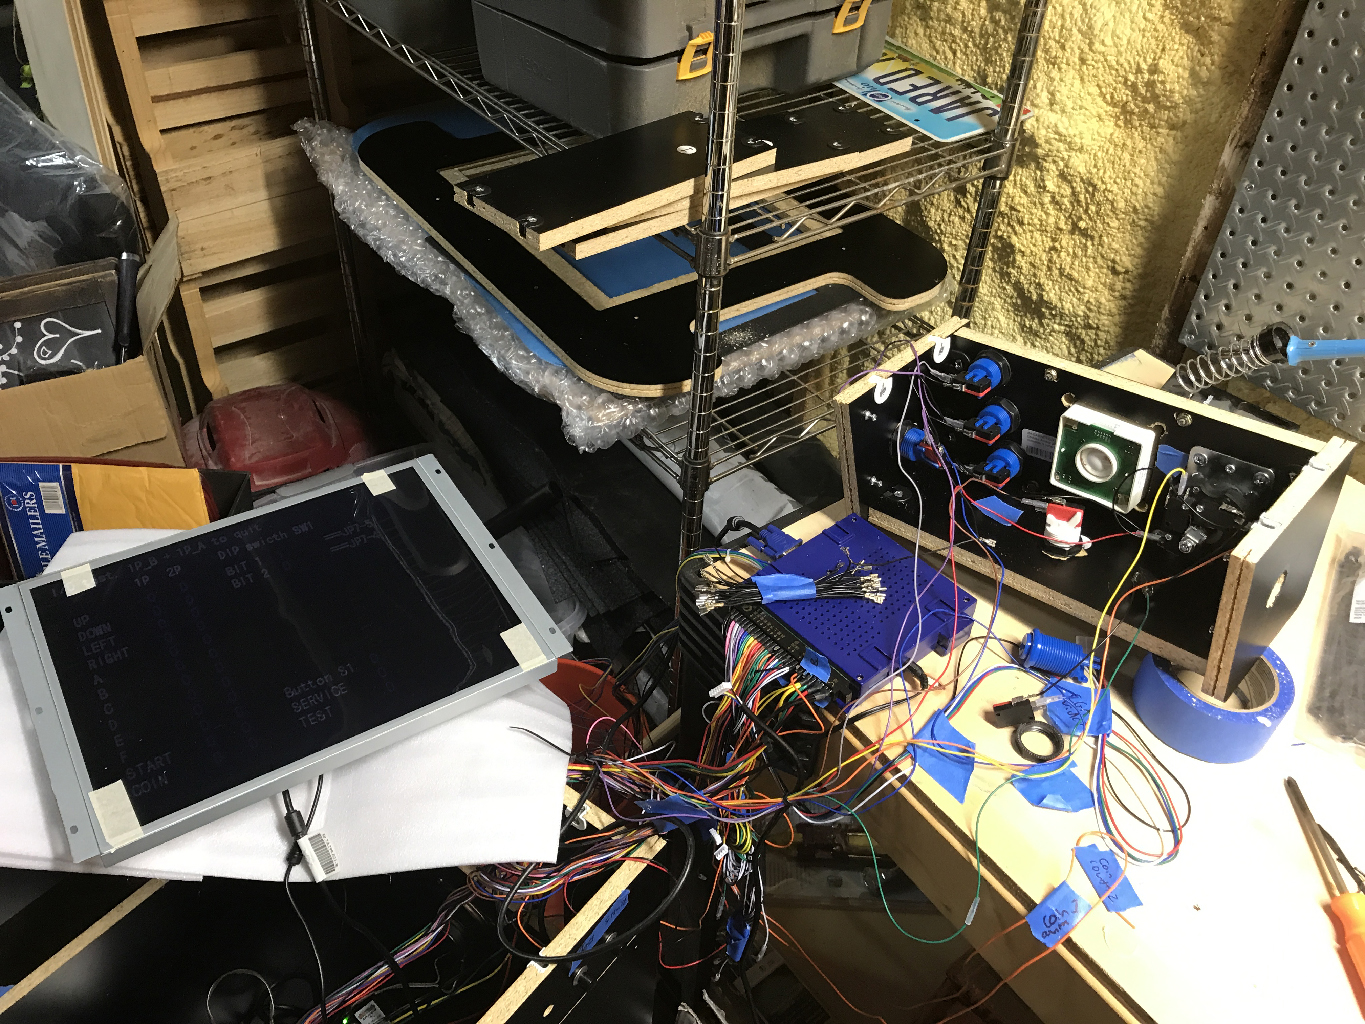
Even though everything is still outside the box, I needed to start testing! Let’s fire it up!
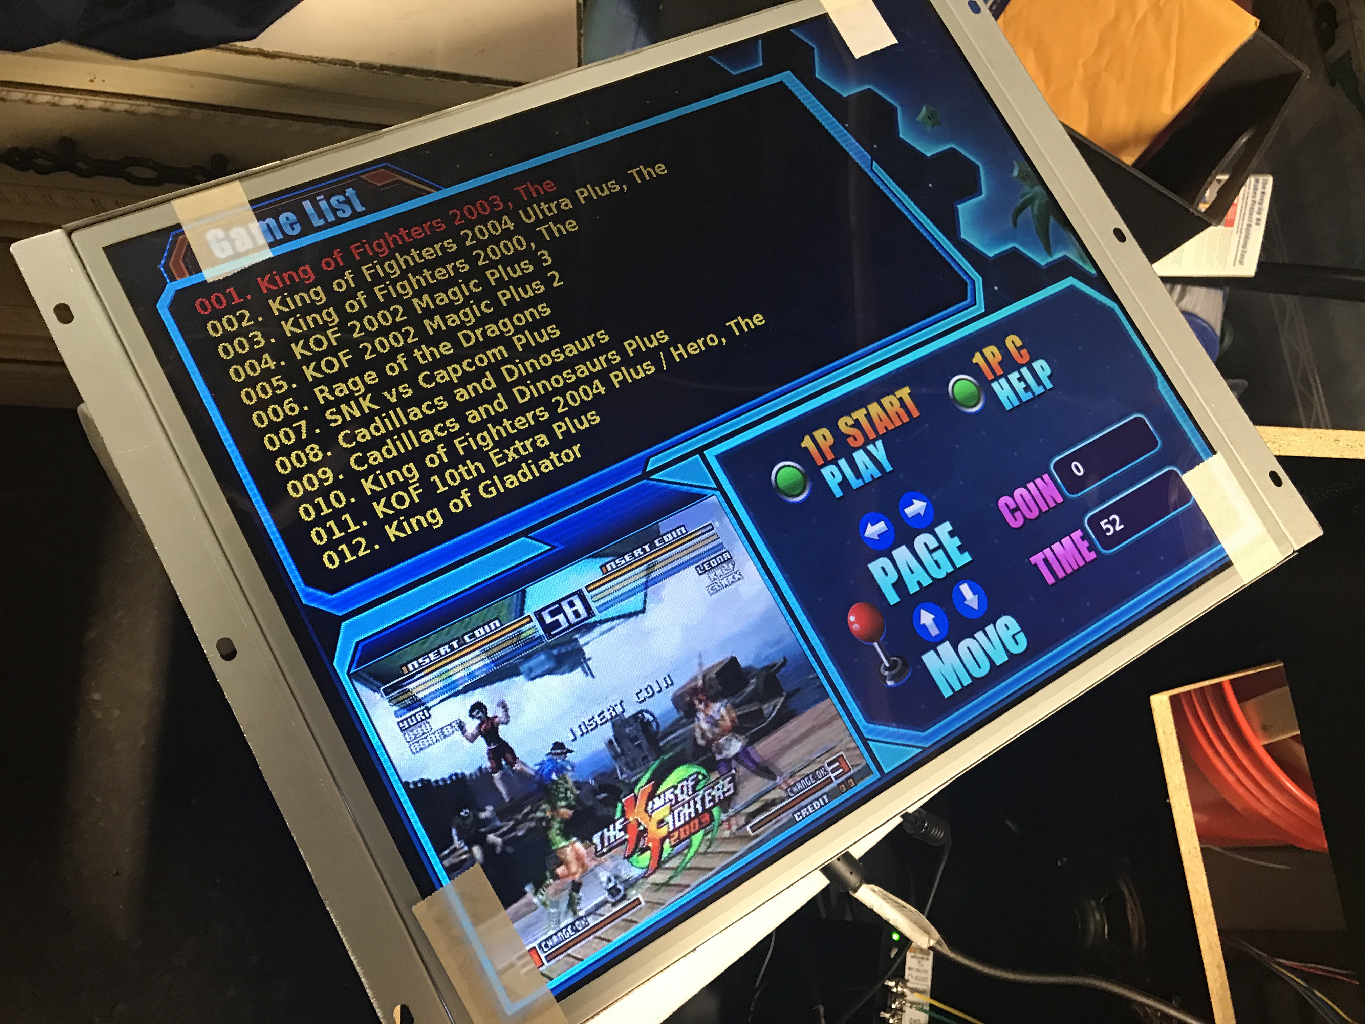
It’s alive! I would like to say at this point everything was perfect. But I had to figure out how to get into the system setup and change it to default to be into vertical mode and then I had to see which connections didn’t get wired right. Some things just didn’t work. I had to wiggle and solder until everything worked.

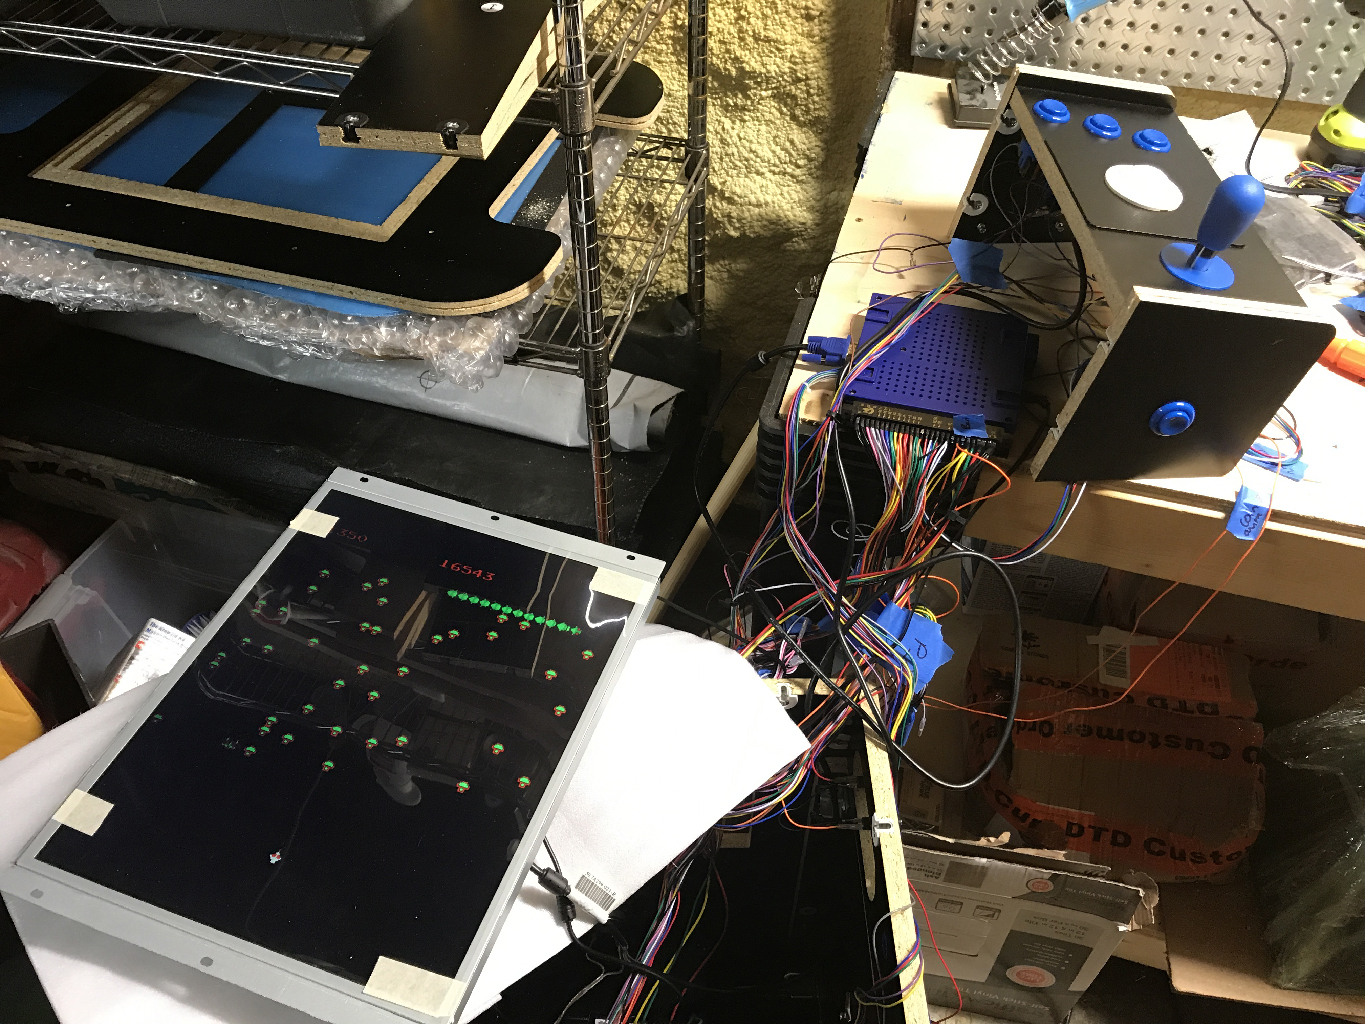
Ms. PacMan! Centipede! Looks right, sounds right, if only the controller were attached to the box already.
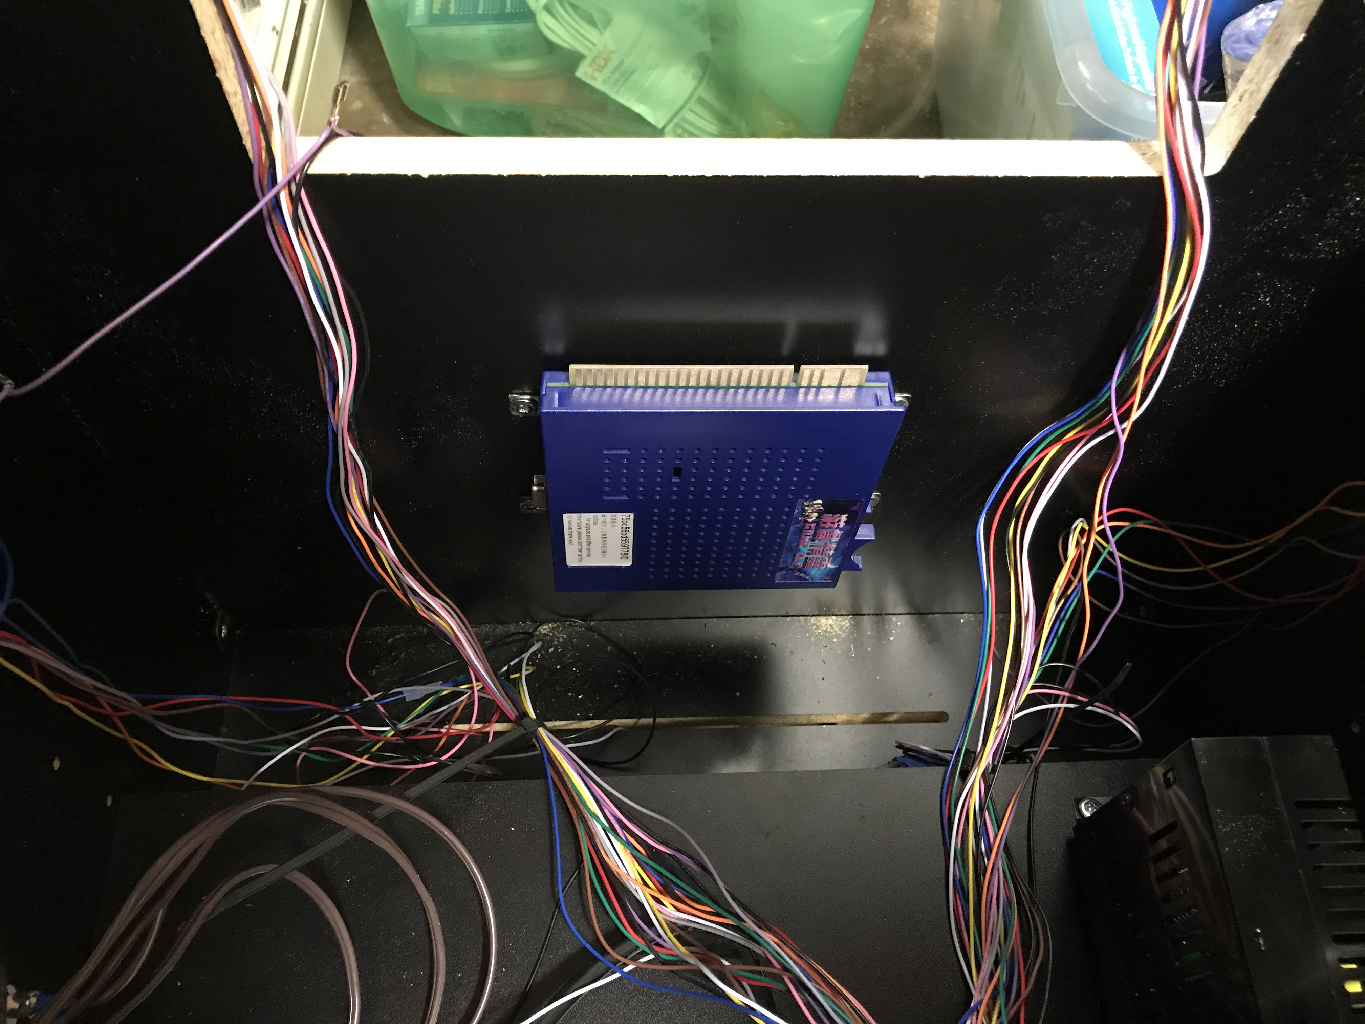
The GameElf mounted in the box under the head to head unit.
The Controllers
Now comes the dance! You have to get all the cables threaded INTO the machine properly and also use the furniture cams to keep things solid.
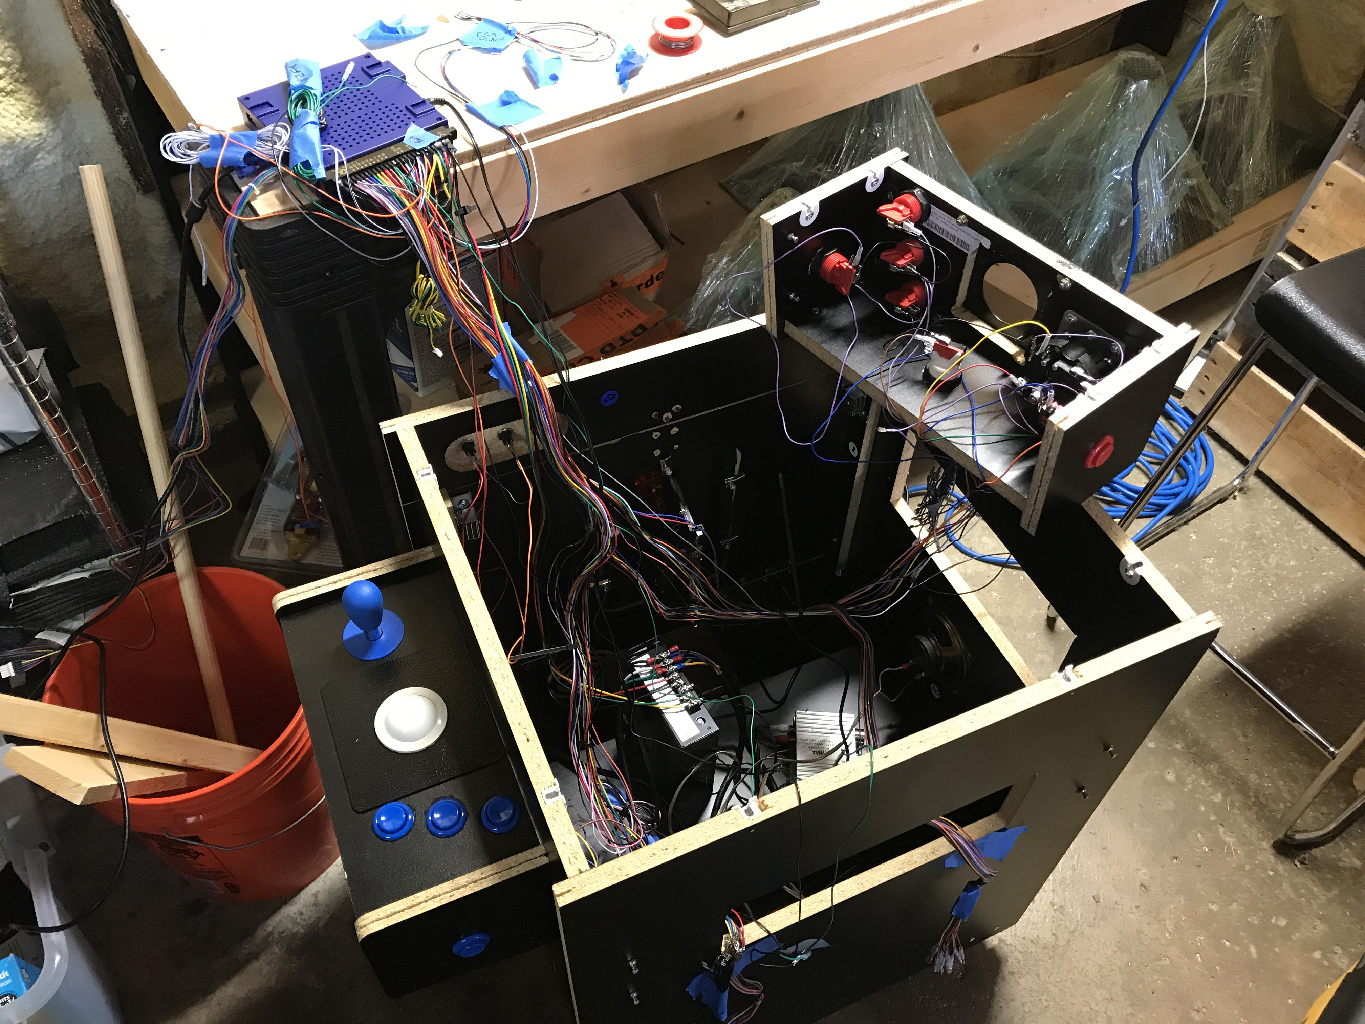
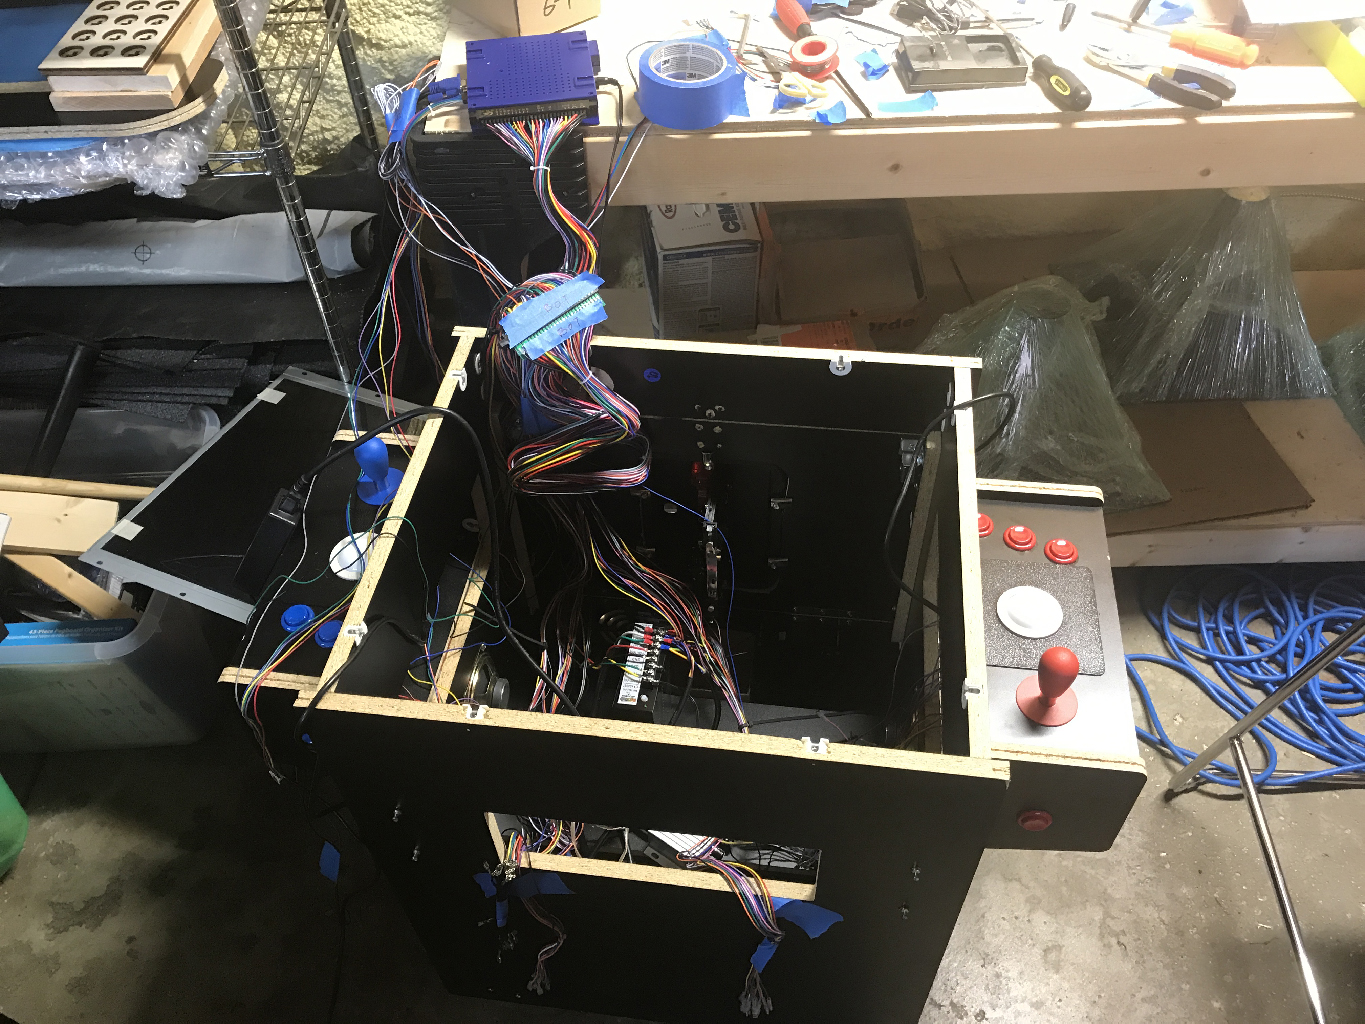

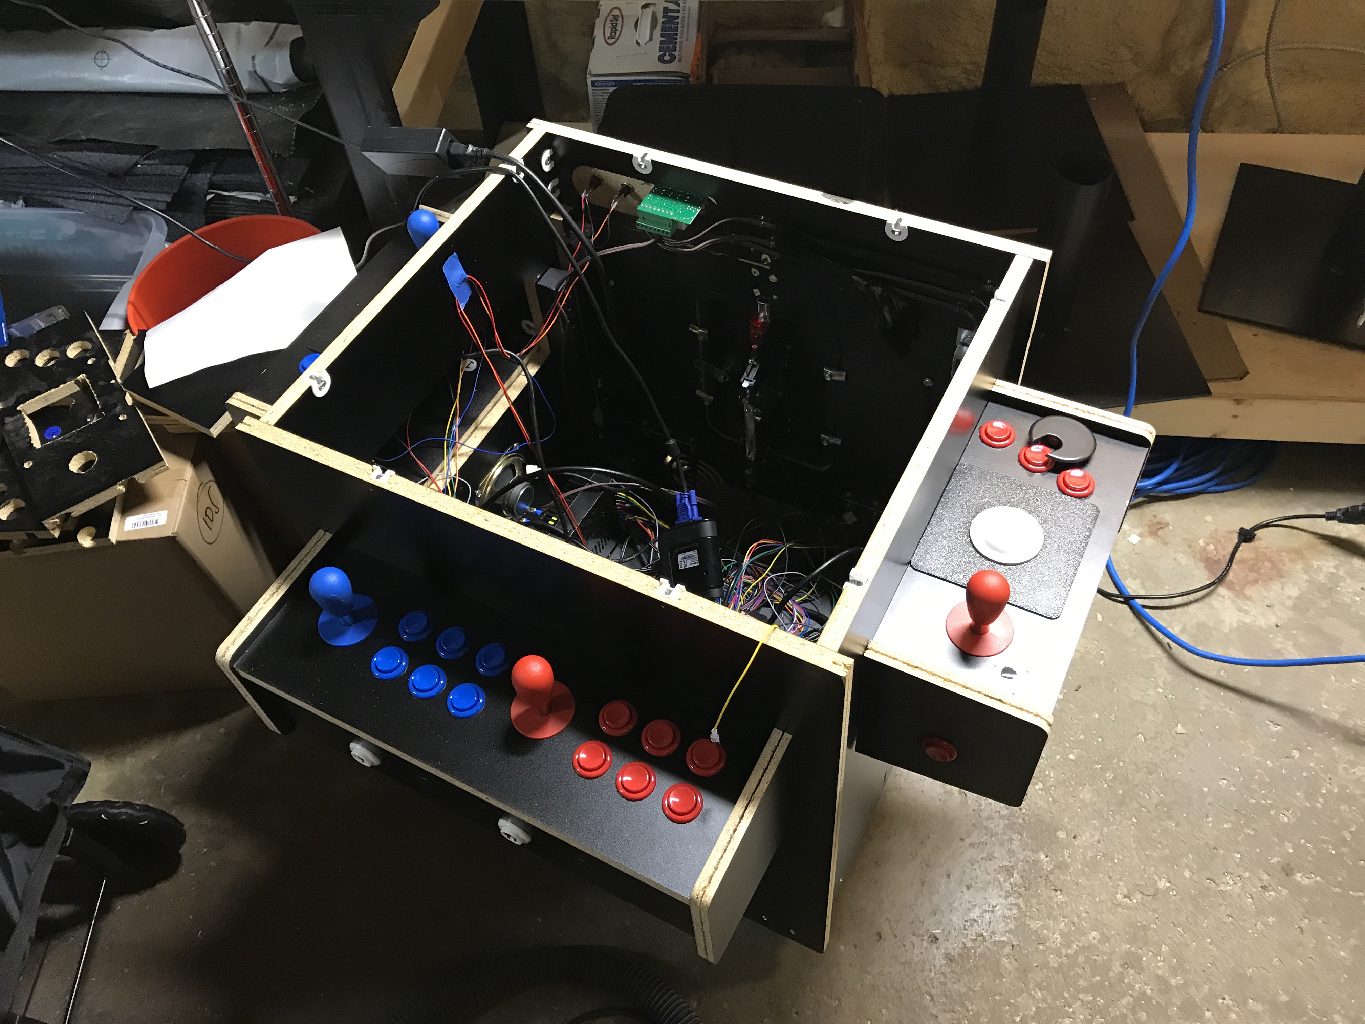
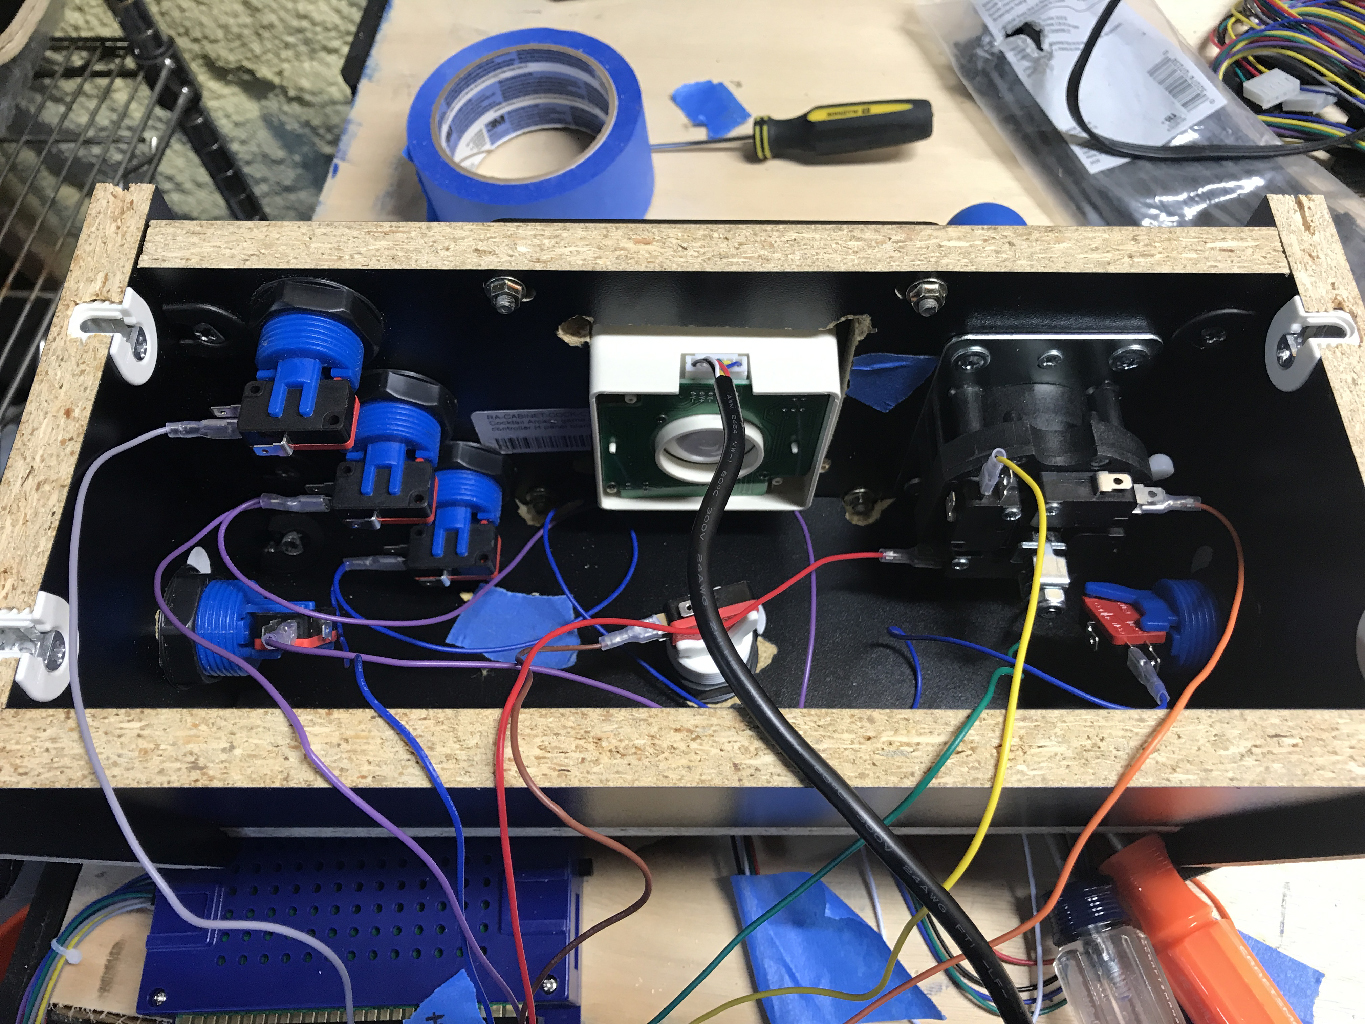
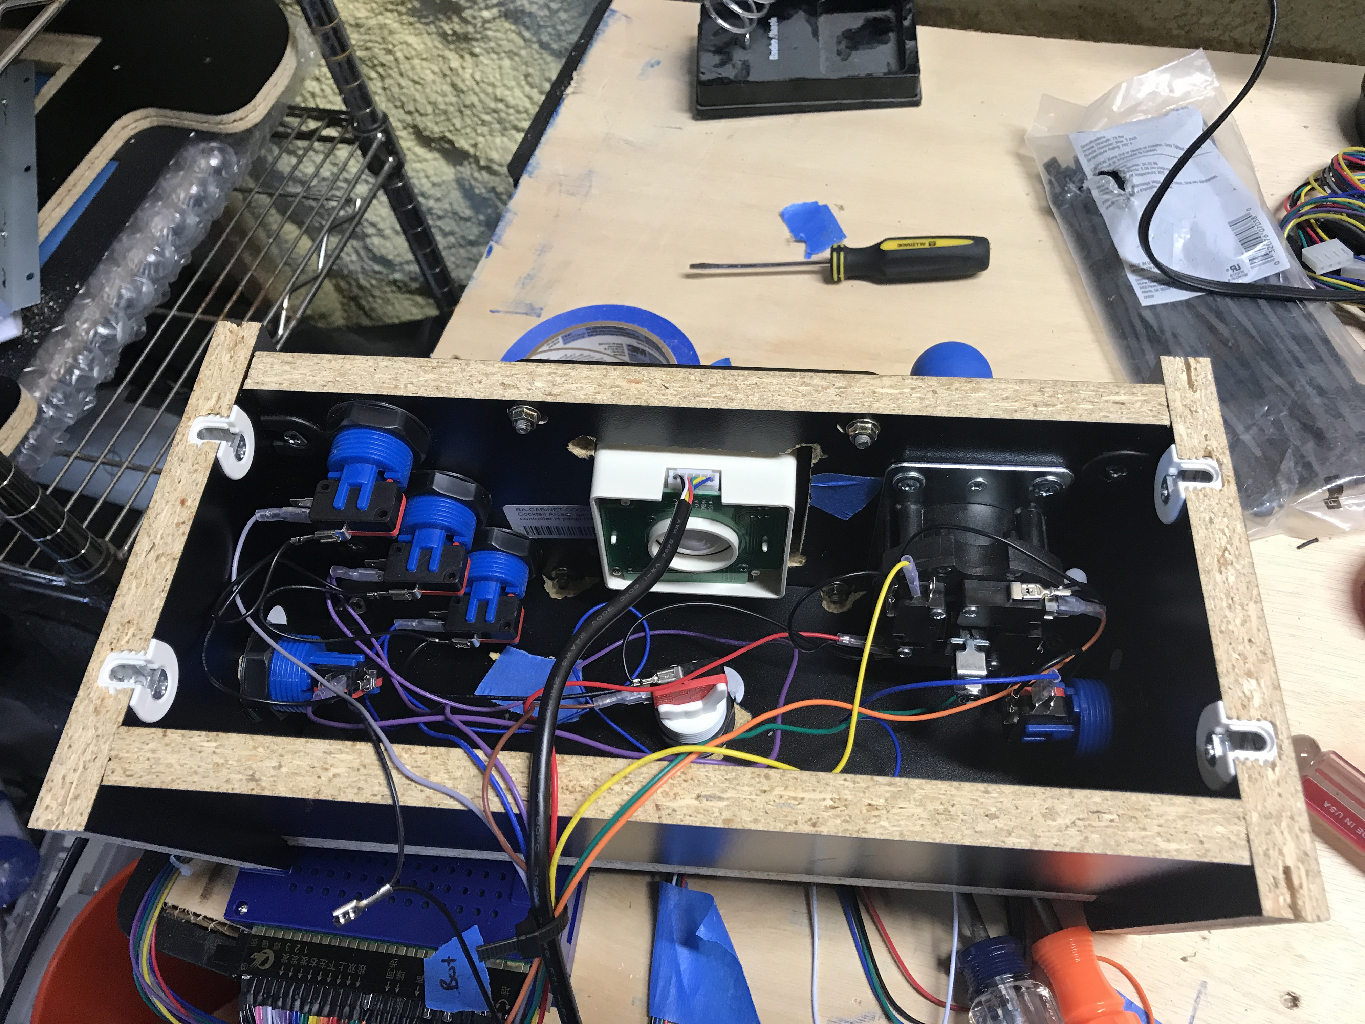
It is so nice once everything is in!
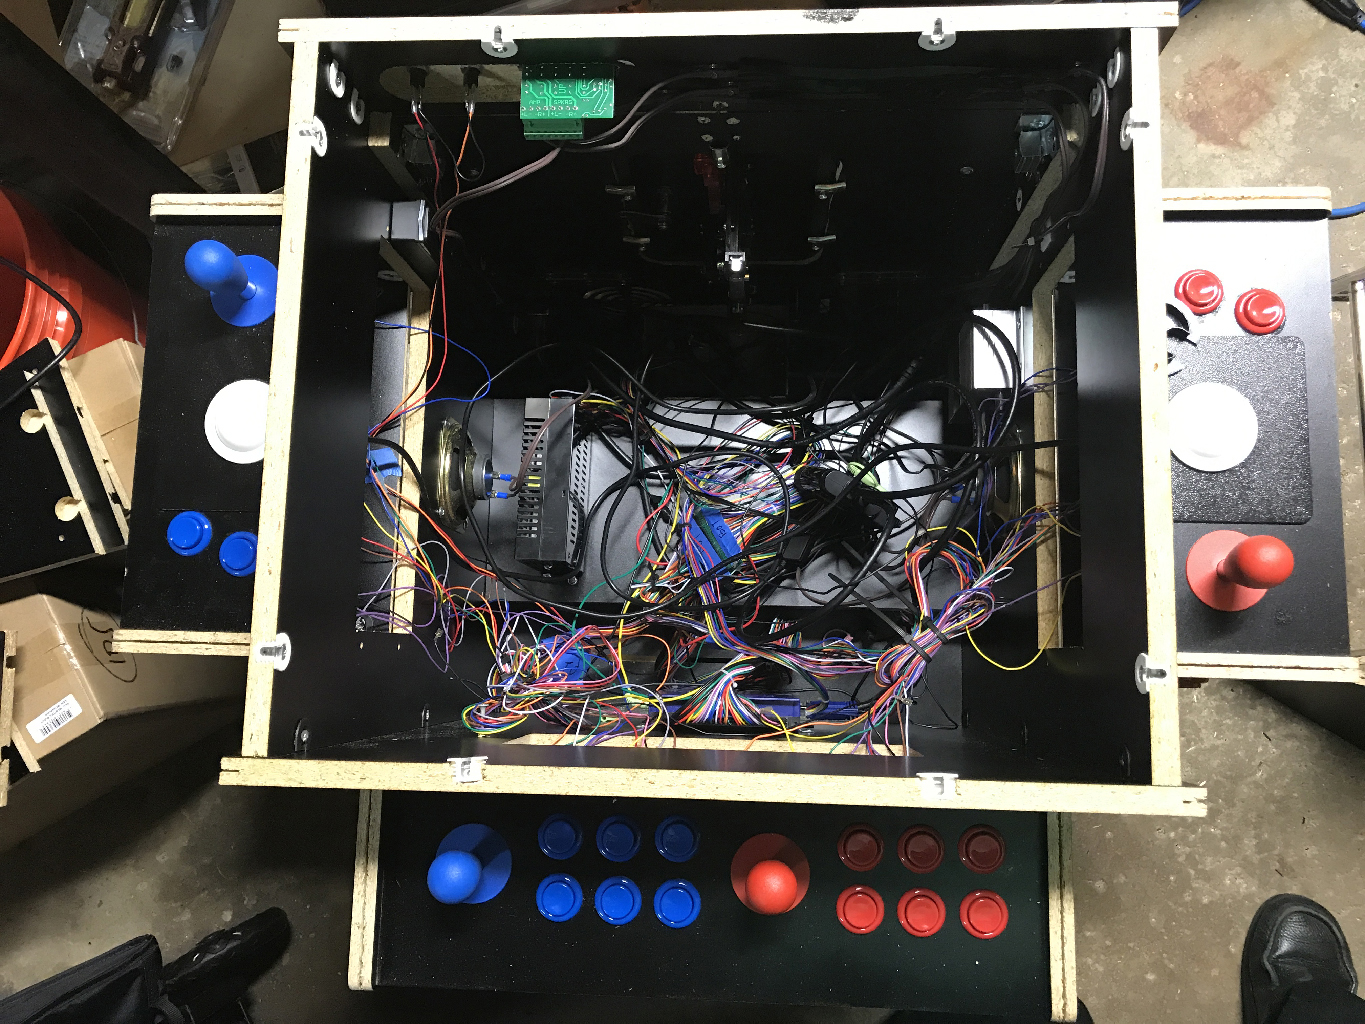
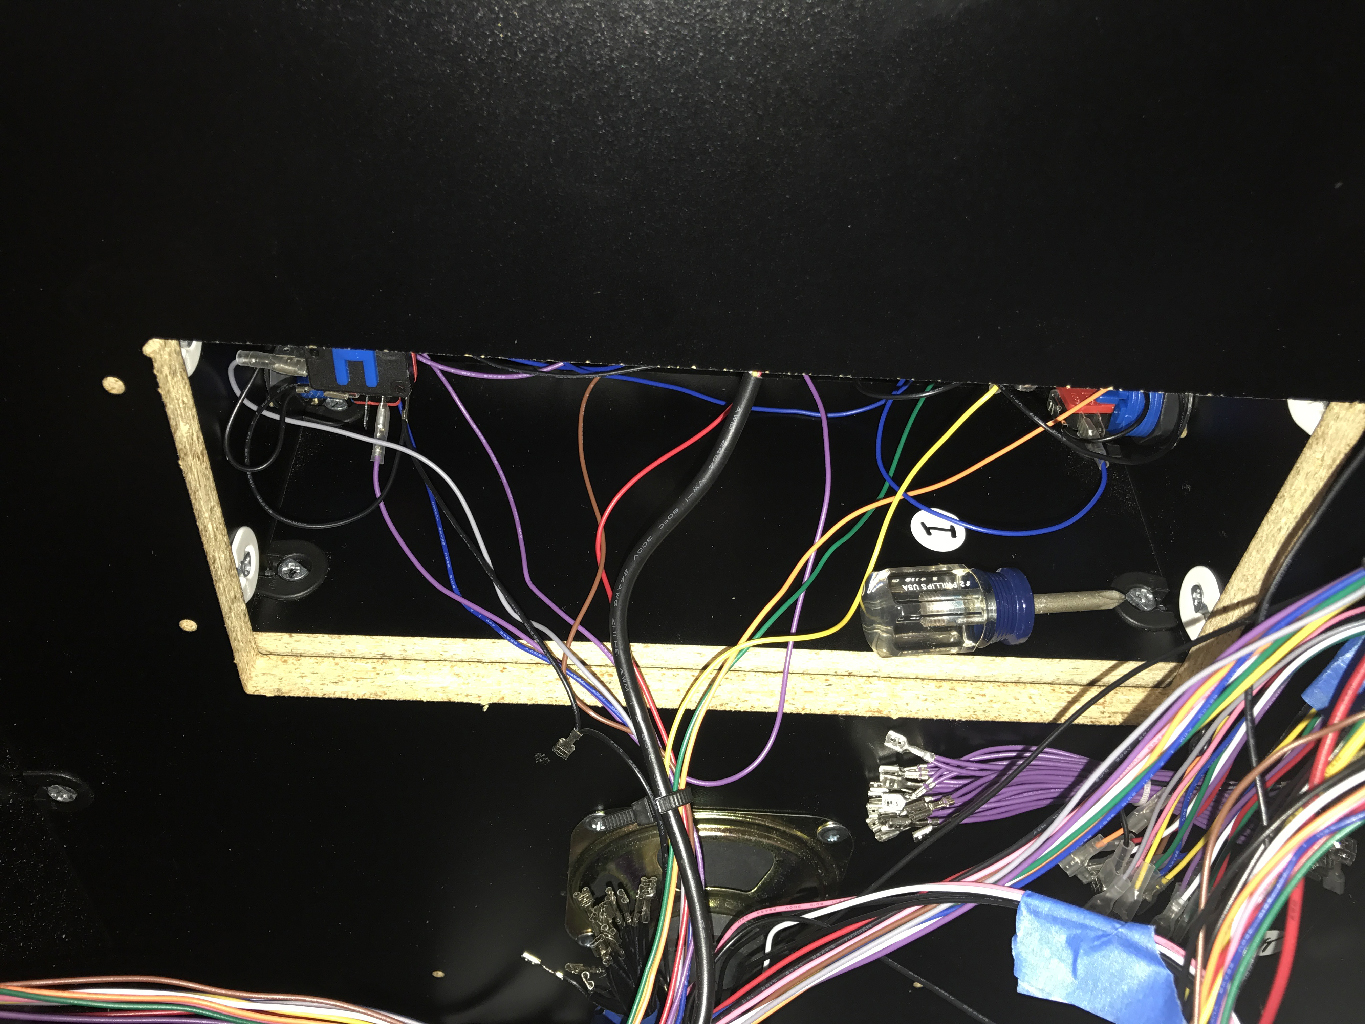
From above! Even though it looks a mess I am using zip ties all along the way to keep things together and tidy.
The Audio

Originally I ran the audio from the amplifier into each of the speakers. This left me with two problems. The first is that the volume would be inside the box and the second was that there was a hole for a volume knob it came pre-drilled. Most potentiometers are for mono audio and are for the pre-amplified signal. I wanted a stereo volume control for the amplified signal heading to the speakers. Oh, and I wanted to get rid of the hole.
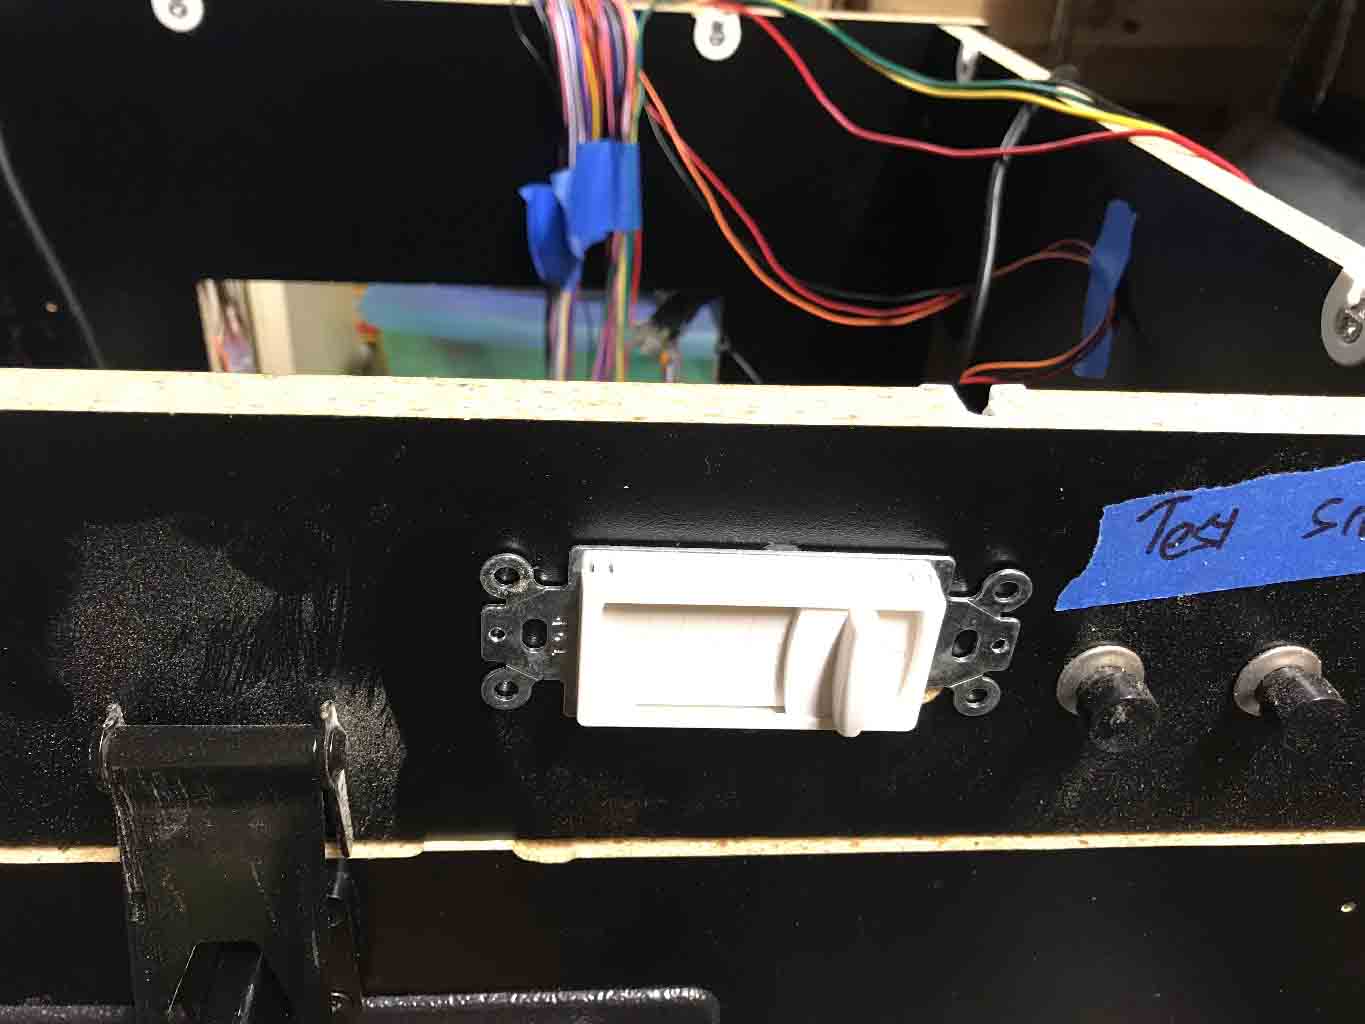
I found an in-wall speaker volume control for amplified stereo signals at Home Depot. I then cut the hole for it over the other hole.


This of course meant that all audio roads would lead to and from this point – which means a lot more cables. I had to carefully run the audio cables around the inside of the box. I wanted to make sure they wouldn’t dangle or be in the way when the access door was open. Other than a little bit of cable management the worse part of this was just figuring out which type of technology I wanted to use.
The Coin Door
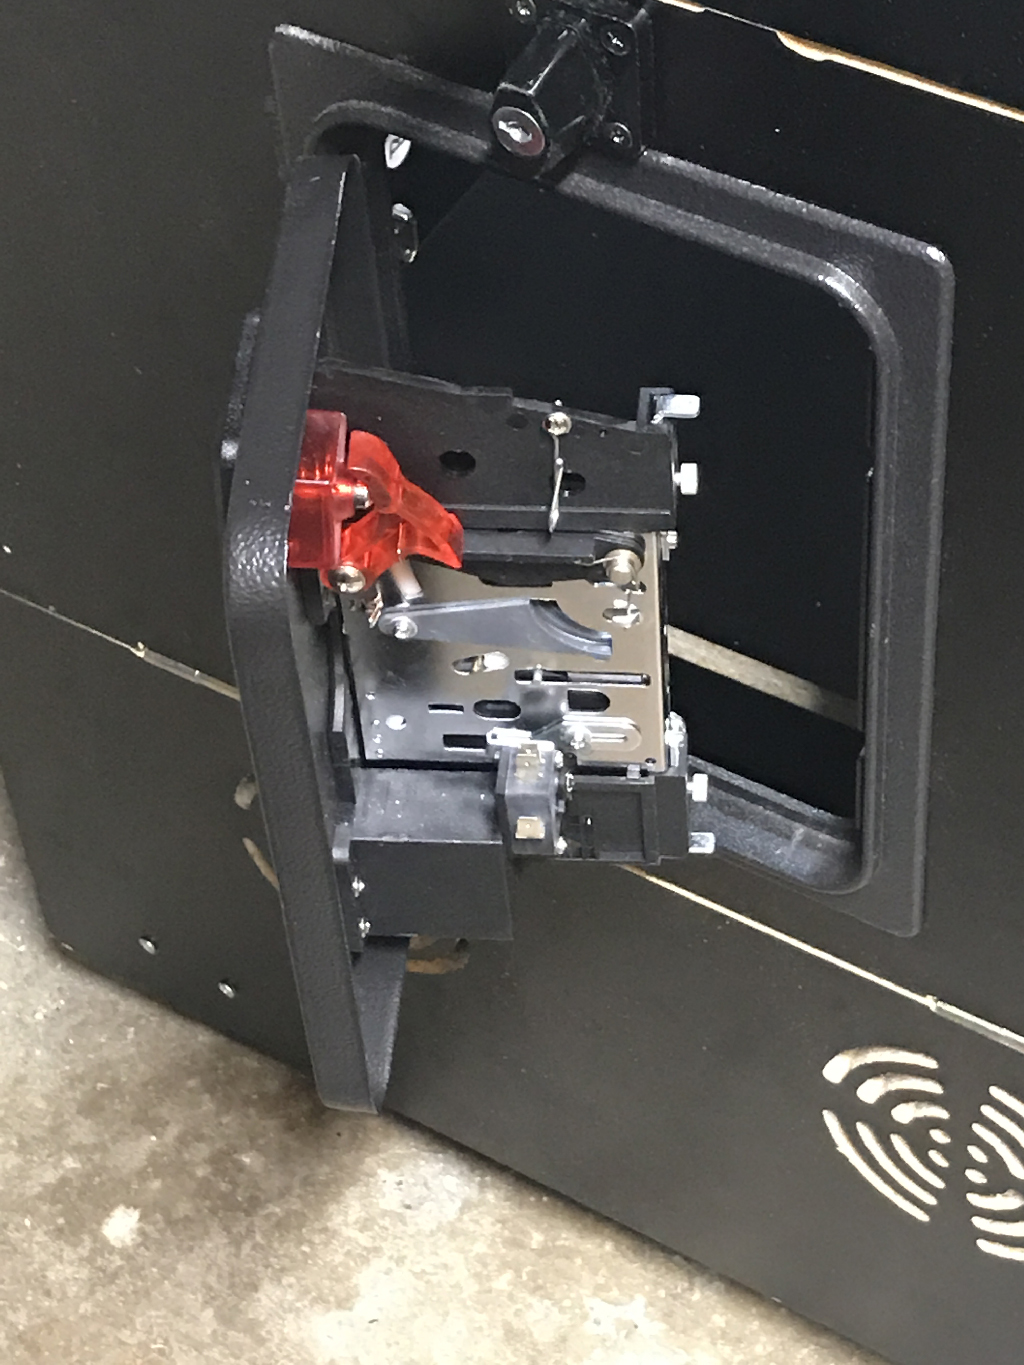
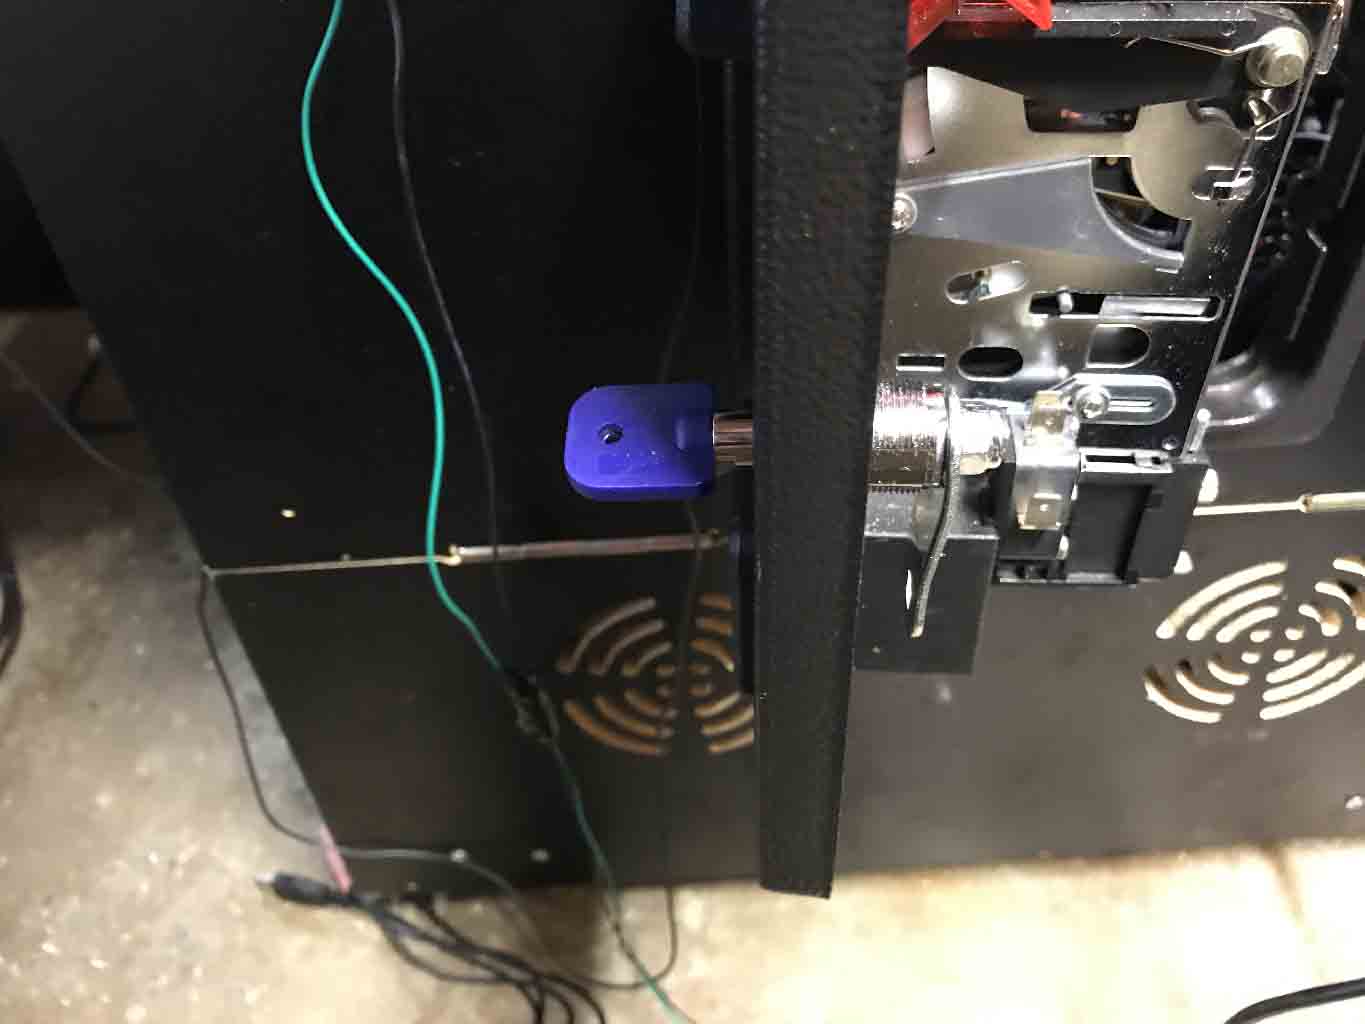
For the coin door, first I installed the lock.
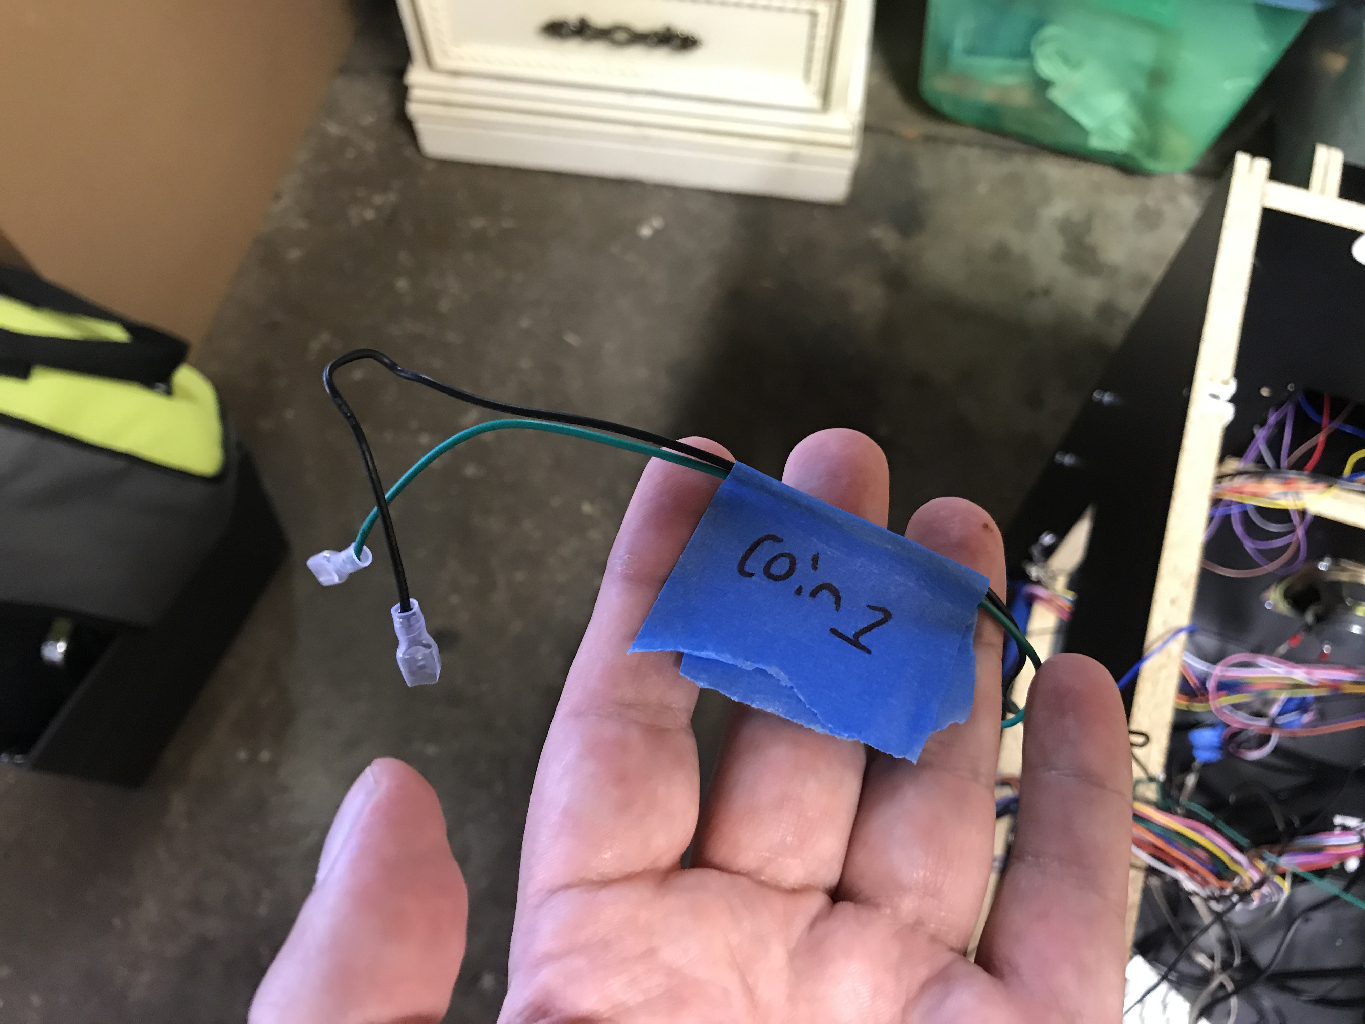
Then I installed the cables. The coin is just another switch (just like the buttons and the joysticks).
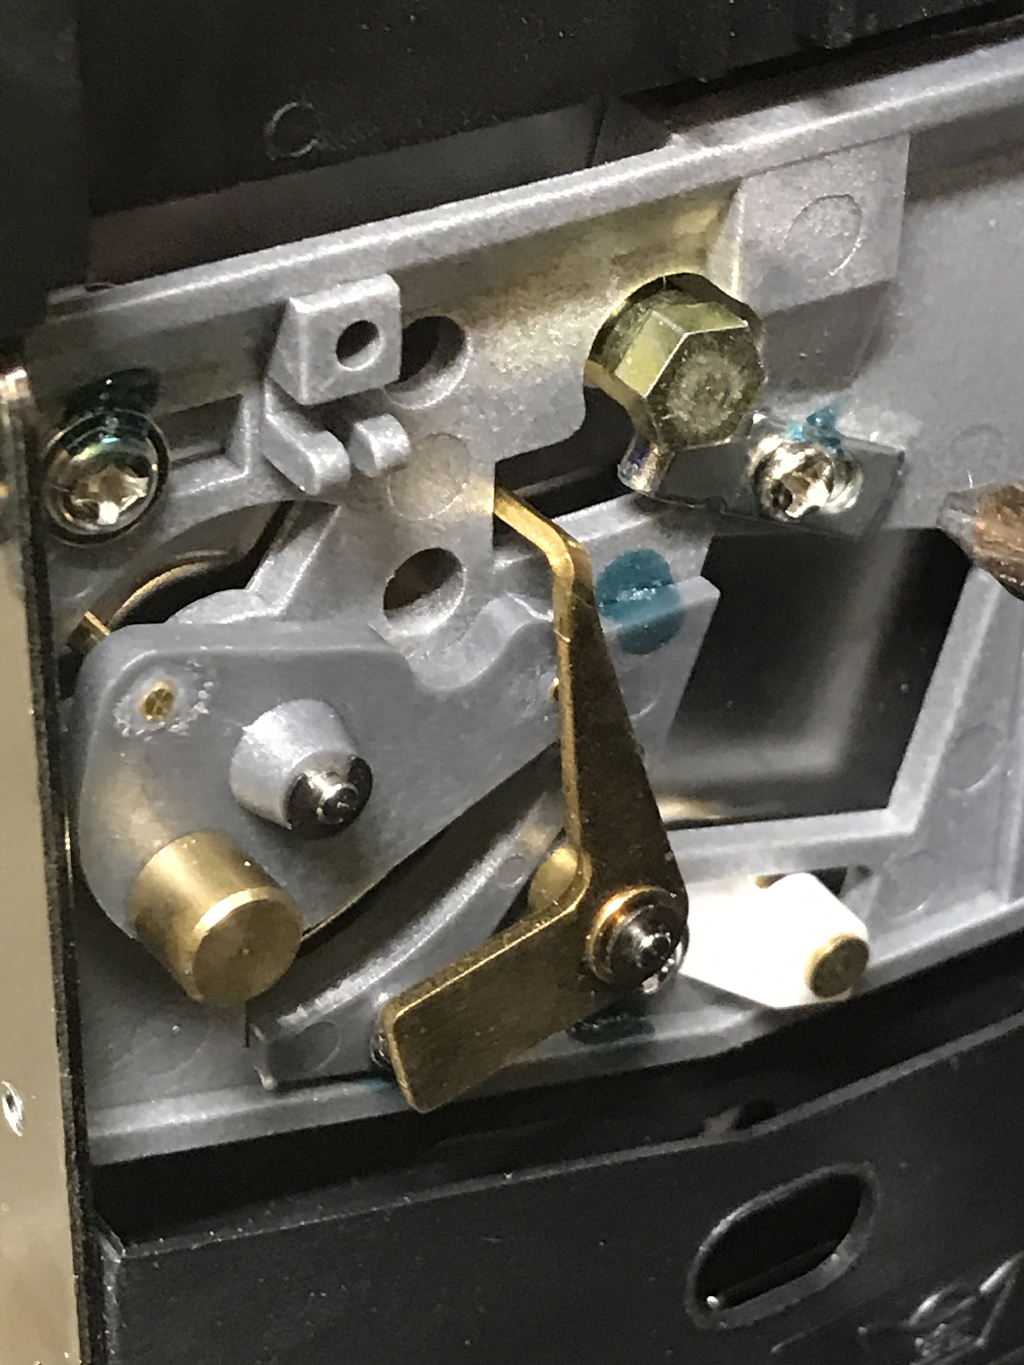
The coin mechanism is adjustable to either work for quarters or for tokens. I set mine for tokens. You also need to make sure you know where the coins are going! I have a small cardboard box that fits perfectly under the coin door. The guys at Holland Computers suggested a plastic fish bowl (they even sold me one) but the way I built my box it didn’t fit.
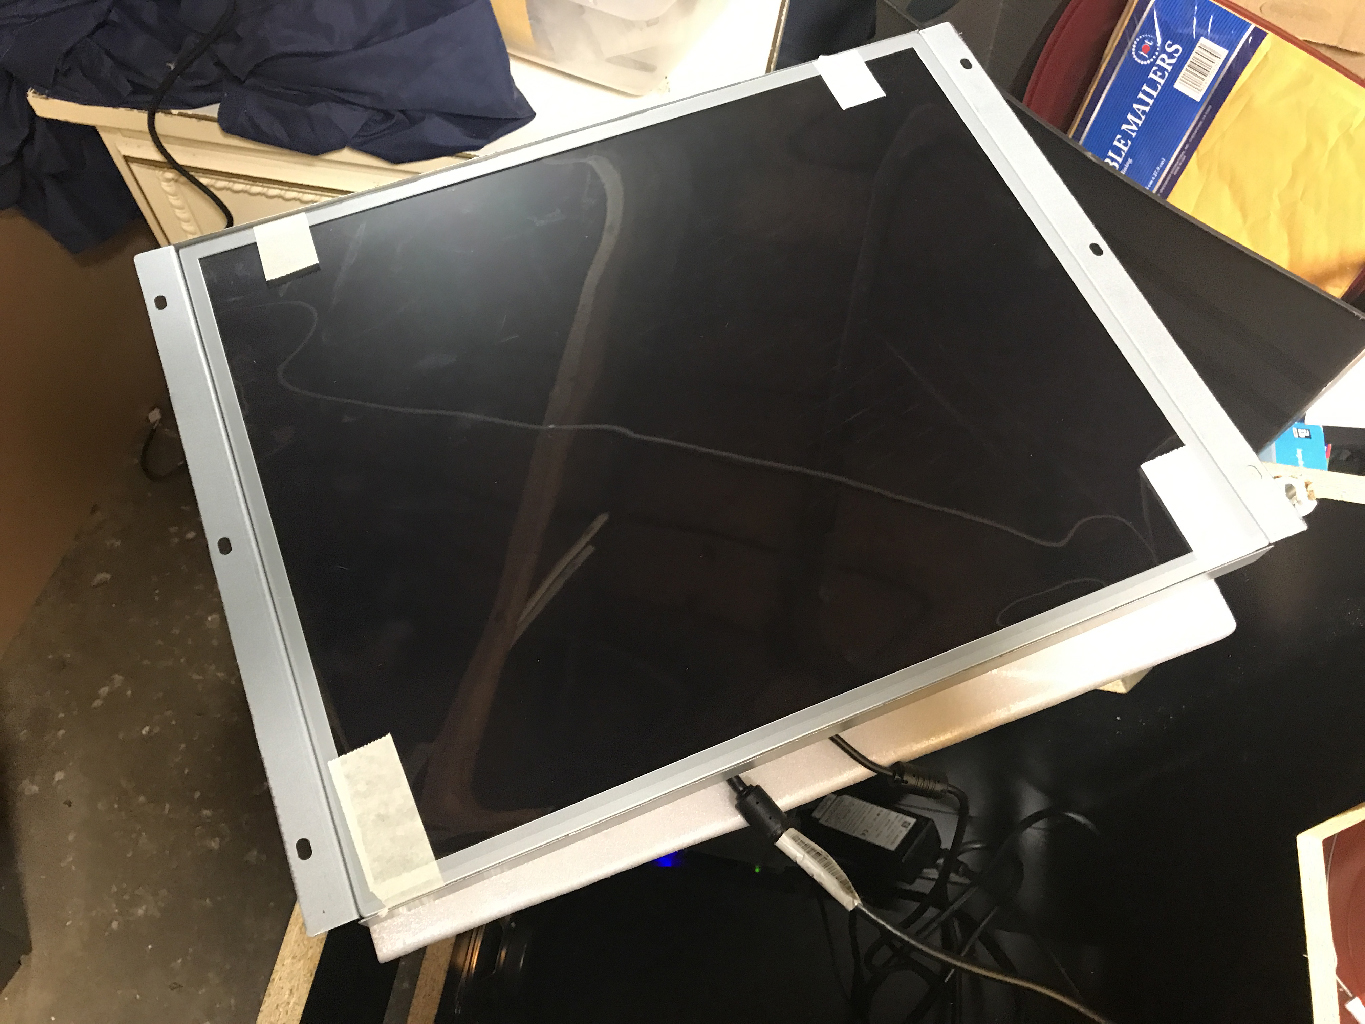
The Monitor

Now it’s time to finish the carpentry! One last set of furniture cams.
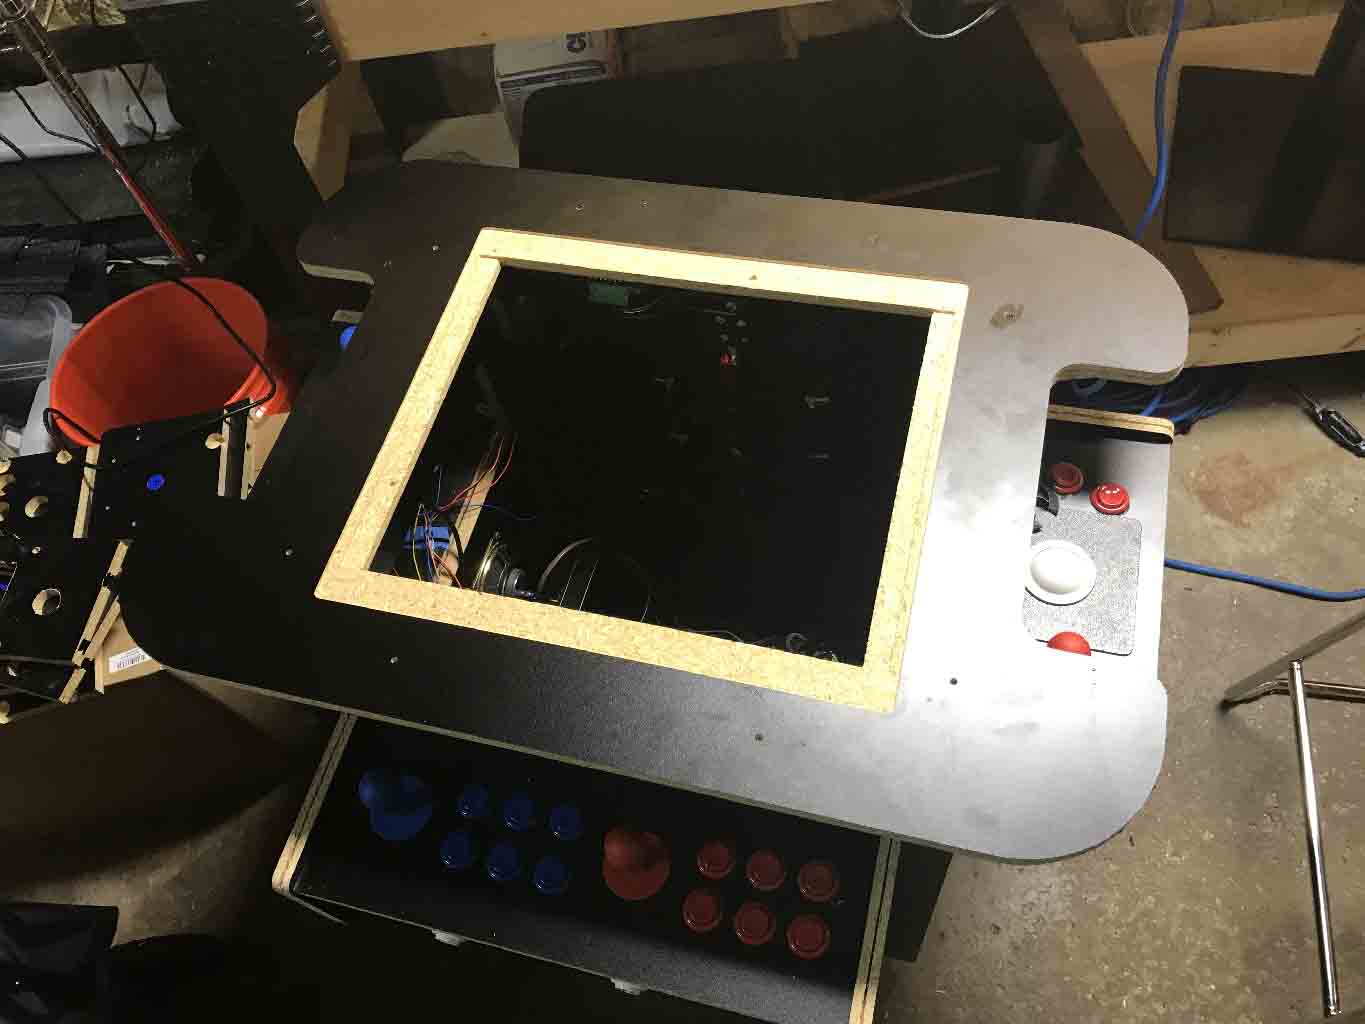
The top gets attached.
The monitor edges are very sharp! Be careful! The monitor gets dropped into place and then screwed into place.
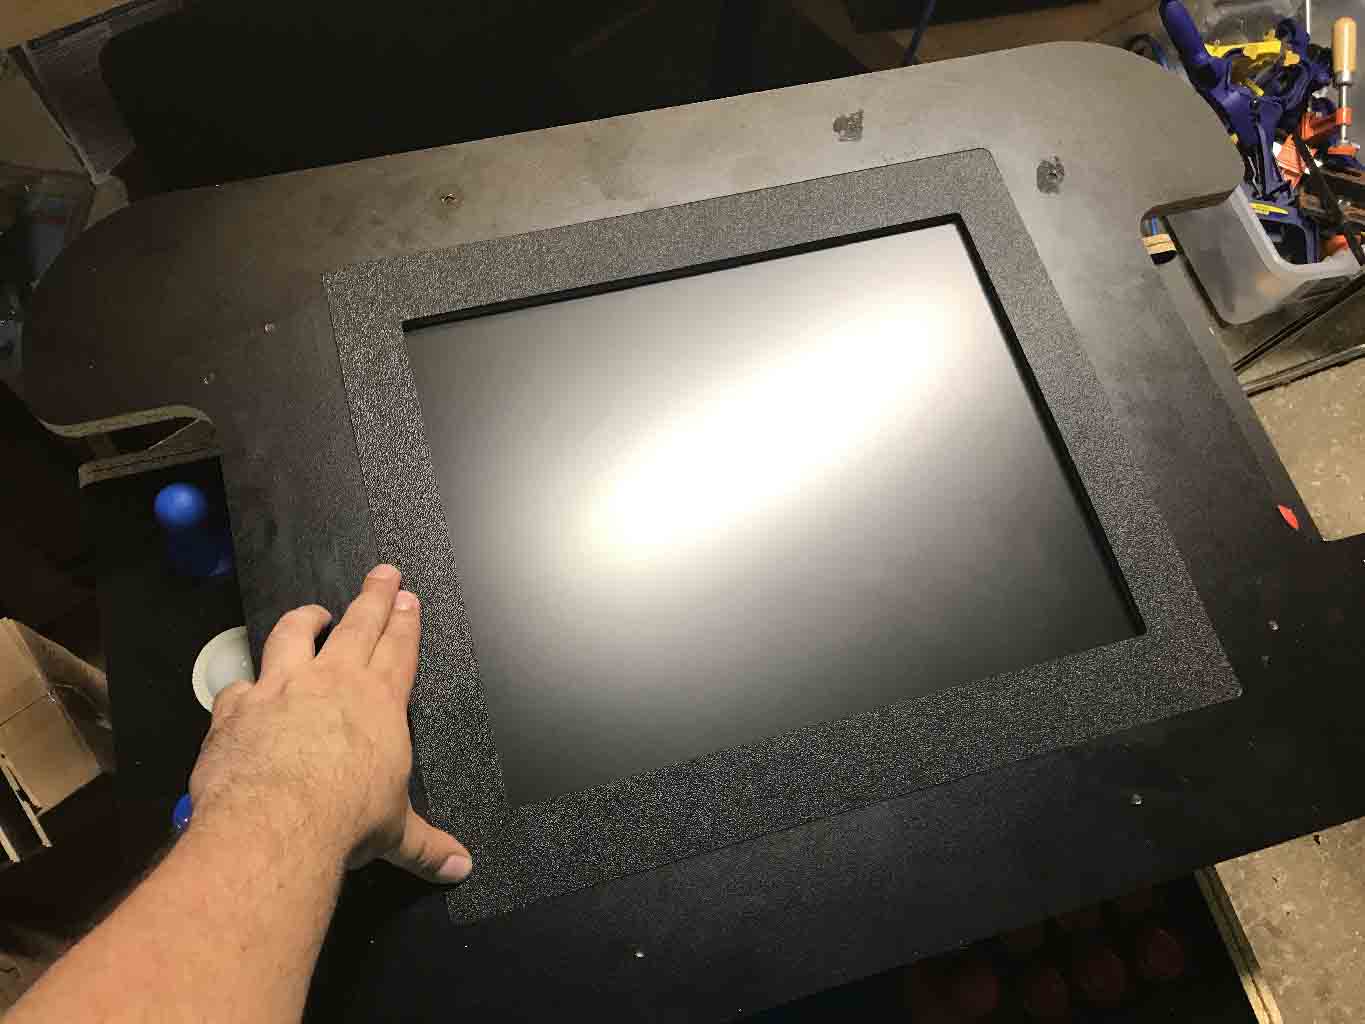
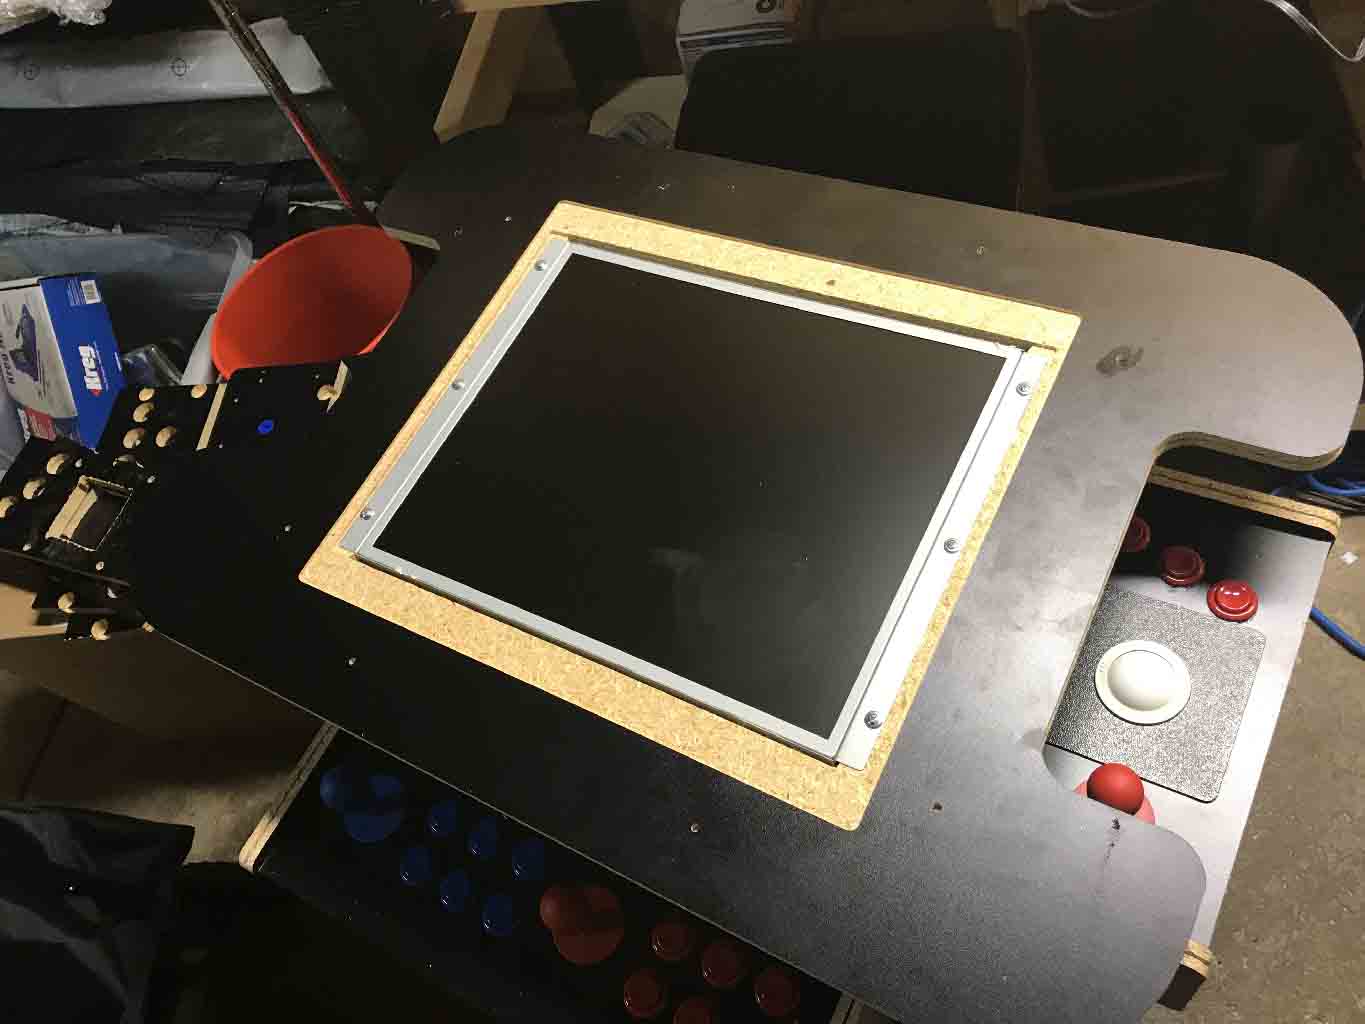
The plastic bezel makes everything look neat.

Tada. It is almost done. The bezel is a lot darker than it looks in the picture, that’s just a trick of lighting.
One more addition! I added chains to the access door to prevent it from putting too much stress on the hinge by trying to over open.
Finishing Touches
I can’t believe I made it to finishing touches. This entire project has been so much work. Every time I thought I was done. I wasn’t.
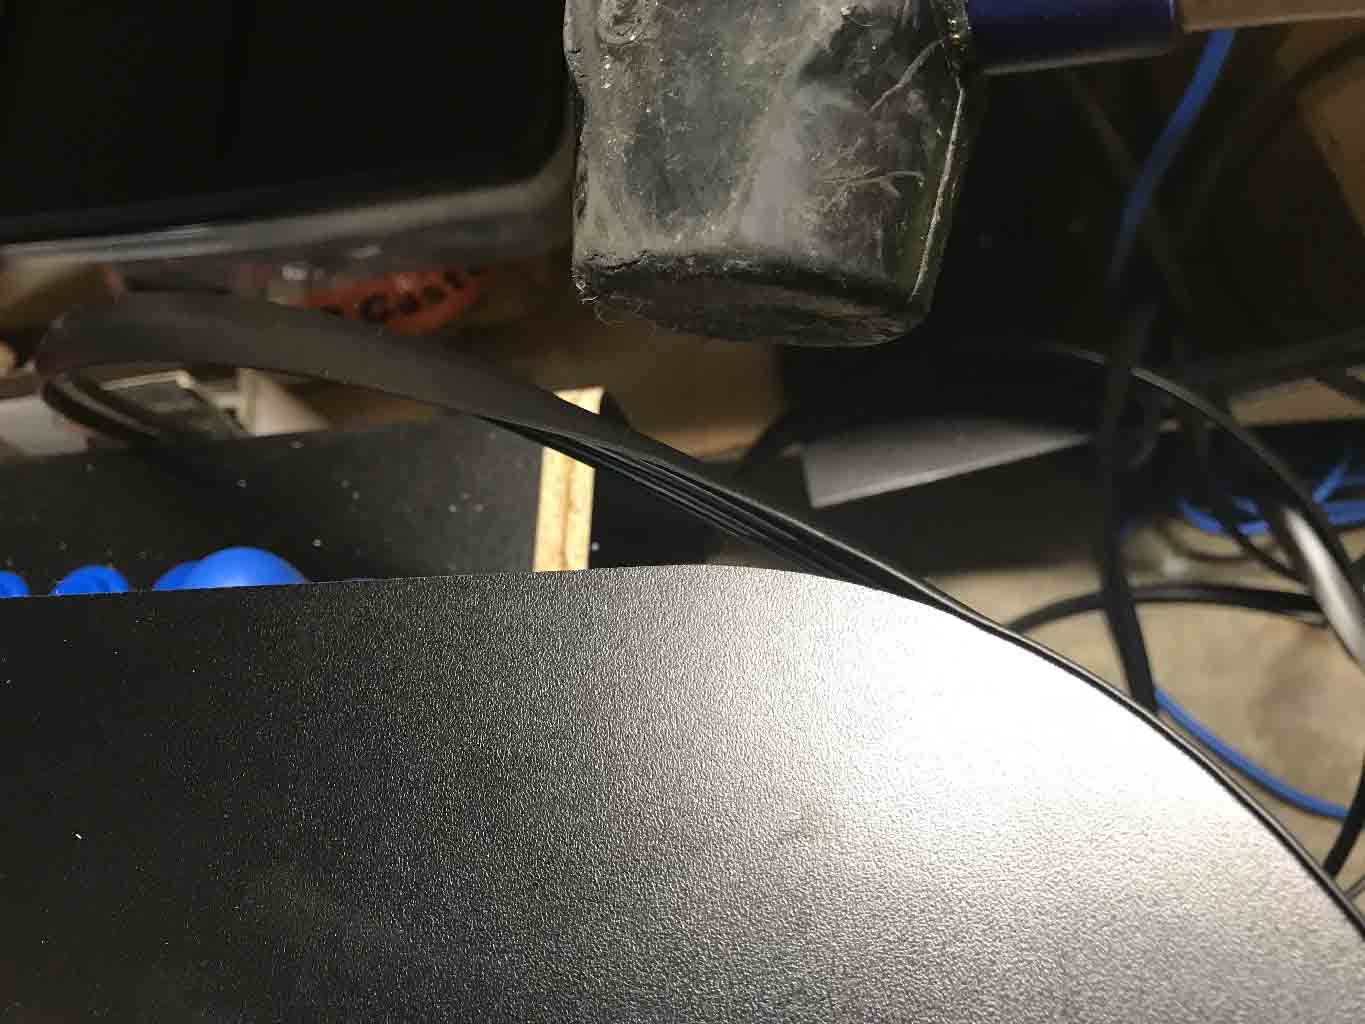
Now for the T-molding. You can choose from a variety of colors. It comes with a blue but I wanted my color contrasts to be in the player 1 vs player 2 colors of red vs. blue so I opted for a black trim. Remember because I purchased the head to head controller kit I need another 4 feet of molding. For the most part you just use a rubber mallet and tap it into place. Notice that I am doing this before I add my glass top.
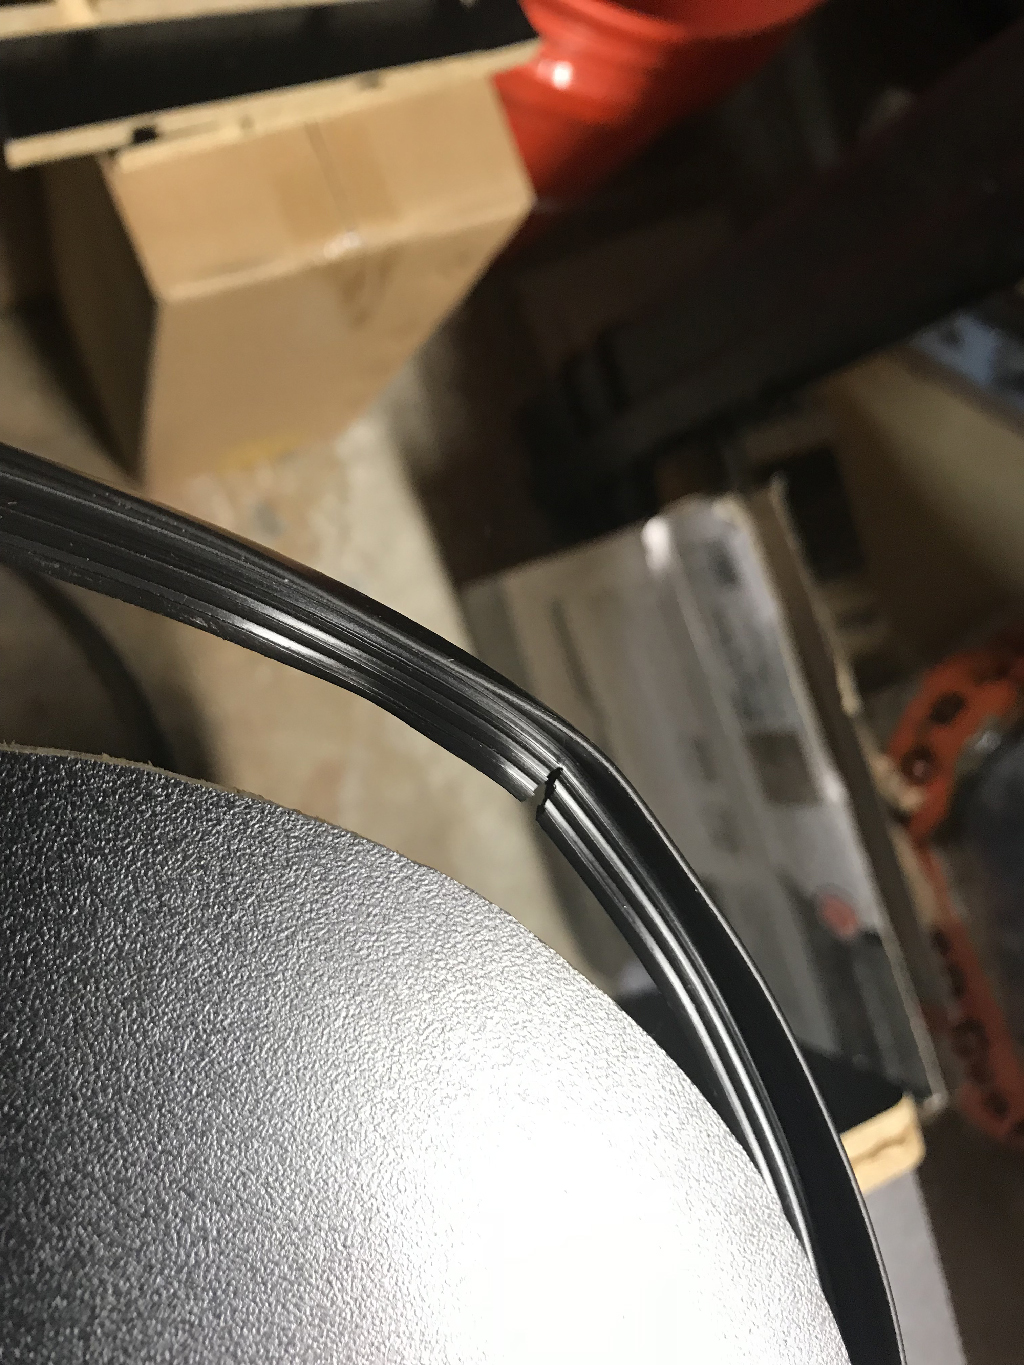
When you need to turn the T-molding you make little cuts or even wedge out some of the plastic. It is an art form but you soon get the hang of it. A good sharp razor is handy!
Curving in the other direction can also be a challenge. Again more careful cutting and hammering.
With all the trim in place the box looks so nice! I won’t lie, the T-molding took a long time to install and I was nervous the entire time. Plan where you want your seams.
![]()
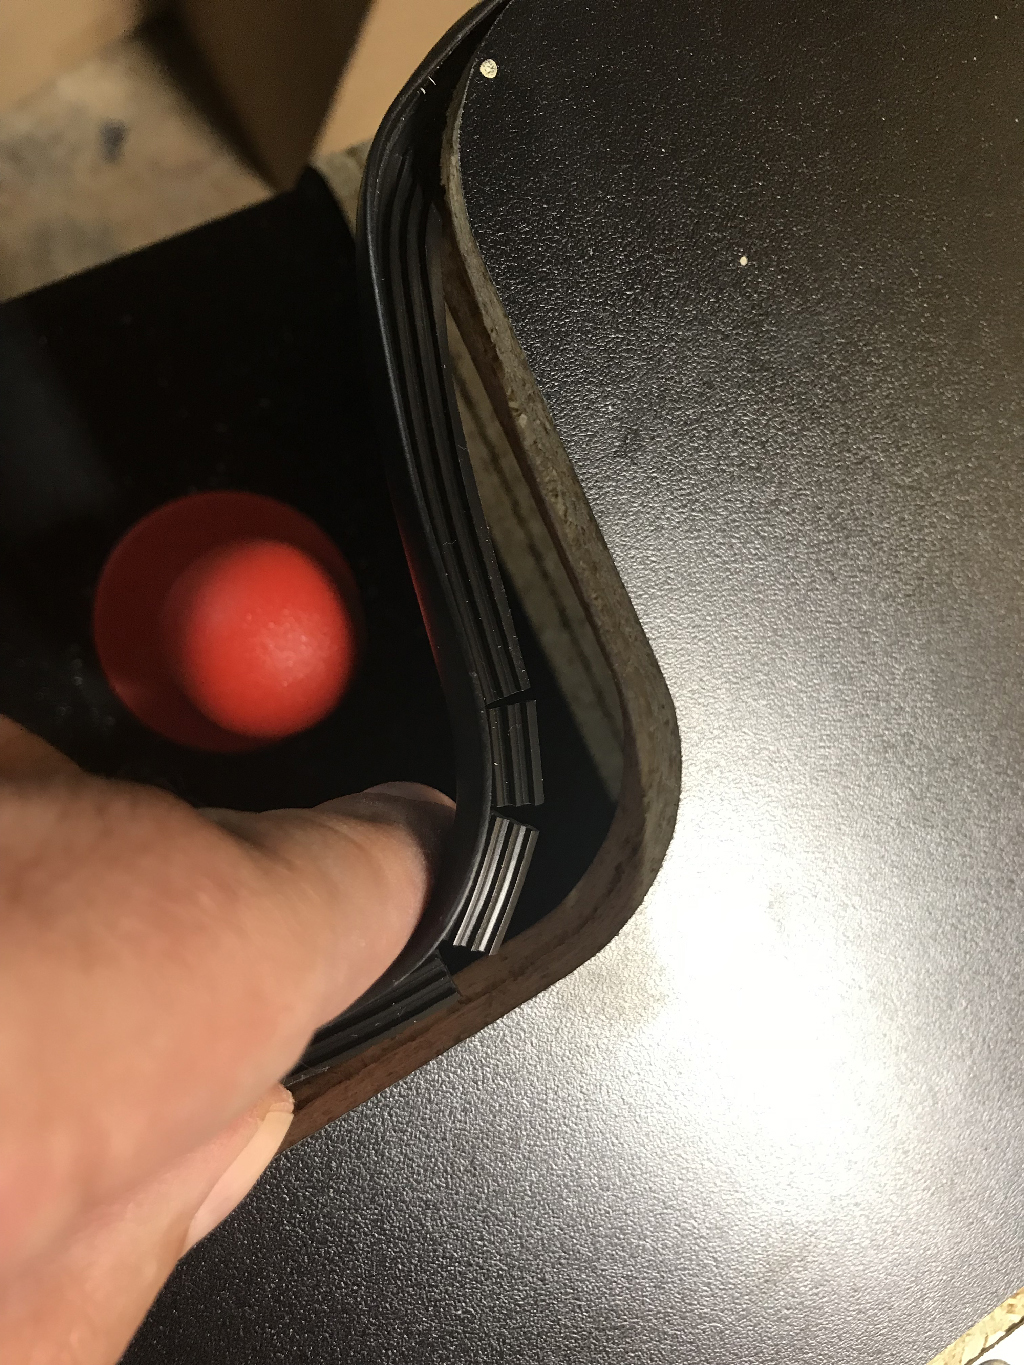
Now to add the spacers for the glass.
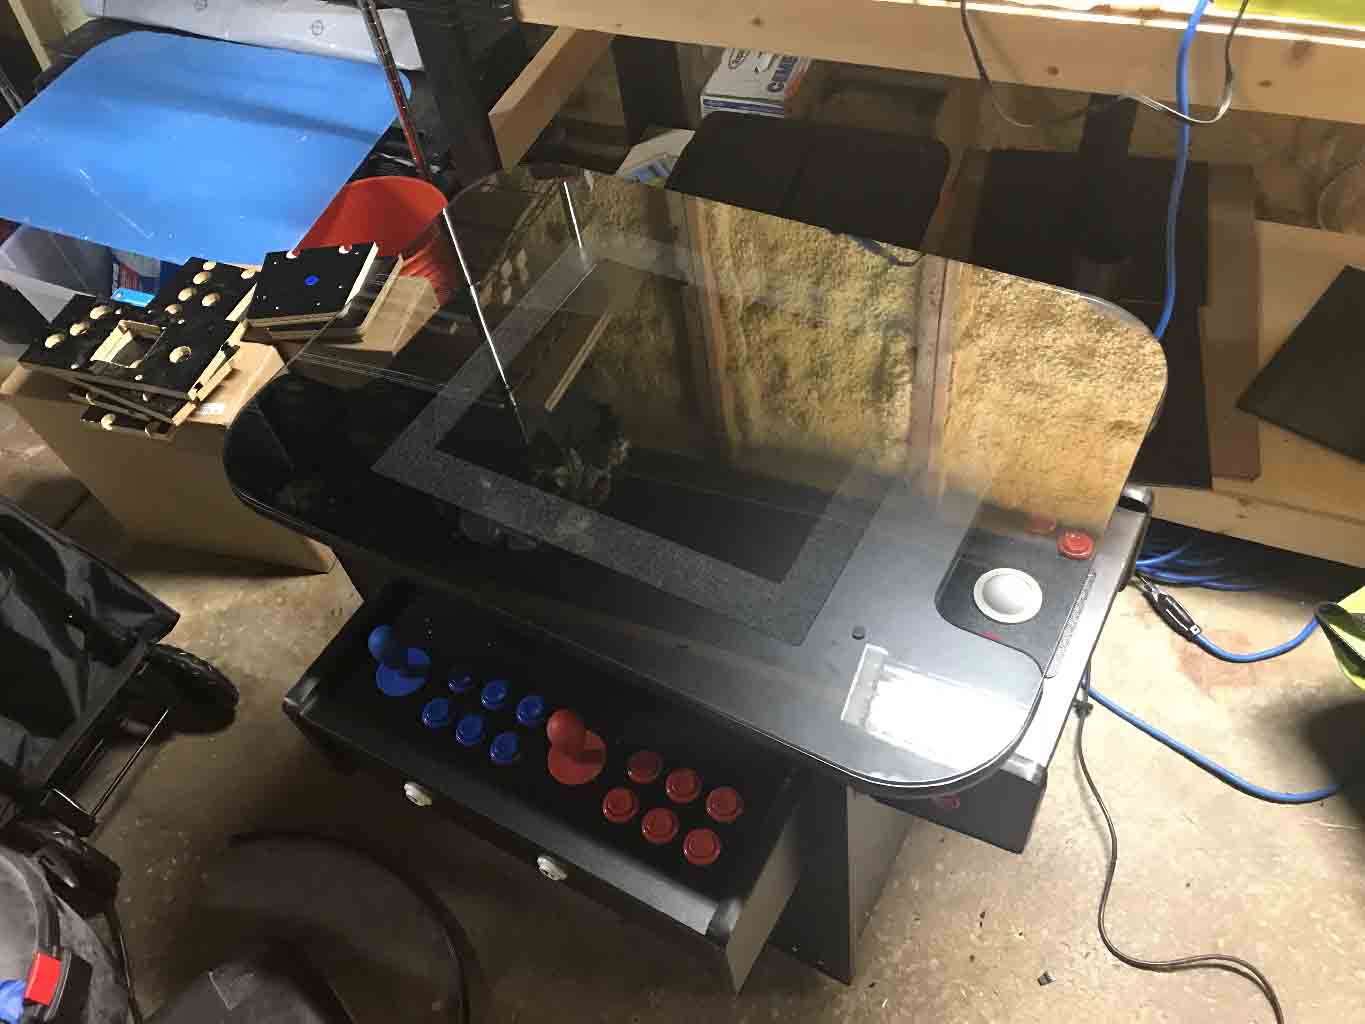
The kit comes with an acrylic top. There was no way I was going to spend all this time and effort and use something that cheap. I opted for a glass top. It comes either clear or a smoked. I love the smoked. The darker glass hides the monitor better and makes the graphics pop even more!
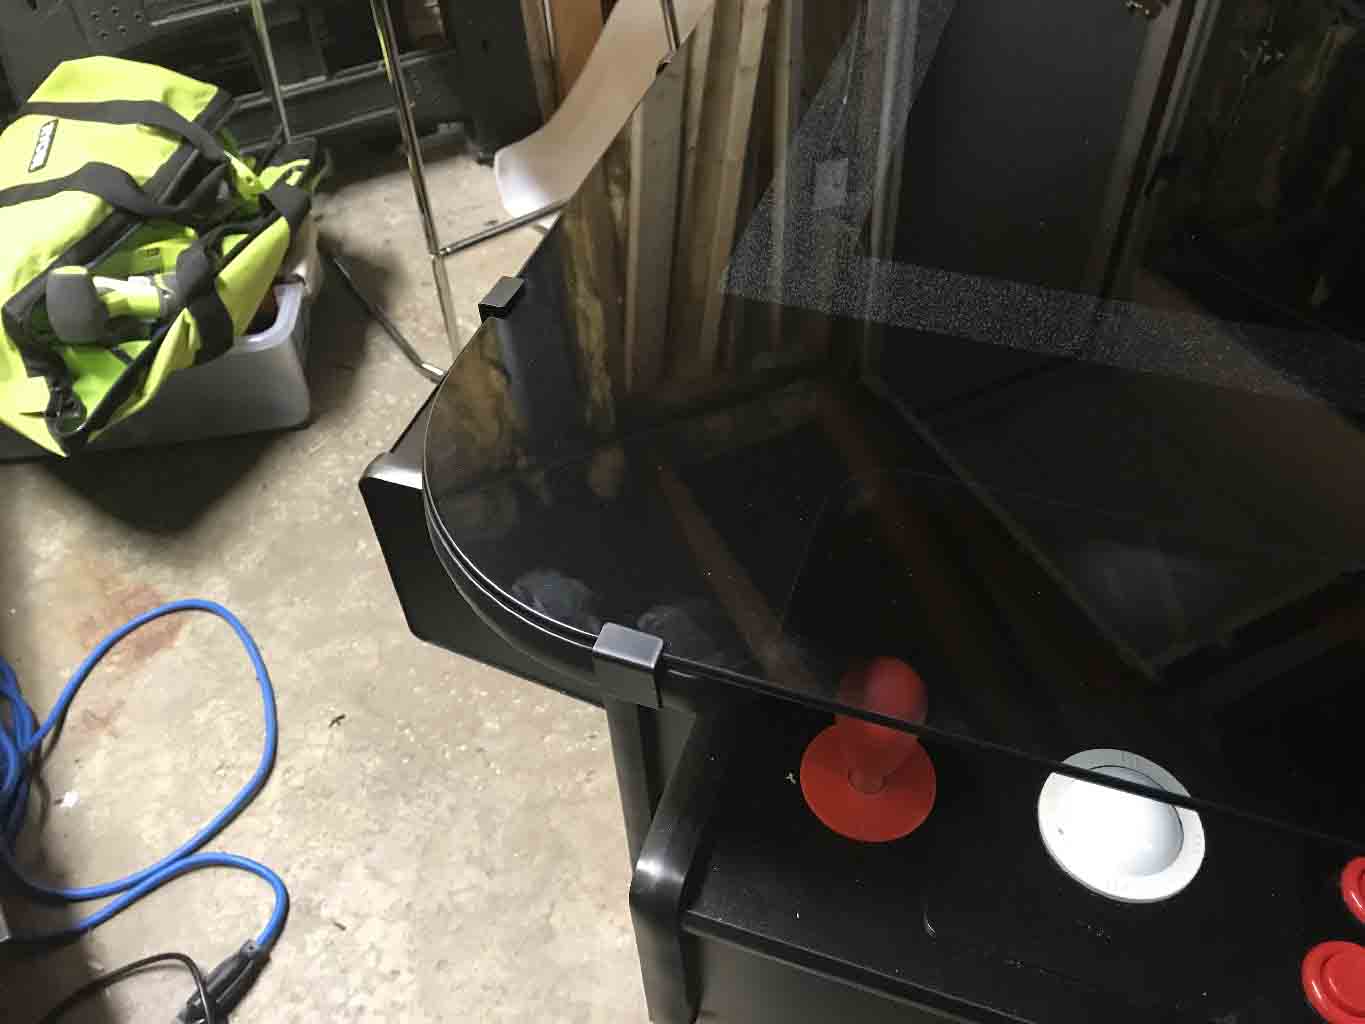
The glass is attached with clips that get screwed in from below. Notice how they go over the T-molding, another reason the T-molding goes first.
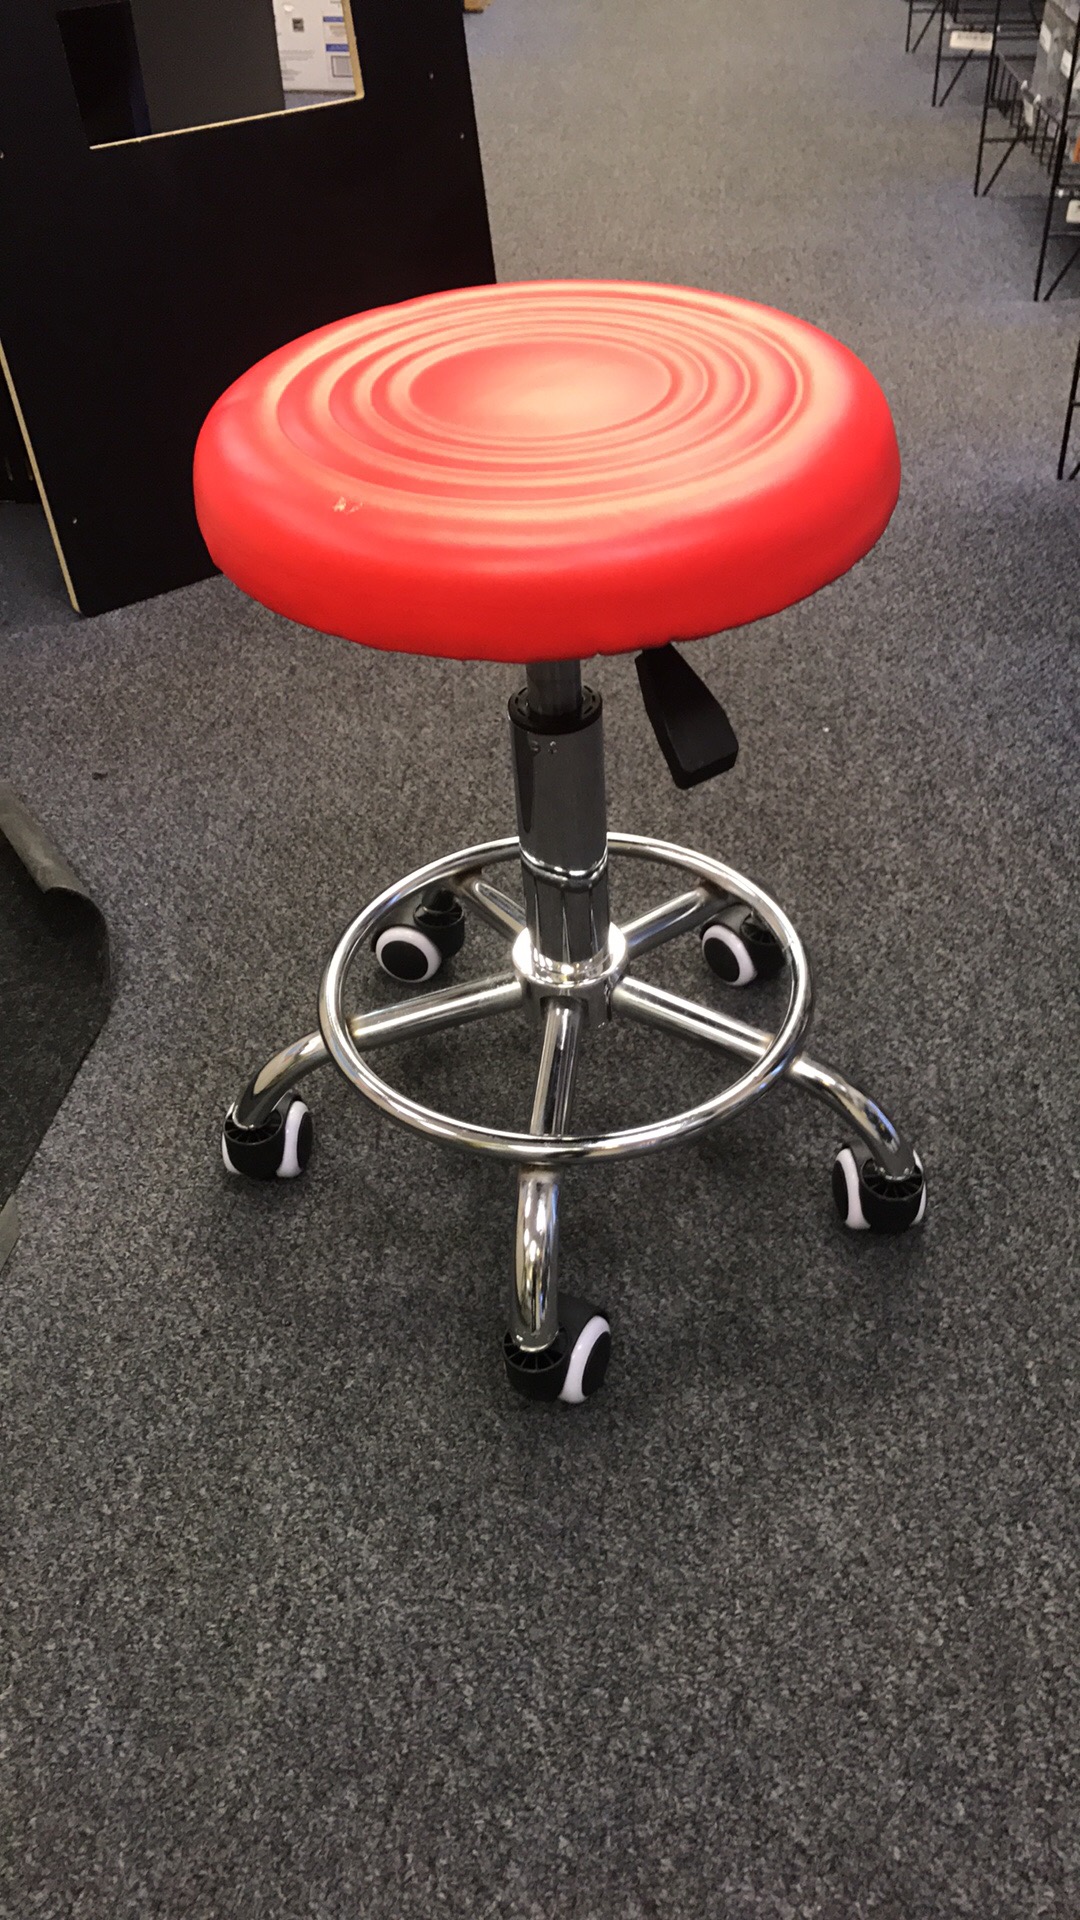
Another finishing touch are these stools that Holland Computers sells. I needed a stool that would be small, adjustable in height, and also roll around. These little guys are perfect.
Is it done?
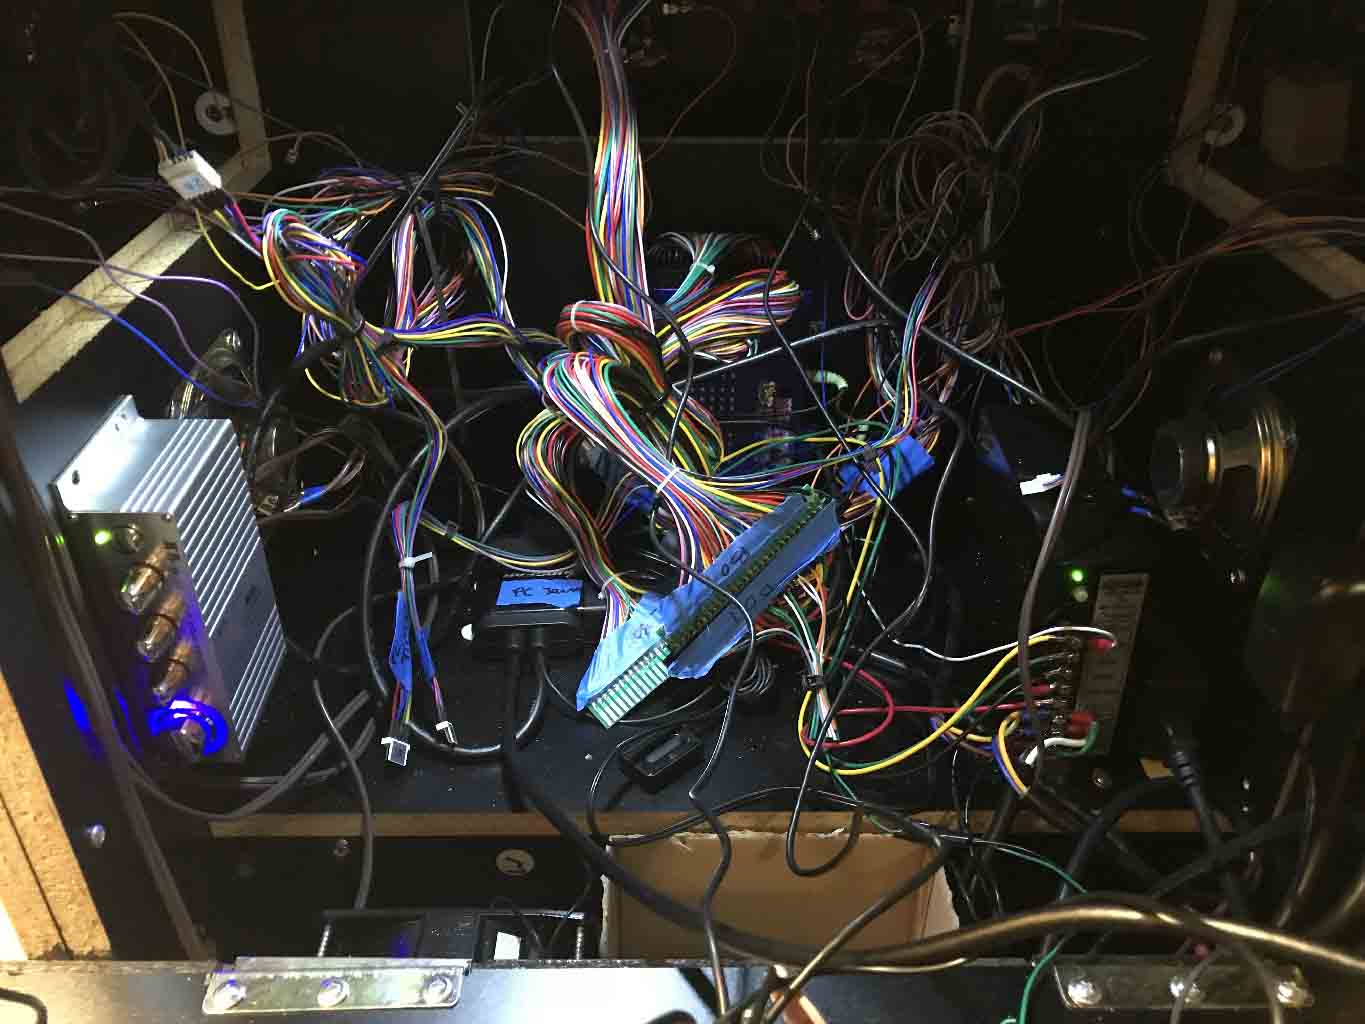
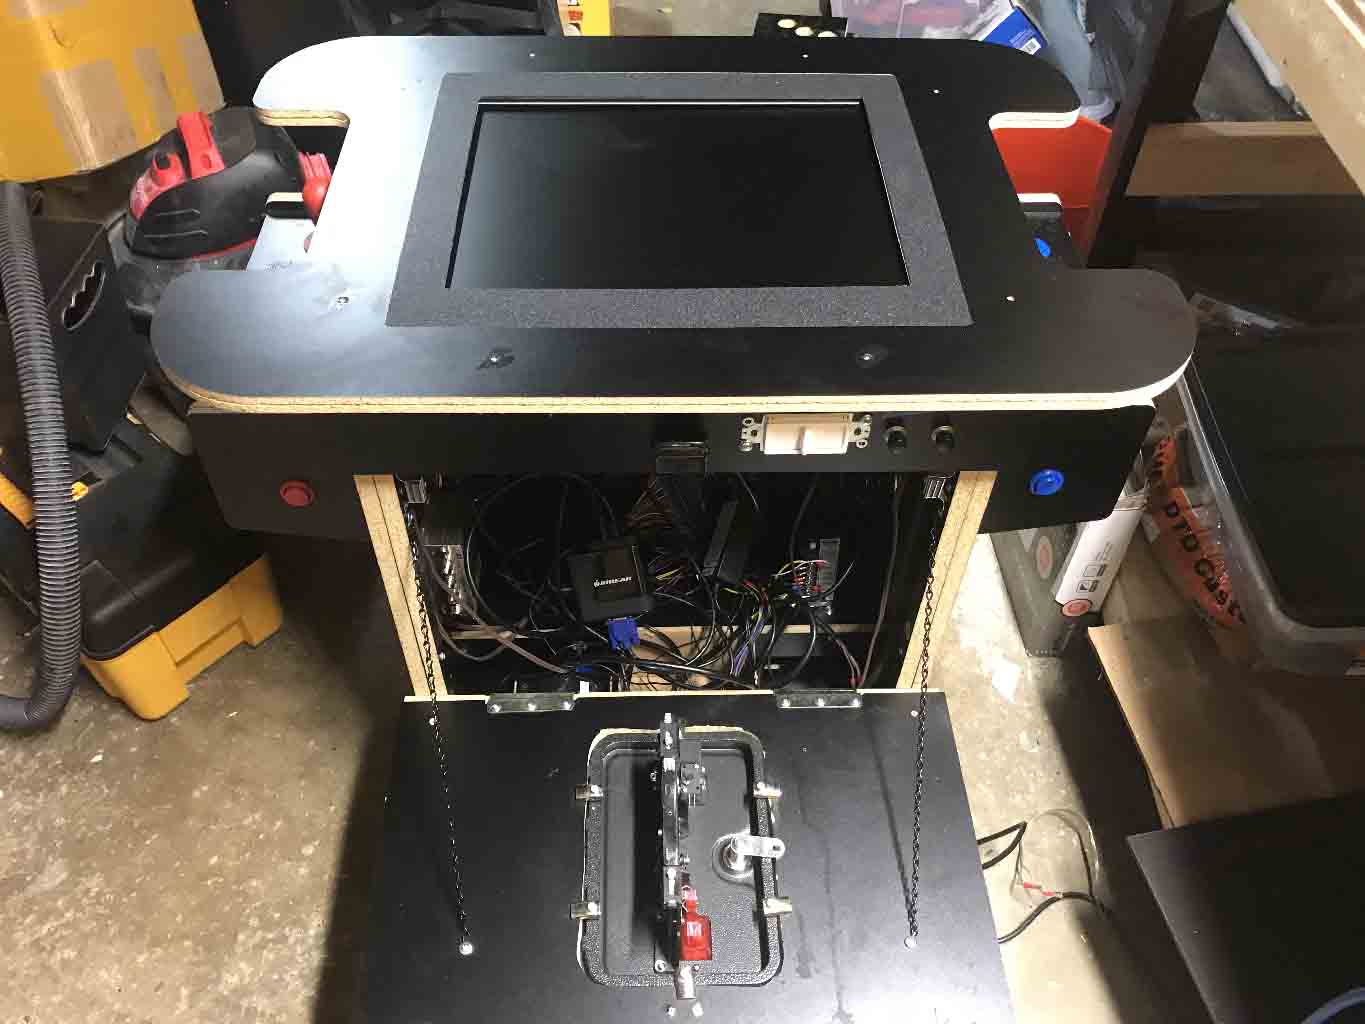
Even with all the very careful cable management, zip ties, etc., it looks like a mess in there. It’s actually better than it looks. On the right is the power supply which is screwed into place. On the left is the audio amplifier (which is also screwed into place), the GameElf is mounted on the far wall. The little black box left of center is a KVM switch (that has a small black one button wired remote which I have come out the hole) that allows me to switch the audio and video between the GameElf and the Computer. To switch the trackball I have to connect and disconnect the white wire in the upper left of the picture). The JAMMA connector that gets either the USB or GameElf are the cables right in the center. For the most part I leave the GameElf plugged in. For those of you who think this is a mess, you should open up a pinball machine sometime.
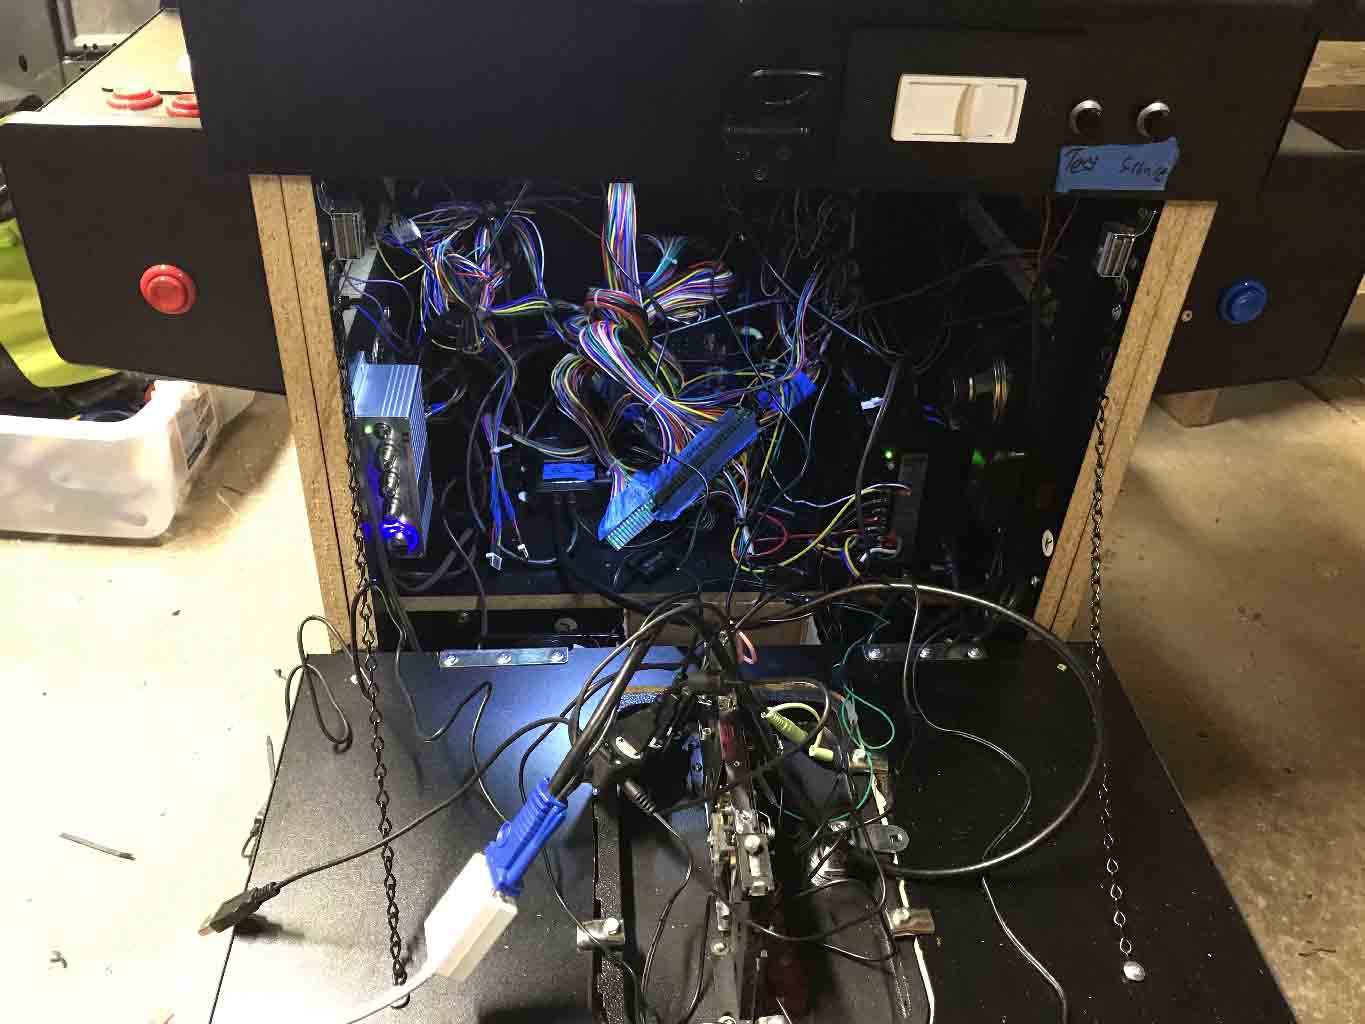
Here it is again.
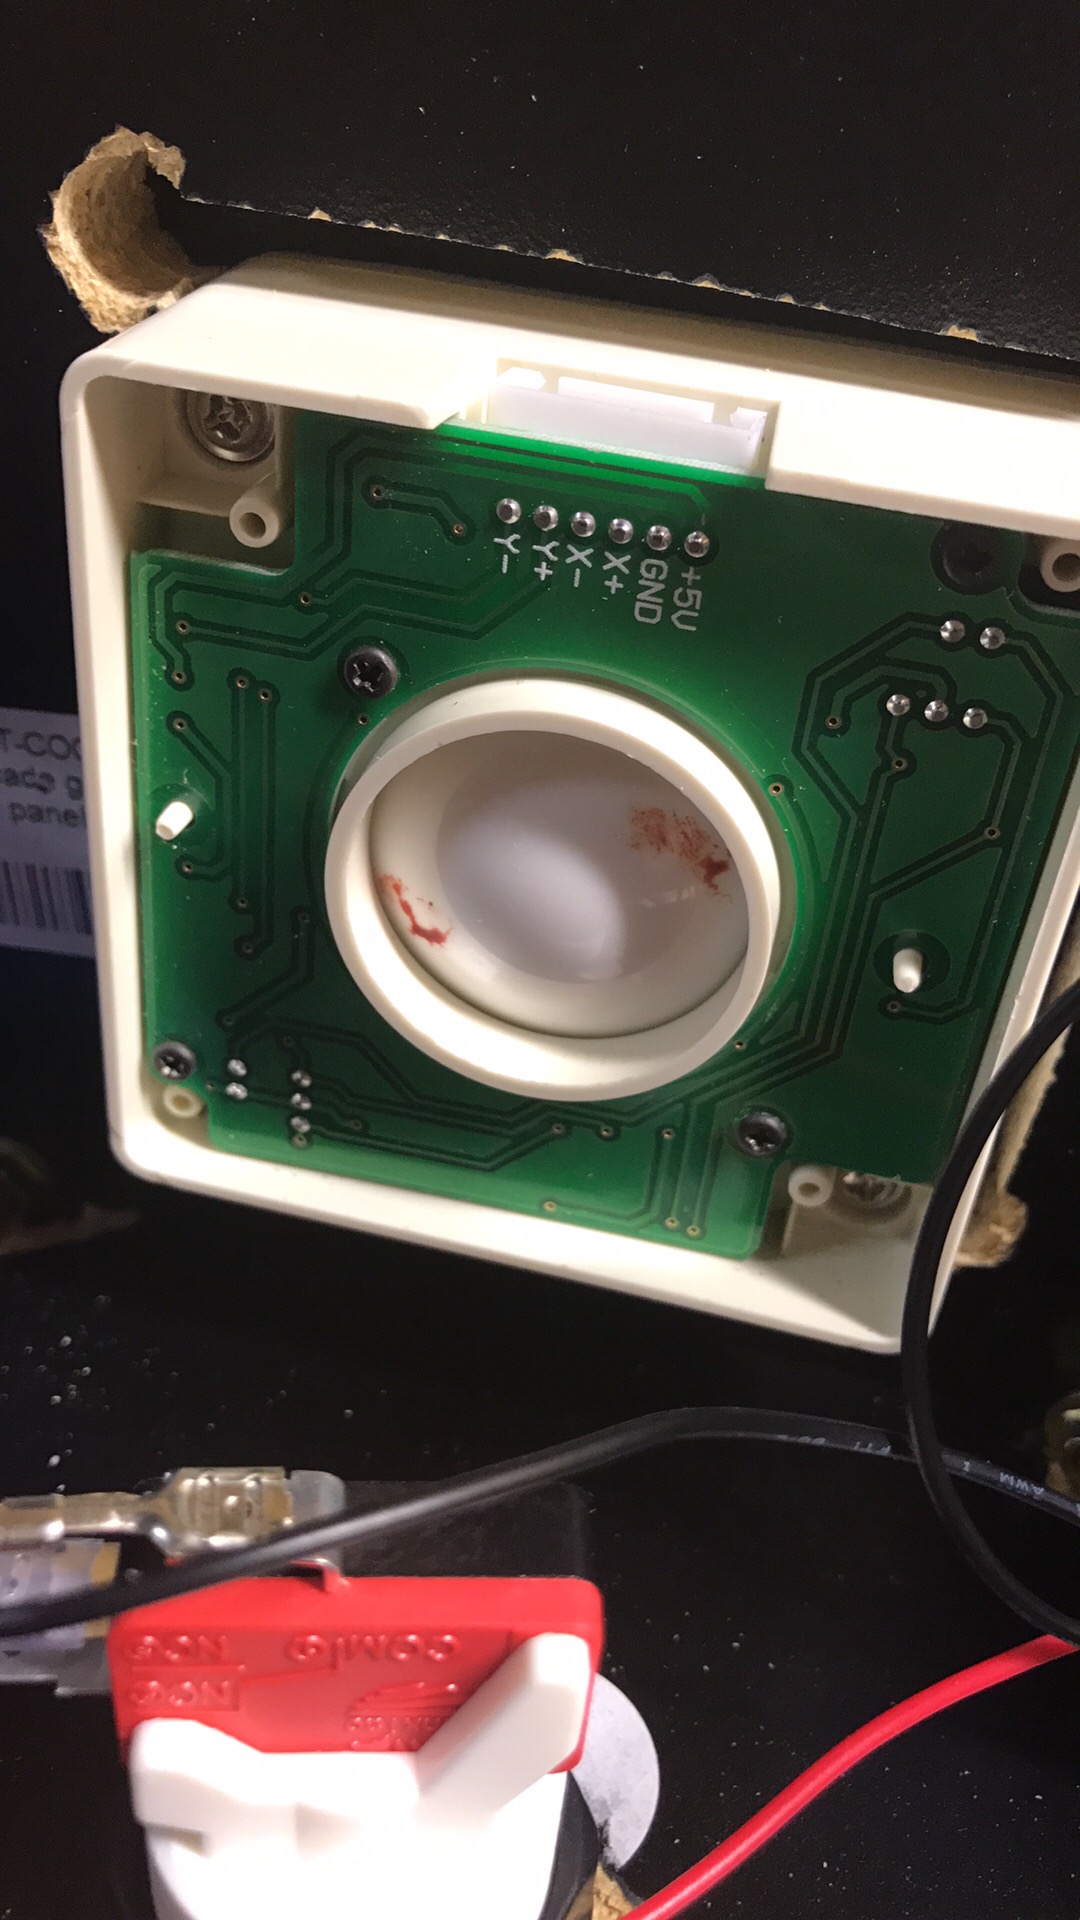
Why is my trackball so sluggish? Wait, is that blood?
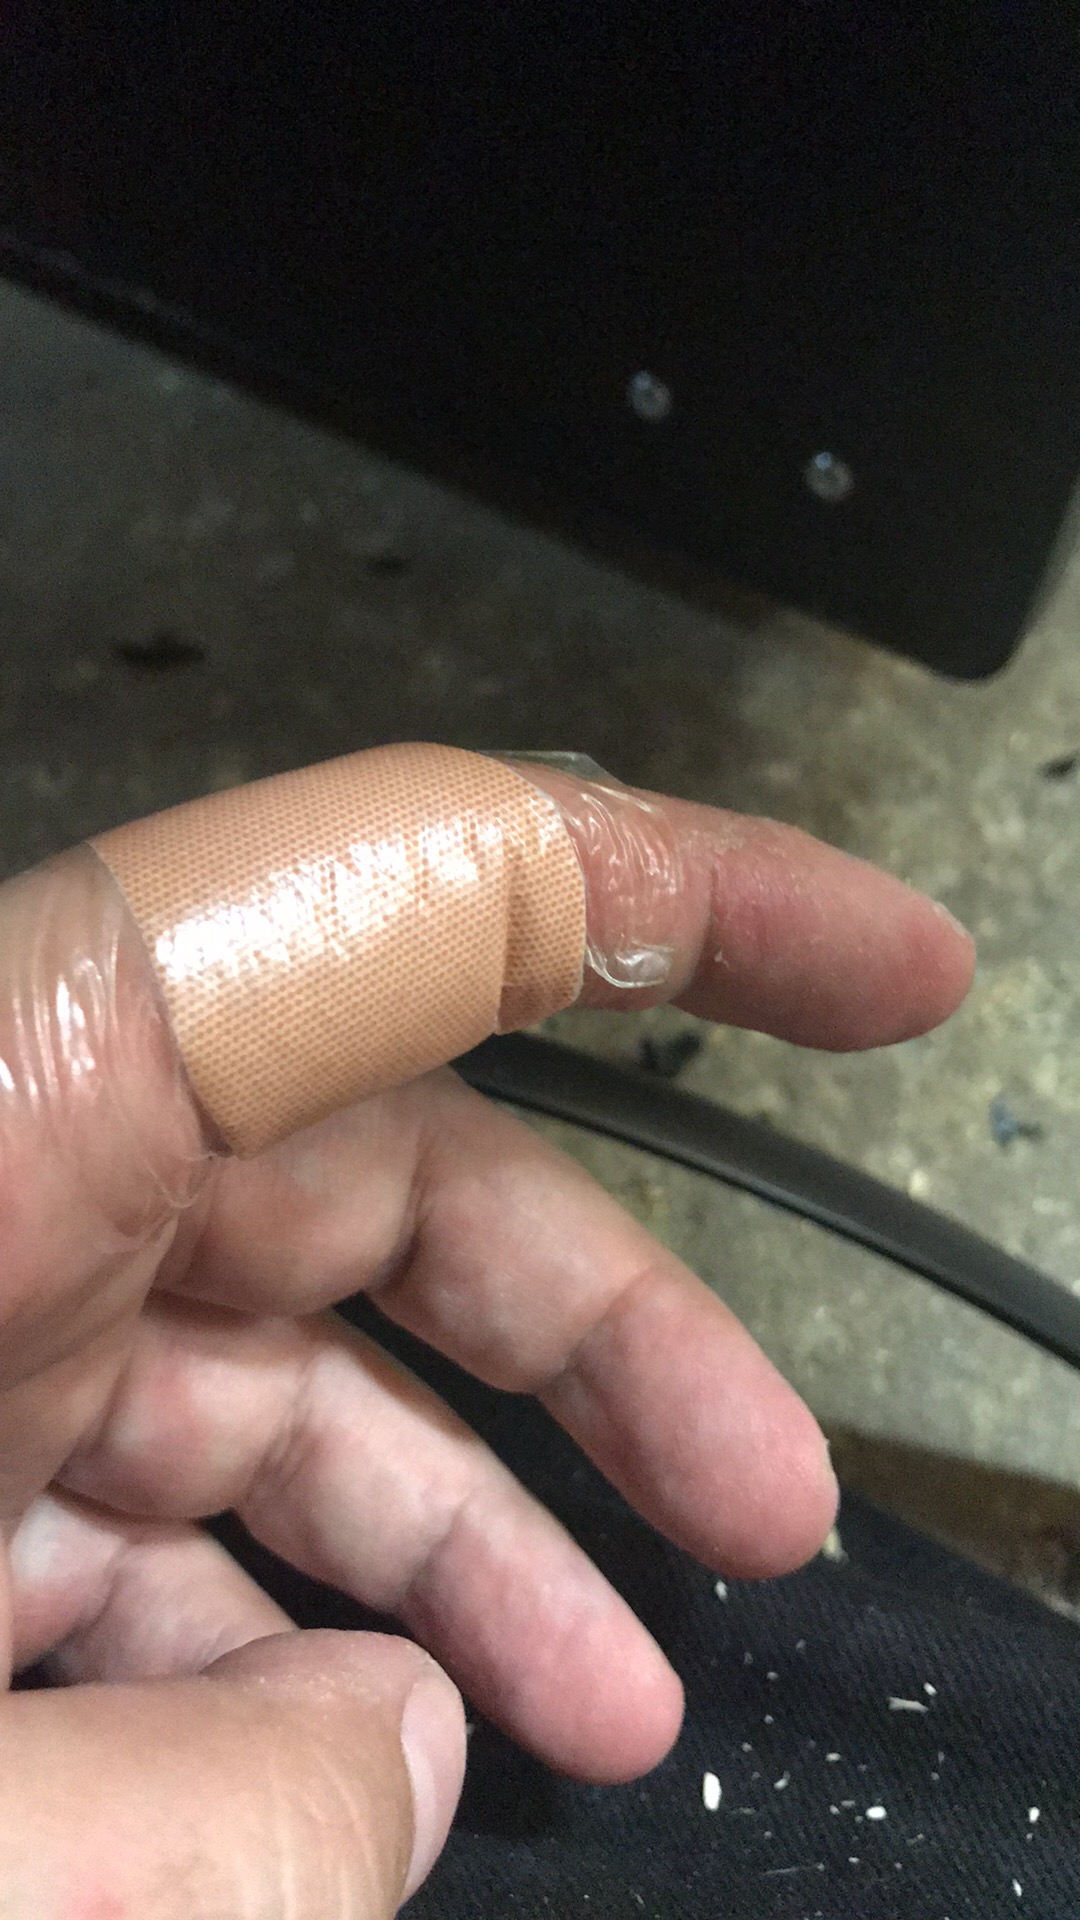
I said the monitor was sharp and I wasn’t kidding!
Programming for the Box
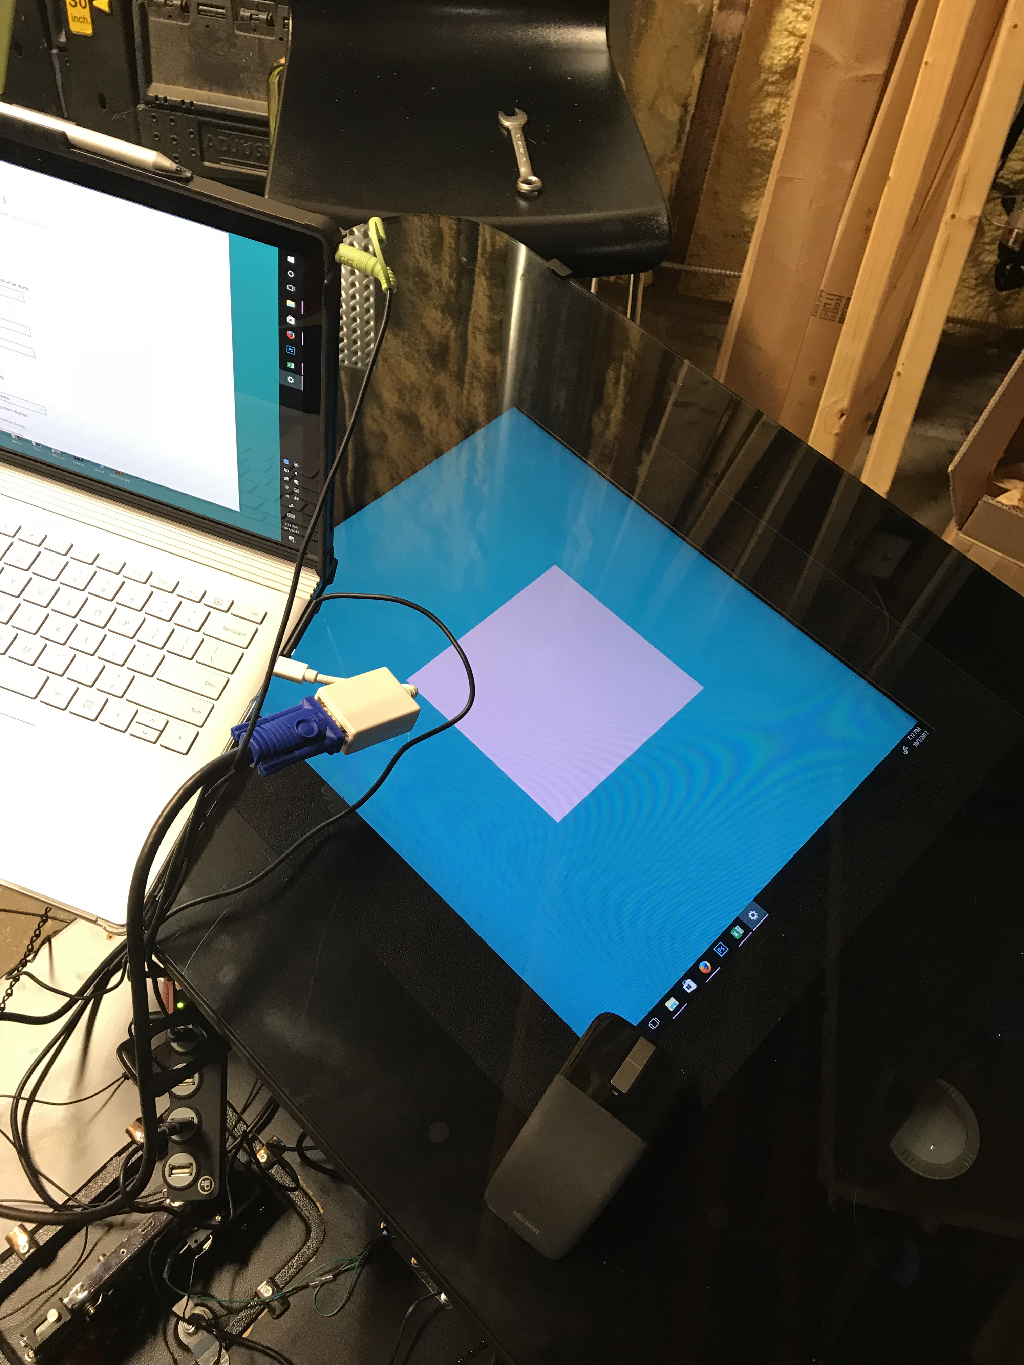
Getting my laptop to play nice wasn’t always easy. To make sure that everything worked the way it should I made my desktop image a square that was centered to the background. This way when I tried different video modes I could see not just did it fill the screen properly but was it distorting my image.
When I custom write software I map everything to keyboard commands and then use JoyToKey to map my joystick to the keyboard. Makes my life a lot easier.
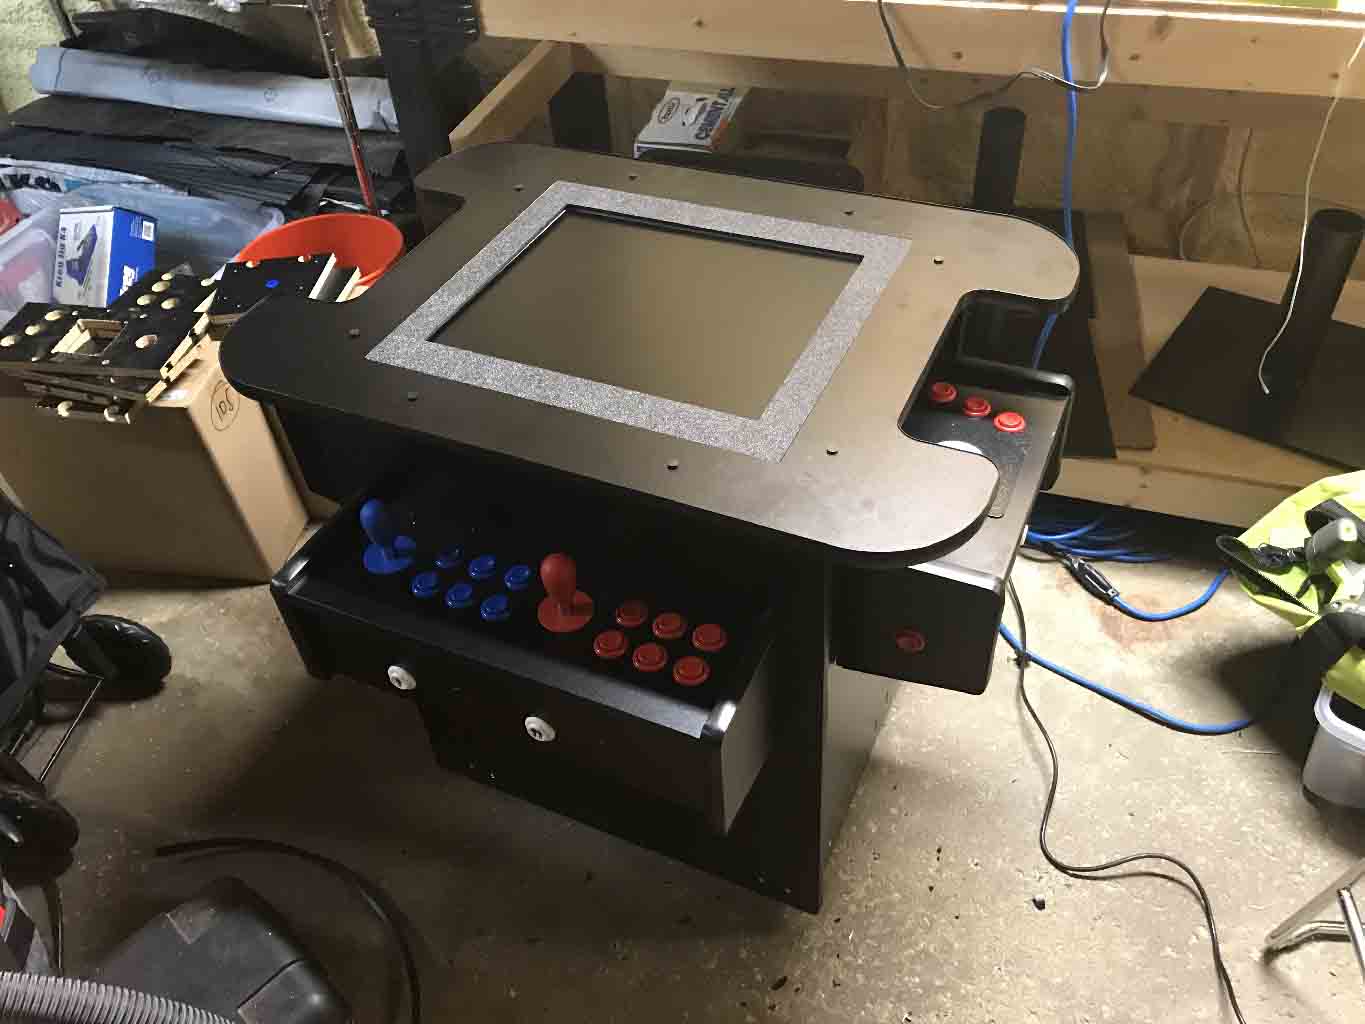
It’s Done!
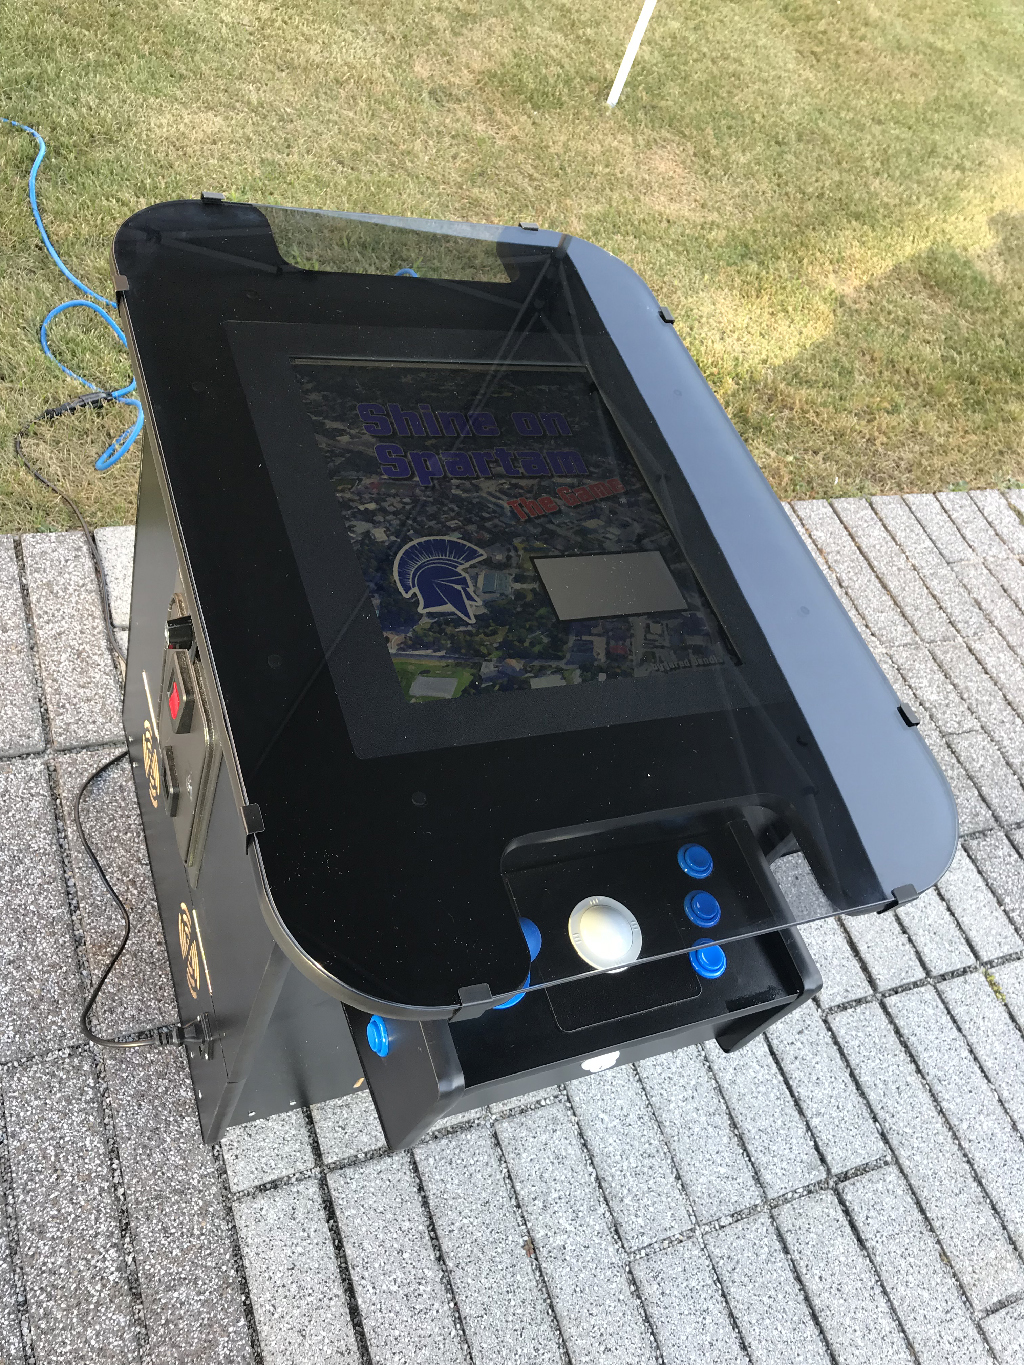

Here it is! In this configuration it is running off of a laptop which I stuck inside the box and is running a game that I designed. It even requires tokens to run. The funny thing about the coin operation is that it is just another button so you basically write software that requires you to press a certain key before your game is active.
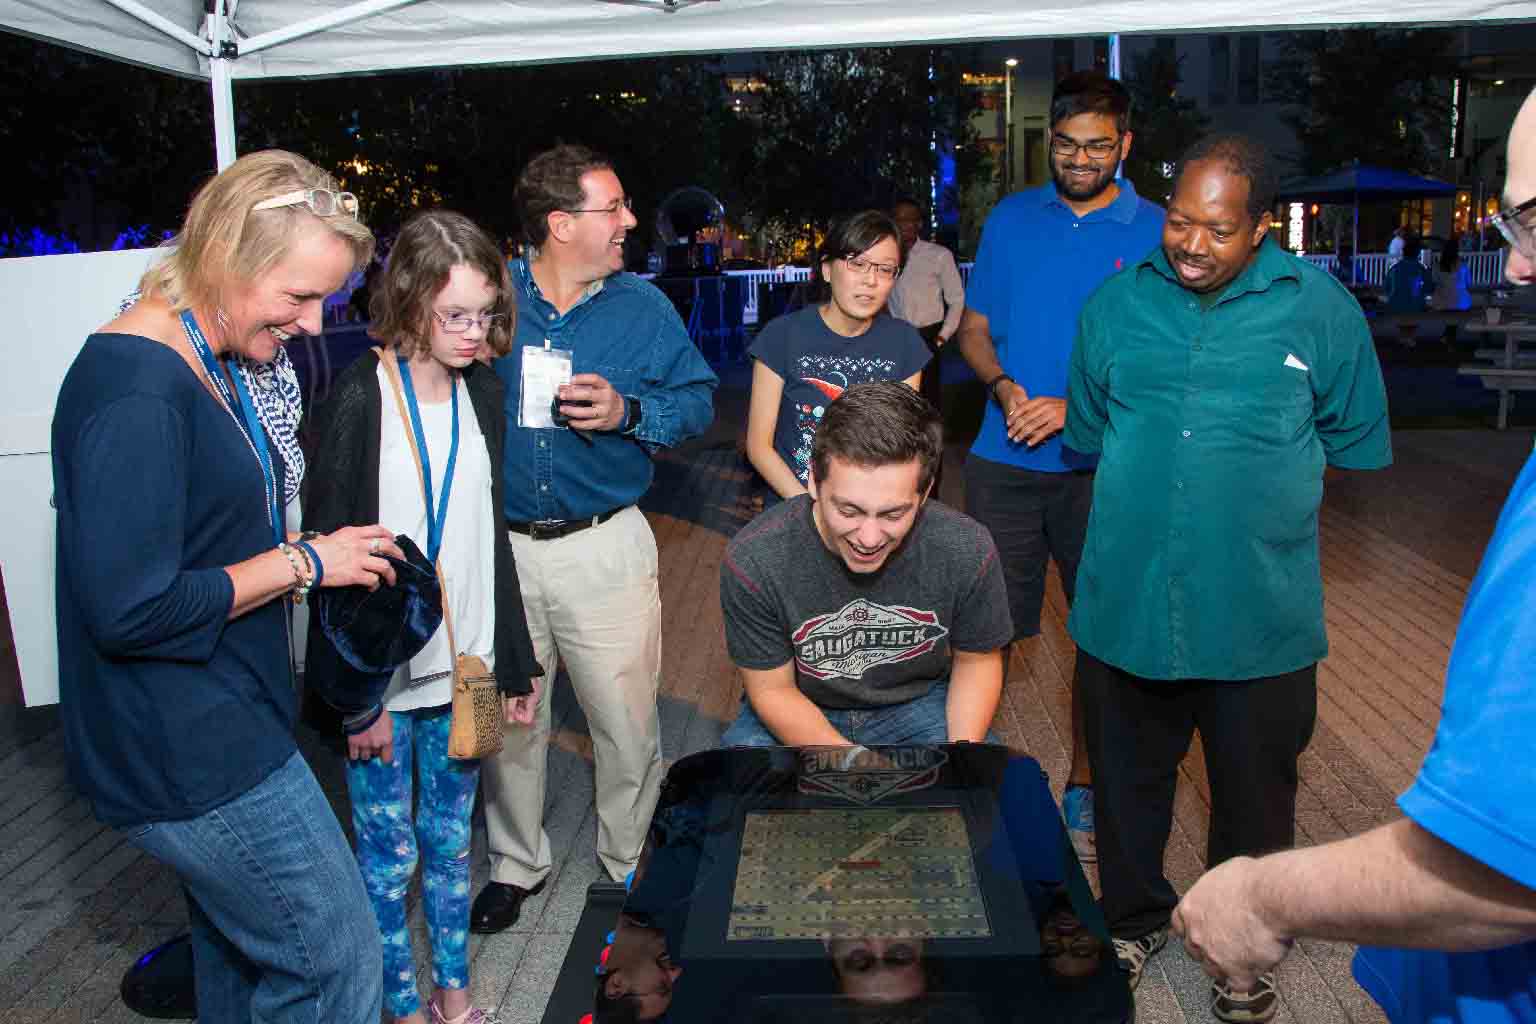
You could see people really getting into it as both player and observer.

That’s me in the blue shirt coaching people a little.
What do I need to build one?
Time, money, space, some tools, supplies, and all the parts.
Time & Space
Do not discount the amount of time and space you need to do this. I was highly motivated to finish because I had a deadline and a project at the end of this. Sitting it front of boxes and boxes of cables and parts can be fun or overwhelming.
Tools
Obviously you need some basic tools and the ability to use them. I am sure I will miss a tool or two along the way but…
Screwdrivers. Especially a very short handled Philips to get in there and turn those furniture cams.
Power Drill and bits. You will need a variety of bits. To start the cuts you will need a bit big enough to get your jigsaw blade in. I needed to be able to drill pilot holes and holes large enough for the legs posts to screw beyond. You will also need the 1 1/8″ flat spade for cutting the button holes. Don’t get cheap you want that spade bit sharp. I also got a 2″ and a 3″ hole cutter for the speaker hole and for the access hole. If you need to make a hole for a cam then you will need a Forstner style bit (and a drill press or a jig if you care about it working right).
Jigsaw. You need to be able to cut openings for the coin door and for the trackball. Oh, and for the volume control.
Rubber Mallet. This is to get the T-Molding into place.
Razor Blade. To cut the T-molding.
Multi-Meter. To tune the voltage of your power supply.
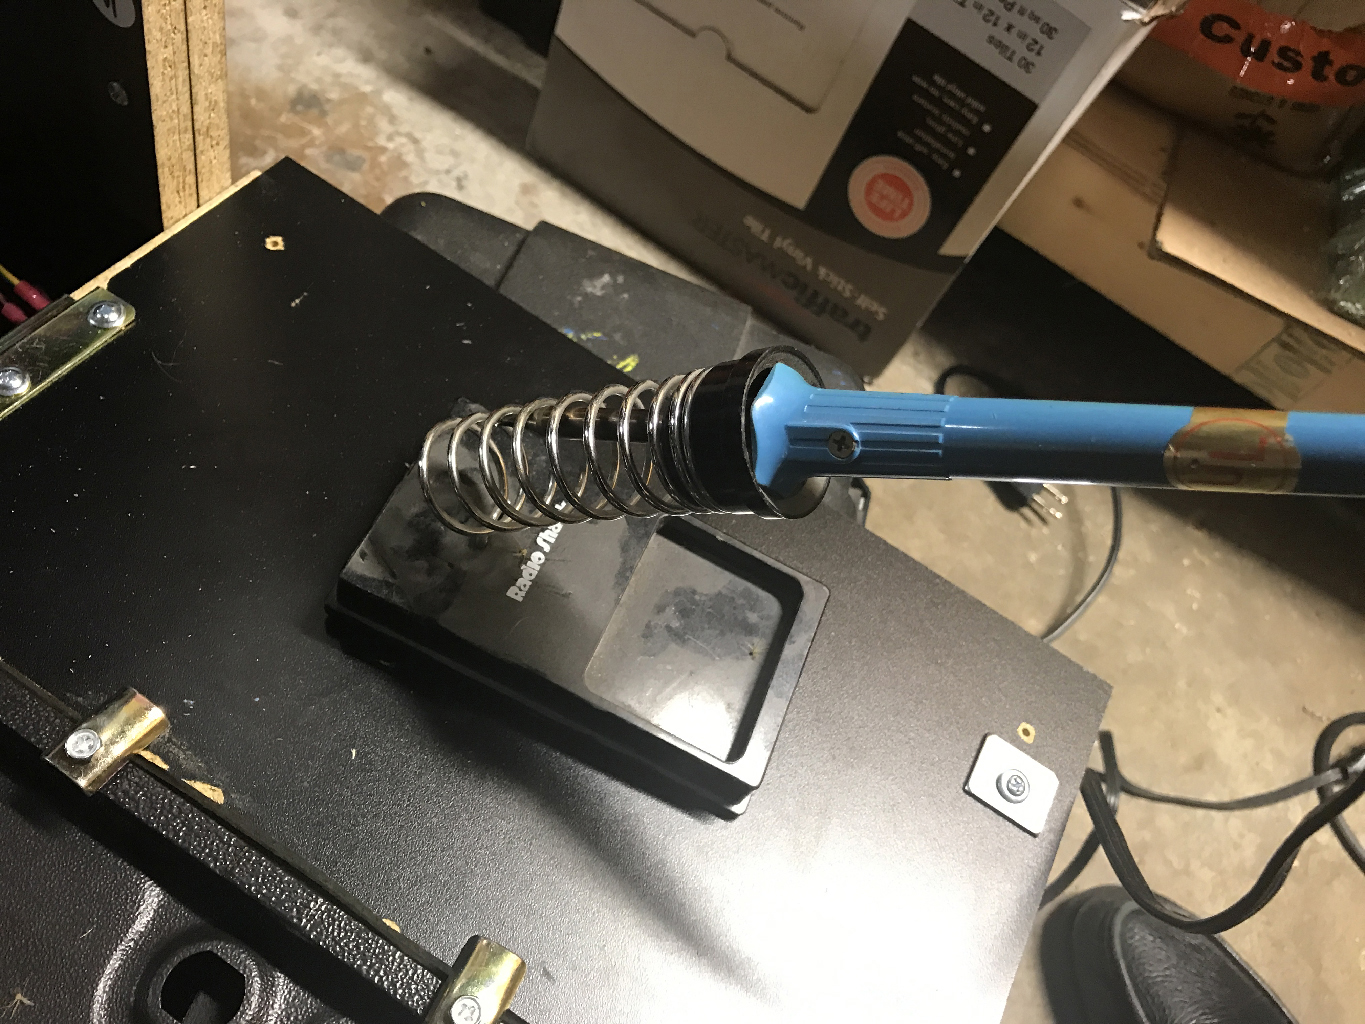
Soldering Iron & Solder. To fix, add, and join cables as needed.
Crimper and ends. I didn’t demonstrate this that often but especially for the power connectors where I used the fork connectors or the buttons which use the spade connectors. It is nice to have a kit. While most of them were “solderless” I ended up still soldering a lot.
Router Table. I used this to set my hinges into the wood. I also used it to take just a touch off the panel to make it fit better – though this could be done with a table saw. I love my router and router table. If you don’t have one you should get one and also learn to use it as they can eat wood really fast.
Shop-vac. You are going to make a mess. Vacuum as you go!
Supplies
Screws, heavy duty painters take (for the cutting), solder, electrical tape, some bits of 2×4 (which I used for the corners), cable ties, cable lockdowns. I am sure there are other little things like cleaning supplies everyone is a little different in how they work. Oh and again – screws.
That’s it – and the part list.
With the exception of the part list, this is my story! Thanks to Holland Computers for letting me be a pain in their ass for about a week. It was funny they were like “just build the kit” and I was like “but I want this and this and this”. They were so sure I wouldn’t fit that trackball in or get it to work with a computer.
People ask what version 2 will look like. I am not ready to build version 2. I am happy with the guts of this machine. I like the buttons and the joystick and my GameElf (which of course doesn’t have every game I want but it has over 1,000 games). I haven’t tried configuring a MAME engine for it or running the entire thing off a Raspberry Pi which I might try at some point.
The big question is what would the box look like not made out of particle board. I’ve thought about laser cutting and building something new but in the end it would be close in size and shape so I am not there yet!
Disclaimer: Again! This post is dated 5/28/2018 and the information is current – here & now. Time will pass, prices will change. Also, I have no affiliation with ANY of the companies listed nor am I getting any affiliate kick-backs. If you want to say thank you just email me, showing me what you built and say “Thank you!” And if you REALLY wanna say thank you my PayPal email is jaredjared@earthlink.net or Venmo me @jaredx2 .
Parts